2021 PEUGEOT BOXER mirror
[x] Cancel search: mirrorPage 75 of 212
73
Driving
6Starting/Switching off the
motor (Electric)
Starting
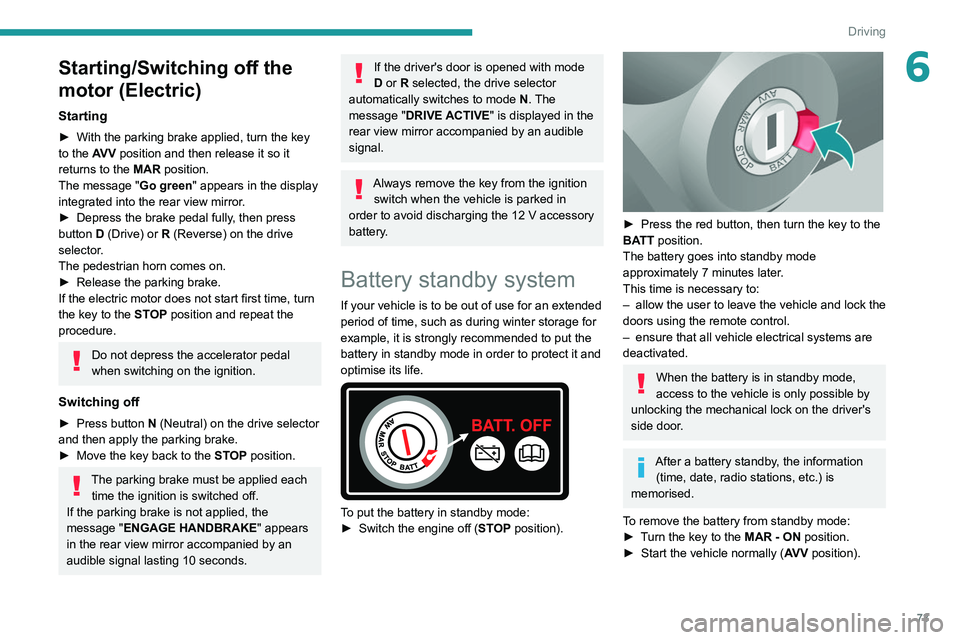
► With the parking brake applied, turn the key
to the AV V position and then release it so it
returns to the MAR position.
The message "Go green" appears in the display
integrated into the rear view mirror.
►
Depress the brake pedal fully
, then press
button D (Drive) or R (Reverse) on the drive
selector.
The pedestrian horn comes on.
►
Release the parking brake.
If the electric motor does not start first time, turn
the key to the
STOP position and repeat the
procedure.
Do not depress the accelerator pedal
when switching on the ignition.
Switching off
► Press button N (Neutral) on the drive selector
and then apply the parking brake.
►
Move the key back to the
STOP position.
The parking brake must be applied each time the ignition is switched off.
If the parking brake is not applied, the
message "ENGAGE HANDBRAKE " appears
in the rear view mirror accompanied by an
audible signal lasting 10 seconds.
If the driver's door is opened with mode
D or R selected, the drive selector
automatically switches to mode N. The
message "DRIVE ACTIVE" is displayed in the
rear view mirror accompanied by an audible
signal.
Always remove the key from the ignition switch when the vehicle is parked in
order to avoid discharging the 12
V accessory
battery.
Battery standby system
If your vehicle is to be out of use for an extended
period of time, such as during winter storage for
example, it is strongly recommended to put the
battery in standby mode in order to protect it and
optimise its life.
To put the battery in standby mode:
► Switch the engine off ( ST
OP position).
► Press the red button, then turn the key to the
BA TT position.
The battery goes into standby mode
approximately 7 minutes later.
This time is necessary to:
–
allow the user to leave the vehicle and lock the
doors using the remote control.
–
ensure that all vehicle electrical systems are
deactivated.
When the battery is in standby mode,
access to the vehicle is only possible by
unlocking the mechanical lock on the driver's
side door.
After a battery standby, the information (time, date, radio stations, etc.) is
memorised.
To remove the battery from standby mode:
►
T
urn the key to the MAR - ON position.
►
Start the vehicle normally ( AV
V position).
Page 77 of 212
75
Driving
6Drive selector (Electric)
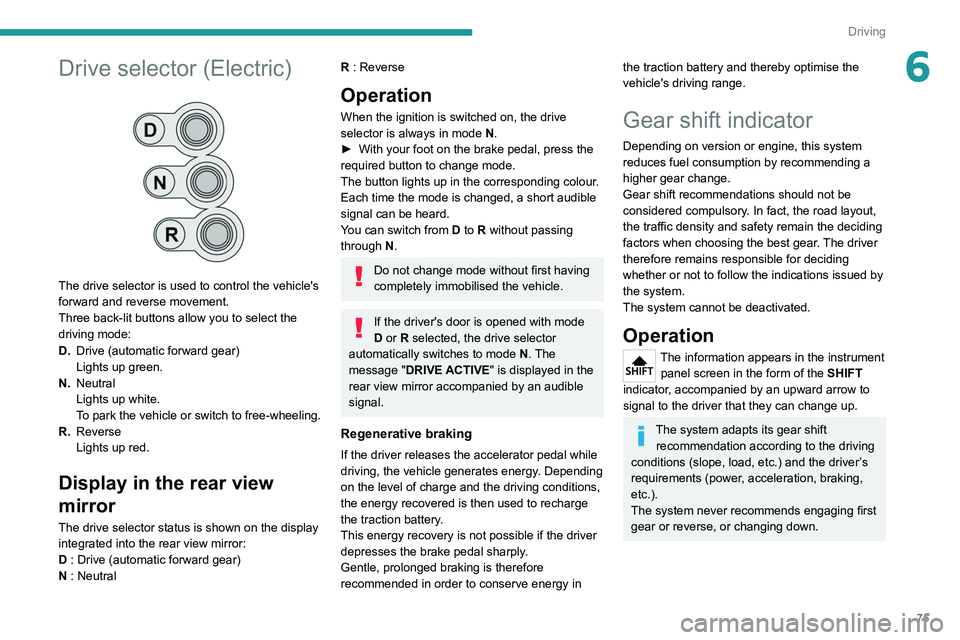
The drive selector is used to control the vehicle's
forward and reverse movement.
Three back-lit buttons allow you to select the
driving mode:
D.Drive (automatic forward gear)
Lights up green.
N. Neutral
Lights up white.
To park the vehicle or switch to free-wheeling.
R. Reverse
Lights up red.
Display in the rear view
mirror
The drive selector status is shown on the display
integrated into the rear view mirror:
D : Drive (automatic forward gear)
N : Neutral
R : Reverse
Operation
When the ignition is switched on, the drive
selector is always in mode N.
►
With your foot on the brake pedal, press the
required button to change mode.
The button lights up in the corresponding colour
.
Each time the mode is changed, a short audible
signal can be heard.
You can switch from D to R without passing
through N.
Do not change mode without first having
completely immobilised the vehicle.
If the driver's door is opened with mode
D or R selected, the drive selector
automatically switches to mode N. The
message "DRIVE ACTIVE" is displayed in the
rear view mirror accompanied by an audible
signal.
Regenerative braking
If the driver releases the accelerator pedal while
driving, the vehicle generates energy. Depending
on the level of charge and the driving conditions,
the energy recovered is then used to recharge
the traction battery.
This energy recovery is not possible if the driver
depresses the brake pedal sharply.
Gentle, prolonged braking is therefore
recommended in order to conserve energy in
the traction battery and thereby optimise the
vehicle's driving range.
Gear shift indicator
Depending on version or engine, this system
reduces fuel consumption by recommending a
higher gear change.
Gear shift recommendations should not be
considered compulsory. In fact, the road layout,
the traffic density and safety remain the deciding
factors when choosing the best gear. The driver
therefore remains responsible for deciding
whether or not to follow the indications issued by
the system.
The system cannot be deactivated.
Operation
The information appears in the instrument panel screen in the form of the SHIFT
indicator, accompanied by an upward arrow to
signal to the driver that they can change up.
The system adapts its gear shift recommendation according to the driving
conditions (slope, load, etc.) and the driver’s
requirements (power, acceleration, braking,
etc.).
The system never recommends engaging first
gear or reverse, or changing down.
Page 82 of 212
80
Driving
Loading sill height manual
correction
Adjusting the platform sill up or down
► A quick press on one of the controls selects
the upper or lower level. Each press (diode lit)
increases or decreases by one level.
A long press on one of the controls selects the
maximum corresponding level (-3 or +3).
Returning to the normal sill height
► Press the same number of times in the
opposite direction of the displayed position.
Deactivation/Reactivation
► Press and hold both controls simultaneously
to deactivate/reactivate the system.
Deactivation is confirmed by the lighting of the
control LEDs.
Beyond a speed of 3 mph (5 km/h), the
system reactivates automatically.
Loading sill height
automatic correction
Beyond a speed of 12 mph (20 km/h), the
system automatically restores the rear sill height
to its normal level.
Malfunction
In the event of a system malfunction, this
warning lamp comes on.
Have it checked by a PEUGEOT dealer or a
qualified workshop.
Driving with the suspension set too high
or too low poses risk of damaging
components under the body.
The height may be adjusted automatically to
take account of changes in temperature or
loading.
You must avoid using this control in the
following circumstances:
–
when working underneath the vehicle,
–
when changing a wheel,
–
when the vehicle is being transported by
lorry
, train, ferry, boat, etc.
To avoid damaging the vehicle or injuring
anyone, check that there is nothing or no
person that might be close to or come into
contact with the vehicle, before raising or
lowering the suspension.
Driving and manoeuvring
aids - General
recommendations
Driving and manoeuvring aids cannot, in
any circumstances, replace the need for
vigilance on the part of the driver.
The driver must comply with the Highway
Code, must remain in control of the vehicle in
all circumstances and must be able to retake
control of it at all times. The driver must adapt
the speed to climatic conditions, traffic and
the state of the road.
It is the driver's responsibility to constantly
monitor traffic conditions, assess the distance
and relative speed of other vehicles, and
anticipate their manoeuvres before using the
direction indicator and changing lanes.
These systems do not make it possible to
exceed the laws of physics.
Driving aids
You should hold the steering wheel with
both hands, always use the door and interior
mirrors, always leave your feet close to the
pedals and take a break every 2 hours.
Manoeuvring aids
The driver must always check the
surroundings of the vehicle before and during
Page 83 of 212
81
Driving
6the whole manoeuvre, in particular using the
mirrors.
Radar(s)
The operation of the radar(s), along with
any associated functions, may be affected
by the accumulation of dirt (e.g.
mud, ice),
in poor weather conditions (e.g.
heavy rain,
snow), or if the bumpers are damaged.
If the front bumper is to be repainted, contact
a PEUGEOT dealer or a qualified workshop;
certain types of paint could interfere with the
operation of the radar(s).
Driving aids camera
This camera and its associated functions
may be impaired or not work if the windscreen
area in front of the camera is dirty, misty,
frosty, covered with snow, damaged or
masked by a sticker.
In humid and cold weather, demist the
windscreen regularly.
Poor visibility (inadequate street lighting,
heavy rain, thick fog, snowfall), dazzle
(headlamps of an oncoming vehicle, low sun,
reflections on a damp road, leaving a tunnel,
alternating shade and light) can also impair
detection performance.
In the event of a windscreen replacement,
contact a PEUGEOT dealer or a qualified
workshop to recalibrate the camera;
otherwise, the operation of the associated
driving aids may be disrupted.
Other cameras
The images from the camera(s)
displayed on the touch screen or on the
instrument panel may be distorted by the
terrain.
In the presence of areas in shade, or in
conditions of bright sunlight or inadequate
lighting, the image may be darkened and with
lower contrast.
Obstacles may appear further away than they
actually are.
Sensors
The operation of the sensors, as well as
any associated functions, may be disrupted
by noise pollution such as that emitted by
noisy vehicles and machinery (e.g. lorries,
pneumatic drills), by the accumulation of
snow or dead leaves on the road or in the
event of damaged bumpers and mirrors.
When reverse gear is engaged, an audible
signal (long beep) indicates that the sensors
may be dirty.
A front or rear impact to the vehicle can
upset the sensors’ settings, which is not
always detected by the system: distance
measurements may be distorted.
The sensors do not systematically detect
obstacles that are too low (pavements, studs)
or too thin (trees, posts, wire fences).
Certain obstacles located in the sensors’ blind
spots may not be detected or may no longer
be detected during the manoeuvre.
Certain materials (fabrics) absorb sound
waves: pedestrians may not be detected.
Maintenance
Clean the bumpers and door mirrors and
the field of vision of the cameras regularly.
When washing your vehicle at high pressure,
direct the spray from at least 30
cm away
from the radar, sensors and cameras.
Mats/Pedal trims
The use of mats or pedal trims not
approved by PEUGEOT may interfere with
the operation of the speed limiter or cruise
control.
To avoid any risk of jamming the pedals:
–
Ensure that the mat is secured correctly
.
–
Never fit one mat on top of another
.
Units of speed
Ensure that the units of speed displayed
on the instrument panel (mph or km/h) are
those for the country you are driving in.
If this is not the case, when the vehicle is
stationary, set the display to the required
Page 91 of 212

89
Driving
6Blind spot monitoring with
trailer detection
For more information, refer to the
General recommendations on the use
of driving and manoeuvring aids .
This system includes sensors, placed on the
sides of the rear bumper, which monitor the blind
spot areas.
It warns the driver of the presence of another
vehicle (car, truck, motorcycle) in the areas
hidden
from their field of vision, while driving and
reversing.
If a trailer is hitched to the vehicle, the detection
area is enlarged by the length of the trailer.
The warning is given by a fixed warning lamp
that appears in the door mirror on the side in
question. Depending on the configuration, an
audible warning may sound.
Activation/Deactivation
The function can be activated or deactivated using the MODE button in the
Blind spot menu.
For more information on Vehicle configuration
(MODE), refer to the corresponding section.
Two modes of activation are available:
–
VISUAL
: visual warning. While driving, a
warning lamp appears in the door mirror on the
side where a vehicle is detected.
–
VISUAL
and AUDIBLE: visual and audible
warning. While driving, a warning lamp appears
in the door mirror on the side in question. If the
direction indicator is activated on the side where
the vehicle is detected, an audible warning will
sound. When starting the vehicle, the
warning lamp
comes on in each mirror to indicate that the
system is activated.
The status of the system is memorised when the
ignition is switched off.
Reverse gear
The system assists the driver during their
manoeuvres in reverse (e.g. exit from a parking
space).
It detects vehicles arriving to the left or right of
the vehicle at a speed of between approximately
1 and 22 mph (1 and 35 km/h).
When a vehicle is detected, a warning lamp
comes on in the mirror on the side in question,
supplemented by an audible warning.
Trailer detection
The system detects the presence and length of a
trailer. The vehicle detection area in blind spots
is extended by the length of the trailer.
Page 103 of 212
101
Practical information
7Charging the traction
battery (Electric)
To charge, connect the vehicle to a domestic
charging unit or a fast public charger (superfast
charging).
For a full charge, follow the desired charging
procedure without interrupting it, until it ends
automatically.
To stop charging at any time, press the locking
button on the remote control for 5 seconds
and remove the charging nozzle. For superfast
charging, also refer to the fast public charger.
The display of information linked to the charging
is integrated into the rear view mirror. For more
information on the Display integrated into the
rear view mirror , refer to the corresponding
section.
As a safety measure, the engine will not start if the charging cable is plugged into
the vehicle's charging connector.
Cooling the traction battery
The cooling fan in the engine
compartment comes on during charging to
cool the on-board charger and the traction
battery.
Balancing the traction battery voltage
After carrying out a full charge (100%)
at least once per week, we recommend not
using the vehicle for about 4 hours.
This time allows the voltage to balance across
all of the traction battery's cells (ensuring a
level voltage across all of its cells).
This process helps keep the traction battery in
good condition and aids in the calculation of
its charging level.
Completely discharged traction
battery
T
o preserve the lifespan of the traction battery
and avoid damaging it, make sure that it is
never completely discharged (0%).
When the charge level drops to 15%, the
message "LOW POWER MODE" appears
on the display integrated into the rear view
mirror. If this message appears while driving,
avoid heavy acceleration and charge the
vehicle as soon as possible.
Long-term parking
Before parking the vehicle for an
extended period, carry out a full charge of the
traction battery.
Park the vehicle in a place where the
temperature will be between 0°C and 45°C
(parking in a place which will experience
extreme temperatures can damage the
traction battery).
Disconnect the cable from the (-) terminal of
the 12
V accessory battery.
Check the level of charge in the traction
battery periodically and charge it if necessary.
When parking the vehicle for more than one
month, keep the level of charge above 50%.
When parking the vehicle for a very long
period, charge the vehicle every 2 months.
Do not leave the charging cable connected.
Lack of use of the traction battery temporarily
affects its performance. At the end of the
parking period, carry out several charge/
discharge cycles to restore the normal
operation of the traction battery.
Precautions
Our electric vehicles have been developed in
accordance with the recommendations on the
maximum limits for electromagnetic fields, as
issued by the International Commission on Non-
Ionizing Radiation Protection
(ICNIRP - 1998
Guidelines).
Wearers of pacemakers or equivalent
devices
Ask your doctor about what precautions you should take, or ask the manufacturer
of your implanted electro-medical device about
whether its operation is guaranteed in an
environment which complies with the ICNIRP
recommendations.
If in doubt
Accelerated charging: do not remain
inside or near the vehicle, or near the
charging cable or charging unit, even for a
short time.
Page 104 of 212
102
Practical information
Superfast charging: do not use the system
yourself and avoid approaching public fast
charging points. Leave the area and ask a
third party to recharge the vehicle.
Before charging
Accelerated charging
Depending on the context:
►
Have a professional check that the
electrical system to be used complies with
applicable standards and is compatible with
the vehicle.
►
Have an accelerated charging unit which
is compatible with the vehicle installed by a
professional.
Favour the use of the cable supplied with the
vehicle or as an accessory
.
For more information, contact a PEUGEOT
dealer or a qualified workshop.
Superfast charging
Check that the fast public charging
station and its charging cable are compatible
with the vehicle.
During charging
Never work under the bonnet:
– Some areas remain very hot, even an
hour after charging ends - risk of burns!
–
The fan may start at any time - risk of cuts
or strangulation!
The performance of the traction battery varies depending on the outside
temperature and the temperature inside the
traction battery itself.
During charging, the outside temperature
must ideally be between 0°C and 45°C.
Charging is not possible when the
temperature inside the traction battery is
below -5°C or above 55°C. Charging time
may be longer if the temperature is below
0°C.
In cold weather, immediately connect the
vehicle after switching off the ignition.
Significant variations in the level of
incoming electric current may stop the
charging process.
►
Disconnect the charging cable and wait for
the level of electric current to return to normal.
After charging
Check that the charging flap is closed.
Connection
► Switch the ignition off.
► Open the charging flap, remove the
protective covers and check that there are no
foreign bodies on the charging connector
.
Accelerated charging, mode 3
► Connect the charging cable to the charging
unit (if applicable).
►
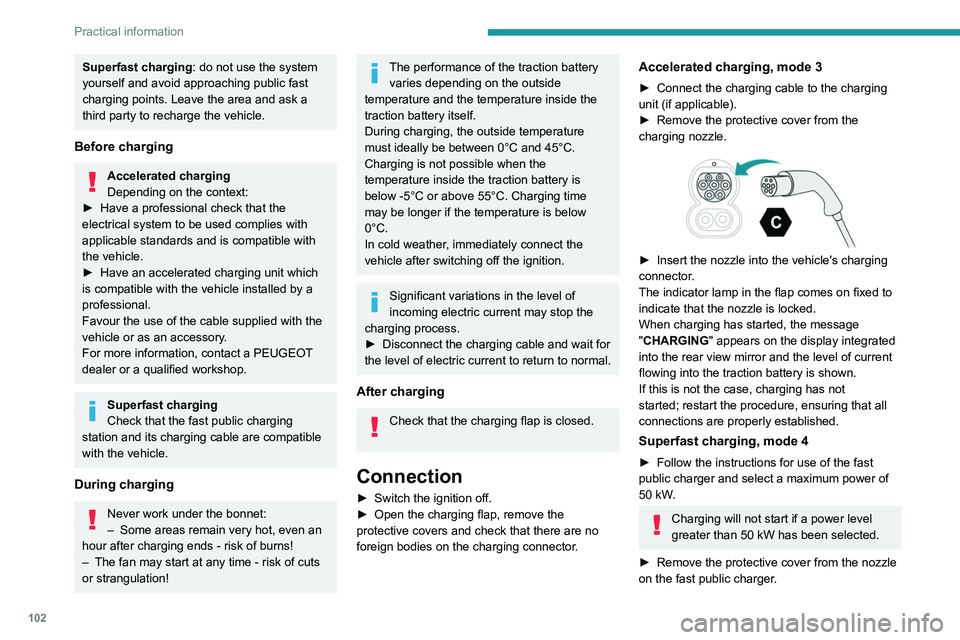
Remove the protective cover from the
charging nozzle.
► Insert the nozzle into the vehicle's charging
connector .
The indicator lamp in the flap comes on fixed to
indicate that the nozzle is locked.
When charging has started, the message
"CHARGING" appears on the display integrated
into the rear view mirror and the level of current
flowing into the traction battery is shown.
If this is not the case, charging has not
started; restart the procedure, ensuring that all
connections are properly established.
Superfast charging, mode 4
► Follow the instructions for use of the fast
public charger and select a maximum power of
50 kW
.
Charging will not start if a power level
greater than 50 kW has been selected.
►
Remove the protective cover from the nozzle
on the fast public charger
.
Page 105 of 212
103
Practical information
7
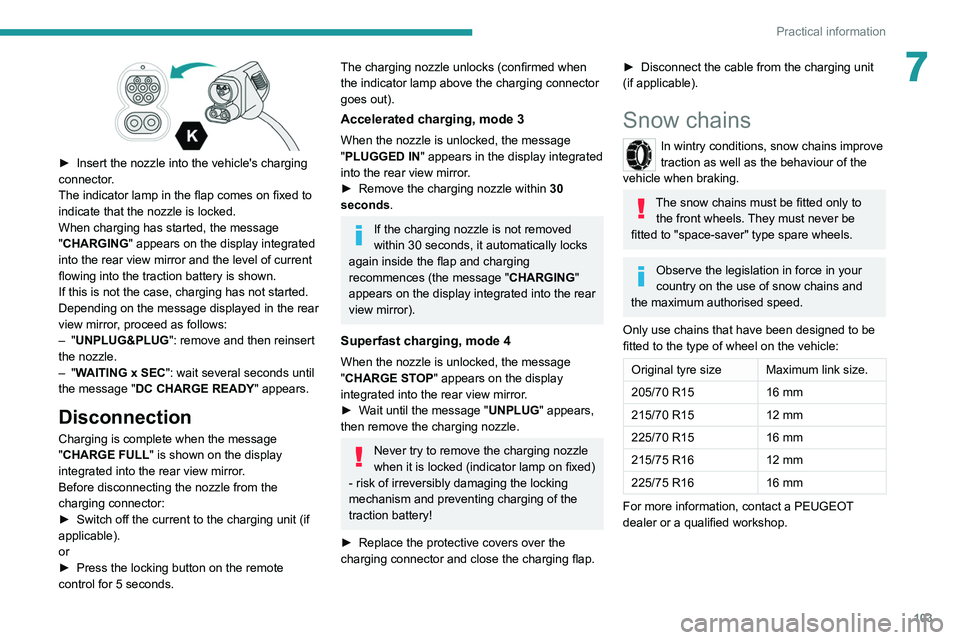
► Insert the nozzle into the vehicle's charging
connector .
The indicator lamp in the flap comes on fixed to
indicate that the nozzle is locked.
When charging has started, the message
"CHARGING" appears on the display integrated
into the rear view mirror and the level of current
flowing into the traction battery is shown.
If this is not the case, charging has not started.
Depending on the message displayed in the rear
view mirror, proceed as follows:
–
"UNPLUG&PLUG": remove and then reinsert
the nozzle.
–
"WAITING x SEC": wait several seconds until
the message "DC CHARGE READY " appears.
Disconnection
Charging is complete when the message
"CHARGE FULL" is shown on the display
integrated into the rear view mirror.
Before disconnecting the nozzle from the
charging connector:
►
Switch off the current to the charging unit (if
applicable).
or
►
Press the locking button on the remote
control for 5 seconds.
The charging nozzle unlocks (confirmed when
the indicator lamp above the charging connector
goes out).
Accelerated charging, mode 3
When the nozzle is unlocked, the message
"PLUGGED IN" appears in the display integrated
into the rear view mirror.
►
Remove the charging nozzle within 30
seconds
.
If the charging nozzle is not removed
within 30 seconds, it automatically locks
again inside the flap and charging
recommences (the message " CHARGING"
appears on the display integrated into the rear
view mirror).
Superfast charging, mode 4
When the nozzle is unlocked, the message
"CHARGE STOP" appears on the display
integrated into the rear view mirror.
►
W
ait until the message "UNPLUG" appears,
then remove the charging nozzle.
Never try to remove the charging nozzle
when it is locked (indicator lamp on fixed)
- risk of irreversibly damaging the locking
mechanism and preventing charging of the
traction battery!
►
Replace the protective covers over the
charging connector and close the charging flap.
► Disconnect the cable from the charging unit
(if applicable).
Snow chains
In wintry conditions, snow chains improve
traction as well as the behaviour of the
vehicle when braking.
The snow chains must be fitted only to the front wheels. They must never be
fitted to "space-saver" type spare wheels.
Observe the legislation in force in your
country on the use of snow chains and
the maximum authorised speed.
Only use chains that have been designed to be
fitted to the type of wheel on the vehicle:
Original tyre size Maximum link size.
205/70 R15 16 mm
215/70 R15 12 mm
225/70 R15 16 mm
215/75 R16 12 mm
225/75 R16 16 mm
For more information, contact a PEUGEOT
dealer or a qualified workshop.