2021 PEUGEOT BOXER air suspension
[x] Cancel search: air suspensionPage 4 of 212

2
Contents
■
Overview
■
Eco-driving
1InstrumentsInstrument panel 8
Warning and indicator lamps 9
Indicators 13
Vehicle configuration (MODE) 15
Touch screen audio and multimedia system 21
Setting the date and time 21
Trip computer 22
Trip computer 22
2AccessKey 23
Remote control 23
Front doors 26
Sliding side door 26
Rear doors 27
Alarm 27
Electric windows 28
3Ease of use and comfortFront seats 30
Front bench seat 31
Rear seats 32
Rear bench seat 32
Steering wheel adjustment 33
Mirrors 34
Heating and Ventilation 35
Heating/Manual air conditioning 35
Automatic air conditioning 36
Heating (Electric) 37
Additional heating systems 39
Rear heating/air conditioning 39
Additional programmable heating 40
Front demist - defrost 42
Rear screen de-icing 42
Cab layout 43
Rear fittings 47
Exterior fittings 49
4Lighting and visibilityLighting control stalk 51
Direction indicators 51
LED daytime running lamps 51
Automatic headlamp dipping 52
Headlamp beam height adjustment 54
Wiper control stalk 54
Changing a wiper blade 55
5SafetyGeneral safety recommendations 56
Hazard warning lamps 56
Horn 56
Pedestrian horn (Electric) 57
Electronic stability control (ESC) 57
Seat belts 60
Airbags 62
Child seats 63
Deactivating the front passenger airbag 65
ISOFIX seats 66
Child lock 68
6DrivingDriving recommendations 69
Starting-switching off the engine 72
Battery standby system 73
Parking brake 74
Gearbox 74
Drive selector (Electric) 75
Gear shift indicator 75
Stop & Start 76
Hill start assist 77
Tyre under-inflation detection 78
Pneumatic suspension 79
Driving and manoeuvring aids - General
recommendations
80
Road signs recognition 82
Speed limiter 83
Cruise control - Specific recommendations 85
Cruise control 85
Lane departure warning system 86
Blind spot monitoring with trailer detection 89
Active Safety Brake with Collision Risk Alert and
Intelligent emergency braking assistance
90
Rear parking sensors 93
Reversing camera 94
7Practical informationFuel 96
Compatibility of fuels 97
Charging system (Electric) 97
Charging the traction battery (Electric) 101
Snow chains 103
Towing a trailer 104
Towbar with quickly detachable towball 104
Roof-mounted carrying system 107
Bonnet 107
Page 6 of 212

4
Overview
Presentation
These illustrations and descriptions are intended
as a guide. The presence and location of certain
elements may vary, depending on the version or
trim level.
Instruments and controls
1. Instrument panel with display screen
2. Lighting control and direction indicator stalk
3. Wiper/Screenwash
control stalk
Trip computer (Diesel)
4. Vehicle configuration/Headlamps beam
height/Front/rear foglamps 5.
Steering mounted controls for the audio
system
6. Driver's front airbag/Horn
7. Ignition switch
8. Additional programmable heating (Diesel)
Heating (Electric)
9. Fusebox
10. Cruise control/speed limiter controls (Diesel)
11 . Pneumatic suspension/Reading spotlamps/
Additional rear ventilation (Diesel)
Centre console
1. Audio system/Navigation
2. Heating/Air conditioning
3. Storage compartment/Removable ashtray
4. 12 volt accessory socket (180
W max)
5. USB socket/Cigarette lighter
6. Dynamic stability control (DSC/ASR)
Intelligent traction control (Diesel)
7. Hill Assist Descent Control
8. Lane departure warning system
9. Hazard warning lamps
10. Central locking
11 . De-icing/Demisting
12. Gear lever (Diesel)
Drive selector (Electric)
Page 12 of 212

10
Instruments
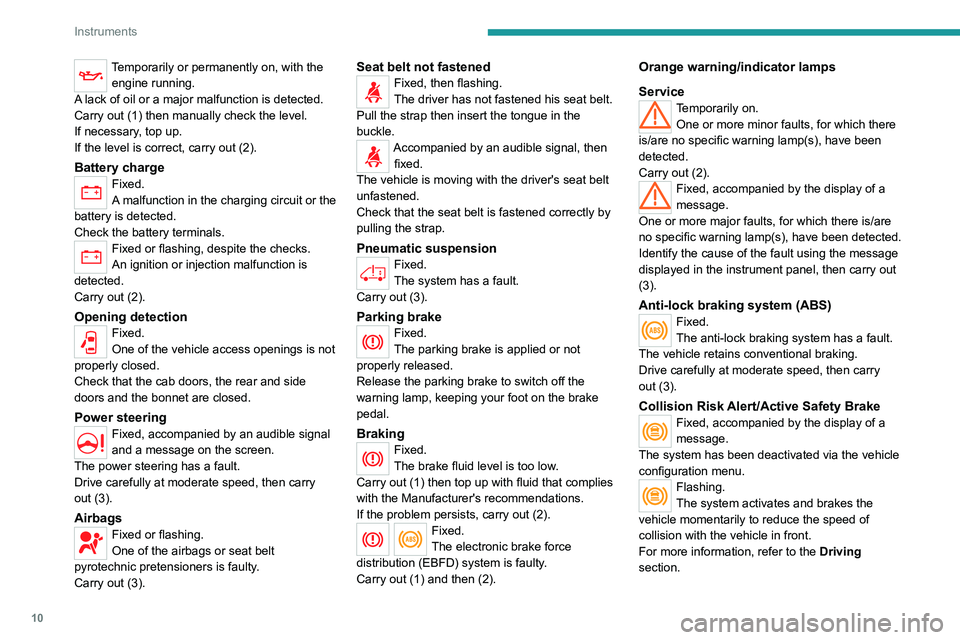
Temporarily or permanently on, with the engine running.
A lack of oil or a major malfunction is detected.
Carry out (1) then manually check the level.
If necessary, top up.
If the level is correct, carry out (2).
Battery chargeFixed.
A malfunction in the charging circuit or the
battery is detected.
Check the battery terminals.
Fixed or flashing, despite the checks.
An ignition or injection malfunction is
detected.
Carry out (2).
Opening detectionFixed.
One of the vehicle access openings is not
properly closed.
Check that the cab doors, the rear and side
doors and the bonnet are closed.
Power steering
Fixed, accompanied by an audible signal
and a message on the screen.
The power steering has a fault.
Drive carefully at moderate speed, then carry
out (3).
AirbagsFixed or flashing.
One of the airbags or seat belt
pyrotechnic pretensioners is faulty.
Carry out (3).
Seat belt not fastenedFixed, then flashing.
The driver has not fastened his seat belt.
Pull the strap then insert the tongue in the
buckle.
Accompanied by an audible signal, then fixed.
The vehicle is moving with the driver's seat belt
unfastened.
Check that the seat belt is fastened correctly by
pulling the strap.
Pneumatic suspensionFixed.
The system has a fault.
Carry out (3).
Parking brakeFixed.
The parking brake is applied or not
properly released.
Release the parking brake to switch off the
warning lamp, keeping your foot on the brake
pedal.
BrakingFixed.
The brake fluid level is too low.
Carry out (1) then top up with fluid that complies
with the Manufacturer's recommendations.
If the problem persists, carry out (2).
Fixed.
The electronic brake force
distribution
(EBFD) system is faulty.
Carry out (1) and then (2).
Orange warning/indicator lamps
Service
Temporarily on. One or more minor faults, for which there
is/are no specific warning lamp(s), have been
detected.
Carry out (2).
Fixed, accompanied by the display of a
message.
One or more major faults, for which there is/are
no specific warning lamp(s), have been detected.
Identify the cause of the fault using the message
displayed in the instrument panel, then carry out
(3).
Anti-lock braking system (ABS)Fixed.
The anti-lock braking system has a fault.
The vehicle retains conventional braking.
Drive carefully at moderate speed, then carry
out (3).
Collision Risk Alert/Active Safety BrakeFixed, accompanied by the display of a
message.
The system has been deactivated via the vehicle
configuration menu.
Flashing.
The system activates and brakes the
vehicle momentarily to reduce the speed of
collision with the vehicle in front.
For more information, refer to the Driving
section.
Page 81 of 212

79
Driving
6Under-inflation alert
This is signalled by the fixed illumination of this warning lamp, accompanied by an
audible signal and, depending on equipment, the
display of a message.
If a fault is detected in just one of the tyres, the
symbol or message displayed, depending on
equipment, will identify it.
►
Reduce speed immediately
, avoid excessive
steering movements and avoid sudden braking.
►
Stop the vehicle as soon as it is safe to do
so.
The loss of pressure detected may not always cause visible deformation of the
tyre.
Do not rely on just a visual check.
►
Using a compressor
, such as the one in
the temporary puncture repair kit, check the
pressures of all four tyres when cold.
►
If it is not possible to carry out this check
immediately
, drive carefully at reduced speed.
►
In the event of a puncture, use the
temporary puncture repair kit or the spare wheel
(depending on equipment).
Driving too slowly may not ensure
optimum monitoring.
The alert is not immediately triggered in the
event of a sudden loss of pressure or tyre
blow-out. This is because analysis of the
values read by the wheel's speed sensors
can take several minutes.
The alert may be delayed at speeds below
25 mph (40 km/h), or when adopting a sporty
driving mode.
The alert is kept active until the tyre/tyres
concerned is/are reinflated, repaired or
replaced.
Malfunction
The flashing and then fixed illumination of this warning lamp, accompanied by the
illumination of the service warning lamp, and
depending on equipment, the display of a
message, indicates a fault with the system.
In this case, the tyre pressures are no longer
monitored.
This alert is also displayed if at least one wheel is not equipped with a sensor.
Contact a PEUGEOT dealer or a qualified
workshop to have the system checked or,
following a puncture, to have a tyre refitted to the
original rim, equipped with a sensor.
Pneumatic suspension
If the vehicle is equipped with pneumatic
suspension, it is possible to change the height
of the rear sill, in order to facilitate loading or
unloading.
There is a normal sill level, as well as 3 higher
levels (from +1 to +3) and 3 lower levels (from
-1 to -3). Each level reached is displayed on the
instrument panel display screen.
Page 85 of 212

83
Driving
6– These traffic signs are then displayed in the
instrument panel.
The system can display two traffic signs (speed
limit and no overtaking/end of no overtaking)
in parallel in the two dedicated zones of the
instrument panel.
If an additional traffic sign is detected, such as
one for a reduced speed limit when the road is
wet, this is displayed in an empty window below
the corresponding sign.
Additional traffic signs are filtered as follows:
–
Signs related to snow or ice are displayed only
if the exterior temperature is below 3°C.
–
Signs related to snow
, rain or fog are
displayed only if the wipers are on and the
exterior temperature is below 3°C.
–
Signs related to heavy goods vehicles are only
displayed if they apply to vehicles weighing less
than 4 tonnes.
–
Signs related to farm vehicles are not
displayed.
Signs such as no overtaking are cleared from
the instrument panel after approximately 40
seconds.
Activation/Deactivation
This function can be set using the MODE button: in the “Traffic Sign” menu, select
“ON” or “OFF”.
For more information on Vehicle
configuration (MODE) , refer to the
corresponding section.
Operating limits
The system does not take account of reduced
speed limits, especially those imposed in the
following cases:
–
Poor weather (rain, snow).
–
Atmospheric pollution.
–
T
owing.
–
Driving with a space-saver type spare wheel
or snow chains fitted.
–
Driving with a non-standard suspension kit.
–
T
yre repaired using the temporary puncture
repair kit.
–
Y
oung drivers.
The system may not display the speed limit if it
does not detect a speed limit sign within a preset
period and in the following situations:
–
Road signs that are obstructed, non-standard,
damaged or bent.
–
Obsolete or incorrect maps.
–
Road incline causing the sign to be out of the
camera field of vision (on a slope, for example).
–
Change in the vehicle load that causes the
camera to tilt significantly (system operation may
temporarily be suspended to enable camera
self-calibration).
Speed limiter
For more information, refer to the
General recommendations on the use
of driving and manoeuvring aids .
System which prevents the vehicle
from exceeding the speed
programmed by the driver.
The speed is selected when the vehicle is
stationary with the engine running or while
driving with at least 2
nd gear engaged.
The minimum speed to be programmed is 19
mph (30 km/h).
Fully depressing the accelerator pedal allows
you to exceed the programmed speed. To
resume use of the speed limiter, gradually
release the pressure on the accelerator pedal
and return below the programmed speed.
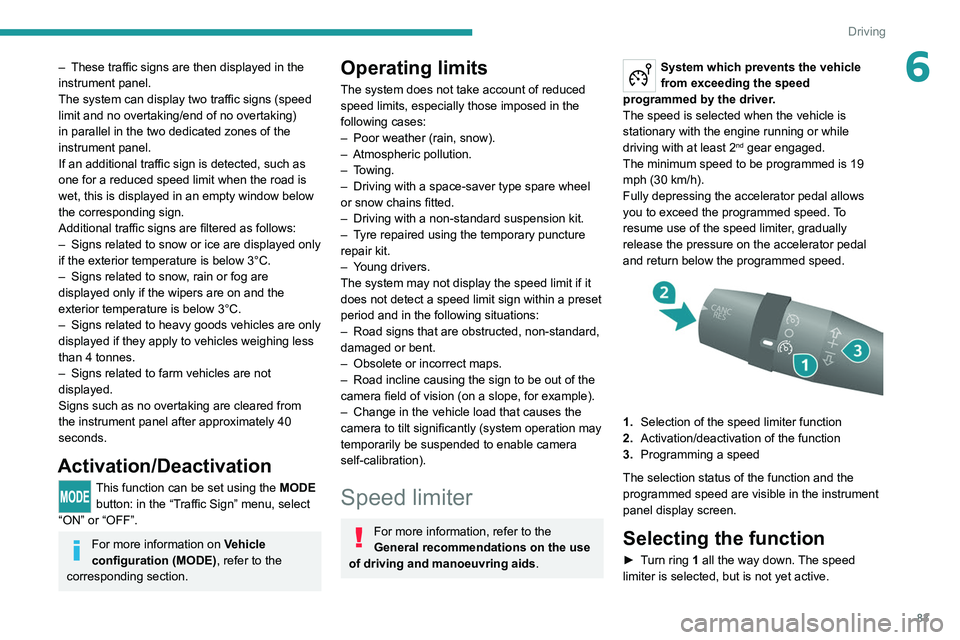
1. Selection of the speed limiter function
2. Activation/deactivation of the function
3. Programming a speed
The selection status of the function and the
programmed speed are visible in the instrument
panel display screen.
Selecting the function
► Turn ring 1 all the way down. The speed
limiter is selected, but is not yet active.
Page 121 of 212

11 9
In the event of a breakdown
8connected to the compressor and the sealant will
not be injected.
If the tyre needs to be deflated, connect hose
I to the tyre valve and press the yellow button
located in the centre of the compressor switch.
Replacing the cartridge
To replace the sealant cartridge, proceed as
follows:
►
Disconnect the hose
I
.
►
T
urn the cartridge to be replaced anti-
clockwise and lift it.
►
Insert the new cartridge and turn it clockwise,
►
Reconnect the hose
I
and connect pipe B to
its location.
The cartridge contains ethylene glycol, which is harmful if swallowed and irritates
the eyes.
It must be kept out of the reach of children.
After use, do not discard the cartridge in standard waste, take it to a
PEUGEOT dealer or an authorised waste
disposal site.
Spare wheel
Parking
► Immobilise the vehicle where it does not
obstruct traffic: the ground must be level, stable
and non-slippery
.
►
In case of sloping or deformed road, place an
object under the wheels to act as a chock.
►
With a manual gearbox, engage first gear
then switch off the ignition to lock the wheels.
►
Apply the parking brake and check that the
indicator lamp lights up on the instrument panel.
►
Y
ou must ensure that the occupants have
exited the vehicle and have moved to a safe
place.
►
Put on your safety vest and indicate that
the vehicle is immobilised using the measures
required by law in the country where you are
driving (warning triangle, hazard warning lamps,
etc.).
►
T
ake out the tools.
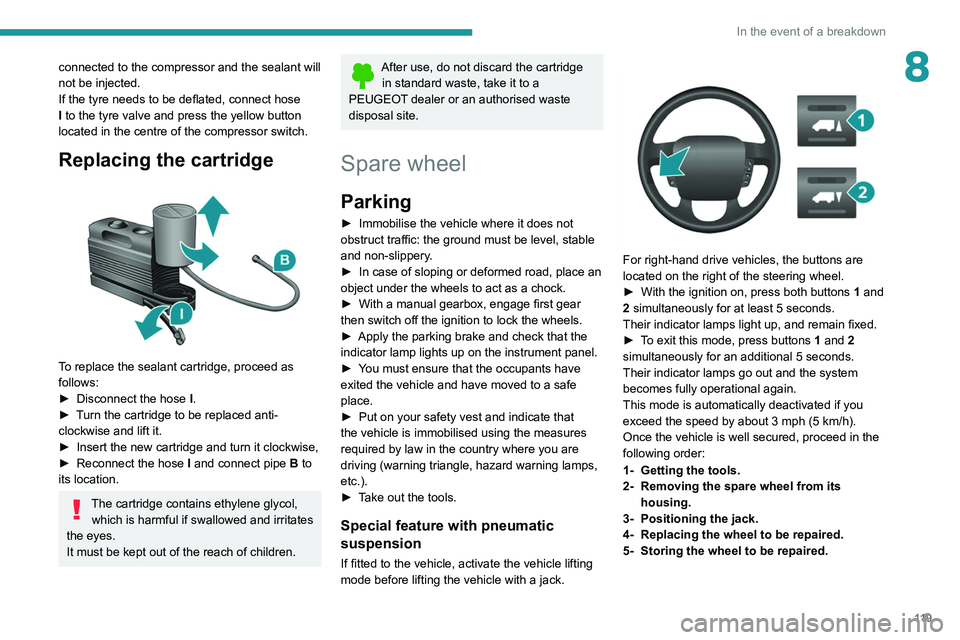
Special feature with pneumatic
suspension
If fitted to the vehicle, activate the vehicle lifting
mode before lifting the vehicle with a jack.
For right-hand drive vehicles, the buttons are
located on the right of the steering wheel.
►
With the ignition on, press both buttons 1
and
2 simultaneously for at least 5 seconds.
Their indicator lamps light up, and remain fixed.
►
T
o exit this mode, press buttons 1 and 2
simultaneously for an additional 5 seconds.
Their indicator lamps go out and the system
becomes fully operational again.
This mode is automatically deactivated if you
exceed the speed by about 3 mph (5 km/h).
Once the vehicle is well secured, proceed in the
following order:
1- Getting the tools.
2- Removing the spare wheel from its housing.
3- Positioning the jack.
4- Replacing the wheel to be repaired.
5- Storing the wheel to be repaired.