2021 PEUGEOT BOXER remove seats
[x] Cancel search: remove seatsPage 32 of 212
30
Ease of use and comfort
Driver's seat
For safety reasons, seat adjustments
must only be made when the vehicle is
stationary.
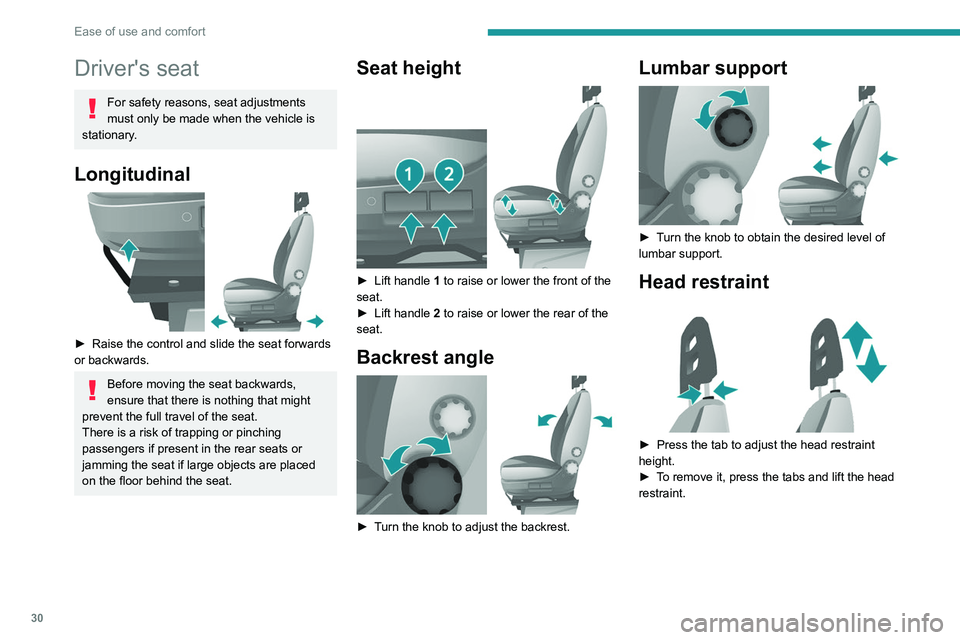
Longitudinal
► Raise the control and slide the seat forwards
or backwards.
Before moving the seat backwards,
ensure that there is nothing that might
prevent the full travel of the seat.
There is a risk of trapping or pinching
passengers if present in the rear seats or
jamming the seat if large objects are placed
on the floor behind the seat.
Seat height
► Lift handle 1 to raise or lower the front of the
seat.
►
Lift handle 2
to raise or lower the rear of the
seat.
Backrest angle
► Turn the knob to adjust the backrest.
Lumbar support
► Turn the knob to obtain the desired level of
lumbar support.
Head restraint
► Press the tab to adjust the head restraint
height.
►
T
o remove it, press the tabs and lift the head
restraint.
Page 35 of 212
33
Ease of use and comfort
3
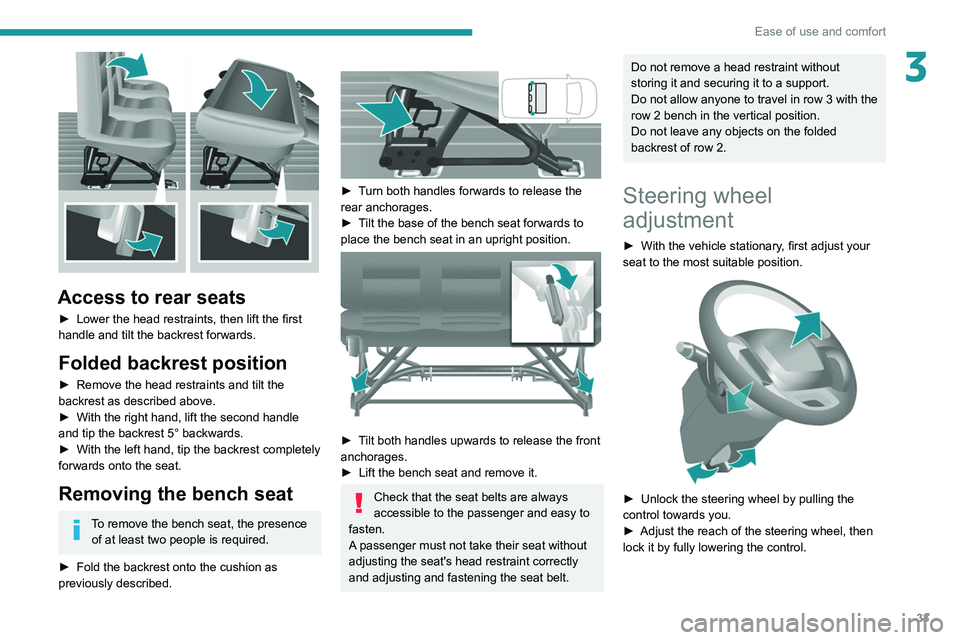
Access to rear seats
► Lower the head restraints, then lift the first
handle and tilt the backrest forwards.
Folded backrest position
► Remove the head restraints and tilt the
backrest as described above.
►
With the right hand, lift the second handle
and tip the backrest 5° backwards.
►
With the left hand, tip the backrest completely
forwards onto the seat.
Removing the bench seat
To remove the bench seat, the presence of at least two people is required.
►
Fold the backrest onto the cushion as
previously described.
► Turn both handles forwards to release the
rear anchorages.
►
T
ilt the base of the bench seat forwards to
place the bench seat in an upright position.
► Tilt both handles upwards to release the front
anchorages.
►
Lift the bench seat and remove it.
Check that the seat belts are always
accessible to the passenger and easy to
fasten.
A passenger must not take their seat without
adjusting the seat's head restraint correctly
and adjusting and fastening the seat belt.
Do not remove a head restraint without
storing it and securing it to a support.
Do not allow anyone to travel in row 3 with the
row 2 bench in the vertical position.
Do not leave any objects on the folded
backrest of row 2.
Steering wheel
adjustment
► With the vehicle stationary , first adjust your
seat to the most suitable position.
► Unlock the steering wheel by pulling the
control towards you.
►
Adjust the reach of the steering wheel, then
lock it by fully lowering the control.
Page 50 of 212
48
Ease of use and comfort
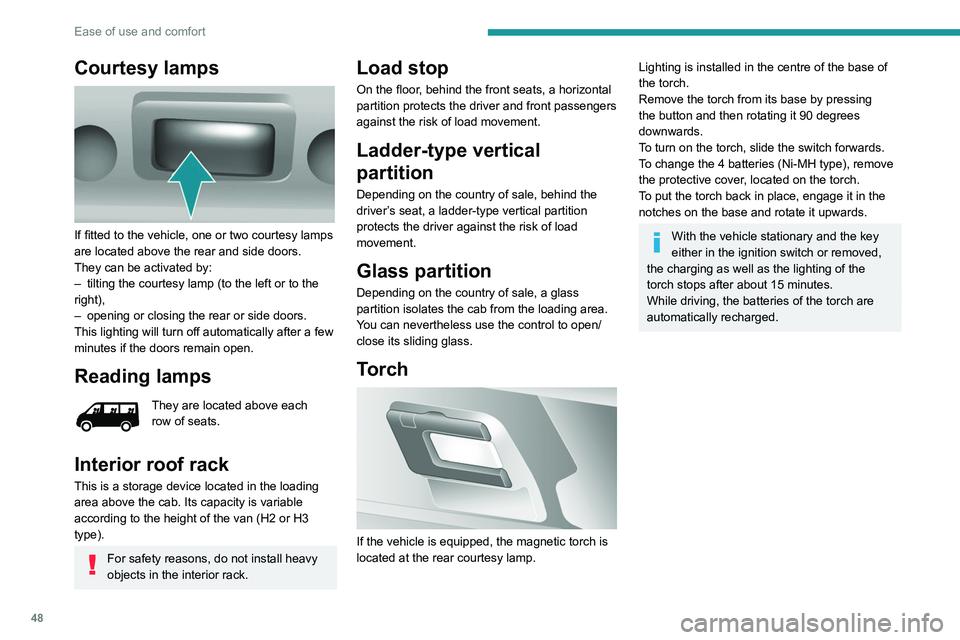
Courtesy lamps
If fitted to the vehicle, one or two courtesy lamps
are located above the rear and side doors.
They can be activated by:
–
tilting the courtesy lamp (to the left or to the
right),
–
opening or closing the rear or side doors.
This lighting will turn off automatically after a few
minutes if the doors remain open.
Reading lamps
They are located above each
row of seats.
Interior roof rack
This is a storage device located in the loading
area above the cab. Its capacity is variable
according to the height of the van (H2 or H3
type).
For safety reasons, do not install heavy
objects in the interior rack.
Load stop
On the floor, behind the front seats, a horizontal
partition protects the driver and front passengers
against the risk of load movement.
Ladder-type vertical
partition
Depending on the country of sale, behind the
driver’s seat, a ladder-type vertical partition
protects the driver against the risk of load
movement.
Glass partition
Depending on the country of sale, a glass
partition isolates the cab from the loading area.
You can nevertheless use the control to open/
close its sliding glass.
Torch
If the vehicle is equipped, the magnetic torch is
located at the rear courtesy lamp.
Lighting is installed in the centre of the base of
the torch.
Remove the torch from its base by pressing
the button and then rotating it 90 degrees
downwards.
To turn on the torch, slide the switch forwards.
To change the 4 batteries (Ni-MH type), remove
the protective cover, located on the torch.
To put the torch
back in place, engage it in the
notches on the base and rotate it upwards.
With the vehicle stationary and the key
either in the ignition switch or removed,
the charging as well as the lighting of the
torch stops after about 15 minutes.
While driving, the batteries of the torch are
automatically recharged.
Page 65 of 212
63
Safety
5Lateral airbags and curtain
airbags
If fitted to your vehicle, the lateral airbags are
built into the backrests of the front seats, on the
side by the door.
The curtain airbags are built into the pillars and
the upper passenger compartment area, in the
roof above the front seats.
They inflate between the occupant and the
window.
They deploy on one side only (the side where
the collision occurs).
Malfunction
If this warning lamp comes on, contact a
PEUGEOT dealer to have the system
checked.
Advice
For the airbags to be fully effective,
observe the safety recommendations
below.
Adopt a normal upright sitting position.
Fasten the seat belt ensuring it is correctly
positioned and adjusted.
Do not leave anything between the occupants
and the airbags (a child, pet, object, etc.), nor
fix or attach anything close to or in the way of
the airbag release trajectory; this could cause
injuries during their deployment.
Never modify the original definition of your
vehicle, particularly in the area directly around
the airbags.
After an accident or if the vehicle has been
stolen, have the airbag systems checked.
All work on the airbag systems must only
be performed by a PEUGEOT dealer or a
qualified workshop.
Even if all of the precautions mentioned
are observed, a risk of injury or of minor
burns to the head, chest or arms cannot be
ruled out when an airbag is deployed. The
airbag inflates almost instantly (within a few
milliseconds) then deflates within the same
time discharging the hot gas via openings
provided for this purpose.
Front airbags
Do not drive holding the steering wheel
by its spokes or resting your hands on the
centre part of the wheel.
Passengers must not place their feet on the
dashboard.
Do not smoke as deployment of the airbags
can cause burns or the risk of injury from a
cigarette or pipe.
Never remove or pierce the steering wheel or
hit it violently.
Do not fix or attach anything to the steering
wheel or dashboard, as this could cause
injuries when the airbags are deployed.
Lateral airbags
Use only approved covers on the seats,
compatible with the deployment of the lateral
airbags. For information on the range of seat
covers suitable for your vehicle, contact a
PEUGEOT dealer.
Do not fix or attach anything to the seat
backrests (clothes, etc.), as this could cause
injuries to the thorax or arm when the lateral
airbag is deployed.
Do not sit with the upper part of the body any
nearer to the door than necessary.
Curtain airbags
Do not fix or attach anything to the roof,
as this could cause head injuries when the
curtain airbag is deployed.
Do not remove the grab handles installed on
the roof, as they play a part in securing the
curtain airbags.
Child seats
The regulations on carrying children are specific to each country. Refer to the
legislation in force in your country.
For maximum safety, please observe the
following recommendations:
–
In accordance with European regulations,
all children under the age of 12 or less than
1.5 metres tall must travel in approved child
Page 66 of 212
64
Safety
seats suited to their weight, on seats fitted with
a seat belt or ISOFIX mountings.
–
Statistically
, the safest seats in your
vehicle for carrying children are the rear
seats.
–
Children weighing less than 9 kg must
travel in the "rearward facing" position,
whether in the front or rear of the vehicle.
It is recommended that children travel
on the rear seats of the vehicle:
–
"rearward facing" up to the age of 3,
–
"forward facing" over the age of 3.
Make sure that the seat belt is correctly
positioned and tightened.
For child seats with a support leg, ensure that
the support leg is in firm and steady contact
with the floor.
An incorrectly installed child seat in a vehicle compromises the child's safety in
the event of an accident.
Ensure that there is no seat belt or seat belt
buckle under the child seat, as this could
destabilise it.
Remember to fasten the seat belts or the
child seat harness keeping the slack relative
to the child's body to a minimum, even for
short journeys.
When installing a child seat using the seat
belt, ensure that the seat belt is tightened
correctly on the child seat and that it secures
the child seat firmly on the vehicle seat. If
the passenger seat is adjustable, move it
forwards if necessary.
Remove the head restraint before
installing a child seat with a backrest on a
passenger seat.
Ensure that the head restraint is stored or
attached securely to prevent it from being
thrown around the vehicle in the event of
sharp braking. Refit the head restraint once
the child seat has been removed.
Installing a booster seat
The chest part of the seat belt must be
positioned on the child's shoulder without
touching the neck.
Ensure that the lap part of the seat belt
passes correctly over the child's thighs.
Use a booster seat with a backrest, equipped
with a belt guide at shoulder level.
Additional protections
To prevent accidental opening of the
doors and rear windows, use the "Child lock".
Take care not to open the rear windows by
more than one third.
To protect young children from the sun's rays,
fit side blinds on the rear windows.
As a safety measure, do not leave:
–
A
child alone and unsupervised inside a
vehicle.
– A child or an animal in a vehicle which is
exposed to the sun, with the windows closed.
–
The keys within reach of children inside the
vehicle.
Child seat at the rear
Forward-facing or rearward-facing
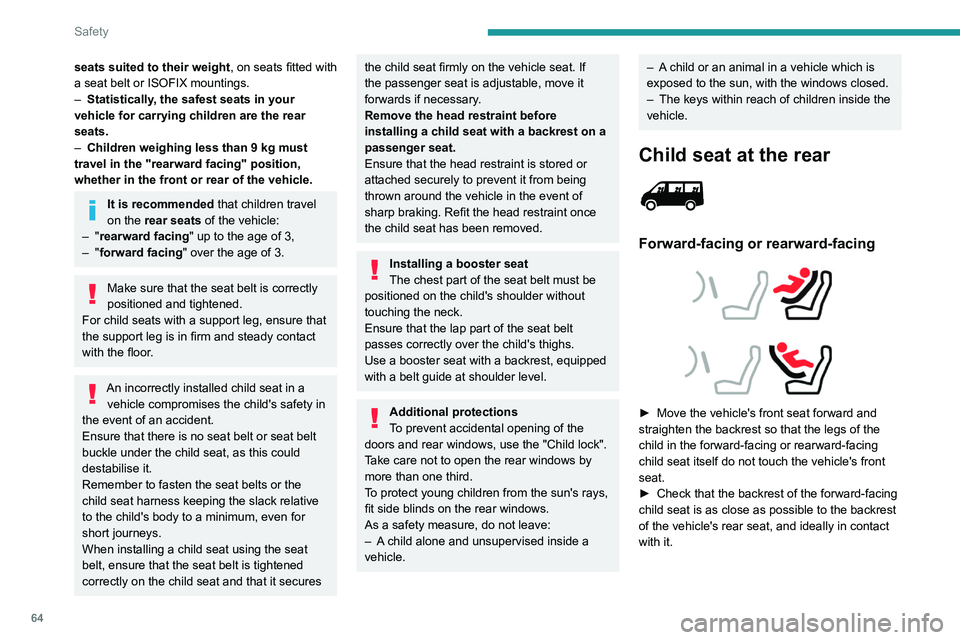
► Move the vehicle's front seat forward and
straighten the backrest so that the legs of the
child in the forward-facing or rearward-facing
child seat itself do not touch the vehicle's front
seat.
►
Check that the backrest of the forward-facing
child seat is as close as possible to the backrest
of the vehicle's rear seat, and ideally in contact
with it.
Page 69 of 212
67
Safety
5
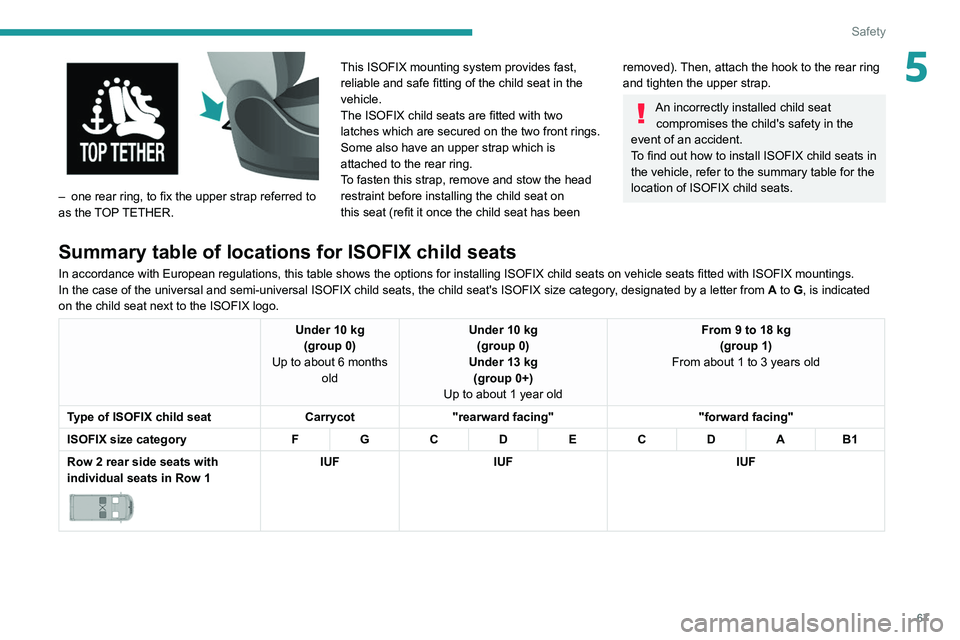
– one rear ring, to fix the upper strap referred to
as the TOP TETHER. This ISOFIX mounting system provides fast,
reliable and safe fitting of the child seat in the
vehicle.
The ISOFIX child seats are fitted with two
latches which are secured on the two front rings.
Some also have an upper strap which is
attached to the rear ring.
To fasten this strap, remove and stow the head
restraint before installing the child seat on
this seat (refit it once the child seat has been
removed). Then, attach the hook to the rear ring
and tighten the upper strap.
An incorrectly installed child seat
compromises the child's safety in the
event of an accident.
To find out how to install ISOFIX child seats in
the vehicle, refer to the summary table for the
location of ISOFIX child seats.
Summary table of locations for ISOFIX child seats
In accordance with European regulations, this table shows the options for installing ISOFIX child seats on vehicle seats fitted with ISOFIX mountings.
In the case of the universal and semi-universal ISOFIX child seats, the child seat's ISOFIX size category , designated by a letter from A to G, is indicated
on the child seat next to the ISOFIX logo.
Under 10 kg (group 0)
Up to about 6 months old Under 10 kg
(group 0)
Under 13 kg (group 0+)
Up to about 1 year old From 9 to 18 kg
(group 1)
From about 1 to 3 years old
Type of ISOFIX child seat Carrycot"rearward facing" "forward facing"
ISOFIX size category FG C DEC DA B1
Row 2 rear side seats with
individual seats in Row 1
IUF IUF IUF