2021 PEUGEOT BOXER cooling
[x] Cancel search: coolingPage 16 of 212

14
Instruments
Menu... Select... Allows you to...
Service Service (miles/
km before
service) Display the
remaining
miles/
kilometres to
be travelled
before the
next service.
Oil change
(miles/km
before oil
change) Display the
remaining
miles/
kilometres to
be travelled
before the
next oil
change.
For more information on
Vehicle
configuration (MODE) , refer to the
corresponding section.
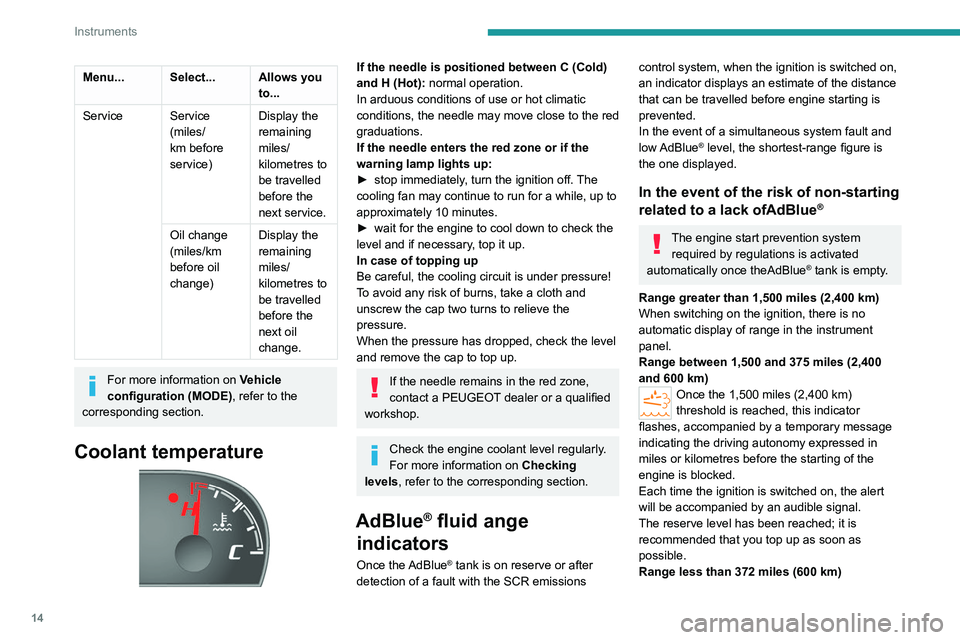
Coolant temperature
If the needle is positioned between C (Cold)
and H (Hot): normal operation.
In arduous conditions of use or hot climatic
conditions, the needle may move close to the red
graduations.
If the needle enters the red zone or if the
warning lamp lights up:
►
stop immediately
, turn the ignition off. The
cooling fan may continue to run for a while, up to
approximately 10 minutes.
►
wait for the engine to cool down to check the
level and if necessary
, top it up.
In case of topping up
Be careful, the cooling circuit is under pressure!
To avoid any risk of burns, take a cloth and
unscrew the cap two turns to relieve the
pressure.
When the pressure has dropped, check the level
and remove the cap to top up.
If the needle remains in the red zone,
contact a PEUGEOT dealer or a qualified
workshop.
Check the engine coolant level regularly.
For more information on Checking
levels, refer to the corresponding section.
AdBlue® fluid ange
indicators
Once the AdBlue® tank is on reserve or after
detection of a fault with the SCR emissions
control system, when the ignition is switched on,
an indicator displays an estimate of the distance
that can be travelled before engine starting is
prevented.
In the event of a simultaneous system fault and
low AdBlue
® level, the shortest-range figure is
the one displayed.
In the event of the risk of non-starting
related to a lack ofAdBlue®
The engine start prevention system required by regulations is activated
automatically once theAdBlue
® tank is empty.
Range greater than 1,500 miles (2,400 km)
When switching on the ignition, there is no
automatic display of range in the instrument
panel.
Range between 1,500 and 375 miles (2,400
and 600 km)
Once the 1,500 miles (2,400 km)
threshold is reached, this indicator
flashes, accompanied by a temporary message
indicating the driving autonomy expressed in
miles or kilometres before the starting of the
engine is blocked.
Each time the ignition is switched on, the alert
will be accompanied by an audible signal.
The reserve level has been reached; it is
recommended that you top up as soon as
possible.
Range less than 372 miles (600 km)
Page 39 of 212

37
Ease of use and comfort
3This is the normal operating mode for the
automatic air conditioning system.
–
Using the moving ring surrounding the
AUTO
control, adjust the comfort temperature to be
reached according to a scale between: •
HI (High up to ≈32) and
•
LO (Low until ≈16).
The system manages the air distribution, flow
and intake to ensure the comfort equivalent
to the graduation displayed and sufficient air
recirculation in the passenger compartment.
Customisable AUTO mode
In AUTO mode, some settings can be changed:
distribution, air flow, air conditioning and air
intake/recirculation.
The display changes from FULL AUTO to
AUTO.
►
T
o return to fully automatic operation, press
button 1 again. The control panel display
changes from AUTO to
FULL AUTO.
If after manual adjustments, the system cannot
maintain the selected graduation, this will flash
and AUTO will then go out. Press control 1 to
return to the automatic settings.
Air conditioning off
► Press button 2 to switch off the air
conditioning functions. The snowflake goes out
on the display.
Complete switch-off
► Press button 3 to switch off the system. The
LED and the display go out.
Temperature
The scale is between:
– a rise in interior air temperature HI (High),
which heats up to a maximum graduation of 32,
–
a cooling of interior air temperature LO (Low),
which decreases to a graduation
of 16.
Air distribution
► Press one of the buttons 4 to direct the air
flow towards:
the windscreen and front side window
vents (demisting - defrosting windows),
the central and side vents (chest and
face),
the diffusers of the front and rear zones
(footwells).
Combining buttons makes it possible to refine
the air distribution.
Air flow
► Press one of the buttons 5 to increase or
decrease the air flow.
Air intake/Air recirculation
The intake of exterior air prevents the formation
of mist on the windscreen and side windows.
Recirculating the interior air isolates the
passenger compartment from exterior odours
and fumes.
This function allows hot or cold air to be delivered selectively and more quickly.
Return to exterior air intake as soon as possible
to avoid deterioration of the air quality and the
formation of mist.
►
Press button
6 to activate interior air
recirculation. The indicator lamp comes on.
Pressing this button again restores exterior air
intake. The indicator lamp goes off.
Pressing button 1 also restores exterior
air intake. Returning to this position
allows the air in the passenger compartment
to be renewed and demisting. Pressing button
1
again restores the FULL AUTO function.
Heating (Electric)
A thermostatic control panel is used to heat
the passenger compartment, in addition to the
standard controls located on the central console.
The control panel is located next to the steering
wheel, below the MODE control panel.
Page 72 of 212

70
Driving
A load that is not properly secured inside the
vehicle may affect vehicle handling and create a
risk of accident.
If your vehicle is fitted with a drop-side back, the
height and width of the load must remain within
the overall dimensions of the vehicle.
Drive the vehicle in a prudent and efficient
way
Take corners gently.
Anticipate the need to brake as the stopping
distance is increased, particularly on wet or icy
roads.
Be aware of the effect of side winds on the
vehicle.
Effective eco-driving allows you to save energy;
accelerate gradually, anticipate the need to slow
down and adapt your speed to suit the situation.
Indicate changes of direction well in advance so
that you are seen by other road users.
Take care
The tyres must be inflated to at least the
pressures indicated on the label, even over-
inflated by 0.2 to 0.3 bar for long journeys.
On flooded roads
We strongly advise against driving on flooded
roads, as this could cause serious damage to the
engine or gearbox, as well as to your vehicle's
electrical systems.
If the vehicle absolutely must drive through a
flooded section of road:
►
Check that the depth of the water does not
exceed 15
cm, taking account of waves that
might be generated by other users.
►
Deactivate the Stop & Start function.
►
Drive as slowly as possible without stalling. In
all cases, do not exceed 6 mph (10
km/h).
►
Do not stop and do not switch off the engine.
On leaving the flooded road, as soon as safety
conditions allow
, make several light brake
applications to dry the brake discs and pads.
If in doubt about the state of your vehicle,
contact a PEUGEOT dealer or a qualified
workshop.
Noise (Electric)
On the outside
Due to the vehicle’s quiet operation when
driving, the driver must pay particular attention.
When manoeuvring, the driver must always
check the vehicle's immediate surroundings.
At speeds of up to 25 mph (40 km/h), the
pedestrian horn warns other road users of the
vehicle’s presence.
Cooling the traction battery
The cooling fan comes on during
charging to cool the on-board charger.
On the inside
During use, you may hear certain perfectly
normal noises specific to electric vehicles, such
as:
–
T
raction battery relay when starting.
–
V
acuum pump when braking.
–
V
ehicle tyres or aerodynamics when driving.
–
Jolting and knocking noise during hill starts.
Towing
Driving with a trailer places greater
demands on the towing vehicle and
particular care must be taken.
Do not exceed the maximum towable
weights.
At altitude: reduce the maximum load by
10% per 1,000 metres of altitude; the lower
air density at high altitudes decreases engine
performance.
New vehicle: do not tow a trailer until the
vehicle has driven at least 620 miles
(1,000 kilometres).
Page 73 of 212

71
Driving
6If the outside temperature is high, let the
engine idle for 1 to 2 minutes after the
vehicle comes to a stop, to help it to cool.
Before setting off
Nose weight
► Distribute the load in the trailer so that the
heaviest items are located as close as possible
to the axle, and the nose weight (at the point
where it joins your vehicle) approaches the
maximum permitted, without exceeding it.
Tyres
► Check the tyre pressures of the towing
vehicle and of the trailer , observing the
recommended pressures.
Lighting
► Check the electrical signalling on the trailer
and the headlamp beam height of your vehicle.
If a genuine PEUGEOT towing device is
used, the rear parking sensors will be
deactivated automatically to avoid activating
the audible signal.
When driving
Cooling
Towing a trailer uphill causes the coolant
temperature to increase. The maximum towable
load depends on the gradient and the exterior temperature. The fan’s cooling capacity does not
increase with engine speed.
►
Reduce speed and lower the engine speed to
limit the amount of heating produced.
►
Pay constant attention to the coolant
temperature.
If this warning lamp and the STOP
warning lamp come on, stop the vehicle
and switch off the engine as soon as possible.
Brakes
Using the engine brake is recommended to limit
the overheating of the brakes. Braking distances
are increased when towing a trailer.
Side wind
Bear in mind that the vehicle will be more
susceptible to wind when towing.
Anti-theft protection
Electronic immobiliser
The keys contain an electronic immobiliser
device.
This device locks the engine supply system. It
activates automatically when the key is removed
from the ignition.
When the ignition switch is turned on, a dialogue
is set up between the key and the electronic
immobiliser.
This warning lamp goes off after the key has been recognised, the ignition is
switched on and the engine can be started.
If the key is not recognised, the engine
cannot be started. Use another key and
have the faulty key checked by a PEUGEOT
dealer.
Carefully note the key number. In case of
loss, the intervention of a PEUGEOT
dealer will be faster and more efficient if you
provide this number and the confidential card.
Do not make any modifications to the
electronic immobiliser system.
Operating the remote control, even in your
pocket, may cause the doors to be unlocked
accidentally.
The simultaneous use of other high-frequency
devices (mobile phones, home alarms, etc.),
may temporarily disturb the operation of the
remote control.
Except for reinitialisation, the remote control
cannot operate while the key is in the ignition
switch, even when the ignition is off.
Driving with the doors locked could make
it more difficult for the emergency
services to enter the vehicle in an emergency.
As a safety precaution (with children on
board), remove the key from the ignition when
leaving the vehicle, even for a short time.
Page 103 of 212

101
Practical information
7Charging the traction
battery (Electric)
To charge, connect the vehicle to a domestic
charging unit or a fast public charger (superfast
charging).
For a full charge, follow the desired charging
procedure without interrupting it, until it ends
automatically.
To stop charging at any time, press the locking
button on the remote control for 5 seconds
and remove the charging nozzle. For superfast
charging, also refer to the fast public charger.
The display of information linked to the charging
is integrated into the rear view mirror. For more
information on the Display integrated into the
rear view mirror , refer to the corresponding
section.
As a safety measure, the engine will not start if the charging cable is plugged into
the vehicle's charging connector.
Cooling the traction battery
The cooling fan in the engine
compartment comes on during charging to
cool the on-board charger and the traction
battery.
Balancing the traction battery voltage
After carrying out a full charge (100%)
at least once per week, we recommend not
using the vehicle for about 4 hours.
This time allows the voltage to balance across
all of the traction battery's cells (ensuring a
level voltage across all of its cells).
This process helps keep the traction battery in
good condition and aids in the calculation of
its charging level.
Completely discharged traction
battery
T
o preserve the lifespan of the traction battery
and avoid damaging it, make sure that it is
never completely discharged (0%).
When the charge level drops to 15%, the
message "LOW POWER MODE" appears
on the display integrated into the rear view
mirror. If this message appears while driving,
avoid heavy acceleration and charge the
vehicle as soon as possible.
Long-term parking
Before parking the vehicle for an
extended period, carry out a full charge of the
traction battery.
Park the vehicle in a place where the
temperature will be between 0°C and 45°C
(parking in a place which will experience
extreme temperatures can damage the
traction battery).
Disconnect the cable from the (-) terminal of
the 12
V accessory battery.
Check the level of charge in the traction
battery periodically and charge it if necessary.
When parking the vehicle for more than one
month, keep the level of charge above 50%.
When parking the vehicle for a very long
period, charge the vehicle every 2 months.
Do not leave the charging cable connected.
Lack of use of the traction battery temporarily
affects its performance. At the end of the
parking period, carry out several charge/
discharge cycles to restore the normal
operation of the traction battery.
Precautions
Our electric vehicles have been developed in
accordance with the recommendations on the
maximum limits for electromagnetic fields, as
issued by the International Commission on Non-
Ionizing Radiation Protection
(ICNIRP - 1998
Guidelines).
Wearers of pacemakers or equivalent
devices
Ask your doctor about what precautions you should take, or ask the manufacturer
of your implanted electro-medical device about
whether its operation is guaranteed in an
environment which complies with the ICNIRP
recommendations.
If in doubt
Accelerated charging: do not remain
inside or near the vehicle, or near the
charging cable or charging unit, even for a
short time.
Page 109 of 212

107
Practical information
7Roof-mounted carrying
systems
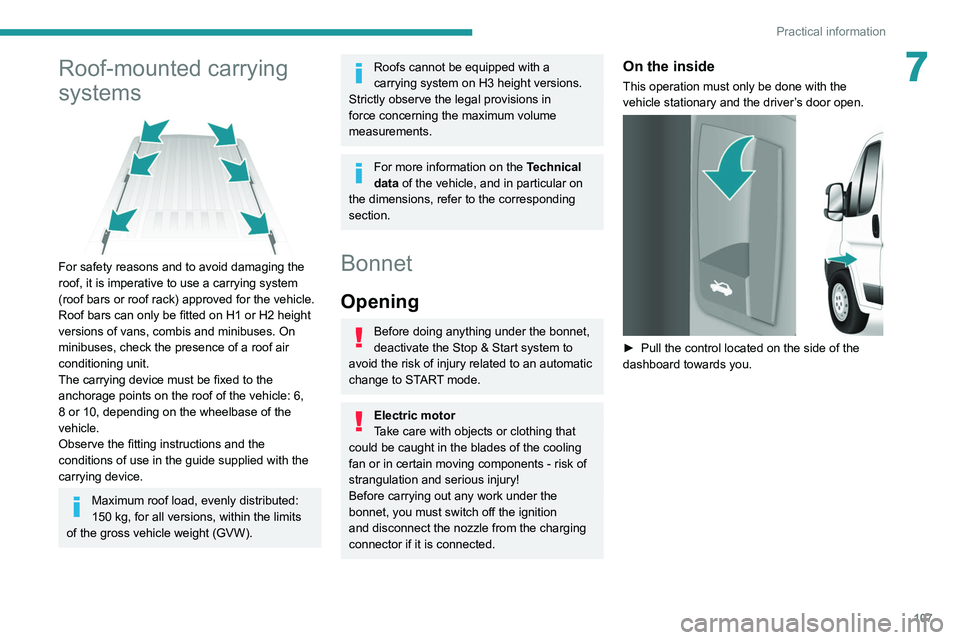
For safety reasons and to avoid damaging the
roof, it is imperative to use a carrying system
(roof bars or roof rack) approved for the vehicle.
Roof bars can only be fitted on H1 or H2 height
versions of vans, combis and minibuses. On
minibuses, check the presence of a roof air
conditioning unit.
The carrying device must be fixed to the
anchorage points on the roof of the vehicle: 6,
8 or 10, depending on the wheelbase of the
vehicle.
Observe the fitting instructions and the
conditions of use in the guide supplied with the
carrying device.
Maximum roof load, evenly distributed:
150 kg, for all versions, within the limits
of the gross vehicle weight (GVW).
Roofs cannot be equipped with a
carrying system on H3 height versions.
Strictly observe the legal provisions in
force concerning the maximum volume
measurements.
For more information on the Technical
data of the vehicle, and in particular on
the dimensions, refer to the corresponding
section.
Bonnet
Opening
Before doing anything under the bonnet,
deactivate the Stop & Start system to
avoid the risk of injury related to an automatic
change to START mode.
Electric motor
Take care with objects or clothing that
could be caught in the blades of the cooling
fan or in certain moving components - risk of
strangulation and serious injury!
Before carrying out any work under the
bonnet, you must switch off the ignition
and
disconnect the nozzle from the charging
connector
if it is connected.
On the inside
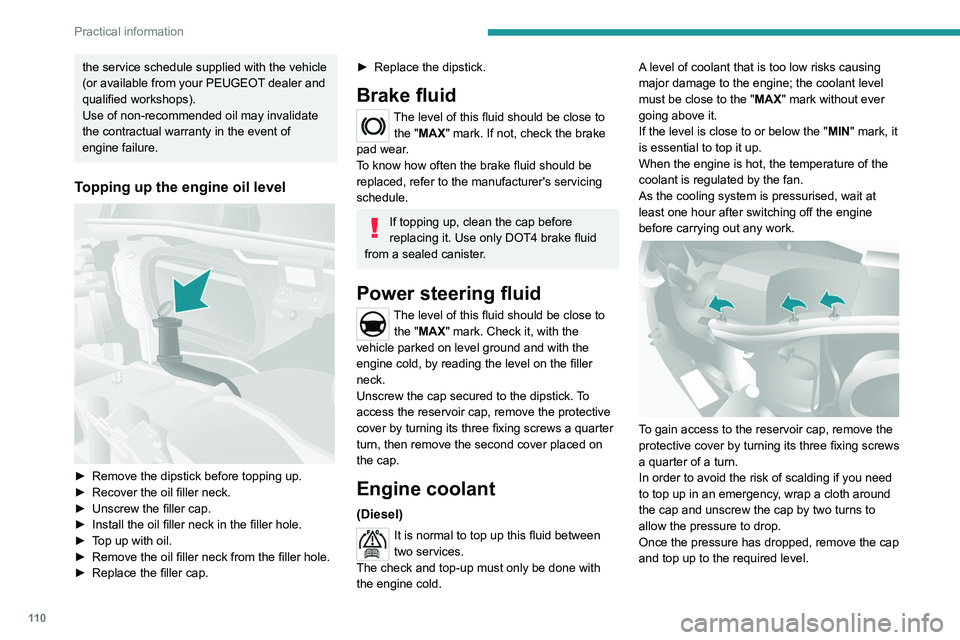
This operation must only be done with the
vehicle stationary and the driver’s door open.
► Pull the control located on the side of the
dashboard towards you.
Page 111 of 212

109
Practical information
7All work must be carried out only by a
PEUGEOT dealer or a qualified workshop
Electric motor
1.Screenwash and headlamp washer reservoir
2. Engine coolant reservoir
3. Power steering fluid reservoir
4. Brake and clutch fluid reservoir
5. Heating
circuit fluid reservoir
6. Fusebox
Checking levels
Check all of the following levels regularly in
accordance with the manufacturer's service
schedule. Top them up if required, unless
otherwise indicated.
If a level drops significantly, have the
corresponding system checked by a PEUGEOT
dealer or a qualified workshop.
The fluids must comply with the
manufacturer's requirements and with
the vehicle's engine.
Take care when working under the bonnet, as certain areas of the engine
may be extremely hot (risk of burns) and the
cooling fan could start at any time (even with
the ignition off).
If the engine cover is to be removed /
refitted, handle it with care to avoid
damaging the mounting clips.
Used products
Avoid prolonged contact of used oil or fluids with the skin.
Most of these fluids are harmful to health and
very corrosive.
Do not discard used oil or fluids into
sewers or onto the ground.
Empty used oil into the containers reserved
for this purpose at a PEUGEOT dealer or a
qualified workshop.
Engine oil
The level is checked, with the engine having been switched off for at least 30
minutes and on level ground, using the dipstick.
It is normal to top up the oil level between two
services (or oil changes). It is recommended
that you check the level, and top up if necessary,
every 3,000 miles (5,000 km).
In order to maintain the reliability of the
engine and emissions control system,
never use additives in the engine oil.
Checking using the dipstick
For the location of the dipstick, please refer
to the illustration of the corresponding engine
compartment.
►
Grasp the dipstick by its coloured grip and
pull it out completely
.
►
Wipe the end of the dipstick using a clean,
lint-free cloth.
► Reinsert the dipstick and push fully down,
then pull it out again to visually check the oil
level: the correct level is between marks A
(max)
and B (min).
Do not start the engine if the level is:
–
above mark
A: contact a PEUGEOT dealer or
a qualified workshop.
–
below mark B
: top up the engine oil
immediately.
Oil grade
Before topping up or changing the engine
oil, check that the oil is suitable for the engine
and complies with the recommendations in
Page 112 of 212

11 0
Practical information
the service schedule supplied with the vehicle
(or available from your PEUGEOT dealer and
qualified workshops).
Use of non-recommended oil may invalidate
the contractual warranty in the event of
engine failure.
Topping up the engine oil level
► Remove the dipstick before topping up.
► Recover the oil filler neck.
►
Unscrew the filler cap.
►
Install the oil filler neck in the filler hole.
►
T
op up with oil.
►
Remove the oil filler neck from the filler hole.
►
Replace the filler cap.
► Replace the dipstick.
Brake fluid
The level of this fluid should be close to the "MAX" mark. If not, check the brake
pad wear.
To know how often the brake fluid should be
replaced, refer to the manufacturer's servicing
schedule.
If topping up, clean the cap before
replacing it. Use only DOT4 brake fluid
from a sealed canister.
Power steering fluid
The level of this fluid should be close to the "MAX" mark. Check it, with the
vehicle parked on level ground and with the
engine cold, by reading the level on the filler
neck.
Unscrew the cap secured to the dipstick. To
access the reservoir cap, remove the protective
cover by turning its three fixing screws a quarter
turn, then remove the second cover placed on
the cap.
Engine coolant
(Diesel)
It is normal to top up this fluid between
two services.
The check and top-up must only be done with
the engine cold. A level of coolant that is too low risks causing
major damage to the engine; the coolant level
must be close to the "MAX" mark without ever
going above it.
If the level is close to or below the "
MIN" mark, it
is essential to top it up.
When the engine is hot, the temperature of the
coolant is regulated by the fan.
As the cooling system is pressurised, wait at
least one hour after switching off the engine
before carrying out any work.
To gain access to the reservoir cap, remove the
protective cover by turning its three fixing screws
a quarter of a turn.
In order to avoid the risk of scalding if you need
to top up in an emergency, wrap a cloth around
the cap and unscrew the cap by two turns to
allow the pressure to drop.
Once the pressure has dropped, remove the cap
and top up to the required level.