2021 Peugeot 308 light
[x] Cancel search: lightPage 170 of 244

168
In the event of a breakdown
Table of fuses
FuseN° Rating
(A) Functions
F9 5Alarm,
emergency
and assistance
calls.
F13 5Reversing
camera
and parking
sensors.
F15 1512V accessory
socket.
F16 15Cigarette
lighter.
F18 20Touch screen,
CD player,
audio and
navigation
system.
F19 5Rain, sunshine
sensor.
F20 5Airbags.
F21 5Instrument
panel.
F22/F24 30 Internal/
external locks,
front and rear.
Fuse
N° Rating
(A) Functions
F23 5Glove
box lamp,
courtesy
mirror,
front and rear
courtesy lamps.
F25/F27 15 Front/rear
screenwash
pump.
F26 15Horn.
F30 15Rear wiper.
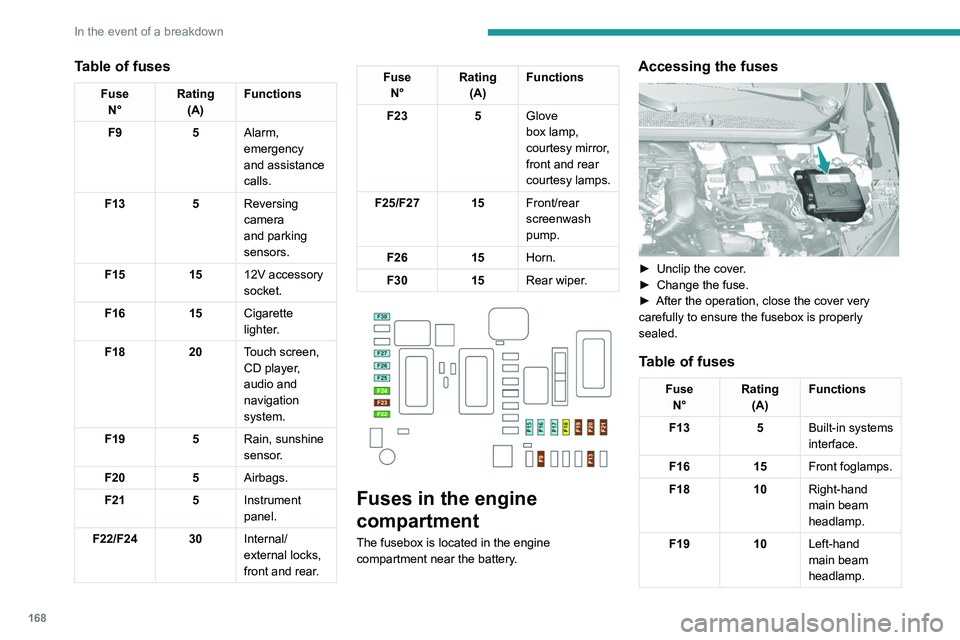
Fuses in the engine
compartment
The fusebox is located in the engine
compartment near the battery.
Accessing the fuses
► Unclip the cover .
► Change the fuse.
►
After the operation, close the cover very
carefully to ensure the fusebox is properly
sealed.
Table of fuses
Fuse N° Rating
(A) Functions
F13 5Built-in systems
interface.
F16 15Front foglamps.
F18 10Right-hand
main beam
headlamp.
F19 10Left-hand
main beam
headlamp.
Page 172 of 244

170
In the event of a breakdown
► Secure the bonnet stay.
► Remove the plastic cover on the (+) terminal.
The battery (-) terminal is not accessible.
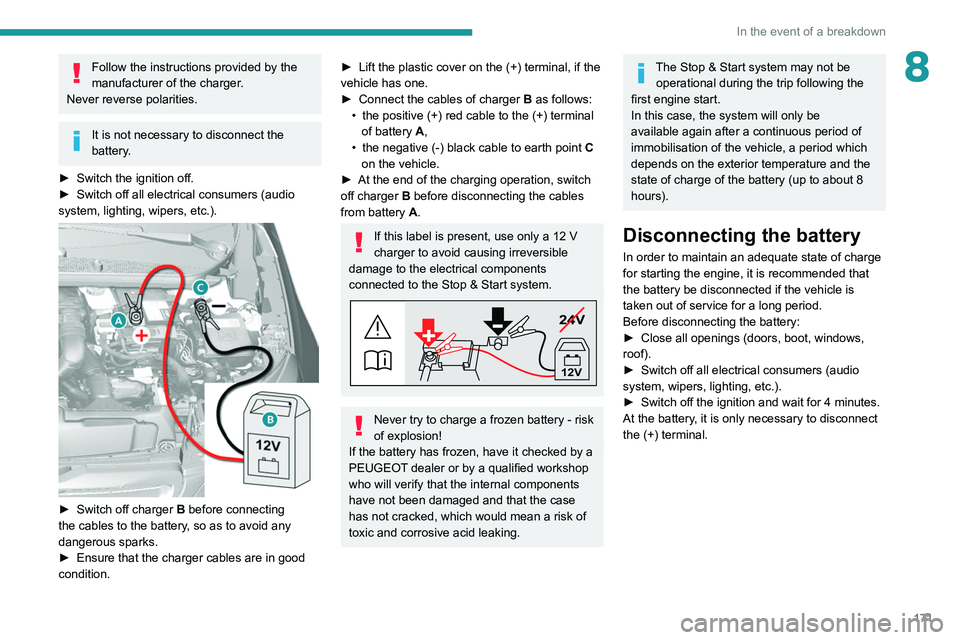
A
remote earth point is located on the engine.
Starting using another
battery
If your vehicle's battery is flat, the engine can be
started using a backup battery (either external or
from another vehicle) and jump leads or using a
battery booster.
Never start the engine by connecting a
battery charger.
Never use a 24
V or higher battery booster.
Check beforehand that the backup battery
has a nominal voltage of 12
V and a capacity
at least equal to that of the discharged
battery.
The two vehicles must not be in contact with
each other.
Switch off all electricity-consuming equipment
on both vehicles (audio system, wipers,
lighting, etc.).
Make sure that the jump leads are well away
from the engine’s moving parts (fan, belt,
etc.).
Do not disconnect the (+) terminal while the
engine is running.
► Lift the plastic cover on the (+) terminal, if the
vehicle has one.
►
Connect the red cable to the (+) terminal of
flat battery
A (at the metal elbow), then to the
(+) terminal of the backup battery
B or of the
booster.
►
Connect one end of the green or black cable
to the (-) terminal of the backup battery
B or of
the booster (or to an earth point on the assisting
vehicle).
►
Connect the other end of the green or black
cable to the earth point
C
.
►
Start the engine on the assisting vehicle and
leave it running for a few minutes.
►
Operate the starter on the broken down
vehicle and let the engine run.
If the engine does not start immediately, switch
off the ignition and wait a few moments before
trying again.
►
W
ait for it to return to idle.
►
Disconnect the jump leads in reverse order.
►
Refit the plastic cover to the (+) terminal, if
the vehicle has one.
►
Allow the engine to run for at least
30
minutes, with the vehicle stationary, so that
the battery reaches an adequate state of charge.
Drive cautiously during the first 30
minutes after starting the engine.
With an automatic gearbox, never try to
start the engine by pushing the vehicle.
Charging the battery using a
battery charger
For optimum service life of the battery, it is
essential to maintain an adequate state of
charge.
In some circumstances, it may be necessary to
charge the battery:
–
When using the vehicle mainly for short
journeys.
–
If the vehicle is to be taken off the road for
several weeks.
Contact a PEUGEOT
dealer or a qualified
workshop.
Page 173 of 244

171
In the event of a breakdown
8Follow the instructions provided by the
manufacturer of the charger.
Never reverse polarities.
It is not necessary to disconnect the
battery.
►
Switch the ignition off.
►
Switch off all electrical consumers (audio
system, lighting, wipers, etc.).
► Switch off charger B before connecting
the cables to the battery, so as to avoid any
dangerous sparks.
►
Ensure that the charger cables are in good
condition.
► Lift the plastic cover on the (+) terminal, if the
vehicle has one.
►
Connect the cables of charger B
as follows:
•
the positive (+) red cable to the (+) terminal
of battery
A,
•
the negative (-) black cable to earth point C
on the vehicle.
►
At the end of the charging operation, switch
off charger B
before disconnecting the cables
from battery A.
If this label is present, use only a 12 V
charger to avoid causing irreversible
damage to the electrical components
connected to the Stop & Start system.
24V
12V
Never try to charge a frozen battery - risk
of explosion!
If the battery has frozen, have it checked by a
PEUGEOT dealer or by a qualified workshop
who will verify that the internal components
have not been damaged and that the case
has not cracked, which would mean a risk of
toxic and corrosive acid leaking.
The Stop & Start system may not be operational during the trip following the
first engine start.
In this case, the system will only be
available again after a continuous period of
immobilisation of the vehicle, a period which
depends on the exterior temperature and the
state of charge of the battery (up to about 8
hours).
Disconnecting the battery
In order to maintain an adequate state of charge
for starting the engine, it is recommended that
the battery be disconnected if the vehicle is
taken out of service for a long period.
Before disconnecting the battery:
►
Close all openings (doors, boot, windows,
roof).
►
Switch off all electrical consumers (audio
system, wipers, lighting, etc.).
►
Switch off the ignition and wait for 4
minutes.
At the battery, it is only necessary to disconnect
the (+) terminal.
Page 178 of 244

176
Technical data
Engine technical data and
towed loads
Engines
The engine characteristics are given in the
vehicle's registration document, as well as in
sales brochures.
The maximum power corresponds to the value type-approved on a test bed, under
conditions defined in European legislation
(Directive 1999/99/EC).
For more information, contact a PEUGEOT
dealer or a qualified workshop.
Weights and towed loads
The weights and towed loads relating to
the vehicle are indicated on the registration
document, as well as in sales brochures.
These values are also indicated on the
manufacturer's plate or label.
For more information, contact a PEUGEOT
dealer or a qualified workshop.
The GTW (Gross Train Weight) and towed load
values indicated are valid up to a maximum
altitude of 1,000 metres. The towed load value
must be reduced by 10% for each additional
1,000 metres of altitude.
The maximum authorised nose weight
corresponds to the weight permitted on the
towball.
When exterior temperatures are high, the
vehicle performance may be limited in
order to protect the engine. When the exterior
temperature is higher than 37°C, reduce the
towed weight.
Towing even with a lightly loaded vehicle can adversely affect its road holding.
Braking distances are increased when towing
a trailer.
When using a vehicle to tow, never exceed
a speed of 62 mph (100
km/h) (observe the
local legislation in force).
If the exterior temperature is high, it is
recommended that the engine is allowed
to idle for 1 to 2 minutes after the vehicle
comes to a stop, to facilitate its cooling.
Engines and towed loads - PETROL
Engine PureTech 110 BVM5PureTech 110 BVM6PureTech 130 BVM6
Gearbox Manual 5-speedManual 6-speedManual 6-speed
Code EB2DTM BE5EB2ADT STT MB6E EB2DTSM MCM
Body style Hatchback SW Hatchback SW Hatchback SW
Model codes LPHNVA LRHNVA LPHNPJ LRHNPJ LPHNWG LRHNWG
Cubic capacity (cc) 1,1991,1991,199
Max. power: EC standard (kW) 818196
Fuel UnleadedUnleadedUnleaded
Braked trailer (within the GTW limit) (kg)
on a 10% or 12% gradient 1,200
1,1001,3151,2001,3001,200
Unbraked trailer (kg) 575630575630580630
Maximum authorised nose weight (kg) 757175717571
Engine PureTech 130 S&S BVM6 PureTech 130 EAT6 PureTech 130 S&S EAT8
Gearbox Manual 6-speedAutomatic 6-speed Automatic 8-speed
Code EB2ADTS MB6EEB2DTSM AT6III EB2ADTS ATN8
Body style Hatchback SW Hatchback SW Hatchback SW
Model codes LPHNSJ LRHNSJ LPHNWV LRHNWV LPHNSK LRHNSK
Cubic capacity (cm
3) 1,1991,1991,199
Max. power: EC standard (kW) 969696
Fuel UnleadedUnleadedUnleaded
Braked trailer (within the GTW limit) (kg)
on a 10% or 12% gradient 1,300
1,2001,2001,1001,2001,200
Page 187 of 244

185
PEUGEOT Connect Radio
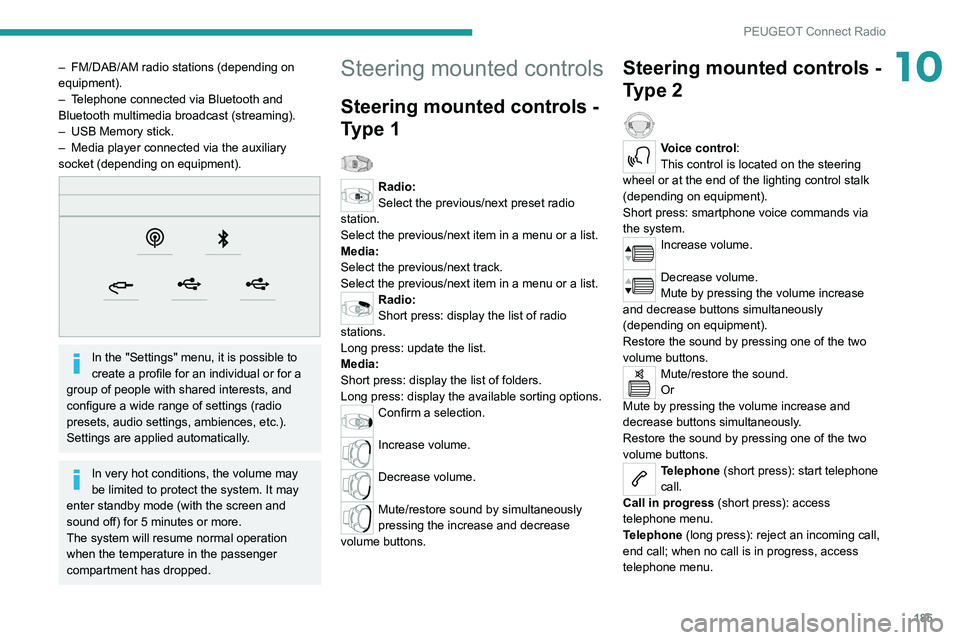
10– FM/DAB/AM radio stations (depending on
equipment).
–
T
elephone connected via Bluetooth and
Bluetooth multimedia broadcast (streaming).
–
USB Memory stick.
–
Media player connected via the auxiliary
socket (depending on equipment).
In the "Settings" menu, it is possible to
create a profile for an individual or for a
group of people with shared interests, and
configure a wide range of settings (radio
presets, audio settings, ambiences, etc.).
Settings are applied automatically.
In very hot conditions, the volume may
be limited to protect the system. It may
enter standby mode (with the screen and
sound off) for 5 minutes or more.
The system will resume normal operation
when the temperature in the passenger
compartment has dropped.
Steering mounted controls
Steering mounted controls -
Type 1
Radio:
Select the previous/next preset radio
station.
Select the previous/next item in a menu or a list.
Media:
Select the previous/next track.
Select the previous/next item in a menu or a list.
Radio:
Short press: display the list of radio
stations.
Long press: update the list.
Media:
Short press: display the list of folders.
Long press: display the available sorting options.
Confirm a selection.
Increase volume.
Decrease volume.
Mute/restore sound by simultaneously
pressing the increase and decrease
volume buttons.
Steering mounted controls -
Type 2
Voice control:
This control is located on the steering
wheel or at the end of the lighting control stalk
(depending on equipment).
Short press: smartphone voice commands via
the system.
Increase volume.
Decrease volume.
Mute by pressing the volume increase
and decrease buttons simultaneously
(depending on equipment).
Restore the sound by pressing one of the two
volume buttons.
Mute/restore the sound.
Or
Mute by pressing the volume increase and
decrease buttons simultaneously.
Restore the sound by pressing one of the two
volume buttons.
Telephone (short press): start telephone
call.
Call in progress (short press): access
telephone menu.
Telephone (long press): reject an incoming call,
end call; when no call is in progress, access
telephone menu.
Page 201 of 244

199
PEUGEOT Connect Nav
11Audio source selection (depending on
equipment):
–
FM/DAB/AM radio stations (depending on
equipment).
–
T
elephone connected via Bluetooth and
Bluetooth multimedia broadcast (streaming).
–
USB memory stick.
–
Media player connected via the auxiliary
socket (depending on equipment).
–
V
ideo (depending on equipment).
In the "Settings" menu, it is possible to
create a profile for an individual or for a
group of people with shared interests, and
configure a wide range of settings (radio
presets, audio settings, navigation history,
favourite contacts, etc.). Settings are applied
automatically.
In very hot conditions, the volume may
be limited to protect the system. It may
enter standby mode (with the screen and
sound off) for 5 minutes or more.
The system will resume normal operation
when the temperature in the passenger
compartment has dropped.
Steering mounted controls
Voice control:
This control is located on the steering
wheel or at the end of the lighting control stalk
(depending on equipment).
Short press, system voice control.
Long press, voice commands from smartphone
or CarPlay
®, Android Auto via the system.Increase volume.
Decrease volume.
Mute/restore the sound.
Telephone (short press): start telephone
call.
Call in progress (short press): access
telephone menu.
Telephone (long press): reject an incoming call,
end call; when no call is in progress, access
telephone menu.
Radio (rotate): automatic search for the
previous/next station.
Media (rotate): previous/next track, move
through a list. Short press: confirm a selection; if nothing
selected, access presets.
Radio: display the list of stations.
Media: display the list of tracks.
Radio (press and hold): update the list of
detected stations.
Menus
Connected navigation
Enter navigation settings and choose a
destination.
Use real-time services, depending on equipment.
Page 203 of 244

201
PEUGEOT Connect Nav
11Voice commands
Steering wheel-mounted
controls
Voice commands:
Voice commands can be issued from any
screen page after a short press on the "Voice
commands" button located on the steering
wheel or at the end of the lighting control stalk
(depending on equipment), as long as there is no
telephone call in progress.
To ensure that voice commands are always recognised by the system, please
follow these recommendations:
–
use natural language in a normal tone
without breaking up words or raising your
voice.
–
always wait for the "beep" (audible signal)
before speaking.
–
for best results, closing the windows and
sunroof is recommended, to avoid extraneous
interference (depending on version).
–
before issuing a voice command, ask any
other passengers to refrain from speaking.
First steps
Example of a "voice command" for
navigation:
"Navigate to address 11 regent street,
London"
Example of a "voice command" for the radio and
media:
"Play artist Madonna"
Example of a "voice command" for the
telephone:
"Call David Miller'' "
The voice commands, with a choice of 17 languages (Arabic, Brazilian, Czech,
Danish, Dutch, English, Farsi, French,
German, Italian, Norwegian, Polish,
Portuguese, Russian, Spanish, Swedish,
Turkish), are made using the language
previously chosen and set in the system.
For some voice commands, there are
alternative synonyms.
Example: Guide to / Navigate to / Go to / ...
The voice commands in Arabic for: "Navigate
to address" and "Display POI in the city", are
not available.
Information - Using the
system
When voice commands are activated, by
briefly pressing the button, help is
displayed on the touch screen, offering various
menus and enabling voice-based interaction with
the system.
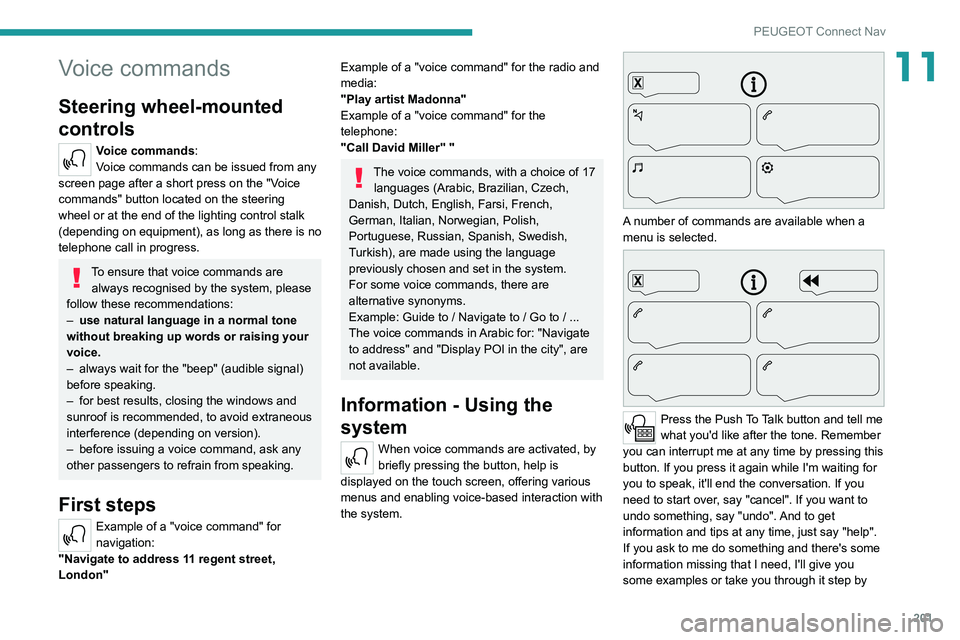
A number of commands are available when a
menu is selected.
Press the Push To Talk button and tell me
what you'd like after the tone. Remember
you can interrupt me at any time by pressing this
button. If you press it again while I'm waiting for
you to speak, it'll end the conversation. If you
need to start over, say "cancel". If you want to
undo something, say "undo". And to get
information and tips at any time, just say "help".
If you ask to me do something and there's some
information missing that I need, I'll give you
some examples or take you through it step by
Page 224 of 244

222
Alphabetical index
3D digital instrument panel 7
A
ABS 62
Accessories
26, 58, 84
Active Safety Brake
112–114
AdBlue®
15, 146
AdBlue® tank
147
Additive, Diesel
144
Adjusting headlamps
54
Adjusting head restraints
30
Adjusting seat
30–31
Adjusting the air distribution
44–46
Adjusting the air flow
44–46
Adjusting the date
195, 218
Adjusting the height and reach of
the steering wheel
33
Adjusting the lumbar support
31
Adjusting the seat angle
31
Adjusting the temperature
44–46
Adjusting the time
195, 218
Advice on care and maintenance
148
Advice on driving
6, 81
Affaire version
182
Airbags
66, 68, 70
Airbags, curtain
67–68
Airbags, front
67–68, 70
Airbags, lateral
67–68
Air conditioning
43, 43–44
Air conditioning, automatic
44–46
Air conditioning, digital 47
Air conditioning, manual
43–44
Air intake
46
Air vents
42
Alarm
26–28
Android Auto connection
210
Anti-lock braking system (ABS)
62
Anti-pinch
28–29, 47–48
Antitheft / Immobiliser
23
Apple CarPlay connection
191, 209
Applications
210
Armrest
37
Armrest, front
38–39
Armrest, rear
39
Assistance call
59–60
Assistance, emergency braking
62, 113
Audible warning
61
Audio streaming (Bluetooth)
190, 214
B
Battery 139, 169
Battery, 12 V
144, 169–172
Battery, charging
170–171
Battery, remote control
23–25
Bicycle carrier
26
Blanking screen (snow shield)
133, 135
Blind, panoramic roof
47–48
Blind spot monitoring system, active
120
Blind spot sensors
119–120
BlueHDi
15, 174
Bluetooth (hands-free) 192–193, 214–215
Bluetooth (telephone)
192–193, 214–215
Bodywork
149
Bonnet
141
Boot
20, 25
Boot light
40
Brake discs
145–146
Brake lamps
164–166
Brakes
145–146
Braking assistance system
62
Braking, automatic emergency
112–114
Braking, dynamic emergency
86–88
Brightness
194
Bulbs (changing)
160–161, 164–166
C
Cable, audio 213
Cable, Jack
213
Capacity, fuel tank
131–132
Cap, fuel filler
131–132
Care of the bodywork
149
CD
190
CD, MP3
190
Central locking
20–22
Changing a bulb
160–161, 164–166
Changing a fuse
166–168
Changing a wheel
150, 157–158
Changing a wiper blade
55–56
Changing the remote control battery
24–25
CHECK
17