2021 LINCOLN CORSAIR install
[x] Cancel search: installPage 422 of 638

•
Not all S-class snow chains or cables
meet these restrictions. Chains of this
size restriction will include a tensioning
device.
• The snow chains or cables must be
mounted in pairs on the front axle.
• Do not use chains or cables on
225/55R19, and 245/45R20 tires.
• Install cables securely, verifying that the
cables do not touch any wiring, brake
lines or fuel lines.
• When driving with tire cables do not
exceed 29.8 mph (48 km/h) or the
maximum speed recommended by the
chain manufacturer, whichever is less.
• Drive cautiously. If you hear the cables
rub or bang against the vehicle, stop and
retighten them. If this does not work,
remove the cables to prevent vehicle
damage.
• Remove the cables when they are no
longer needed. Do not use cables on dry
roads.
If you have any questions regarding snow
chains or cables, please contact your
authorized dealer. TIRE PRESSURE MONITORING
SYSTEM WARNING:
The tire pressure
monitoring system is not a substitute for
manually checking tire pressures. You
should periodically check tire pressures
using a pressure gauge. Failure to correctly
maintain tire pressures could increase the
risk of tire failure, loss of control, vehicle
rollover and personal injury.
Note: You should only use tire sealants in
roadside emergencies as they may cause
damage to the tire pressure monitoring
system sensor.
Note: If the tire pressure monitoring system
sensor becomes damaged, it may not
function. Each tire, including the spare (if
provided), should be checked
monthly when cold and inflated to
the inflation pressure recommended by the
vehicle manufacturer on the vehicle placard
or tire inflation pressure label. (If your vehicle
has tires of a different size than the size
indicated on the vehicle placard or tire
inflation pressure label, you should
determine the proper tire inflation pressure
for those tires).
As an added safety feature, your vehicle has
been equipped with a Tire Pressure
Monitoring System (TPMS) that illuminates a
low tire pressure telltale when one or more
of your tires is significantly under-inflated.
Accordingly, when the low tire pressure
telltale illuminates, you should stop and
check your tires as soon as possible, and
inflate them to the proper pressure. Driving
on a significantly under-inflated tire causes
the tire to overheat and can lead to tire
failure. Under-inflation also reduces fuel
efficiency and tire tread life, and may affect
the vehicle ’s handling and stopping ability.
419
Corsair (CTF) Canada/United States of America, enUSA, Edition date: 202007, First-Printing Wheels and Tires
Page 423 of 638

Please note that the TPMS is not a substitute
for proper tire maintenance, and it is the
driver’
s responsibility to maintain correct tire
pressure, even if under-inflation has not
reached the level to trigger illumination of
the TPMS low tire pressure telltale.
Your vehicle has also been equipped with a
TPMS malfunction indicator to indicate when
the system is not operating properly. The
TPMS malfunction indicator is combined with
the low tire pressure telltale. When the
system detects a malfunction, the telltale will
flash for approximately one minute and then
remain continuously illuminated. This
sequence will continue upon subsequent
vehicle start-ups as long as the malfunction
exists.
When the malfunction indicator is illuminated,
the system may not be able to detect or
signal low tire pressure as intended. TPMS
malfunctions may occur for a variety of
reasons, including the installation of
replacement or alternate tires or wheels on
the vehicle that prevent the TPMS from functioning properly. Always check the TPMS
malfunction telltale after replacing one or
more tires or wheels on your vehicle to
ensure that the replacement or alternate tires
and wheels allow the TPMS to continue to
function properly.
This device complies with Part 15 of the FCC
Rules and with License exempt RSS
Standards of Industry Canada. Operation is
subject to the following two conditions:
1. This device may not cause harmful
interference, and
2. This device must accept any interference
received, including interference that may
cause undesired operation. WARNING: Changes or modifications
not expressively approved by the party
responsible for compliance could void the
user's authority to operate the equipment.
The term "IC:" before the radio certification
number only signifies that Industry Canada
technical specifications were met. Changing Tires With a Tire Pressure
Monitoring System
Note:
Each road tire is equipped with a tire
pressure sensor located inside the wheel
and tire assembly cavity. The pressure
sensor is attached to the valve stem. The
pressure sensor is covered by the tire and
is not visible unless the tire is removed. Take
care when changing the tire to avoid
damaging the sensor.
You should always have your tires serviced
by an authorized dealer.
420
Corsair (CTF) Canada/United States of America, enUSA, Edition date: 202007, First-Printing Wheels and TiresE142549
Page 424 of 638

Check the tire pressure periodically (at least
monthly) using an accurate tire gauge. See
When Inflating Your Tires in this chapter.
Understanding Your Tire Pressure
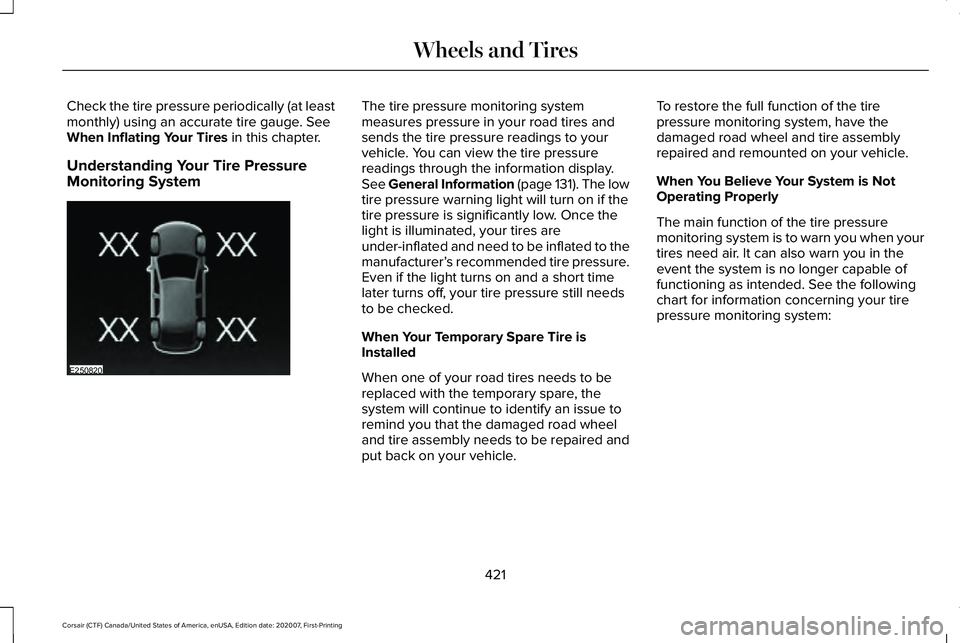
Monitoring System The tire pressure monitoring system
measures pressure in your road tires and
sends the tire pressure readings to your
vehicle. You can view the tire pressure
readings through the information display.
See General Information (page 131). The low
tire pressure warning light will turn on if the
tire pressure is significantly low. Once the
light is illuminated, your tires are
under-inflated and need to be inflated to the
manufacturer’
s recommended tire pressure.
Even if the light turns on and a short time
later turns off, your tire pressure still needs
to be checked.
When Your Temporary Spare Tire is
Installed
When one of your road tires needs to be
replaced with the temporary spare, the
system will continue to identify an issue to
remind you that the damaged road wheel
and tire assembly needs to be repaired and
put back on your vehicle. To restore the full function of the tire
pressure monitoring system, have the
damaged road wheel and tire assembly
repaired and remounted on your vehicle.
When You Believe Your System is Not
Operating Properly
The main function of the tire pressure
monitoring system is to warn you when your
tires need air. It can also warn you in the
event the system is no longer capable of
functioning as intended. See the following
chart for information concerning your tire
pressure monitoring system:
421
Corsair (CTF) Canada/United States of America, enUSA, Edition date: 202007, First-Printing Wheels and TiresE250820
Page 425 of 638

Customer action required
Possible cause
Low tire pressure warning light
Make sure tires are at the proper pressure. See Inflating your tires
in this chapter. After inflating your tires to the manufacturer’s
recommended pressure as shown on the Tire Label (located on
the edge of driver’ s door or the B-Pillar), the vehicle must be driven
for at least two minutes over 20 mph (32 km/h) before the light
turns off.
Tire(s) under-inflated
Solid warning light Repair the damaged road wheel and tire assembly and reinstall
it on the vehicle to restore system function. For a description on
how the system functions, see When Your Temporary Spare Tire
is Installed
in this section.
Spare tire in use
If the tires are properly inflated and the spare tire is not in use but
the light remains on, contact your authorized dealer as soon as
possible.
TPMS malfunction
Repair the damaged road wheel and tire assembly and reinstall
it on the vehicle to restore system function. For a description on
how the system functions, see When Your Temporary Spare Tire
is Installed
in this section.
Spare tire in use
Flashing warning light If the tires are properly inflated and the spare tire is not in use but
the light remains on, contact your authorized dealer as soon as
possible.
TPMS malfunction
422
Corsair (CTF) Canada/United States of America, enUSA, Edition date: 202007, First-Printing Wheels and Tires
Page 431 of 638

14. Remove the lug nuts with the lug
wrench.
Note: For vehicles with full wheel covers with
exposed wheel nuts, remove the wheel nuts
prior to removing the wheel cover or damage
to the wheel cover may occur.
15. Replace the flat tire with the spare tire,
making sure the valve stem is facing
outward. Reinstall the lug nuts until the
wheel is snug against the hub. Do not
fully tighten the lug nuts until the wheel
has been lowered.
16. Lower the wheel by turning the jack handle counterclockwise. 17. Remove the jack and fully tighten the
lug nuts in the order shown. See
Technical Specifications (page 431). Stowing the flat tire
1. To store the jack kit on Non Plug-in
Hybrid Electric Vehicles "Non-PHEV", fold
the jack and wrench handle and engage
it to the bracket of the jack base using
the lug wrench pin. Note:
To store the jack and wrench on
Plug-in Hybrid Electric Vehicles "PHEV", fold
the jack and wrench into the closed position,
and place the wrench into the storage
compartment. Position the jack assembly
into the closed position and make sure the
jack is fastened securely before you drive.
2. When attaching the folded wrench on the
jack, swing the wrench upward and
adjust the jack height until the wrench
hook engages the hole on the jack.
Tighten the hex nut clockwise until
secure. 3.
Re-position the jack kit assembly into the
original vehicle position and secure with
the plastic wing nut. Make sure the jack
is fastened securely before you drive.
4. Unblock the wheels.
428
Corsair (CTF) Canada/United States of America, enUSA, Edition date: 202007, First-Printing Wheels and TiresE294119 12
3
4
5E306781 E294121
Page 434 of 638

TECHNICAL SPECIFICATIONS
Wheel Lug Nut Torque Specifications
WARNING: When you install a wheel, always remove any corrosion, dirt or foreign m\
aterials present on the mounting surfaces of the
wheel or the surface of the wheel hub, brake drum or brake disc that contacts the wheel. Make sure to secure any fasteners that attach
the rotor to the hub so they do not interfere with the mounting surfaces\
of the wheel. Installing wheels without correct metal-to-metal contact
at the wheel mounting surfaces can cause the wheel nuts to loosen and th\
e wheel to come off while your vehicle is in motion, resulting in
loss of vehicle control, personal injury or death. Ib-ft (Nm)
*
Bolt size
99.57 lb.ft (135 Nm)
M12 x 1.5
* Torque specifications are for nut and bolt threads free of oil, dirt and \
rust. Use only Ford recommended replacement fasteners.
Retighten the lug nuts to the specified torque within 100 mi (160 km) after any wheel disturbance (such as tire rotation, changing a flat ti\
re,
wheel removal).
431
Corsair (CTF) Canada/United States of America, enUSA, Edition date: 202007, First-Printing Wheels and Tires
Page 435 of 638

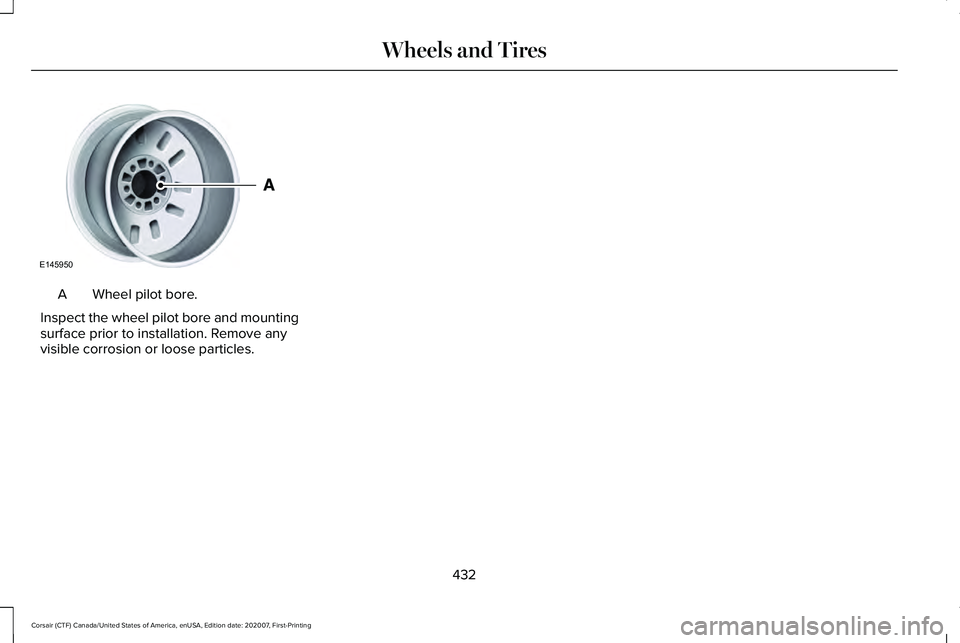
Wheel pilot bore.
A
Inspect the wheel pilot bore and mounting
surface prior to installation. Remove any
visible corrosion or loose particles.
432
Corsair (CTF) Canada/United States of America, enUSA, Edition date: 202007, First-Printing Wheels and TiresE145950
Page 477 of 638

SiriusXM Satellite Radio Service
Note:
SiriusXM reserves the unrestricted
right to change, rearrange, add or delete
programming including canceling, moving
or adding particular channels, and its prices,
at any time, with or without notice to you.
Ford Motor Company shall not be
responsible for any such programming
changes. SiriusXM satellite radio is a
subscription-based satellite radio service that
broadcasts a variety of music, sports, news,
weather, traffic and entertainment
programming. Your factory-installed SiriusXM
satellite radio system includes hardware and
a limited subscription term, which begins on
the date of sale or lease of your vehicle. See
an authorized dealer for availability.
For more information on extended
subscription terms (a service fee is required),
the online media player and a complete list
of SiriusXM satellite radio channels, and
other features, please visit www.siriusxm.com
in the United States, www.siriusxm.ca in
Canada, or call SiriusXM at 1-888-539-7474.
Satellite Radio Electronic Serial
Number (ESN)
You need your ESN to activate, modify or
track your satellite radio account.
Locating Your ESN
With satellite radio as the source, use the
touchscreen to select the following:
1.
Select Settings. See Settings (page 526).
2. Select
SiriusXM.
3. Select
SiriusXM information.
474
Corsair (CTF) Canada/United States of America, enUSA, Edition date: 202007, First-Printing Audio SystemE208625