Page 285 of 410

2836-3. Do-it-yourself maintenance
6
Maintenance and care
Tires cannot be rotated.
When run-flat tires are installed, the
vehicle can be driven for a maximum of
100 miles (160 km) at a speed below
50 mph (80 km/h) after any tire goes
flat. (However, the vehicle speed may
not increase to near 50 mph [80
km/h] depending on weather or driv-
ing conditions.)
A run-flat tire has a mark on
the sidewall.
Make sure to replace the flat tire before
the vehicle has been driven for near 100
miles (160 km). Also, do not use a repaired
tire.
■Run-flat tires
●The run-flat tires are for only this vehicle.
Do not use the tires on other vehicles.
●Do not mix run-flat tires and normal tires.
●If non-genuine Lexus wheels are used, it
may be impossible to sufficiently demon-
strate the performanc e of run-flat tires.
Your vehicle is equipped with a tire
pressure warning system that uses tire
pressure warning valves and transmit-
ters to detect low tire inflation pressure
before serious problems arise.
If the tire pressure drops below a
predetermined level, the driver is
warned by a screen display and a
warning light. ( P.319)
The tire pressure detected by the
tire pressure warning system can be
displayed on the multi-information
display. ( P.79)
The illustration used is intended as an
example, and may differ from the image
that is actually displayed on the multi-infor-
mation display.
■Routine tire inflation pressure checks
The tire pressure warning system does not
replace routine tire inflation pressure
checks. Make sure to check tire inflation
pressure as part of your routine of daily
vehicle checks.
■Situations in which the tire pressure
warning system may not operate prop-
erly
●In the following cases, the tire pressure
warning system may not operate prop-
erly.
• If non-genuine Lexus wheels are used.
• A tire has been replaced with a tire that is not an OE (Original Equipment) tire.
• A tire has been replaced with a tire that is not of the specified size.
• Tire chains etc. are equipped.
• An auxiliary-supported run-flat tire is equipped.
• If a window tint that affects the radio wave signals is installed.
• If there is a lot of snow or ice on the vehi- cle, particularly around the wheels or
wheel housings.
• If the tire inflation pressure is extremely higher than the specified level.
• If wheel without tire pressure warning valves and transmitters are used.
Tire rotation
Run-flat tires
Tire pressure warning system
Page 309 of 410
3077-1. Essential information
7
When trouble arises
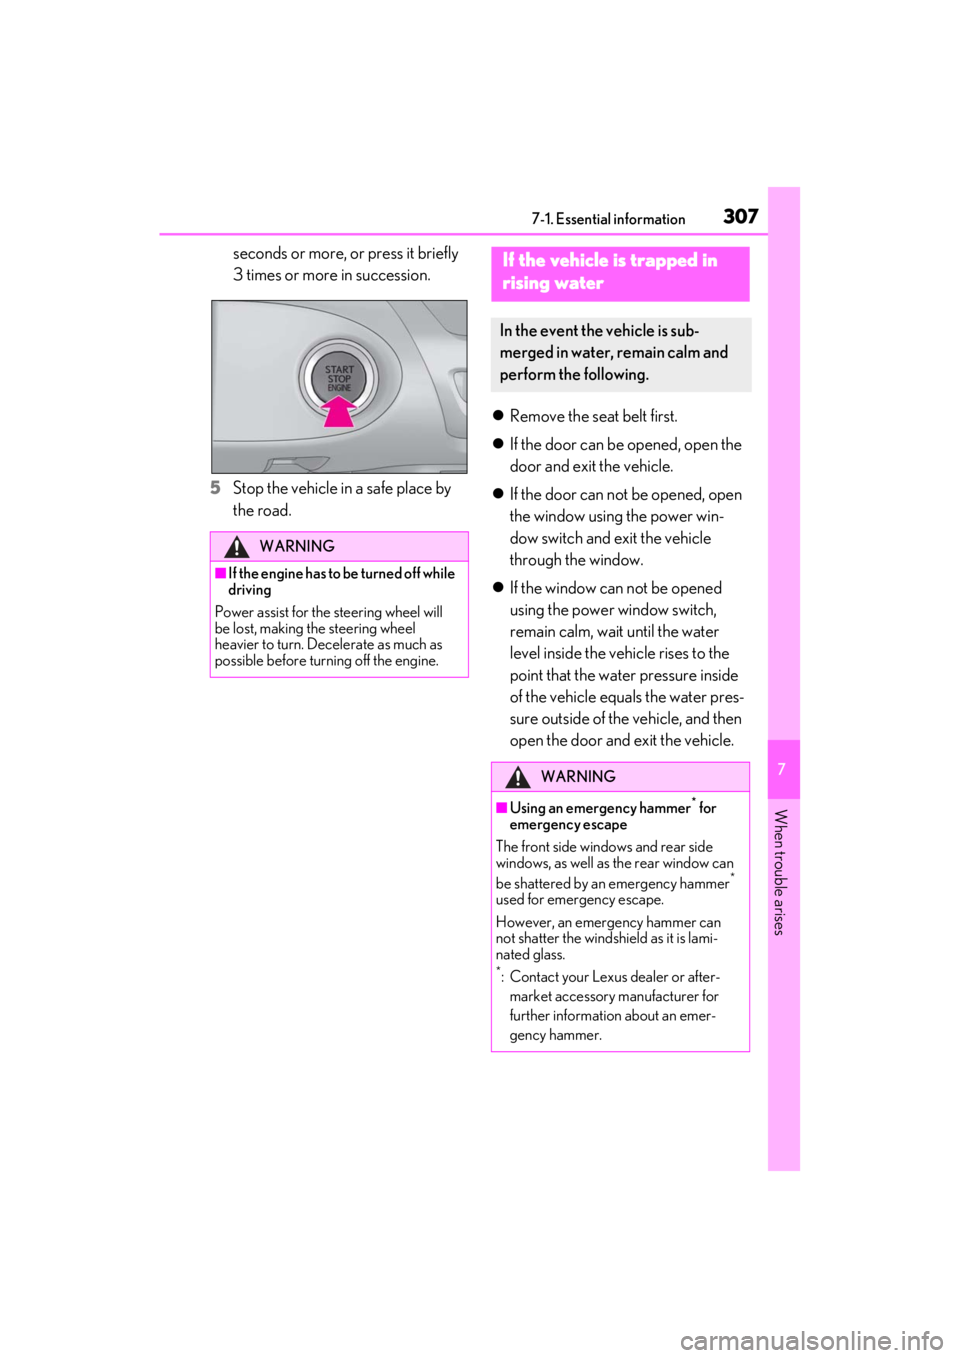
seconds or more, or press it briefly
3 times or more in succession.
5
Stop the vehicle in a safe place by
the road.
Remove the seat belt first.
If the door can be opened, open the
door and exit the vehicle.
If the door can not be opened, open
the window using the power win-
dow switch and exit the vehicle
through the window.
If the window can not be opened
using the power window switch,
remain calm, wait until the water
level inside the vehicle rises to the
point that the water pressure inside
of the vehicle equals the water pres-
sure outside of the vehicle, and then
open the door and exit the vehicle.
WARNING
■If the engine has to be turned off while
driving
Power assist for the steering wheel will
be lost, making the steering wheel
heavier to turn. Decelerate as much as
possible before turning off the engine.
If the vehicle is trapped in
r
ising water
In the event the vehicle is sub-
merged in water, remain calm and
perform the following.
WARNING
■Using an emergency hammer* for
emergency escape
The front side wind ows and rear side
windows, as well as the rear window can
be shattered by an emergency hammer
*
used for emergency escape.
However, an emergency hammer can
not shatter the windshield as it is lami-
nated glass.
*: Contact your Lexus dealer or after-
market accessory manufacturer for
further information about an emer-
gency hammer.
Page 310 of 410
3087-1. Essential information
WARNING
■Escaping the vehicle from the win-
dow
There are cases where escaping the
vehicle from the window is not possible
due to seating position, passenger body
type, etc.
When using an emergency hammer,
consider your seat location and the size
of the window opening to ensure that the
opening is accessible and large enough
to escape.
Page 333 of 410

3317-2. Steps to take in an emergency
7
When trouble arises
■Locking and unlocking the door
1
Push in the depression on the front
edge of the driver’s door handle.
2
Insert the mechanical key while
pulling on the driver’s door handle.
3
Turn the key in order to perform
the following operations.
Locks both side doors
Closes the windows (turn and
hold)
*
Unlocks the door
Turning the key rearward unlocks the
driver’s door. Turning the key once again
within 5 seconds unlocks the other door.
Opens the windows (turn and
hold)
*
*: These settings must be customized at
your Lexus dealer.
■Opening the trunk
Unlock the doors, and press the trunk
opener switch.
1
Depress the brake pedal.
2
Touch the Lexus emblem side of
the electronic key to the engine
switch.
When the electronic key is detected, a
buzzer sounds and the engine switch will
turn to ON.
When the smart access system with push-
button start is deactivated in customization
A
B
C
D
WARNING
■When using the mechanical key and
operating the power windows
Operate the power window after check-
ing to make sure that there is no possibil-
ity of any passenger having any of their
body parts caught in the window.
Also, do not allow children to operate the
mechanical key. It is possible for children
and other passengers to get caught in
the power window.
Starting the engine
Page 338 of 410

3367-2. Steps to take in an emergency
■When the battery is removed or dis-
charged
●Side window open/close function linked
to door operation does not operate.
When closing the side window, slowly
close the side window while pushing the
upper portion of the side window
inside the soft top roof.
●Information stored in the ECU is cleared.
When the battery is depleted, have the
vehicle inspected at your Lexus dealer.
●Some systems may require initialization.
( P.378)
■When removing the battery terminals
When the battery terminals are removed,
the information stored in the ECU is
cleared. Before removi ng the battery termi-
nals, contact your Lexus dealer.
■Charging the battery
The electricity stored in the battery will dis-
charge gradually even when the vehicle is
not in use, due to natural discharge and the
draining effects of certain electrical appli-
ances. If the vehicle is left for a long time,
the battery may discharge, and the engine
may be unable to start. (The battery
recharges automatically during driving.)
■When recharging or replacing the bat-
tery
●Immediately after replacing the battery,
fully open or close the soft top roof, as the
luggage cover may be half-opened.
●In some cases, it may not be possible to
unlock the doors using the smart access
system with push-button start when the
battery is discharged. Use the wireless
remote control or the mechanical key to
lock or unlock the doors.
●The engine may not start on the first
attempt after the battery has recharged
but will start normally after the second
attempt. This is not a malfunction.
●The engine switch mode is memorized by
the vehicle. When the battery is recon-
nected, the system will return to the
mode it was in before the battery was dis-
charged. Before disconnecting the bat-
tery, turn the engine switch off.
If you are unsure wh at mode the engine
switch was in before the battery dis-
charged, be especially careful when
reconnecting the battery.
●If the battery discharges, it may not be
possible to shift the shift position to other
positions. In this case, the vehicle cannot
be towed without lifting both rear wheels
because the rear wheels will be locked.
( P.310)
■When replacing the battery
●Use a Central Degassing type battery
(European Regulations).
●Use a battery that the case size is same as
the previous one (LN4), 20 hour rate
capacity (20HR) is eq uivalent (80Ah) or
greater, and performance rating (CCA)
is equivalent (685A) or greater.
• If the sizes differ, the battery cannot be
properly secured.
• If the 20 hour rate capacity is low, even if the time period where the vehicle is not
used is a short time, the battery may dis-
charge and engine may not be able to
start.
●Use a battery with a handle. If a battery
without a handle is used, removal is more
difficult.
●After exchanging, firmly attach the fol-
lowing items to the exhaust hole of the
battery.
• Use the exhaust hose that was attached to the battery before exchanging.
• Use the exhaust hole plug included with the battery exchanged or the one
A
Page 341 of 410
3397-2. Steps to take in an emergency
7
When trouble arises
When touching a place where a
hand can not easily reach, wear
gloves to protect your hands.
Turn the engine switch off.
The tool for manually closing the
soft top roof is stored in the glove
box. ( P.246)
Tool bag
Tool
Groove
1 Press the All window control switch
to fully open the side windows and
rear quarter windows. ( P.122) If
the switch does not operate, con-
tact your Lexus dealer. 2
Remove the cover behind the rear
left seat.
1 Remove the claw on the left side
using the flathead screwdriver.
The flathead screwdriver is installed in the
trunk.
2Remove the claw on the right side.
Tool
Closing the soft top roof
A
B
C
Page 343 of 410
3417-2. Steps to take in an emergency
7
When trouble arises
Rotate the tool again with applying more
force to check that the tool has been com-
pletely rotated.
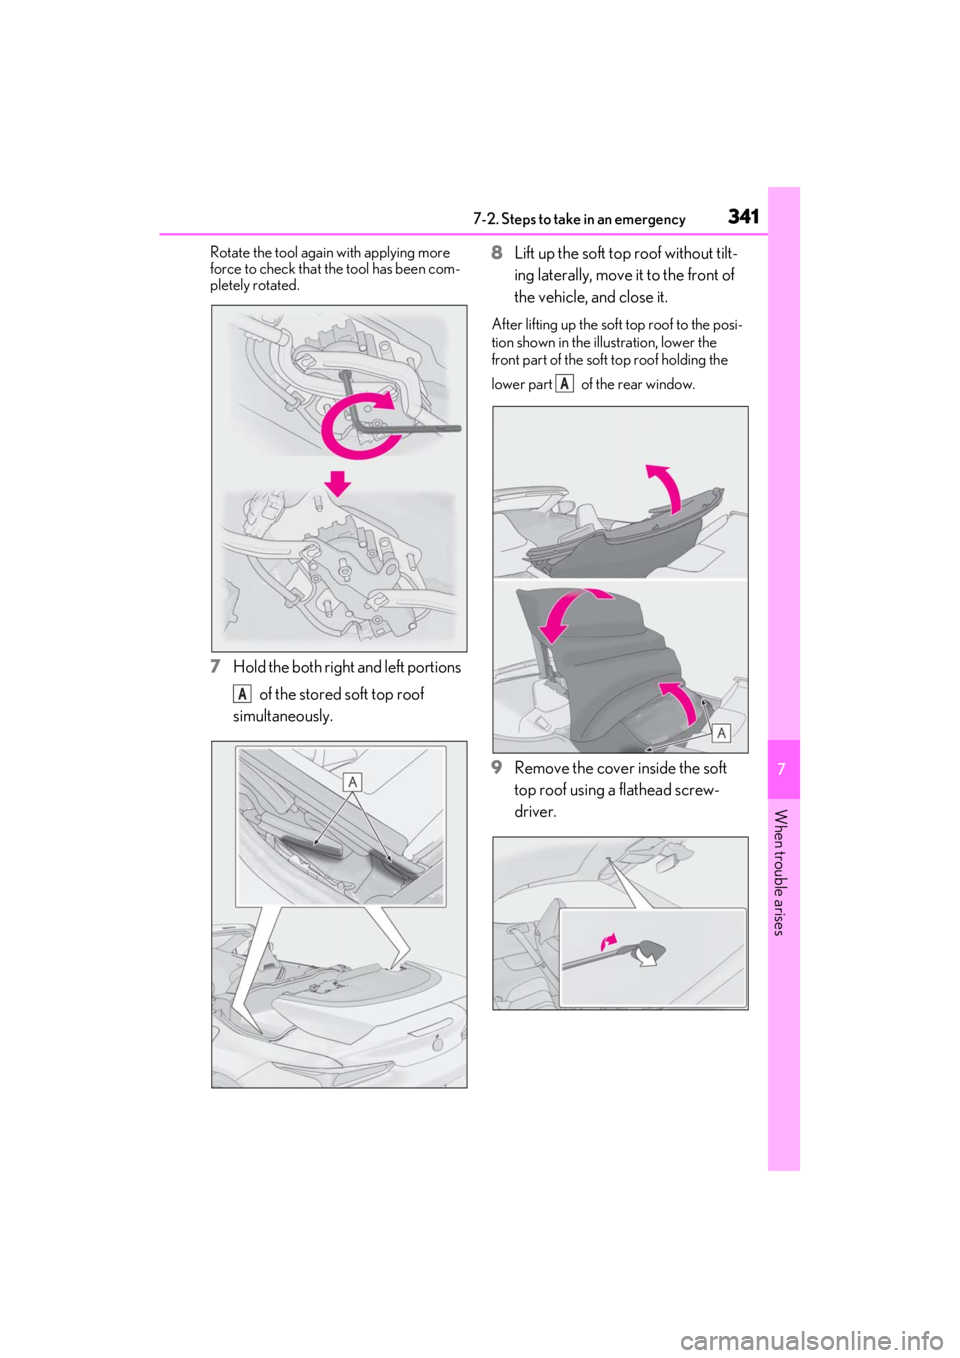
7Hold the both right and left portions
of the stored soft top roof
simultaneously. 8
Lift up the soft top roof without tilt-
ing laterally, move it to the front of
the vehicle, and close it.
After lifting up the soft top roof to the posi-
tion shown in the illustration, lower the
front part of the soft top roof holding the
lower part of the rear window.
9Remove the cover inside the soft
top roof using a flathead screw-
driver.
A
A
Page 344 of 410
3427-2. Steps to take in an emergency
10Insert the tool into the hole .
11 Rotate the tool until it no longer
moves.
The front side of the soft top roof will be
locked.
Push the inner side of the soft top roof
to check that the soft top roof is firmly
locked and not raised.
If the soft top roof is not firmly locked, it
may be opened by wind pressure while
driving.
12While lifting the portion of the
under the rear window, hold the
portion of the luggage cover and move it to the front side of the
vehicle and close it.
When closing the luggage cover, be care-
ful that your hand or fi
ngers is not caught in
the luggage cover and vehicle.
13 Lower the rear window and push
the rear center of the luggage
cover.
Check that there is no difference in height
between the luggage cover and trunk and
A
A
A
B