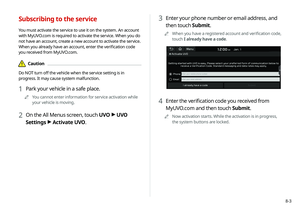
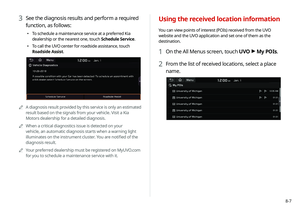
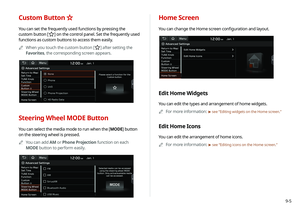
Page 41 of 211

2-7
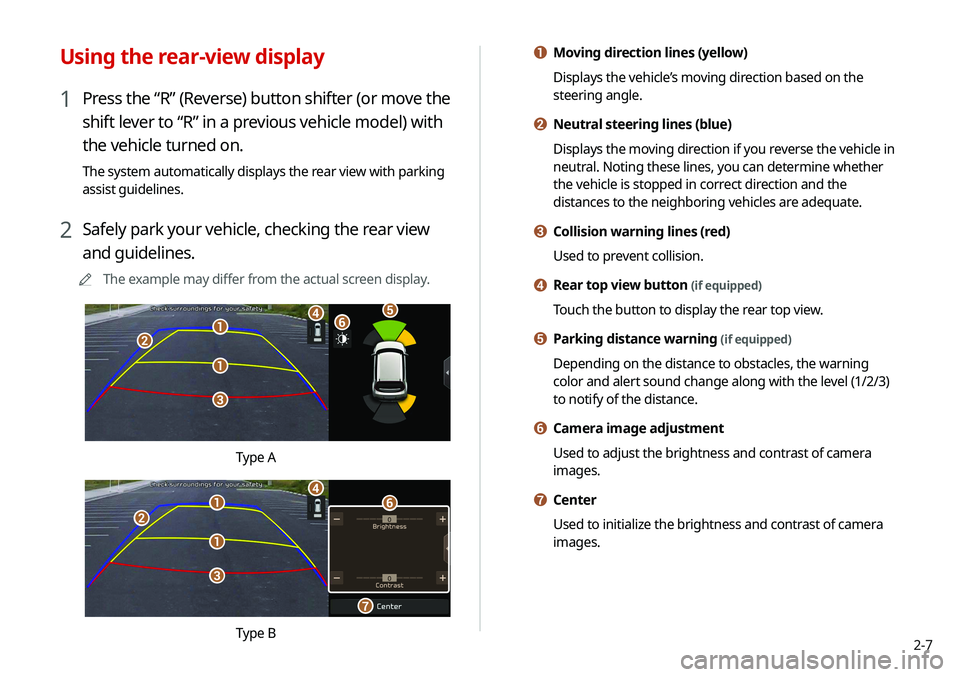
a Moving direction lines (yellow)
Displays the vehicle’s moving direction based on the
steering angle.
b Neutral steering lines (blue)
Displays the moving direction if you reverse the vehicle in
neutral. Noting these lines, you can determine whether
the vehicle is stopped in correct direction and the
distances to the neighboring vehicles are adequate.
c Collision warning lines (red)
Used to prevent collision.
d Rear top view button (if equipped)
Touch the button to display the rear top view.
e Parking distance warning (if equipped)
Depending on the distance to obstacles, the warning
color and alert sound change along with the level (1/2/3)
to notify of the distance.
f Camera image adjustment
Used to adjust the brightness and contrast of camera
images.
g Center
Used to initialize the brightness and contrast of camera
images.
Using the rear-view display
1 Press the “R” (Reverse) button shifter (or move the
shift lever to “R” in a previous vehicle model) with
the vehicle turned on.
The system automatically displays the rear view with parking
assist guidelines.
2 Safely park your vehicle, checking the rear view
and guidelines.
0000
A
The example may differ from the actual screen display.
\037
\037
\036
\035
\034\033\032
Type A
\037
\037
\036
\035
\034
\033
\032
Type B
Page 42 of 211

2-8
Using the HD Radio Data
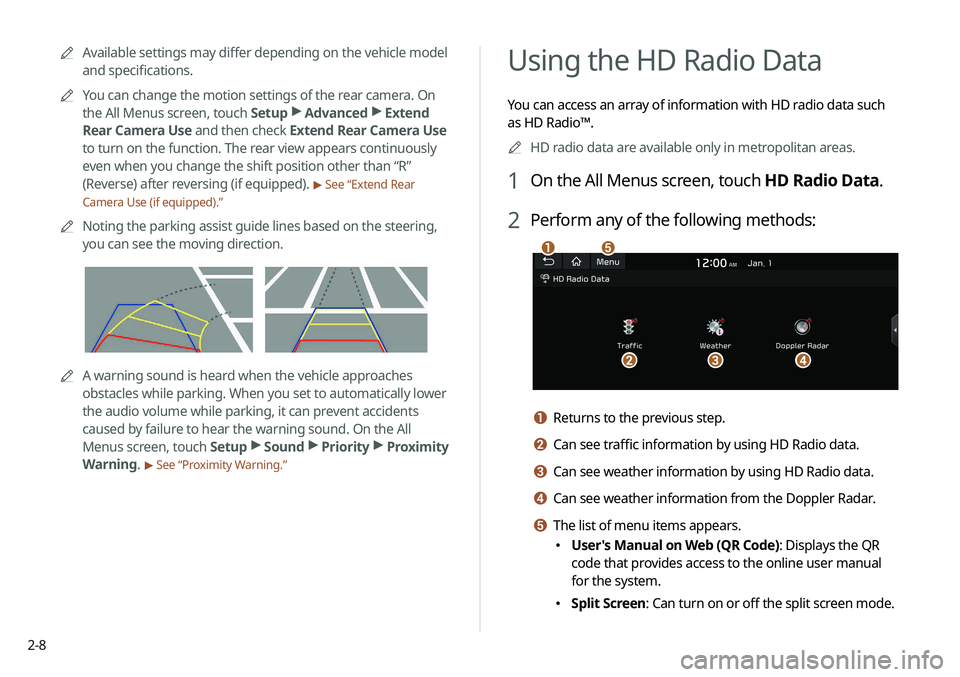
You can access an array of information with HD radio data such
as HD Radio™.0000
A
HD radio data are available only in metropolitan areas.
1 On the All Menus screen, touch HD Radio Data.
2 Perform any of the following methods:
\037
\036\035\034
\033
a Returns to the previous step.
b Can see traffic information by using HD Radio data.
c Can see weather information by using HD Radio data.
d Can see weather information from the Doppler Radar.
e The list of menu items appears.
\225User's Manual on Web (QR Code): Displays the QR
code that provides access to the online user manual
for the system.
\225Split Screen: Can turn on or off the split screen mode.
0000
A
Available settings may differ depending on the vehicle model
and specifications.
0000
A
You can change the motion settings of the rear camera. On
the All Menus screen, touch Setup >
Advanced >
Extend
Rear Camera Use and then check Extend Rear Camera Use
to turn on the function. The rear view appears continuously
even when you change the shift position other than “R”
(Reverse) after reversing (if equipped).
> See “Extend Rear
Camera Use (if equipped).”
0000
A
Noting the parking assist guide lines based on the steering,
you can see the moving direction.
0000AA warning sound is heard when the vehicle approaches
obstacles while parking. When you set to automatically lower
the audio volume while parking, it can prevent accidents
caused by failure to hear the warning sound. On the All
Menus screen, touch Setup >
Sound >
Priority >
Proximity
Warning.
> See “Proximity Warning.”
Page 43 of 211
2-9
4 Check the traffic information details.
0000
A
Traffic information for border crossings and speed limits
in local roads may not be accurate. Use the information at
your discretion.
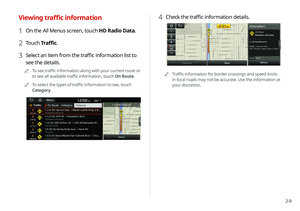
Viewing traffic information
1 On the All Menus screen, touch HD Radio Data.
2 Touch Traffic.
3 Select an item from the traffic information list to
see the details.
0000
A
To see traffic information along with your current route or
to see all available traffic information, touch On Route.
0000
A
To select the types of traffic information to see, touch
Category.
Page 44 of 211
2-10
Checking weather information in
Doppler Radar
1 On the All Menus screen, touch HD Radio Data.
2 Touch Doppler Radar.
3 See the weather condition details in the HD Radio
coverage area.
Checking weather information via HD
Radio Data
1 On the All Menus screen, touch HD Radio Data.
2 Touch Weather.
3 Check today's weather information of your
position (for city).
0000
A
To see weather forecasts for today and the next four days,
touch 5 Days.
0000
A
To see weather information of another area, touch Other
City.
Page 45 of 211

2-11
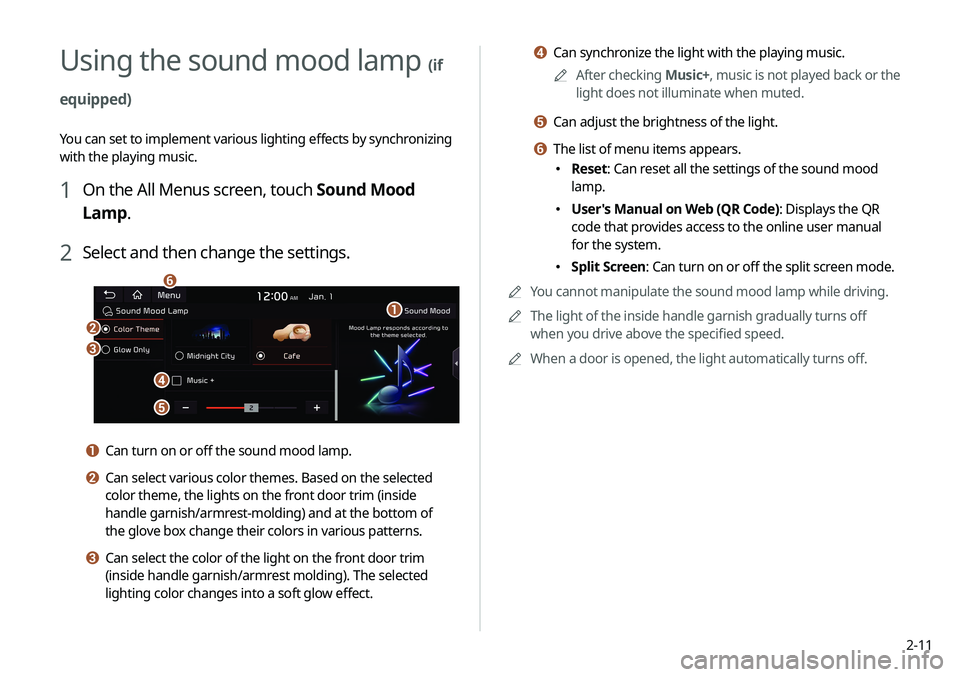
d Can synchronize the light with the playing music.0000
A
After checking Music+, music is not played back or the
light does not illuminate when muted.
e Can adjust the brightness of the light.
f The list of menu items appears.
\225 Reset: Can reset all the settings of the sound mood
lamp.
\225User's Manual on Web (QR Code): Displays the QR
code that provides access to the online user manual
for the system.
\225Split Screen: Can turn on or off the split screen mode.
0000
A
You cannot manipulate the sound mood lamp while driving.
0000
A
The light of the inside handle garnish gradually turns off
when you drive above the specified speed.
0000
A
When a door is opened, the light automatically turns off.
Using the sound mood lamp (if
equipped)
You can set to implement various lighting effects by synchronizing
with the playing music.
1 On the All Menus screen, touch Sound Mood
Lamp.
2 Select and then change the settings.
\037
\036
\035
\034
\033
\032
a Can turn on or off the sound mood lamp.
b Can select various color themes. Based on the selected
color theme, the lights on the front door trim (inside
handle garnish/armrest-molding) and at the bottom of
the glove box change their colors in various patterns.
c Can select the color of the light on the front door trim
(inside handle garnish/armrest molding). The selected
lighting color changes into a soft glow effect.
Page 46 of 211
Page 47 of 211
Radio
Listening to the radio
Listening to HD Radio™
Listening to SiriusXM™ radio
03
Page 48 of 211
3-2
Listening to the radio
You can scan radio channels by using various options. Save your
favorite channels to the presets list.
Perform any of the following methods:
\225On the All Menus screen, touch Radio.
\225On the control panel, press the [ RADIO] button.
Radio screen
The radio screen provides various functions while listening to
radio broadcasts.
\037\036\035
\034
\033\032
\031
\030
\027
\026
a Returns to the previous step.
b Can change the radio mode.
c Activate the HD Radio mode.
d You can change radio channels by using voice commands.
> See “Changing the channel by using voice commands.”
e Presets list
f Radio broadcast information
g You can delete or save the current frequency to the presets
list.
> See “Saving the current radio channel.”
h Split Screen: Can turn on or off the split screen mode.
i You can listen to each radio channel for a short time and
select the desired channel.
> See “Using the scan function.”