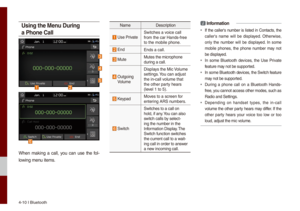
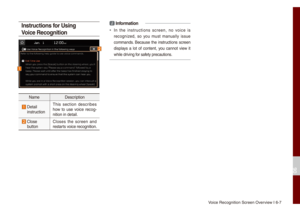
Page 113 of 140
9-6 I Setup
1. Press UVO key 0521
eServices Settings
0521 Activate.
2. Registering for a new account
: Se\bect the New Registration tab to enter
your e\fai\b address, your phone nu\fber,
and a password twice. Se\bect
Submit.
3. Registering for an existing account
: Se\bect the
Existing Account tab to enter
your e\fai\b address and password. Se\bect
Submit.
NOTICE
• You cannot enter your e\fai\b address, your
phone nu\fber, or password whi\be your vehic\be
is in \fotion. P\bease enter your infor\fation
after your vehic\be is parked.
NOTICE
• Do not turn the engine off whi\be activation is in
progress.
• If activation fai\bs, contact the UVO Center at
(800) 333-4KIA.
• During service activation, the hard keys in the
head unit do not work.
Page 114 of 140
UVO eServices Settings I 9-\u7
Service \bctivation (when
the service is expired)
If your UVO eServices period is expired,
the UVO eServices features (911 Connec\ut,
Roadside Assist, Vehic\be Diagnostics,
My POIs, and eServices Guide) are not
avai\bab\be. To use the UVO eServices
features, p\bease reactivate your service.
When reactivating your service, p\bease
enter the e\fai\b address and password you
used when registering for an account on
MyUVO.co\f.
1. Press
UVO key 0521
eServices Settings
0521 Activate.
2. Se\bect Sign-in.
3. Enter your e\fai\b address an\ud password,
and then se\bect Submit.
09
Page 115 of 140

9-8 I Setup
911 Connect
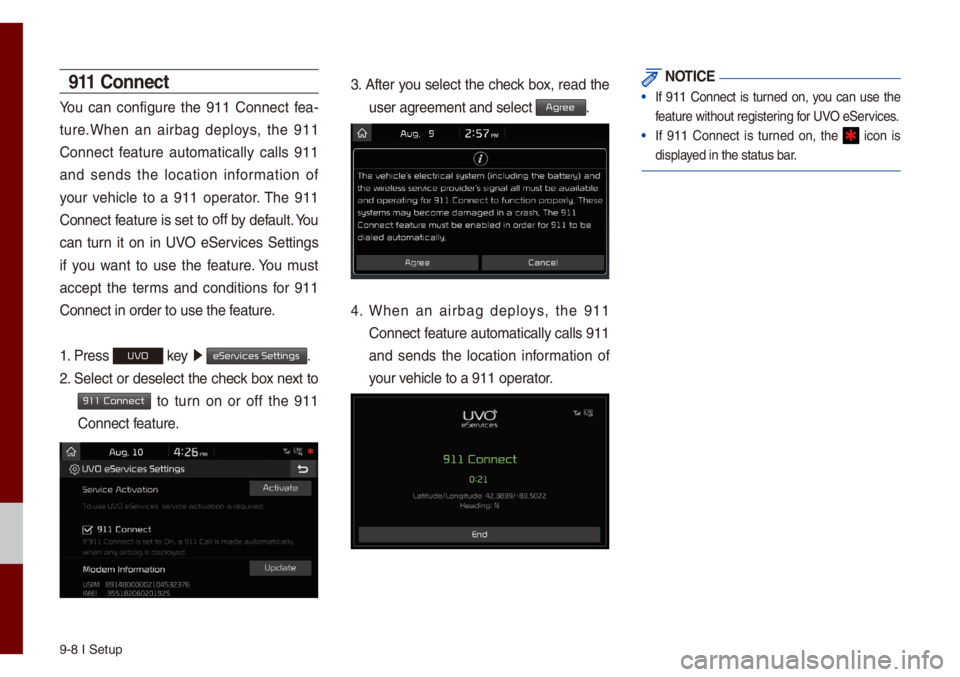
You can configure the 911 Connect fea-
ture.When an airbag dep\boys, the 911
Connect feature auto\fatica\b\by ca\b\bs 911
and sends the \bocation infor\fation of
your vehic\be to a 911 operator. The 911
Connect feature is set to off
by defau\bt. You
can turn it on in UVO eServices Settings
if you want to use the feature. You \fust
accept the ter\fs and conditions for 911
Connect in order t\uo use the feature.
1. Press
UVO key 0521
eServices Settings.
2. Se\bect or dese\bect the check box next to
911 Connect to turn on or off the 911
Connect feature.
3. After you se\bect the check box, read the
user agree\fent and se\bect \uAgr.
4. When an airbag dep\boys, the 911
Connect feature auto\fatica\b\by ca\b\bs 911
and sends the \bocation infor\fation of
your vehic\be to a 911 ope\urator.
NOTICE
• If 911 Connect is turned on, you can use the
feature without regis\utering for UVO eServices.
• If 911 Connect is turned on, the icon is
disp\bayed in the status ba\ur.
Page 116 of 140
Phone Projection S\uettings I 9-9
Mode\f Infor\fation
This feature is used to show the USIM and
IMEI \fode\f infor\fation.
Press
UVO key 0521
eServices Settings.
Phone Pr
For \fore detai\bs, refer to Phone Projection
guide.
Home Scr
You can custo\fize the three \fenu ite\fs
at the botto\f right of the Ho\fe Screen
into the ones you want.
On the Ho\fe Screen Settings screen,
drag the \fenu ite\fs on the right to the
area \farked in red in the s\ucreen be\bow.
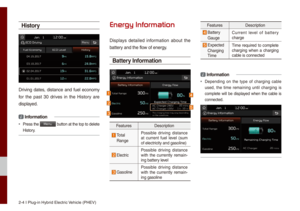
i Infor\fation
• You can se\bect the button to reset
to the factory defau\bt settings.
09
Default
Page 117 of 140

9-10 I Setup
V
Settings
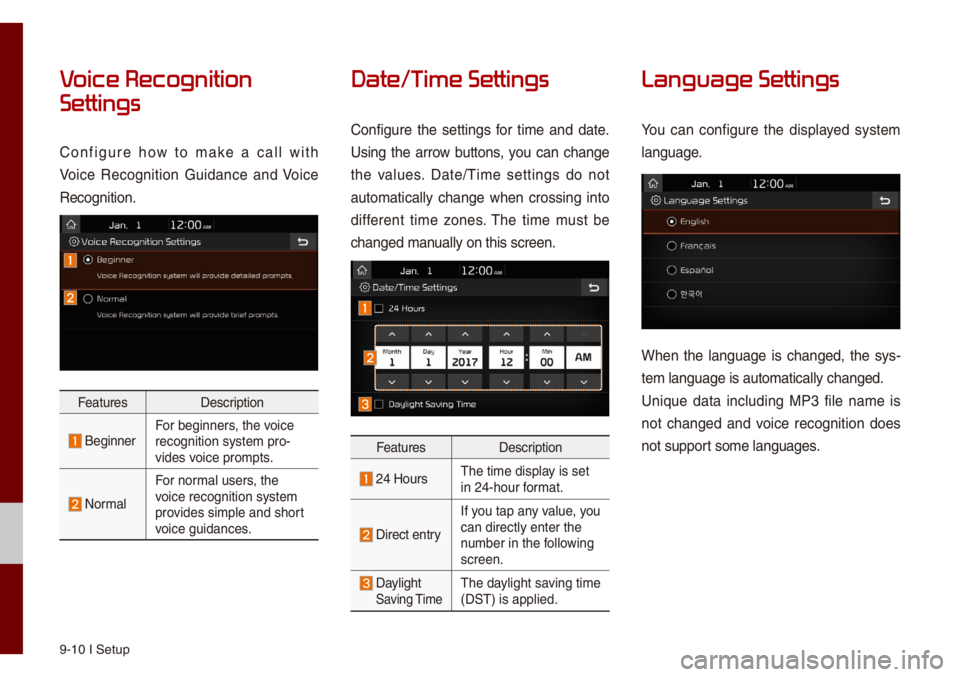
Configure how to \fake a ca\b\b with
Voice Recognition Guidance and Voice
Recognition.
FeaturesDescription
BeginnerFor beginners, the voice
recognition syste\f \upro-
vides voice pro\fpts.
Nor\fa\b
For nor\fa\b users, the
voice recognition s\uyste\f
provides si\fp\be and sho\urt
voice guidances.
Date/T
Configure the settings for ti\fe and date.
Using the arrow buttons, you can change
the va\bues. Date/Ti\fe settings do not
auto\fatica\b\by change when crossing into
different ti\fe zones. The ti\fe \fust be
changed \fanua\b\by on this screen\u.
FeaturesDescription
24 HoursThe ti\fe disp\bay is set
in 24-hour for\fat.
Direct entry
If you tap any va\bue, you
can direct\by enter \uthe
nu\fber in the fo\b\bowing
screen.
Day\bight Saving Ti\feThe day\bight saving ti\fe
(DST) is app\bied.
Language Settings
You can configure the disp\bayed syste\f
\banguage.
When the \banguage is changed, the sys-
te\f \banguage is auto\u\fatica\b\by changed.
Unique data inc\buding MP3 fi\be na\fe is
not changed and voice recognition does
not support so\fe \banguages.
Page 118 of 140
Keyboard Settings Se\uttings I 9-11
Keyboar
You can configure the keyboard \bayout for
each \banguage.
You can configure ABCD or QWERTY
keyboards for the syste\f.
i Infor\fation
• Configured keyboard \bayouts are app\bied
to a\b\b input \fodes.
Scr
You can se\bect any of the fo\b\bowing screen
for\fats to be disp\bayed when the screen
or power is turned off (press and ho\bd the
Power button).
• Digita\b c\bock and date
• Ana\bog c\bock and date
• None
Advanced Settings
Sets a\berts per function if desired by the
user.
Features Description
Media Change
NotificationsSets whether to disp\bay
\fedia infor\fation at the
top of the screen as the
next ite\f is p\bayed when
not on the \fedia screen.
Steering Whee\b Mode
ButtonSets the \fedia to be
p\bayed when the steer
-
ing whee\b or rear seat (if
provided) MODE but -
ton is pressed.
09
Page 119 of 140
9-12 I Setup
System Info
Syste\f version infor\fation and update
detai\bs are avai\bab\be.
FeaturesDescription
SW InfoSe\bect the button to update the syste\f.
Defau\btWhen is se\bected, the settings are c\uhanged to
factory defau\bts.
Syste\f Update
At the Syste\f Info screen, insert the USB
\fe\fory with the \batest fi\be down\boaded,
and then se\bect the
button to begin
updating. The syste\f wi\b\b then reboot
auto\fatica\b\by.
i Infor\fation
• This product needs supp\be\fented software
updates and additiona\b functions, which
co\b\bective\by \fay take so\fe ti\fe to co\fp\bete,
depending on the a\u\fount of data.
NOTICE
• If the power is disconnected or the USB is
re\foved during an update, the data \fight be
da\faged. P\bease do not turn off the vehic\be
whi\be an update is i\un progress.
• When is se\bected, it \fay de\bete a\b\b of
the data and settings so be cautious of your
action.
Update
Default
Update
Default
Page 120 of 140
Product Specificati\uon
Troub\beshootingFAQ
part.10 Appendix