09
9-15
Checking the engine oil level
Engine oil is used for lubrication and
cooling, so it is gradually consumed
during driving the vehicle.
Regularly check and manage the oil level
using the following procedure.
1. Follow all of the oil manufacturer’s
precautions.
2. Be sure the vehicle is on the level
ground in P (Park) with the parking
brake set and the wheels blocked.
3. Turn the engine on and allow the
engine to reach normal operating
temperature.
4. Turn the engine off and wait about 15
minutes for the oil to return to the oil
pan.
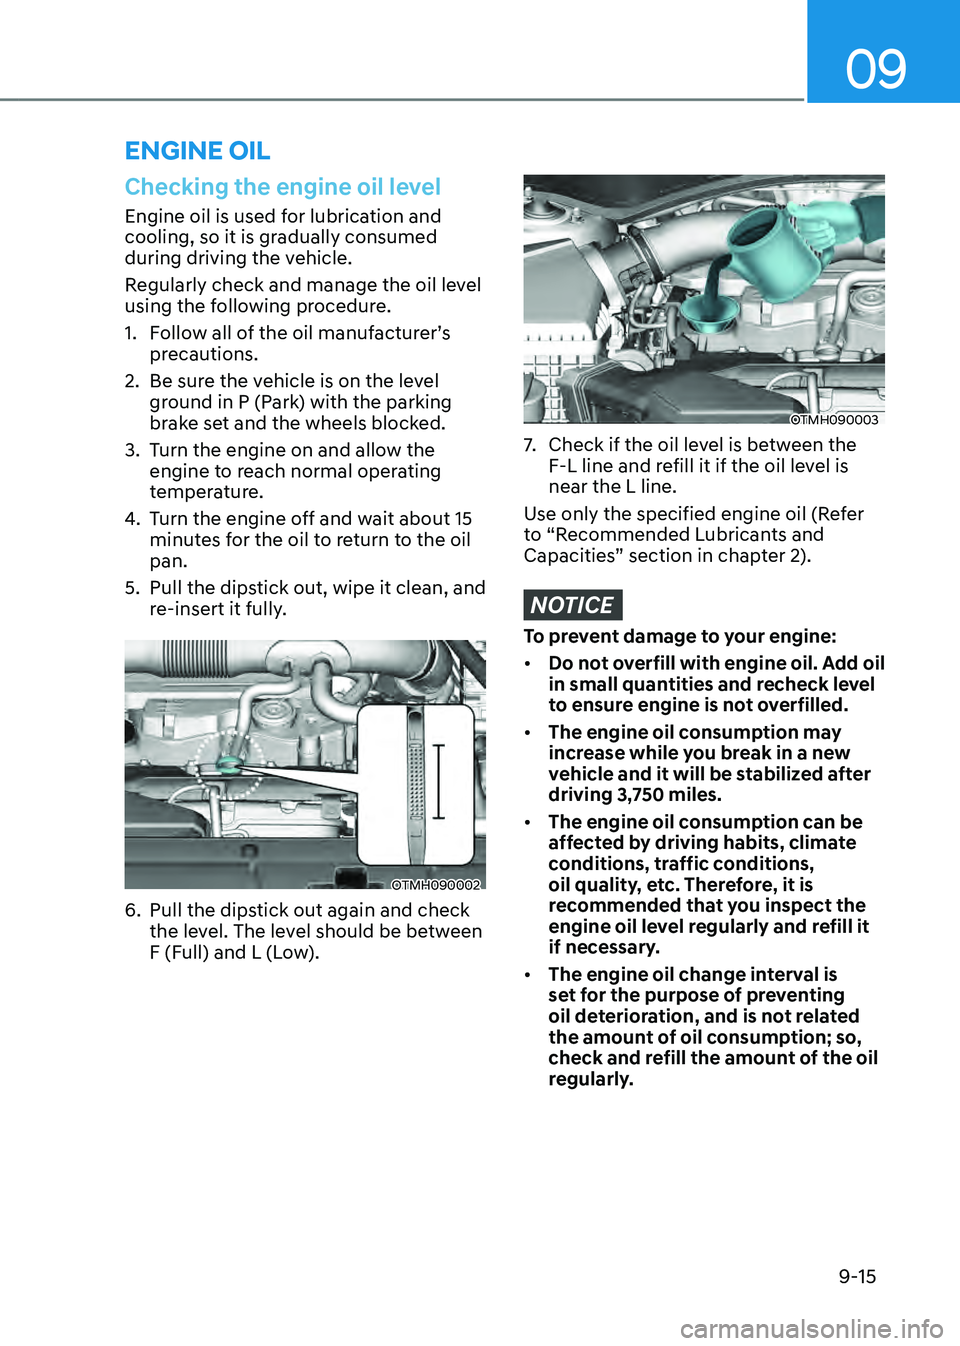
5. Pull the dipstick out, wipe it clean, and
re-insert it fully.
OTMH090002
6. Pull the dipstick out again and check
the level. The level should be between
F (Full) and L (Low).
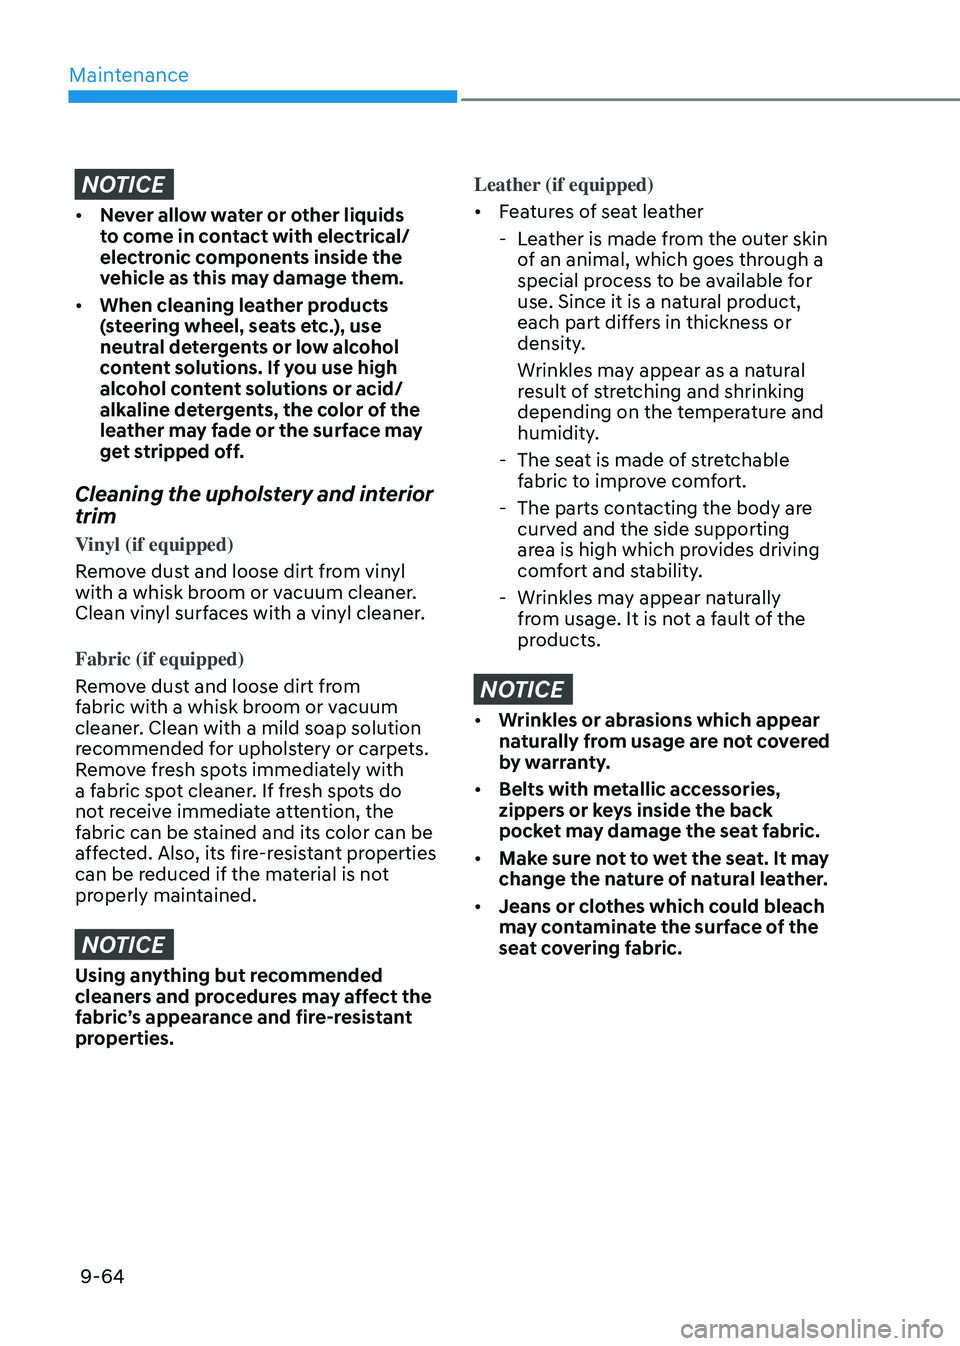
OTMH090003
7. Check if the oil level is between the
F-L line and refill it if the oil level is
near the L line.
Use only the specified engine oil (Refer
to “Recommended Lubricants and
Capacities” section in chapter 2).
NOTICE
To prevent damage to your engine:
• Do not overfill with engine oil. Add oil
in small quantities and recheck level
to ensure engine is not overfilled.
• The engine oil consumption may
increase while you break in a new
vehicle and it will be stabilized after
driving 3,750 miles.
• The engine oil consumption can be
affected by driving habits, climate
conditions, traffic conditions,
oil quality, etc. Therefore, it is
recommended that you inspect the
engine oil level regularly and refill it
if necessary.
• The engine oil change interval is
set for the purpose of preventing
oil deterioration, and is not related
the amount of oil consumption; so,
check and refill the amount of the oil
regularly.
ENGINE OIL
Maintenance
9-64
NOTICE
• Never allow water or other liquids
to come in contact with electrical/
electronic components inside the
vehicle as this may damage them.
• When cleaning leather products
(steering wheel, seats etc.), use
neutral detergents or low alcohol
content solutions. If you use high
alcohol content solutions or acid/
alkaline detergents, the color of the
leather may fade or the surface may
get stripped off.
Cleaning the upholstery and interior
trim
Vinyl (if equipped)
Remove dust and loose dirt from vinyl
with a whisk broom or vacuum cleaner.
Clean vinyl surfaces with a vinyl cleaner.
Fabric (if equipped)
Remove dust and loose dirt from
fabric with a whisk broom or vacuum
cleaner. Clean with a mild soap solution
recommended for upholstery or carpets.
Remove fresh spots immediately with
a fabric spot cleaner. If fresh spots do
not receive immediate attention, the
fabric can be stained and its color can be
affected. Also, its fire-resistant properties
can be reduced if the material is not
properly maintained.
NOTICE
Using anything but recommended
cleaners and procedures may affect the
fabric’s appearance and fire-resistant
properties.
Leather (if equipped)
• Features of seat leather
-Leather is made from the outer skin
of an animal, which goes through a
special process to be available for
use. Since it is a natural product,
each part differs in thickness or
density.
Wrinkles may appear as a natural
result of stretching and shrinking
depending on the temperature and
humidity.
-The seat is made of stretchable
fabric to improve comfort.
-The parts contacting the body are
curved and the side supporting
area is high which provides driving
comfort and stability.
-Wrinkles may appear naturally
from usage. It is not a fault of the
products.
NOTICE
• Wrinkles or abrasions which appear
naturally from usage are not covered
by warranty.
• Belts with metallic accessories,
zippers or keys inside the back
pocket may damage the seat fabric.
• Make sure not to wet the seat. It may
change the nature of natural leather.
• Jeans or clothes which could bleach
may contaminate the surface of the
seat covering fabric.