2021 FORD F-150 maintenance schedule
[x] Cancel search: maintenance schedulePage 515 of 796

3. Add engine oil that meets our
specifications. See Capacities and
Specifications (page 574).
4. Reinstall the engine oil filler cap. Turn it clockwise until you feel a strong
resistance.
Note: Do not add oil further than the
maximum mark. Oil levels above the
maximum mark may cause engine damage.
Note: Immediately soak up any oil spillage
with an absorbent cloth.
RESETTING THE ENGINE OIL
CHANGE REMINDER - VEHICLES
WITH: 4.2 INCH SCREEN
1. Press the Menu button on the steering
wheel to enter the information display
main menu.
2. Select
Truck Info.
3. Select
Oil Life.
4. Select
Reset Oil Life.
5. Press and hold the OK button until the
system reset confirmation appears.
RESETTING THE ENGINE OIL
CHANGE REMINDER - VEHICLES
WITH: 8 INCH SCREEN/12.3 INCH
SCREEN
Depending on your cluster, there are two
paths to reset the engine oil change
reminder.
Path 1
1. Press the Menu button on the steering
wheel to enter the information display
main menu.
2. Select
Settings.
3. Select
Vehicle Maintenance.
4. Select
Oil Life.
5. Press and hold the OK button until the
system reset confirmation appears. Path 2
1.
Press the Menu button on the steering
wheel to enter the information display
main menu.
2. Select
Truck Info.
3. Select
Engine Information.
4. Press and hold the OK button until the
system reset confirmation appears.
ENGINE OIL CAPACITY AND
SPECIFICATION
For filling information, please refer to the
Capacities and Specifications section of
your owner's manual. See
Engine Oil
Capacity and Specification (page 511).
CHECKING THE COOLANT
When the engine is cold, check the
concentration and level of the coolant at
the intervals listed in the scheduled
maintenance information. See Scheduled
Maintenance
(page 664).
Note: Make sure that the coolant level is
between the minimum and maximum marks
on the coolant reservoir.
Note: Coolant expands when it is hot. The
level may extend beyond the
MAX mark.
If the coolant level is at or below the
minimum mark, add prediluted coolant
immediately.
Maintain coolant concentration within
48% to 50%, which equates to a freeze
point between
-29°F (-34°C) and -35°F
(-37°C). Coolant concentration should be
checked using a refractometer. We do not
recommend the use of hydrometers or
coolant test strips for measuring coolant
concentration.
511
F-150 (TFD) Canada/United States of America, enUSA, Edition date: 202104, Second-Printing Maintenance
Page 517 of 796

Water alone, without engine coolant, can
cause engine damage from corrosion,
overheating or freezing.
Do not use the following as a coolant
substitute, as they can cause engine
damage from overheating or freezing:
•
Alcohol.
• Methanol.
• Brine.
• Any coolant mixed with alcohol or
methanol antifreeze.
Do not add extra inhibitors or additives to
the coolant. These can be harmful and
compromise the corrosion protection of
the coolant.
Severe Climates
If you drive in extremely cold climates, you
may need to increase the coolant
concentration above 50%.
Note: A coolant concentration of 60%
provides improved freeze point protection.
Coolant concentrations above 60%
decrease the overheat protection
characteristics of the coolant and could
cause engine damage.
If you drive in extremely hot climates, you
may need to decrease the coolant
concentration to 40%.
Note: A coolant concentration of 40%
provides improved overheat protection.
Coolant concentrations below 40%
decrease the overheat and corrosion
protection characteristics of the coolant and
could cause engine damage.
Coolant Change WARNING: Do not dispose of
coolant in the household refuse or the
public sewage system. Use an authorized
waste disposal facility. Change the coolant at specific mileage
intervals. Refer to the scheduled
maintenance information. See
Normal
Scheduled Maintenance (page 667).
Note: Dispose of used coolant in the
appropriate manner.
Follow your community's regulations and
standards for recycling and disposing of
automotive fluids.
Fail-Safe Cooling
Fail-safe cooling allows you to temporarily
drive your vehicle before any incremental
component damage occurs. The fail-safe
distance depends on ambient
temperature, vehicle load and terrain.
How Fail-Safe Cooling Works If the engine begins to overheat,
the coolant temperature gauge
moves toward the red zone:
A warning lamp illuminates and
a message may appear in the
information display.
If the engine reaches a preset
over-temperature condition, the engine
automatically switches to alternating
cylinder operation. Each disabled cylinder
acts as an air pump and cools the engine.
When this occurs, your vehicle still
operates, however:
• Engine power is limited.
• The air conditioning system turns off.
Continued operation increases the engine
temperature, causing the engine to
completely shut down. Your steering and
braking effort increases in this situation.
When the engine temperature cools, you
can re-start the engine. Have your vehicle
checked as soon as possible to minimize
engine damage.
513
F-150 (TFD) Canada/United States of America, enUSA, Edition date: 202104, Second-Printing Maintenance
Page 520 of 796

After operating your vehicle during heavy
snowfall or extreme rain, do the following:
•
Snow: At the earliest opportunity, open
the hood and clear any snow and ice
from the air filter housing inlet and
reset the air filter restriction gauge.
• Extreme rain: The air filter element
dries out after approximately 15– 30
minutes of driving at highway speeds.
At the earliest opportunity, open the
hood and reset the air filter restriction
gauge.
CHANGING THE ENGINE AIR
FILTER - DIESEL WARNING: To reduce the risk of
vehicle damage and personal burn
injuries, do not start your engine with the
air cleaner removed and do not remove
it while the engine is running.
Change the air filter element at the correct
service interval. See
Scheduled
Maintenance (page 664).
Use the correct specification air filter
element. See
Motorcraft Parts (page
581).
Note: Failure to use the correct air filter
element may result in severe engine
damage. Resulting component damage
may not be covered by the vehicle Warranty. 1. Release the clips that secure the air
filter housing cover. Lift and rotate the
air filter housing cover. 2.
Remove the air filter element from the
air filter housing.
3. To install, reverse the removal procedure.
4. After installing a new air filter element,
reset the air filter restriction gauge by
pressing the reset button. See
Checking the Engine Air Filter
Restriction Gauge
(page 515).
516
F-150 (TFD) Canada/United States of America, enUSA, Edition date: 202104, Second-Printing MaintenanceE254171 E254172
Page 521 of 796

CHANGING THE ENGINE AIR
FILTER - GASOLINE
WARNING: To reduce the risk of
vehicle damage and personal burn
injuries, do not start your engine with the
air cleaner removed and do not remove
it while the engine is running.
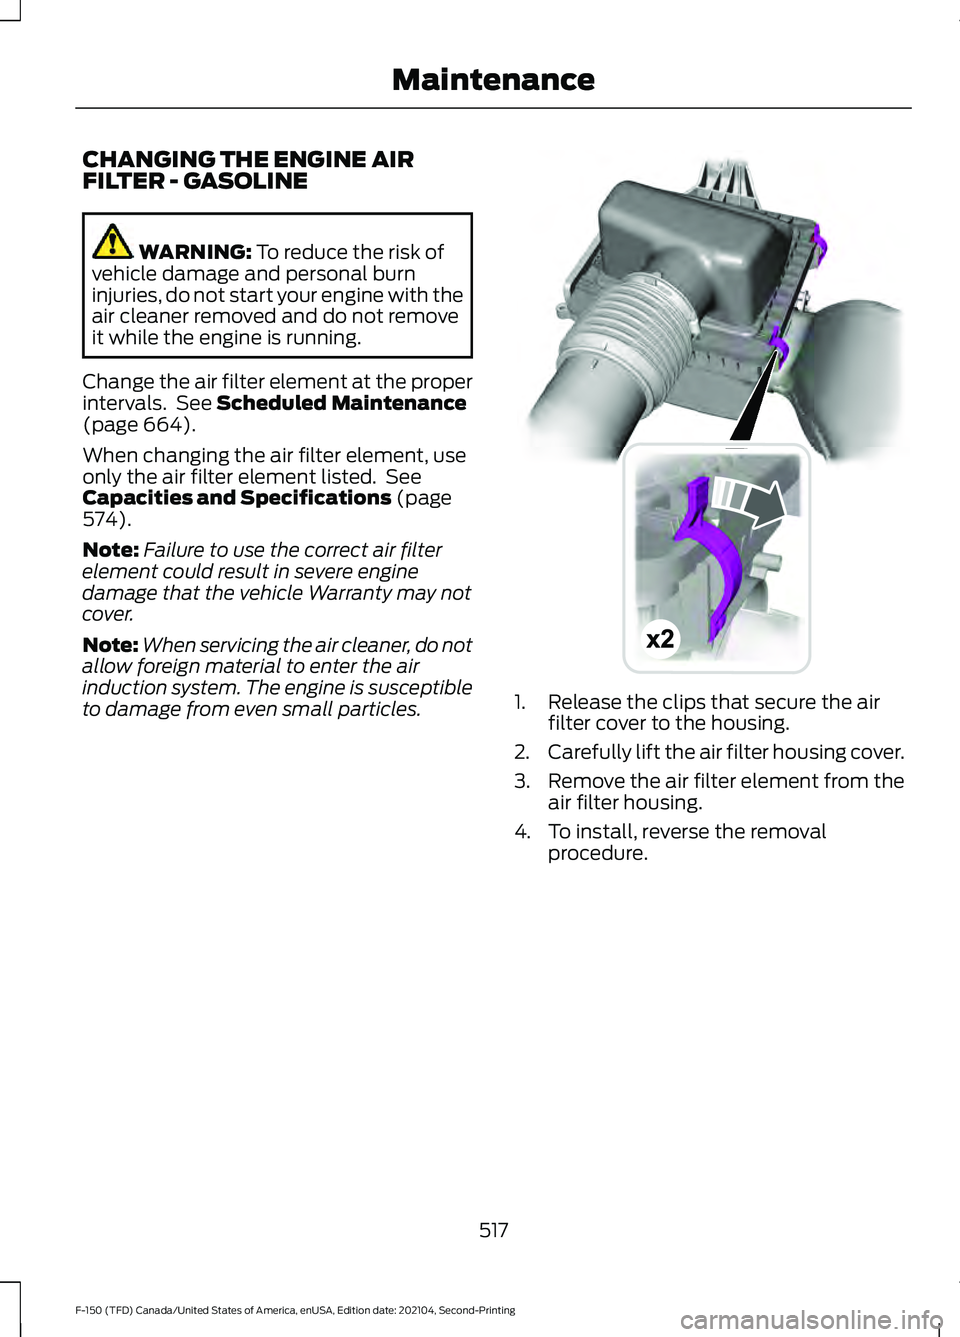
Change the air filter element at the proper
intervals. See
Scheduled Maintenance
(page 664).
When changing the air filter element, use
only the air filter element listed. See
Capacities and Specifications
(page
574).
Note: Failure to use the correct air filter
element could result in severe engine
damage that the vehicle Warranty may not
cover.
Note: When servicing the air cleaner, do not
allow foreign material to enter the air
induction system. The engine is susceptible
to damage from even small particles. 1. Release the clips that secure the air
filter cover to the housing.
2. Carefully lift the air filter housing cover.
3. Remove the air filter element from the
air filter housing.
4. To install, reverse the removal procedure.
517
F-150 (TFD) Canada/United States of America, enUSA, Edition date: 202104, Second-Printing MaintenanceE191820
Page 523 of 796

5. Start the engine.
6. Check for leaks.
Note:
The water in fuel warning lamp turns
off after approximately two seconds with
the engine running.
Note: The in-tank pump will turn off
automatically after approximately 30
seconds.
CHANGING THE FUEL FILTER
- DIESEL
Your fuel filters must be changed at the
correct service interval or when you see the
low fuel pressure message appear. Refer
to scheduled maintenance for the correct
service interval.
CHANGING THE FUEL FILTER
- GASOLINE
Your vehicle has a lifetime fuel filter that
integrates with the fuel tank. It does not
need regular maintenance or replacement.
CHANGING THE 12V BATTERY WARNING: Batteries normally
produce explosive gases which can
cause personal injury. Therefore, do not
allow flames, sparks or lighted
substances to come near the battery.
When working near the battery, always
shield your face and protect your eyes.
Always provide correct ventilation. WARNING:
When lifting a
plastic-cased battery, excessive pressure
on the end walls could cause acid to flow
through the vent caps, resulting in
personal injury and damage to the
vehicle or battery. Lift the battery with a
battery carrier or with your hands on
opposite corners. WARNING:
Keep batteries out of
reach of children. Batteries contain
sulfuric acid. Avoid contact with skin,
eyes or clothing. Shield your eyes when
working near the battery to protect
against possible splashing of acid
solution. In case of acid contact with skin
or eyes, flush immediately with water for
a minimum of 15 minutes and get prompt
medical attention. If acid is swallowed,
call a physician immediately. WARNING:
Battery posts,
terminals and related accessories
contain lead and lead compounds,
chemicals known to the State of
California to cause cancer and
reproductive harm. Wash your hands
after handling
. WARNING:
This vehicle may have
more than one battery. Removing the
battery cables from only one battery
does not disconnect your vehicle
electrical system. Make sure you
disconnect the battery cables from all
batteries when disconnecting power.
Failure to do so may cause serious
personal injury or property damage.
The battery is in the engine compartment.
See
Under Hood Overview (page 504).
Your vehicle has a maintenance-free
battery. It does not require additional
water during service.
519
F-150 (TFD) Canada/United States of America, enUSA, Edition date: 202104, Second-Printing Maintenance
Page 575 of 796

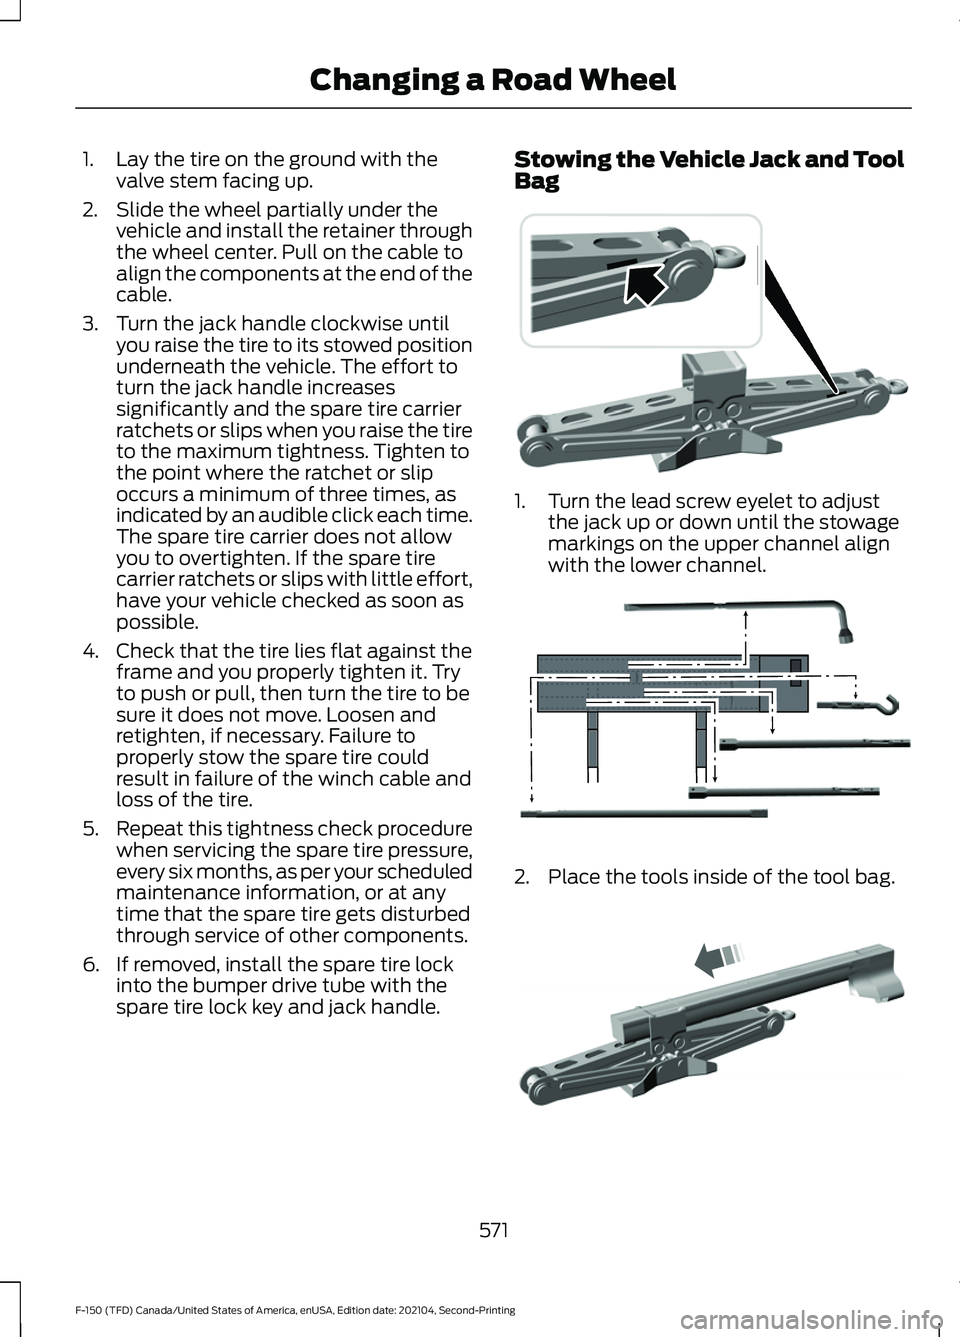
1. Lay the tire on the ground with the
valve stem facing up.
2. Slide the wheel partially under the vehicle and install the retainer through
the wheel center. Pull on the cable to
align the components at the end of the
cable.
3. Turn the jack handle clockwise until you raise the tire to its stowed position
underneath the vehicle. The effort to
turn the jack handle increases
significantly and the spare tire carrier
ratchets or slips when you raise the tire
to the maximum tightness. Tighten to
the point where the ratchet or slip
occurs a minimum of three times, as
indicated by an audible click each time.
The spare tire carrier does not allow
you to overtighten. If the spare tire
carrier ratchets or slips with little effort,
have your vehicle checked as soon as
possible.
4. Check that the tire lies flat against the frame and you properly tighten it. Try
to push or pull, then turn the tire to be
sure it does not move. Loosen and
retighten, if necessary. Failure to
properly stow the spare tire could
result in failure of the winch cable and
loss of the tire.
5. Repeat this tightness check procedure
when servicing the spare tire pressure,
every six months, as per your scheduled
maintenance information, or at any
time that the spare tire gets disturbed
through service of other components.
6. If removed, install the spare tire lock into the bumper drive tube with the
spare tire lock key and jack handle. Stowing the Vehicle Jack and Tool
Bag
1. Turn the lead screw eyelet to adjust
the jack up or down until the stowage
markings on the upper channel align
with the lower channel. 2. Place the tools inside of the tool bag.
571
F-150 (TFD) Canada/United States of America, enUSA, Edition date: 202104, Second-Printing Changing a Road Wheel E323394 E323393 E327653
Page 646 of 796

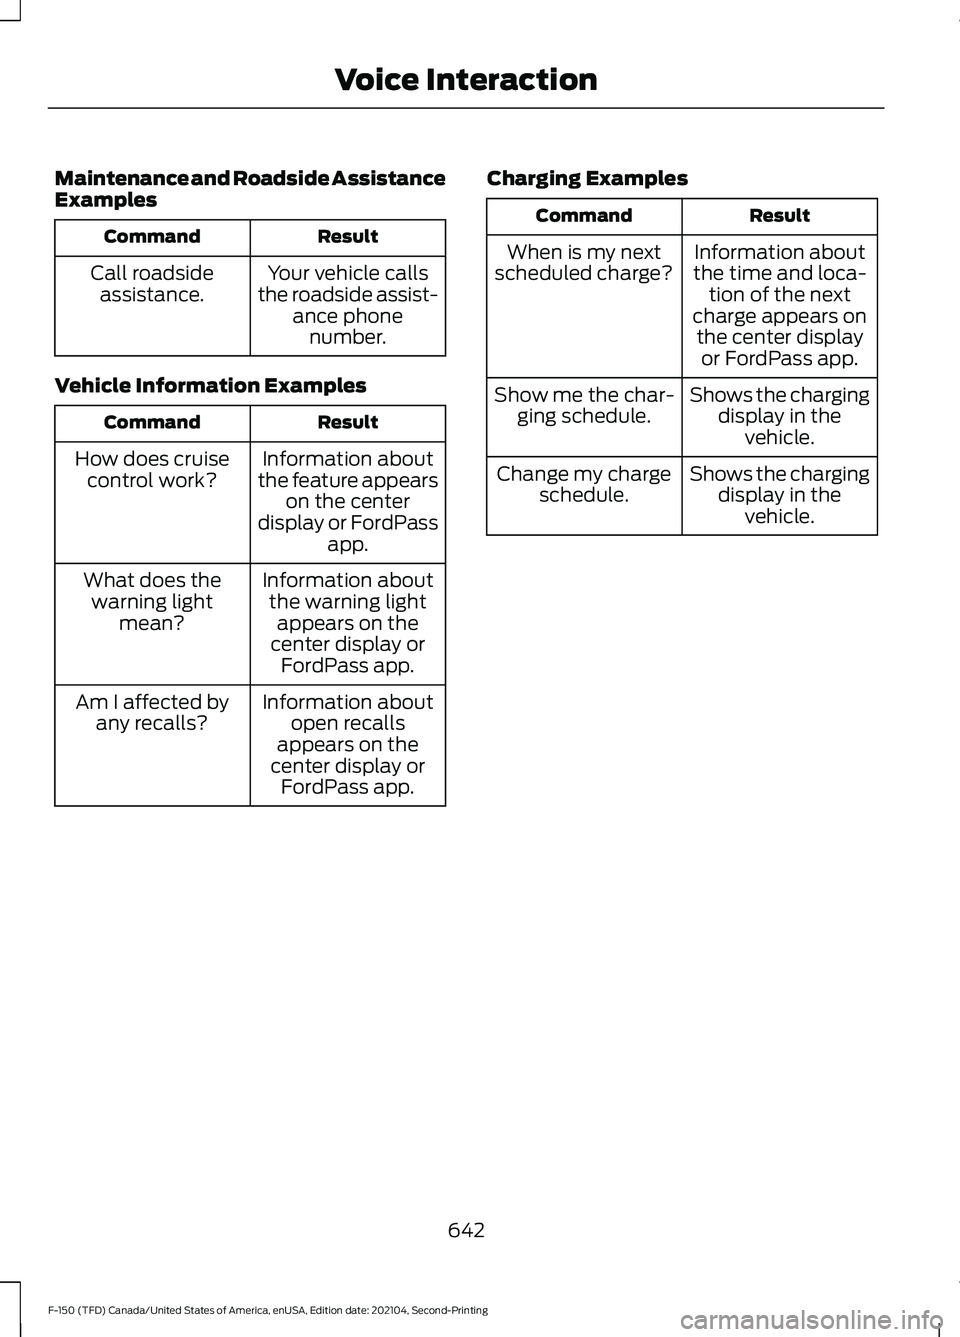
Maintenance and Roadside Assistance
Examples
Result
Command
Your vehicle calls
the roadside assist- ance phonenumber.
Call roadside
assistance.
Vehicle Information Examples Result
Command
Information about
the feature appears on the center
display or FordPass app.
How does cruise
control work?
Information aboutthe warning light appears on the
center display or FordPass app.
What does the
warning light mean?
Information aboutopen recalls
appears on the
center display or FordPass app.
Am I affected by
any recalls? Charging Examples Result
Command
Information about
the time and loca- tion of the next
charge appears on the center display or FordPass app.
When is my next
scheduled charge?
Shows the chargingdisplay in thevehicle.
Show me the char-
ging schedule.
Shows the chargingdisplay in thevehicle.
Change my charge
schedule.
642
F-150 (TFD) Canada/United States of America, enUSA, Edition date: 202104, Second-Printing Voice Interaction
Page 665 of 796

BASE WARRANTY
The F-150 Raptor carries the same New
Vehicle Limited Warranty as other Ford
F-150 models. This information is covered
in its entirety in your warranty information.
Warranty service for the F-150 Raptor or
any Ford Performance vehicle can be
obtained at any Ford dealer nationwide.
Ford Performance does not recommend
modifying or racing Ford Performance
vehicles, as they are designed and built to
be driven as delivered from the factory.
The warranty information discusses vehicle
usage and the installation of aftermarket
parts and their effect on warranty
coverage.
These modifications may not necessarily
protect your engine from damage in
competition conditions. Subjecting your
vehicle to competition conditions even
with these modifications may render
repairs non-reimbursable under the New
Vehicle Limited Warranty.
Ford Performance has engineered your
F-150 Raptor for off-road use beyond what
is normal for a F-150. However, it can incur
damage if driven beyond its capabilities.
Skid plates, shock guards and running
boards were designed to help limit damage
to vital components and exterior finishes,
but cannot prevent all damage if driven in
extreme off-road conditions. Damage to
skid plates, shock guards, running boards
and exterior finishes as well as bent,
cracked or broken body, frame and chassis
components may not be covered by
warranty.
Vehicle damage caused by driving through
deep water at excessive speeds may not
be covered under warranty. See What Is
Off-Road Driving (page 470).
Please see the warranty information for
complete information. Perform Multi-Point Inspection and the
inspections outlined in Scheduled
Maintenance information. Refer to the
vehicle
’s Workshop Manual for removal
and installation procedures. Replace with
genuine Ford and Motorcraft service parts
as needed.
661
F-150 (TFD) Canada/United States of America, enUSA, Edition date: 202104, Second-Printing Warranty Terms and Conditions - Raptor