2021 FORD EXPLORER ECO mode
[x] Cancel search: ECO modePage 169 of 577
5. Press and hold the previously
programmed button on the visor for 2
seconds. Repeat this step up to 3 times
until the garage door moves.
Programming is now complete.
Clearing a HomeLink Device
To erase programming from the three
HomeLink buttons press and hold the two
outer HomeLink buttons until the indicator
light begins to flash. The indicator light will
begin flashing in 10 to 20 seconds, at which
time both buttons should be released.
Programming has now been erased, and
the indicator light should blink slowly to
indicate the device is in train mode when
any of the three HomeLink buttons are
pressed.
FCC and RSS-210 Industry Canada
Compliance
This device complies with Part 15 of the
FCC Rules and with RSS-210 of Industry
Canada. Operation is subject to the
following two conditions: (1) this device
may not cause harmful interference, and
(2) this device must accept any
interference received, including
interference that may cause undesired
operation. WARNING: Changes or
modifications not expressively approved
by the party responsible for compliance
could void the user's authority to operate
the equipment. The term "IC:" before the
radio certification number only signifies
that Industry Canada technical
specifications were met. This equipment complies with FCC
radiation exposure limits set forth for an
uncontrolled environment. End Users must
follow the specific operating instructions
for satisfying RF exposure compliance. This
transmitter must be at least
8 in (20 cm)
from the user and must not be co-located
or operating in conjunction with any other
antenna or transmitter.
The term “IC:” before the
certification/registration number only
signifies that Industry Canada technical
specifications were met.
166
Explorer (CTW), enUSA, Edition date: 202007, Second-Printing Garage Door Opener
(If Equipped)
Page 170 of 577

12 Volt DC Power Point
WARNING: Do not plug optional
electrical accessories into the cigar
lighter socket. Incorrect use of the cigar
lighter can cause damage not covered
by the vehicle warranty, and can result
in fire or serious injury.
Note: When you switch the ignition on, you
can use the socket to power 12 volt
appliances with a maximum current rating
of 15 amps.
Note: If the power supply does not work
after you switch the ignition off, switch the
ignition on.
Note: Do not hang any accessory from the
accessory plug.
Note: Do not use the power point over the
vehicle capacity of 12 volt DC 180 watts or
a fuse may blow.
Note: Always keep the power point caps
closed when not in use.
Do not insert objects other than an
accessory plug into the power point. This
damages the power point and may blow
the fuse.
Run the vehicle for full capacity use of the
power point.
To prevent the battery from running out of
charge:
• Do not use the power point longer than
necessary when the vehicle is not
running.
• Do not leave devices plugged in
overnight or when you park your vehicle
for extended periods. USB Port and Power Point
Locations
USB Ports and Power Points may be in the
following locations:
•
On the lower instrument panel.
• Inside the center console.
• On the front of the center console.
• On the rear of the center console.
• In the cargo area.
• On the passenger side floor panel.
• 3rd row on the quarter trim panels.
Note: Some of the USB ports may not have
data transfer capabilities.
Note: Incorrect use of the USB ports can
cause damage not covered by the vehicle
warranty.
110 Volt AC Power Point
(If Equipped) WARNING:
Do not keep electrical
devices plugged in the power point
whenever the device is not in use. Do not
use any extension cord with the 110 volt
AC power point, since it will defeat the
safety protection design. Doing so may
cause the power point to overload due
to powering multiple devices that can
reach beyond the 150 watt load limit and
could result in fire or serious injury.
Note: The power point turns off when you
switch off the ignition, when the vehicle is
not in accessory mode or when the battery
voltage drops below 11 volts.
You can use the power point for electric
devices that require up to 150 watts. It is
on the rear of the center console.
167
Explorer (CTW), enUSA, Edition date: 202007, Second-Printing Auxiliary Power Points
Page 171 of 577

When the indicator light on the power point
is:
•
On: The power point is working, the
ignition is ON or the vehicle is in
accessory mode.
• Off: The power point is OFF, the ignition
is OFF or the vehicle is not in accessory
mode.
• Flashing: The power point is in fault
mode.
Due to the different technologies used on
its construction, some devices may exceed
the capacity shown on its label when they
are initially plugged-in.
The power outlet temporarily turns off
power when in fault mode if the device
exceeds the 150 watt limit. Unplug your
device and switch the ignition off. Switch
the ignition back on, but do not plug your
device back in. Let the system cool off and
switch the ignition off to reset the fault
mode. Switch the ignition back on and
make sure the indicator light remains on.
Do not use the power point for certain
electric devices, including:
• Cathode-ray, tube-type televisions.
• Motor loads, such as vacuum cleaners,
electric saws and other electric power
tools or compressor-driven
refrigerators. •
Measuring devices, which process
precise data, such as medical
equipment or measuring equipment.
• Other appliances requiring an
extremely stable power supply such as
microcomputer-controlled electric
blankets or touch-sensor lamps.
WIRELESS ACCESSORY
CHARGER (IF EQUIPPED) WARNING:
Wireless charging
devices can affect the operation of
implanted medical devices, including
cardiac pacemakers. If you have any
implanted medical devices, we
recommend that you consult with your
physician.
Note: Devices without built-in Qi wireless
charging receivers require an additional Qi
receiver or sleeve.
Note: For compatible devices with built-in
Qi wireless charging capability, the charging
performance may be affected if your device
is in a case. It may be necessary to remove
the case to wirelessly charge your device.
The system supports one Qi wireless
charging compatible device on the
charging area.
Keep the charging area clean and remove
foreign objects prior to charging a device.
Do not place items with a magnetic strip,
for example passports, parking tickets or
credit cards, near the charging area when
charging a device. Damage may occur to
the magnetic strip.
Do not place metal objects, for example
remote controls, coins and candy
wrappers, on or near the charging area
when charging a device. Metal objects may
heat up and degrade the charging
performance.
168
Explorer (CTW), enUSA, Edition date: 202007, Second-Printing Auxiliary Power PointsE247586
Page 172 of 577
Note:
This device controls the rate of
charge, or charging power. During charging,
the device and the charger may heat up, this
is normal. If the battery gets hotter than
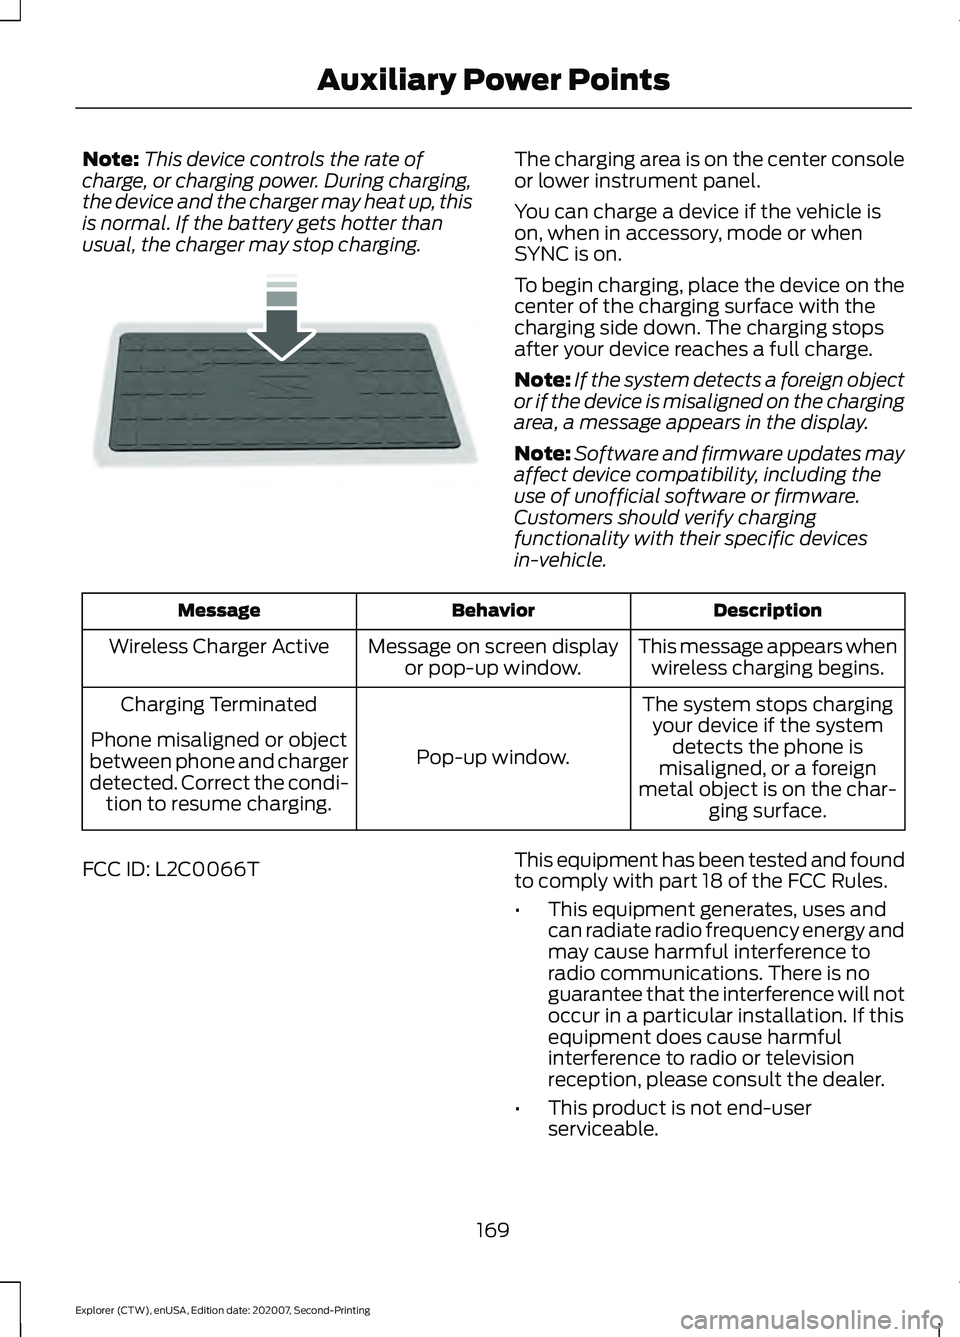
usual, the charger may stop charging. The charging area is on the center console
or lower instrument panel.
You can charge a device if the vehicle is
on, when in accessory, mode or when
SYNC is on.
To begin charging, place the device on the
center of the charging surface with the
charging side down. The charging stops
after your device reaches a full charge.
Note:
If the system detects a foreign object
or if the device is misaligned on the charging
area, a message appears in the display.
Note: Software and firmware updates may
affect device compatibility, including the
use of unofficial software or firmware.
Customers should verify charging
functionality with their specific devices
in-vehicle. Description
Behavior
Message
This message appears whenwireless charging begins.
Message on screen display
or pop-up window.
Wireless Charger Active
The system stops chargingyour device if the system detects the phone is
misaligned, or a foreign
metal object is on the char- ging surface.
Pop-up window.
Charging Terminated
Phone misaligned or object
between phone and charger
detected. Correct the condi- tion to resume charging.
FCC ID: L2C0066T This equipment has been tested and found
to comply with part 18 of the FCC Rules.
•
This equipment generates, uses and
can radiate radio frequency energy and
may cause harmful interference to
radio communications. There is no
guarantee that the interference will not
occur in a particular installation. If this
equipment does cause harmful
interference to radio or television
reception, please consult the dealer.
• This product is not end-user
serviceable.
169
Explorer (CTW), enUSA, Edition date: 202007, Second-Printing Auxiliary Power PointsE250812
Page 176 of 577

Ignition Modes
The keyless starting system has three
modes:
Off: Turns the ignition off.
• Without applying the brake pedal,
press and release the button once
when the ignition is in the on mode, or
when your vehicle is running but is not
moving.
On:
All electrical circuits are operational
and the warning lamps and indicators
illuminate.
• Without applying the brake pedal,
press and release the button once.
Start:
Starts your vehicle. The engine may
not start when your vehicle starts.
• Press the brake pedal, and then press
the button for any length of time. An
indicator light on the button illuminates
when the ignition is on and when your
vehicle starts.
STARTING A GASOLINE
ENGINE
When you start the engine, the idle speed
increases. This helps to warm up the
engine. If the engine idle speed does not
slow down automatically, have your
vehicle checked by an authorized dealer. Note:
You can crank the engine for a total
of 60 seconds without the engine starting
before the starting system temporarily
disables. The 60 seconds does not have to
be all at once. For example, if you crank the
engine three times for 20 seconds each
time, without the engine starting, you
reached the 60-second time limit. A
message appears in the information display
alerting you that you exceeded the cranking
time. You cannot attempt to start the
engine for at least 15 minutes. After 15
minutes, you are limited to a 15-second
engine cranking time. You need to wait 60
minutes before you can crank the engine for
60 seconds again.
Before starting your vehicle, check the
following:
• Make sure all occupants have fastened
their seatbelt.
• Make sure the headlamps and
electrical accessories are off.
• Make sure the parking brake is on.
• Make sure the transmission is in park
(P).
• Switch the ignition on. For vehicles with
a keyless ignition, see the following
instructions.
Vehicles with an Ignition Key
Note: Do not touch the accelerator pedal.
1. Fully depress the brake pedal.
2. Turn the key to the start position to start the engine.
Note: The engine may continue cranking
for up to 15 seconds or until it starts.
Note: If you cannot start the engine on the
first try, wait for a short period and try again.
Vehicles with Keyless Start
Note: Do not touch the accelerator pedal.
173
Explorer (CTW), enUSA, Edition date: 202007, Second-Printing Starting and Stopping the EngineE144447
Page 183 of 577
AUTO-START-STOP (IF EQUIPPED)
The system helps reduce fuel consumption
by automatically stopping and restarting
the engine when your vehicle has stopped.
The engine restarts automatically when
you release the brake pedal.
In some situations, your vehicle may restart
automatically, for example:
• To maintain interior comfort.
• To recharge the battery.
Note: Power assist steering turns off when
the engine is off.
Note: If your vehicle is flex fuel capable,
Auto-Start-Stop will be inhibited for a short
time after a refuel event while the system
is verifying the fuel type being used. WARNING:
Apply the parking
brake, shift into park (P), switch the
ignition off and remove the key before
you leave your vehicle. Failure to follow
this instruction could result in personal
injury or death. WARNING:
Apply the parking
brake, shift into park (P), switch the
ignition off and remove the key before
you open the hood or have any service
or repair work completed. If you do not
switch the ignition off, the engine could
restart at any time. Failure to follow this
instruction could result in personal injury
or death. WARNING:
The system may
require the engine to automatically
restart when the auto-start-stop
indicator illuminates green or flashes
amber. Failure to follow this instruction
could result in personal injury. The Auto-Start-Stop system status is
available at a glance within the information
display.
See Information Displays (page
112).
Enabling Auto-Start-Stop
The system automatically enables every
time you start your vehicle if:
• You do not press the Auto-Start-Stop
button (not illuminated).
• Your vehicle exceeds an initial speed
of
3 mph (5 km/h) after you have
initially started your vehicle.
• You have stopped your vehicle.
• Your foot is on the brake pedal.
• The driver door is closed.
• The interior compartment has cooled
or warmed to an acceptable level.
• The front windshield defroster is off.
• You have not turned the steering wheel
rapidly or you do not have it at a sharp
angle.
• The vehicle is not on a steep road
grade.
• The battery is within optimal operating
conditions (battery state of charge and
temperature in range).
• The engine coolant is near operating
temperature.
• Elevation is below about
12,000 ft
(3,650 m).
• Ambient temperature is moderate.
• The trailer is not connected.
• If you select Normal, Eco, Snow/Wet
or Grass/Gravel/Snow modes.
• You are not in 4H or 4L.
• You have not selected Manual shift
mode.
• Hill descent control is not active.
• You have not selected Tow haul, Sport,
Sand or Mud/Rut modes.
180
Explorer (CTW), enUSA, Edition date: 202007, Second-Printing Unique Driving Characteristics
Page 184 of 577
Note:
Note when in Sport mode it can be
enabled by pressing the Auto-Start-Stop
button. The green Auto-Start-Stop
indicator light on the instrument
cluster will illuminate to indicate
when the automatic engine stop occurs. If the instrument cluster is
equipped with a grey
Auto-Start-Stop indicator light,
it illuminates when automatic engine stop
is not available due to one of the above
noted conditions not being met.
Automatic Engine Restart
Any of the following conditions will result
in an automatic restart of the engine:
• You have removed your foot from the
brake pedal.
• You press the accelerator pedal.
• You press the accelerator and the
brake pedal at the same time.
• The driver safety belt becomes
unfastened or the driver door is ajar.
• Your vehicle is moving.
• The interior compartment does not
meet customer comfort when air
conditioning or heat is on.
• Fogging of the windows could occur
and the air conditioning is on.
• The battery is not within optimal
operating conditions.
• You have exceeded the maximum
engine off time.
• When you press the Auto-Start-Stop
button with the engine automatically
stopped.
• The front defroster is turned to the Max
setting.
• When you shift into park (P), the engine
will restart. Any of the following conditions may result
in an automatic restart of the engine:
•
You have increased the blower fan
speed or changed the climate control
temperature.
• You have an electrical accessory
turned on or plugged in.
Note: You may notice that the climate seat
fan fluctuates during an automatic restart.
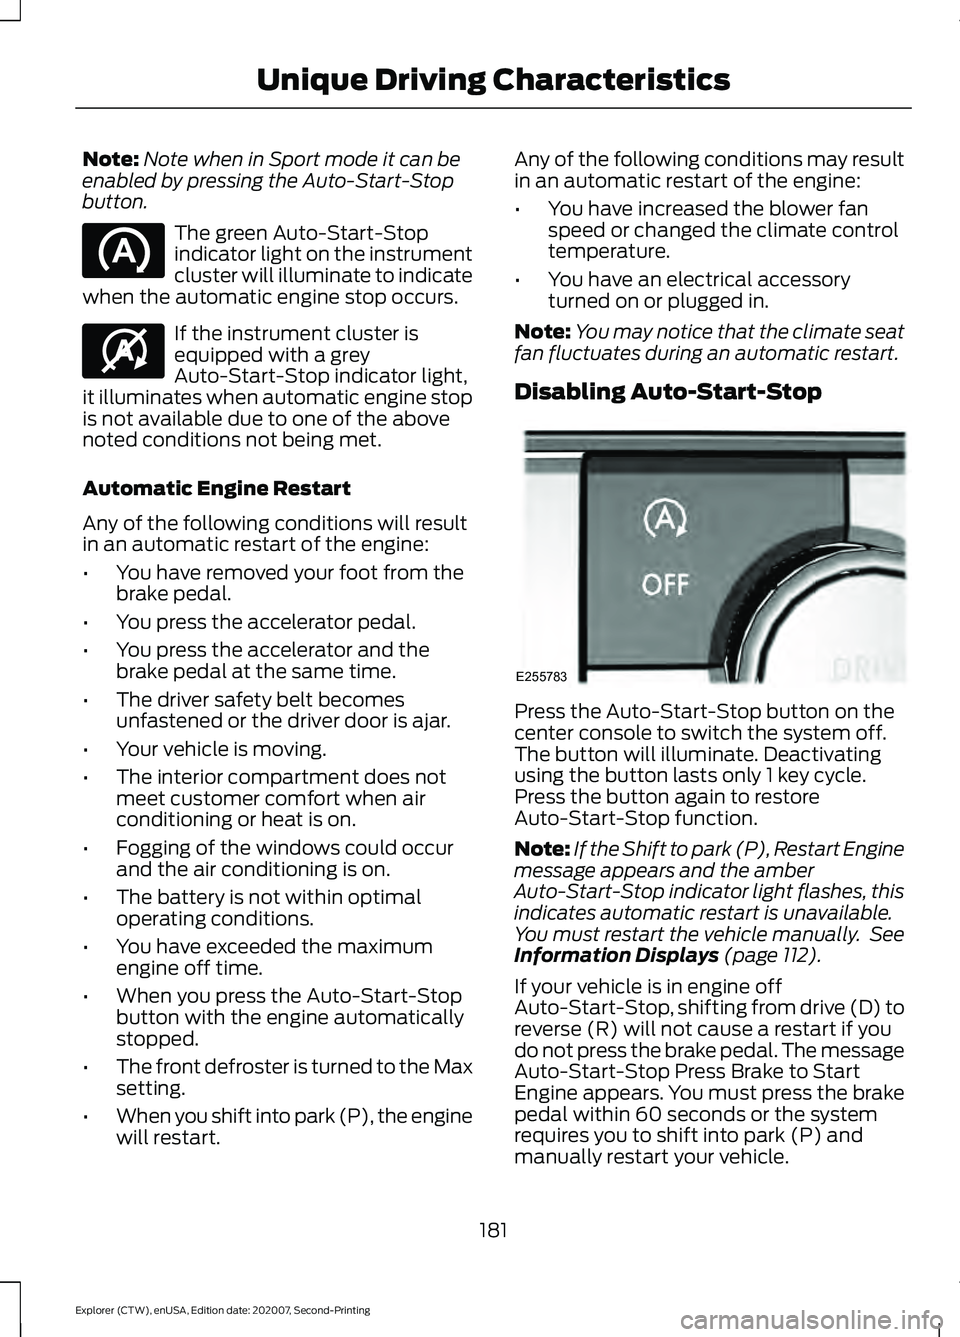
Disabling Auto-Start-Stop Press the Auto-Start-Stop button on the
center console to switch the system off.
The button will illuminate. Deactivating
using the button lasts only 1 key cycle.
Press the button again to restore
Auto-Start-Stop function.
Note:
If the Shift to park (P), Restart Engine
message appears and the amber
Auto-Start-Stop indicator light flashes, this
indicates automatic restart is unavailable.
You must restart the vehicle manually. See
Information Displays (page 112).
If your vehicle is in engine off
Auto-Start-Stop, shifting from drive (D) to
reverse (R) will not cause a restart if you
do not press the brake pedal. The message
Auto-Start-Stop Press Brake to Start
Engine appears. You must press the brake
pedal within 60 seconds or the system
requires you to shift into park (P) and
manually restart your vehicle.
181
Explorer (CTW), enUSA, Edition date: 202007, Second-Printing Unique Driving Characteristics E146361 E255783
Page 185 of 577
HYBRID VEHICLE OPERATION
This hybrid vehicle combines electric and
gasoline propulsion to provide
breakthrough performance and improved
efficiency. Familiarizing yourself with these
unique characteristics provides an optimal
driving experience from your vehicle.
Starting
When you start your vehicle, a
green READY indicator light
appears in the instrument cluster
letting you know that your vehicle is ready
for driving.
The engine may not start because your
vehicle has a silent key start feature. This
fuel saving feature allows your vehicle to
be ready to drive without requiring the gas
engine to be running. The indicator remains
on when your vehicle is on, whether the
engine is running or not, to indicate your
vehicle is capable of movement using the
electric motor, gas engine or both.
Typically, the engine does not start unless
the vehicle is cold, a climate control
change is requested or you press the
accelerator pedal.
Driving
The gas engine automatically starts and
stops to provide power when needed and
to save fuel when not needed. When
coasting at low speeds, coming to a stop,
or standing, the gas engine normally shuts
down and your vehicle operates in
electric-only mode.
Conditions that may cause the engine to
start up or remain running include:
• Considerable vehicle acceleration.
• Climbing a hill.
• Charge level of high voltage battery is
low. •
High or low outside temperatures in
order to provide system heating or
cooling.
• Engine not warm enough to provide
passenger requested cabin
temperature.
• Towing a trailer.
• Selectable drive modes: Certain
selectable drive modes may cause the
engine to run. See What Is Drive Mode
Control (page 278).
• Live in Drive: Use of the paddle shifters
while in drive (D) may cause the engine
to run. See Automatic Transmission
(page
201).
Stopping
The gas engine may shut off to conserve
fuel as you come to a stop. Restarting your
vehicle is not required. Simply step on the
accelerator when you are ready to drive.
Transmission Operation
The engine and electric motor together
propel the vehicle through the automatic
transmission. This is normal hybrid
operating and helps deliver fuel efficiency
and performance.
Battery
Your hybrid is equipped with a high voltage
battery. A cool battery maintains battery
life and provides the best possible
performance. The high voltage battery is
cooled by the vehicle's air conditioning
system. When the air conditioning system
is on, you may notice a slight increase in
air temperature coming from the climate
control vents while the battery is cooling.
You may also notice cool air flowing from
the vents when the air conditioning or
blower is off.
182
Explorer (CTW), enUSA, Edition date: 202007, Second-Printing Unique Driving CharacteristicsE293827