2021 FORD EXPLORER fog light
[x] Cancel search: fog lightPage 5 of 577

Clearing All MyKeys
......................................66
Checking MyKey System Status .............
66
Using MyKey With Remote Start Systems ........................................................
67
MyKey – Troubleshooting ..........................
67
Doors and Locks
Locking and Unlocking ...............................
69
Keyless Entry ...................................................
72
Liftgate
Power Liftgate ................................................
74
Security
Passive Anti-Theft System ........................
78
Anti-Theft Alarm ...........................................
78
Steering Wheel
Adjusting the Steering Wheel - Vehicles With: Manual Adjustable Steering
Column .........................................................
80
Adjusting the Steering Wheel - Vehicles With: Power Adjustable Steering
Column .........................................................
80
Audio Control ..................................................
82
Voice Control ..................................................
82
Cruise Control - Vehicles With: Adaptive Cruise Control With Stop and Go .......
82
Cruise Control - Vehicles With: Cruise Control ..........................................................
83
Information Display Control ......................
83
Heated Steering Wheel ..............................
83
Horn ....................................................................
83
Wipers and Washers
Windshield Wipers .......................................
84
Autowipers ......................................................
84
Windshield Washers ....................................
85
Rear Window Wiper and Washers .........
86Lighting
General Information
.....................................
87
Lighting Control .............................................
87
Autolamps .......................................................
88
Instrument Lighting Dimmer ....................
88
Headlamp Exit Delay ...................................
88
Daytime Running Lamps - Vehicles With: Configurable Daytime Running Lamps
........................................................................\
..
89
Daytime Running Lamps - Vehicles With: Daytime Running Lamps (DRL) .........
89
Front Fog Lamps ...........................................
89
Adaptive Headlamps ..................................
90
Direction Indicators ......................................
90
Interior Lamps .................................................
91
Ambient Lighting - Vehicles With: 8 Inch Information and Entertainment Display
Screen ...........................................................
92
Ambient Lighting - Vehicles With: 10.1 Inch Information and Entertainment
Display Screen ...........................................
92
Automatic High Beam Control
What Is Automatic High Beam Control ........................................................................\
..
94
Switching Automatic High Beam Control On and Off ...................................................
94
Automatic High Beam Control Indicators ........................................................................\
..
94
Overriding Automatic High Beam Control ........................................................................\
..
95
Windows and Mirrors
Power Windows ............................................
96
Global Opening ..............................................
97
Exterior Mirrors - Excluding: ST ................
97
Exterior Mirrors - ST .....................................
98
Interior Mirror ................................................
100
Sun Visors ......................................................
100
Moonroof .........................................................
101
2
Explorer (CTW), enUSA, Edition date: 202007, Second-Printing Table of Contents
Page 13 of 577

Brake system
Cabin air filter
Check fuel cap
Child safety door lock or unlock
Child seat lower anchor
Child seat tether anchor
Cruise control
Do not open when hot
Engine air filter
Engine coolant
Engine coolant temperature
Engine oil
Explosive gas
Fan warning
Fasten seatbelt Flammable
Front airbag
Front fog lamps
Fuel pump reset
Fuse compartment
Hazard flashers
Heated rear window
Windshield defrosting system
Interior luggage compartment
release
Jack
Keep out of reach of children
Lighting control
Low tire pressure warning
Maintain correct fluid level
Note operating instructions
10
Explorer (CTW), enUSA, Edition date: 202007, Second-Printing IntroductionE270480 E139223 E141128 E71340 E71880 E231160 E67017 E161353
Page 91 of 577

Flashing High Beam Headlamps
Pull the lever toward you and release it to
flash the high beam headlamps.
AUTOLAMPS
WARNING: The system does not
relieve you of your responsibility to drive
with due care and attention. You may
need to override the system if it does not
turn the headlamps on in low visibility
conditions, for example daytime fog.
Autolamps turn the headlamps on in low
light situations or when the wipers operate. Switch the lighting control to the
autolamps position.
Note: The lighting control defaults to
autolamps each time you switch your
vehicle on.
The headlamps remain on for a period of
time after you switch the ignition off. Use
the touchscreen to adjust the period of
time that the headlamps remain on.
Note: If you switch the autolamps on, you
cannot switch the high beams on until the
system turns the low beams on. Windshield Wiper Activated
Headlamps
When you switch the autolamps on, the
headlamps turn on within 10 seconds of
switching the wipers on. They turn off
approximately 60 seconds after you switch
the windshield wipers off.
The headlamps do not turn on with the
wipers:
•
During a single wipe.
• When using the windshield washers.
• If the wipers are in intermittent mode.
Note: If you switch the autolamps and the
autowipers on, the headlamps turn on when
the windshield wipers continuously operate.
INSTRUMENT LIGHTING
DIMMER
The instrument lighting dimmer buttons
are on the lighting control. Repeatedly press one of the
buttons to adjust the brightness.
HEADLAMP EXIT DELAY
After you switch the ignition off, you can
switch the headlamps on by pulling the
direction indicator lever toward you. You
will hear a short tone. The headlamps will
switch off automatically after three
minutes with any door open or 30 seconds
after the last door has been closed. You
can cancel this feature by pulling the
direction indicator lever toward you again
or switching the ignition on.
88
Explorer (CTW), enUSA, Edition date: 202007, Second-Printing LightingE248604 E281240 E291299 E296433
Page 92 of 577
DAYTIME RUNNING LAMPS -
VEHICLES WITH:
CONFIGURABLE DAYTIME
RUNNING LAMPS
WARNING: The daytime running
lamps system does not activate the rear
lamps and may not provide adequate
lighting during low visibility driving
conditions. Make sure you switch the
headlamps on, as appropriate, during all
low visibility conditions. Failure to do so
may result in a crash.
Switch the daytime running lamps on or
off using the touchscreen:
1. Select
Settings. See Settings (page
464).
2. Select
Vehicle.
3. Select
Lighting.
The daytime running lamps turn on when:
1. The lamps are on in the information display.
2. You switch the ignition on.
3. The transmission is not in park (P) for vehicles with automatic transmissions
or you release the parking brake for
vehicles with manual transmissions.
4. The lighting control is in the autolamps
position.
5. The headlamps are off.
The other lighting control switch positions
do not turn on the daytime running lamps.
If the daytime running lamps are off in the
information display, the lamps stay off in
all switch positions. DAYTIME RUNNING LAMPS -
VEHICLES WITH: DAYTIME
RUNNING LAMPS (DRL) WARNING:
The daytime running
lamps system does not activate the rear
lamps and may not provide adequate
lighting during low visibility driving
conditions. Make sure you switch the
headlamps on, as appropriate, during all
low visibility conditions. Failure to do so
may result in a crash.
The system turns the lamps on in daylight
conditions.
To switch the system on, switch the
lighting control to any position except
headlamps.
FRONT FOG LAMPS
(IF EQUIPPED)
Switching the Front Fog Lamps On
or Off
Only switch the front fog lamps on during
reduced visibility.
You can switch the front fog lamps on if
any of the following occur:
• You set the lighting control to the
parking lamps position.
• You set the lighting control to the
headlamps position.
• You set the lighting control to the
autolamps position and the headlamps
are on.
The front fog lamp button is on the lighting
control. Press the button to switch the
front fog lamps on or off.
89
Explorer (CTW), enUSA, Edition date: 202007, Second-Printing Lighting
Page 93 of 577
Note:
The brightness of the daytime running
lamps may decrease when the front fog
lamps are switched on.
Front Fog Lamp Indicator It illuminates when you switch
the front fog lamps on.
ADAPTIVE HEADLAMPS (IF
EQUIPPED)
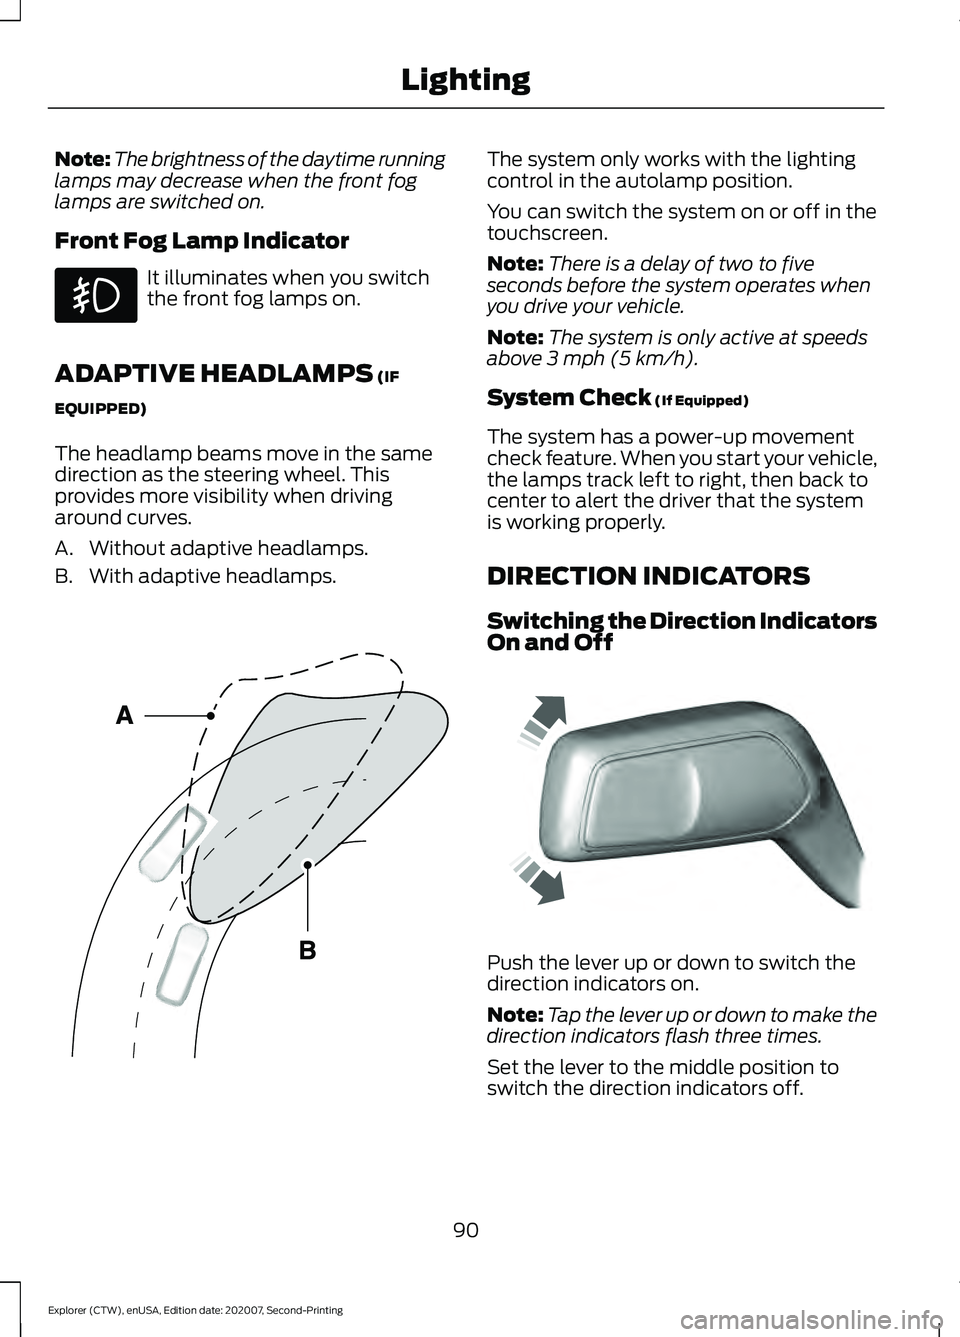
The headlamp beams move in the same
direction as the steering wheel. This
provides more visibility when driving
around curves.
A. Without adaptive headlamps.
B. With adaptive headlamps. The system only works with the lighting
control in the autolamp position.
You can switch the system on or off in the
touchscreen.
Note:
There is a delay of two to five
seconds before the system operates when
you drive your vehicle.
Note: The system is only active at speeds
above 3 mph (5 km/h).
System Check
(If Equipped)
The system has a power-up movement
check feature. When you start your vehicle,
the lamps track left to right, then back to
center to alert the driver that the system
is working properly.
DIRECTION INDICATORS
Switching the Direction Indicators
On and Off Push the lever up or down to switch the
direction indicators on.
Note:
Tap the lever up or down to make the
direction indicators flash three times.
Set the lever to the middle position to
switch the direction indicators off.
90
Explorer (CTW), enUSA, Edition date: 202007, Second-Printing Lighting E161714 E242676
Page 97 of 577
WHAT IS AUTOMATIC HIGH
BEAM CONTROL
The system turns on high beams if it is dark
enough and no other traffic is present. If it
detects an approaching vehicle
’s
headlamps or tail lamps, or street lighting
ahead, the system turns the high beams
off. Low beams remain on.
A camera sensor, centrally mounted
behind the windshield of your vehicle,
continuously monitors conditions to turn
the high beams on and off.
SWITCHING AUTOMATIC HIGH
BEAM CONTROL ON AND OFF WARNING: Do not use the system
in poor visibility, for example fog, heavy
rain, spray or snow.
1. Press
Settings on the touchscreen.
2. Press
Vehicle.
3. Press
Lighting.
Activating the Automatic High
Beam Control Switch the lighting control to the
autolamps position. See
Autolamps
(page 88).
Note: The lighting control defaults to
autolamps each time you switch your
vehicle on.
When active, the high beams turn on if:
• The ambient light level is low enough.
• There is no traffic in front of your
vehicle.
• The vehicle speed is greater than
approximately
32 mph (51 km/h). When active, the high beams turn off if:
•
The ambient light level is high enough
that high beams are not required.
• The system detects an approaching
vehicle's headlamps or tail lamps.
• The system detects severe rain, snow
or fog.
• The camera is blocked.
• The vehicle speed falls below
approximately
27 mph (44 km/h).
Note: The deactivation speed is lower on
curves.
Note: High beam reactivation may be
delayed in certain curvy road situations.
Note: The system may not operate properly
if the sensor is blocked. Keep the windshield
free from obstruction or damage.
Note: The system may not operate properly
in cold or inclement conditions. You can
switch on the high beams by overriding the
system.
Note: If the system detects a blockage, for
example bird droppings, bug splatter, snow
or ice, the system goes into low beam mode
until you clear the blockage. A message may
appear in the information display if the
camera is blocked.
Note: Using much larger tires or equipping
vehicle accessories such as snowplows can
modify your vehicle's ride height and
degrade automatic high beam control
performance.
AUTOMATIC HIGH BEAM
CONTROL INDICATORS The indicator illuminates to
confirm when the system is
ready to assist.
94
Explorer (CTW), enUSA, Edition date: 202007, Second-Printing Automatic High Beam ControlE281240
Page 144 of 577
Switching the Air Conditioning On
and Off
Press and release the button.
Use air conditioning with recirculated air
to improve cooling performance and
efficiency.
Note: In certain conditions, for example,
maximum defrost, the air conditioning
compressor may continue to operate even
though you switch off the air conditioning.
Note: The A/C LED light may turn on and
off based on the temperature setting or the
current conditions.
Switching the Climate Control On
and Off Press and release the button.
Switching Maximum Air
Conditioning On and Off Press and release the button for
maximum cooling.
The driver and passenger temperatures
are set to LO, recirculated air flows through
the instrument panel air vents, air
conditioning turns on and the blower motor
adjusts to the highest speed.
Switching Maximum Defrost On
and Off Press and release the button for
maximum defrosting.
The driver and passenger temperatures
are set to HI, air flows through the
windshield air vents, and the blower motor
adjusts to the highest speed. Note:
Depending on your region, air
conditioning turns on.
You can also use this setting to defog and
clear the windshield of a thin covering of
ice.
Note: To prevent window fogging, you
cannot select recirculated air when
maximum defrost is on.
Note: The heated rear window also turns
on when you select maximum defrost.
Switching Recirculated Air On and
Off Press and release the button to
switch between outside air and
recirculated air.
The air currently in the passenger
compartment recirculates. This may
reduce the time needed to cool the interior,
when used with A/C, and reduce unwanted
odors from entering your vehicle.
Note: Recirculated air may turn off, or
prevent you from switching on, in all air flow
modes except
MAX A/C to reduce the risk
of fogging. Recirculation may also turn on
and off in various air distribution control
combinations during hot weather to improve
cooling efficiency.
HINTS ON CONTROLLING THE
INTERIOR CLIMATE
General Hints
Note: Prolonged use of recirculated air may
cause the windows to fog up.
Note: You may feel a small amount of air
from the footwell air vents regardless of the
air distribution setting.
Note: To reduce humidity build-up inside
your vehicle, do not drive with the system
switched off or with recirculated air always
switched on.
141
Explorer (CTW), enUSA, Edition date: 202007, Second-Printing Climate Control
Page 184 of 577
Note:
Note when in Sport mode it can be
enabled by pressing the Auto-Start-Stop
button. The green Auto-Start-Stop
indicator light on the instrument
cluster will illuminate to indicate
when the automatic engine stop occurs. If the instrument cluster is
equipped with a grey
Auto-Start-Stop indicator light,
it illuminates when automatic engine stop
is not available due to one of the above
noted conditions not being met.
Automatic Engine Restart
Any of the following conditions will result
in an automatic restart of the engine:
• You have removed your foot from the
brake pedal.
• You press the accelerator pedal.
• You press the accelerator and the
brake pedal at the same time.
• The driver safety belt becomes
unfastened or the driver door is ajar.
• Your vehicle is moving.
• The interior compartment does not
meet customer comfort when air
conditioning or heat is on.
• Fogging of the windows could occur
and the air conditioning is on.
• The battery is not within optimal
operating conditions.
• You have exceeded the maximum
engine off time.
• When you press the Auto-Start-Stop
button with the engine automatically
stopped.
• The front defroster is turned to the Max
setting.
• When you shift into park (P), the engine
will restart. Any of the following conditions may result
in an automatic restart of the engine:
•
You have increased the blower fan
speed or changed the climate control
temperature.
• You have an electrical accessory
turned on or plugged in.
Note: You may notice that the climate seat
fan fluctuates during an automatic restart.
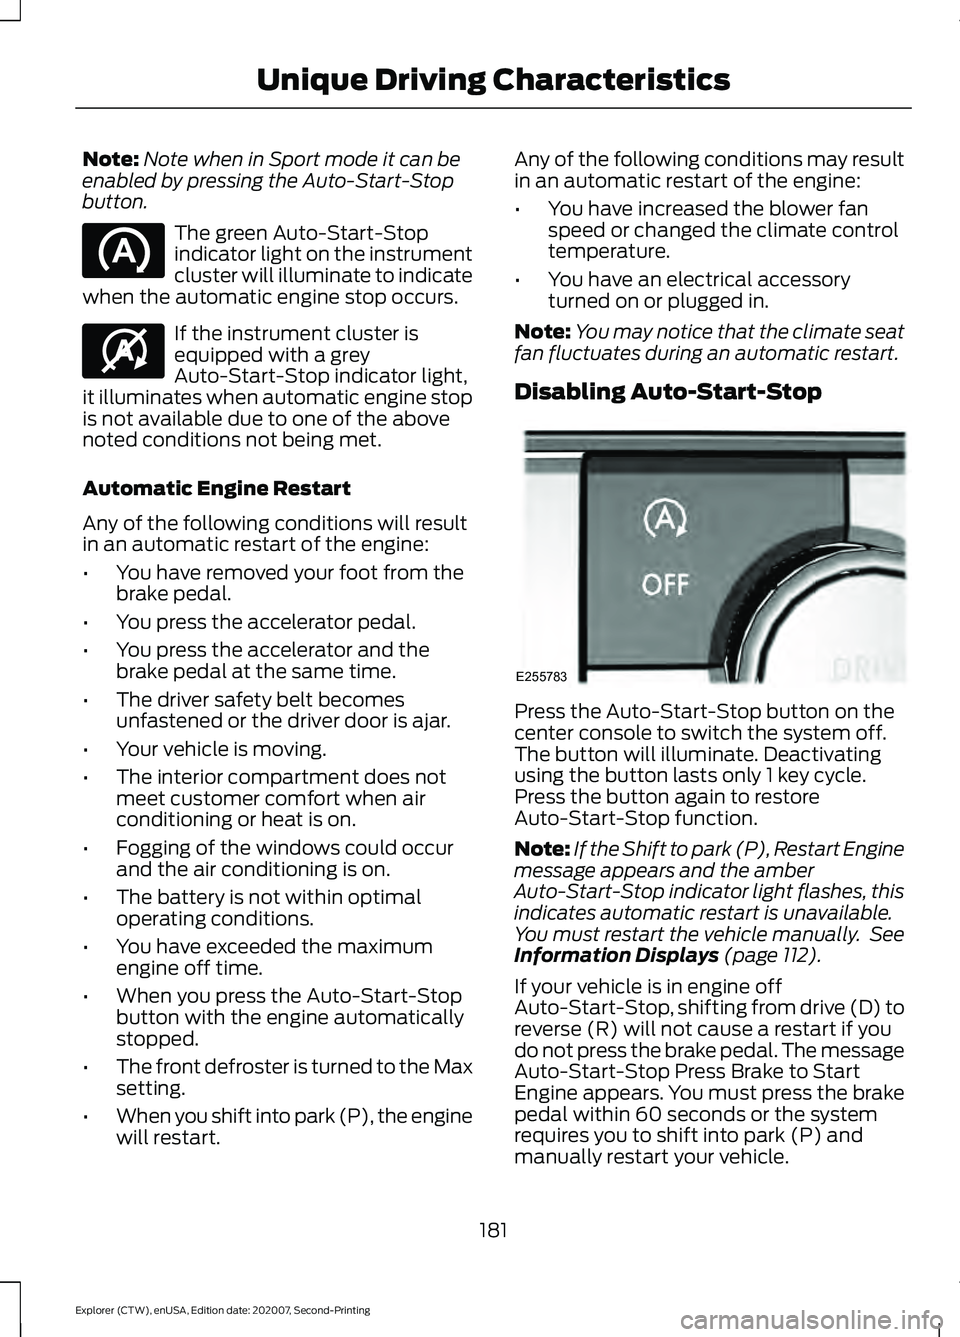
Disabling Auto-Start-Stop Press the Auto-Start-Stop button on the
center console to switch the system off.
The button will illuminate. Deactivating
using the button lasts only 1 key cycle.
Press the button again to restore
Auto-Start-Stop function.
Note:
If the Shift to park (P), Restart Engine
message appears and the amber
Auto-Start-Stop indicator light flashes, this
indicates automatic restart is unavailable.
You must restart the vehicle manually. See
Information Displays (page 112).
If your vehicle is in engine off
Auto-Start-Stop, shifting from drive (D) to
reverse (R) will not cause a restart if you
do not press the brake pedal. The message
Auto-Start-Stop Press Brake to Start
Engine appears. You must press the brake
pedal within 60 seconds or the system
requires you to shift into park (P) and
manually restart your vehicle.
181
Explorer (CTW), enUSA, Edition date: 202007, Second-Printing Unique Driving Characteristics E146361 E255783