2021 FORD BRONCO SPORT tires
[x] Cancel search: tiresPage 322 of 471
5.
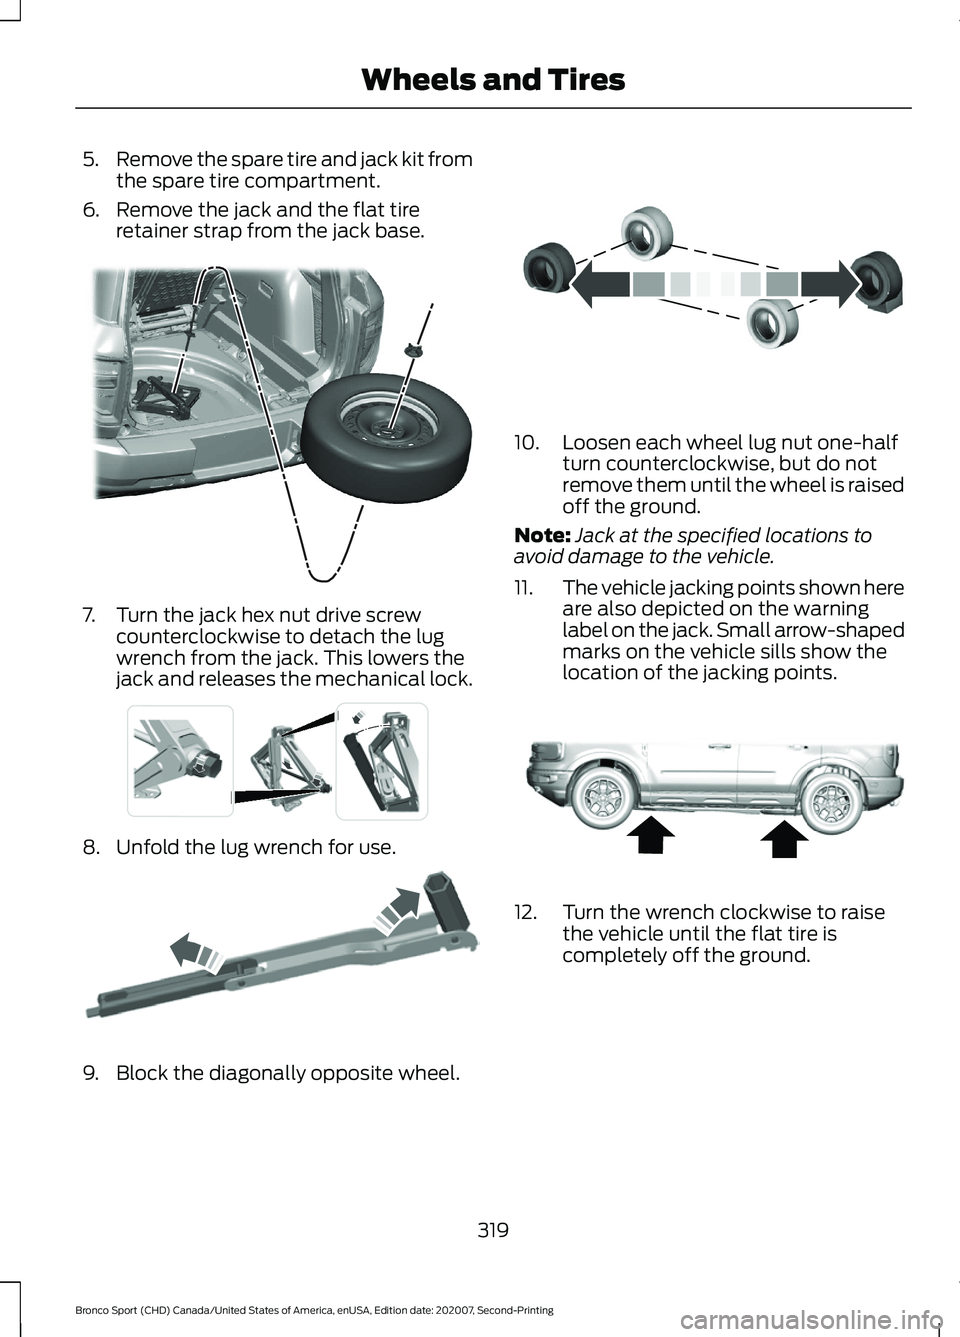
Remove the spare tire and jack kit from
the spare tire compartment.
6. Remove the jack and the flat tire retainer strap from the jack base. 7. Turn the jack hex nut drive screw
counterclockwise to detach the lug
wrench from the jack. This lowers the
jack and releases the mechanical lock. 8. Unfold the lug wrench for use.
9. Block the diagonally opposite wheel. 10. Loosen each wheel lug nut one-half
turn counterclockwise, but do not
remove them until the wheel is raised
off the ground.
Note: Jack at the specified locations to
avoid damage to the vehicle.
11. The vehicle jacking points shown here
are also depicted on the warning
label on the jack. Small arrow-shaped
marks on the vehicle sills show the
location of the jacking points. 12. Turn the wrench clockwise to raise
the vehicle until the flat tire is
completely off the ground.
319
Bronco Sport (CHD) Canada/United States of America, enUSA, Edition date: 202007, Second-Printing Wheels and TiresE323462 E337330 E181744 E142551 E322803
Page 323 of 471
13. Remove the lug nuts with the lug
wrench.
Note: For vehicles with full wheel covers
with exposed wheel nuts, remove the wheel
nuts prior to removing the wheel cover or
damage to the wheel cover may occur.
14. Replace the flat tire with the spare tire, making sure the valve stem is
facing outward. Reinstall the lug nuts
until the wheel is snug against the
hub. Do not fully tighten the lug nuts
until the wheel has been lowered.
15. Lower the wheel by turning the jack handle counterclockwise.
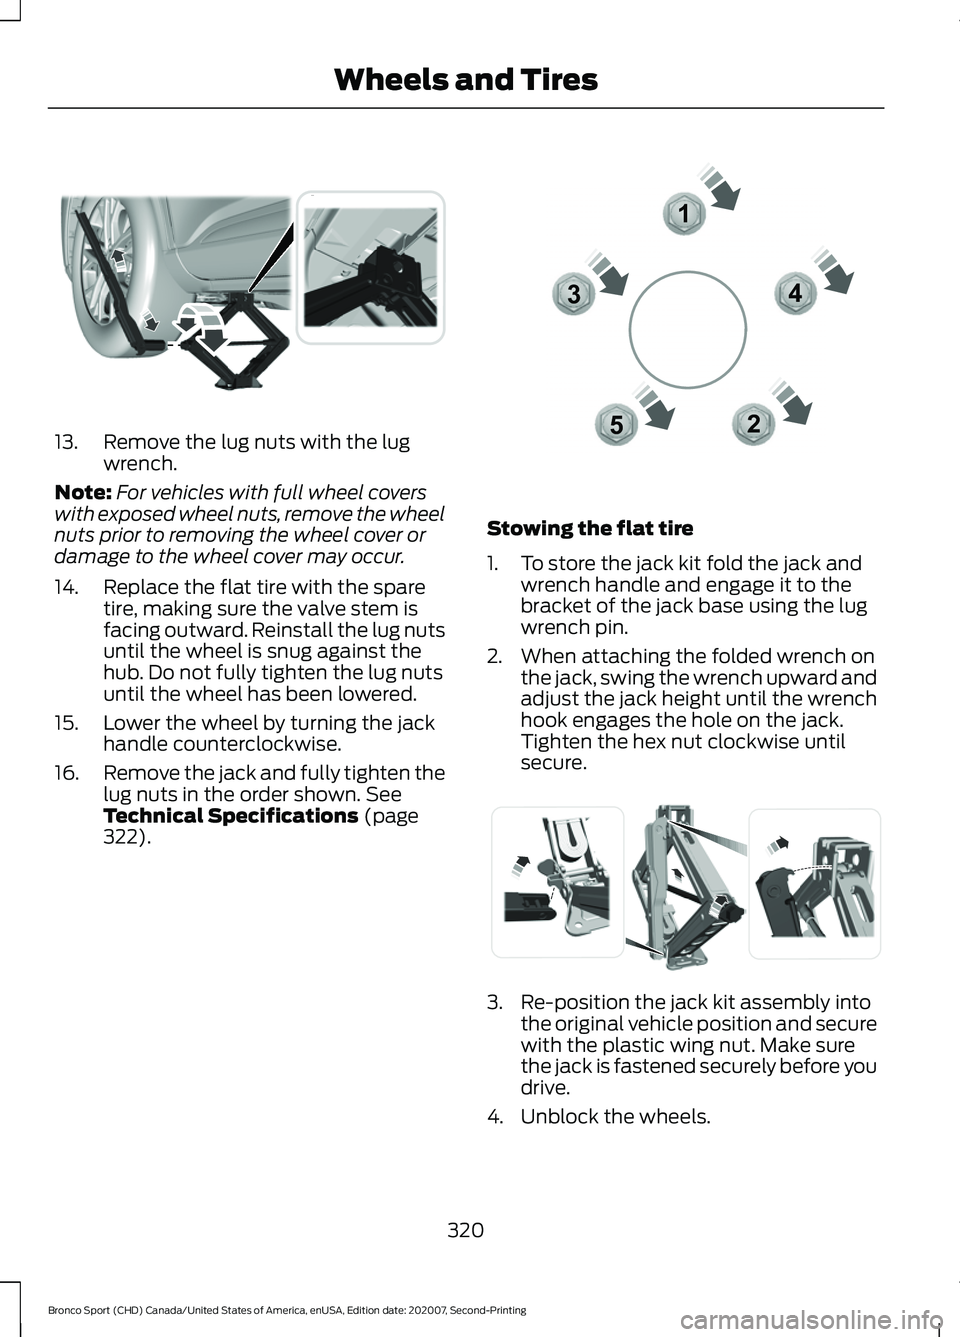
16. Remove the jack and fully tighten the
lug nuts in the order shown. See
Technical Specifications (page
322). Stowing the flat tire
1. To store the jack kit fold the jack and
wrench handle and engage it to the
bracket of the jack base using the lug
wrench pin.
2. When attaching the folded wrench on the jack, swing the wrench upward and
adjust the jack height until the wrench
hook engages the hole on the jack.
Tighten the hex nut clockwise until
secure. 3. Re-position the jack kit assembly into
the original vehicle position and secure
with the plastic wing nut. Make sure
the jack is fastened securely before you
drive.
4. Unblock the wheels.
320
Bronco Sport (CHD) Canada/United States of America, enUSA, Edition date: 202007, Second-Printing Wheels and TiresE294119 12
3
4
5E306781 E294121
Page 324 of 471
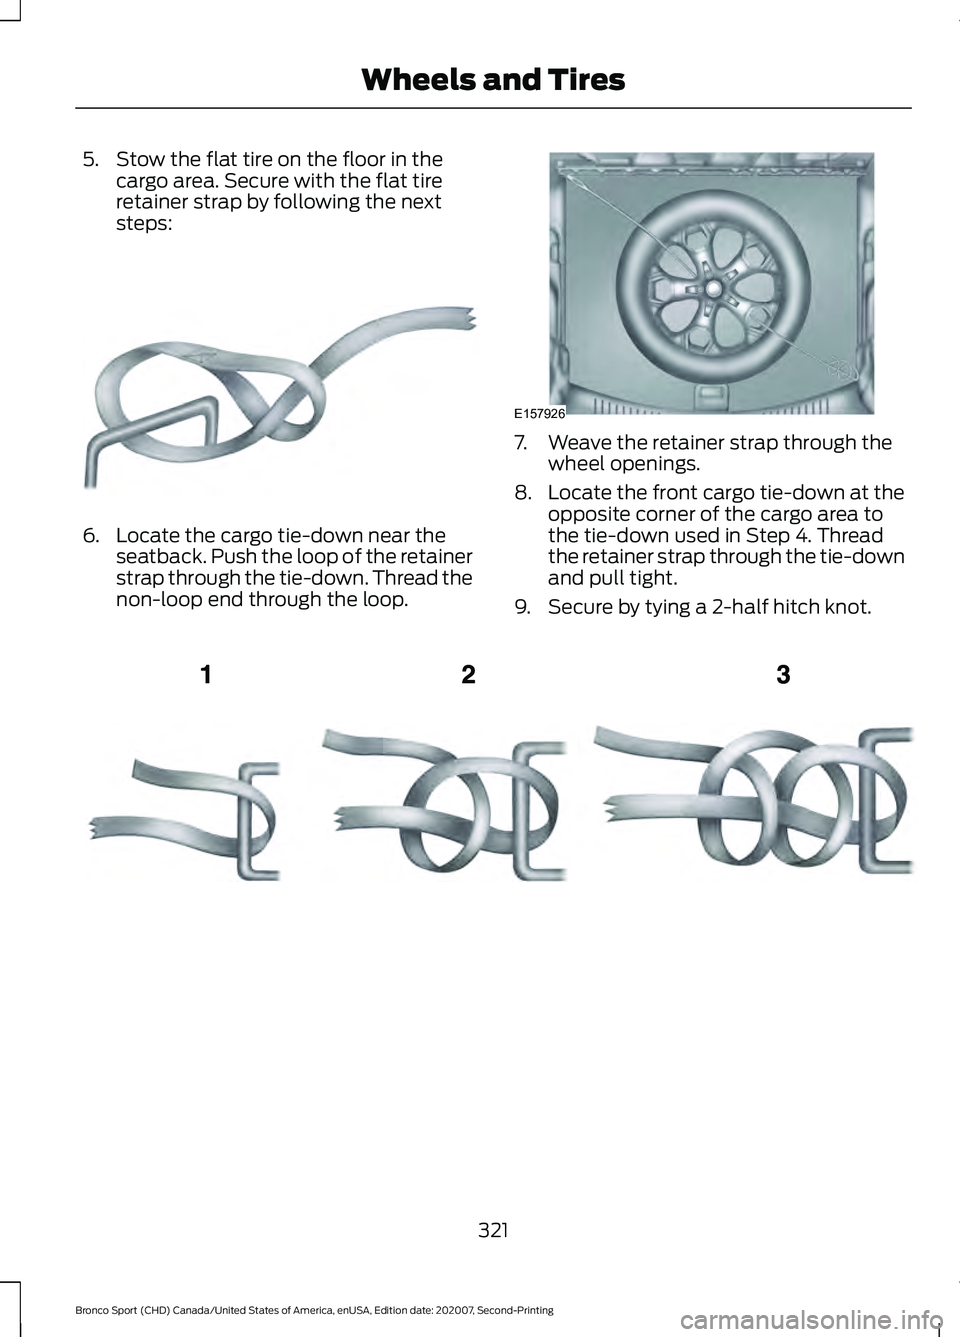
5. Stow the flat tire on the floor in the
cargo area. Secure with the flat tire
retainer strap by following the next
steps: 6. Locate the cargo tie-down near the
seatback. Push the loop of the retainer
strap through the tie-down. Thread the
non-loop end through the loop. 7. Weave the retainer strap through the
wheel openings.
8. Locate the front cargo tie-down at the
opposite corner of the cargo area to
the tie-down used in Step 4. Thread
the retainer strap through the tie-down
and pull tight.
9. Secure by tying a 2-half hitch knot. 321
Bronco Sport (CHD) Canada/United States of America, enUSA, Edition date: 202007, Second-Printing Wheels and TiresE142906 E157926 E143746
Page 325 of 471
TECHNICAL SPECIFICATIONS
Wheel Lug Nut Torque Specifications
WARNING: When you install a wheel, always remove any corrosion, dirt or foreign
materials present on the mounting surfaces of the wheel or the surface of the wheel
hub, brake drum or brake disc that contacts the wheel. Make sure to secure any fasteners
that attach the rotor to the hub so they do not interfere with the mounting surfaces of
the wheel. Installing wheels without correct metal-to-metal contact at the wheel
mounting surfaces can cause the wheel nuts to loosen and the wheel to come off while
your vehicle is in motion, resulting in loss of vehicle control, personal injury or death. Ib-ft (Nm)
*
Bolt size
100 lb.ft (135 Nm)
M12 x 1.5
* Torque specifications are for nut and bolt threads free of dirt and rust. Use only Ford
recommended replacement fasteners.
Retighten the lug nuts to the specified torque within 100 mi (160 km) after any wheel
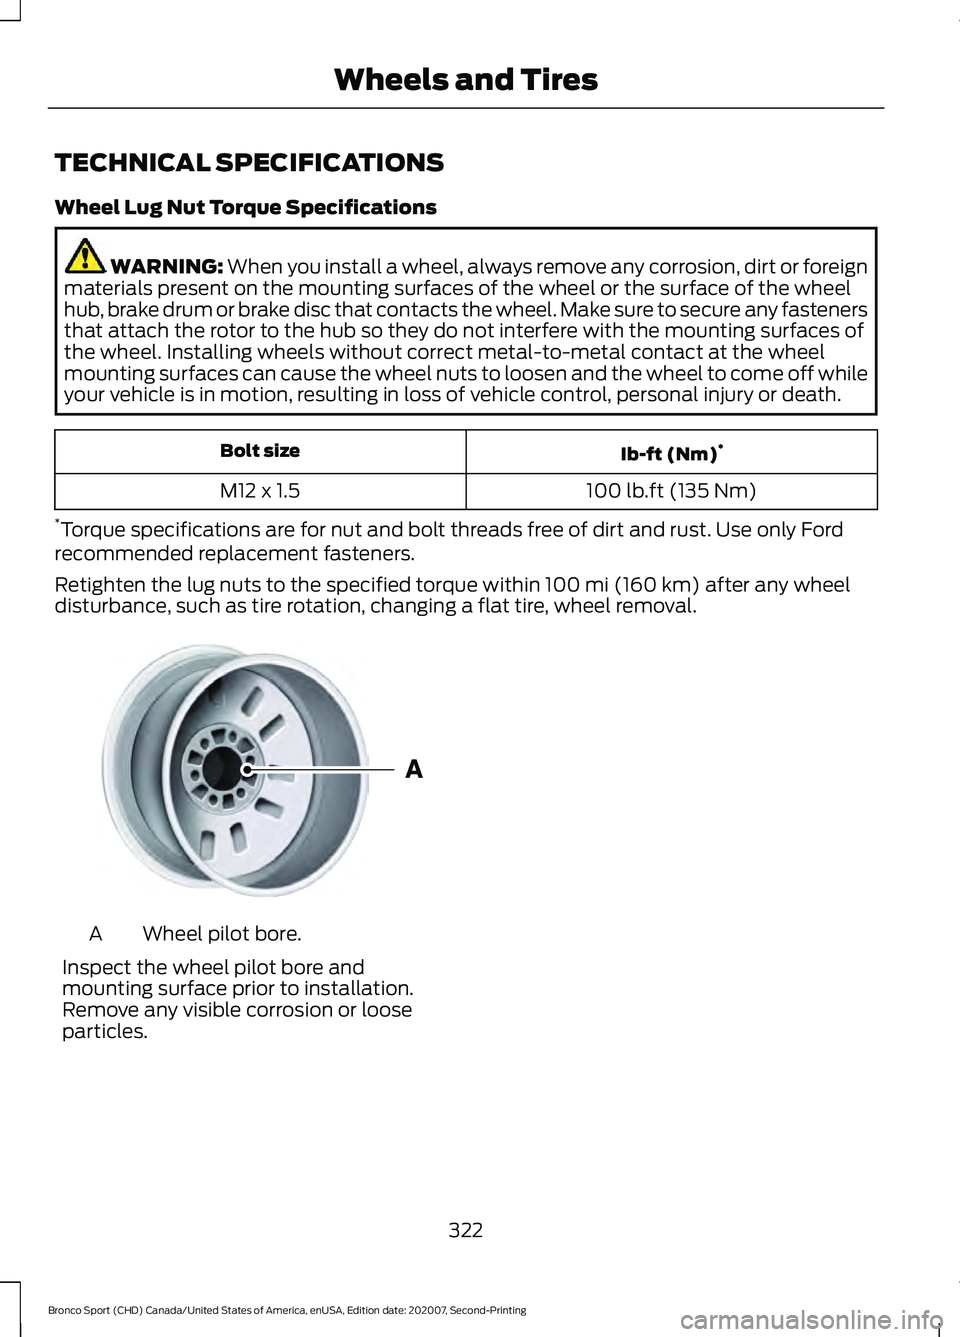
disturbance, such as tire rotation, changing a flat tire, wheel removal. Wheel pilot bore.
A
Inspect the wheel pilot bore and
mounting surface prior to installation.
Remove any visible corrosion or loose
particles.
322
Bronco Sport (CHD) Canada/United States of America, enUSA, Edition date: 202007, Second-Printing Wheels and TiresE145950
Page 400 of 471
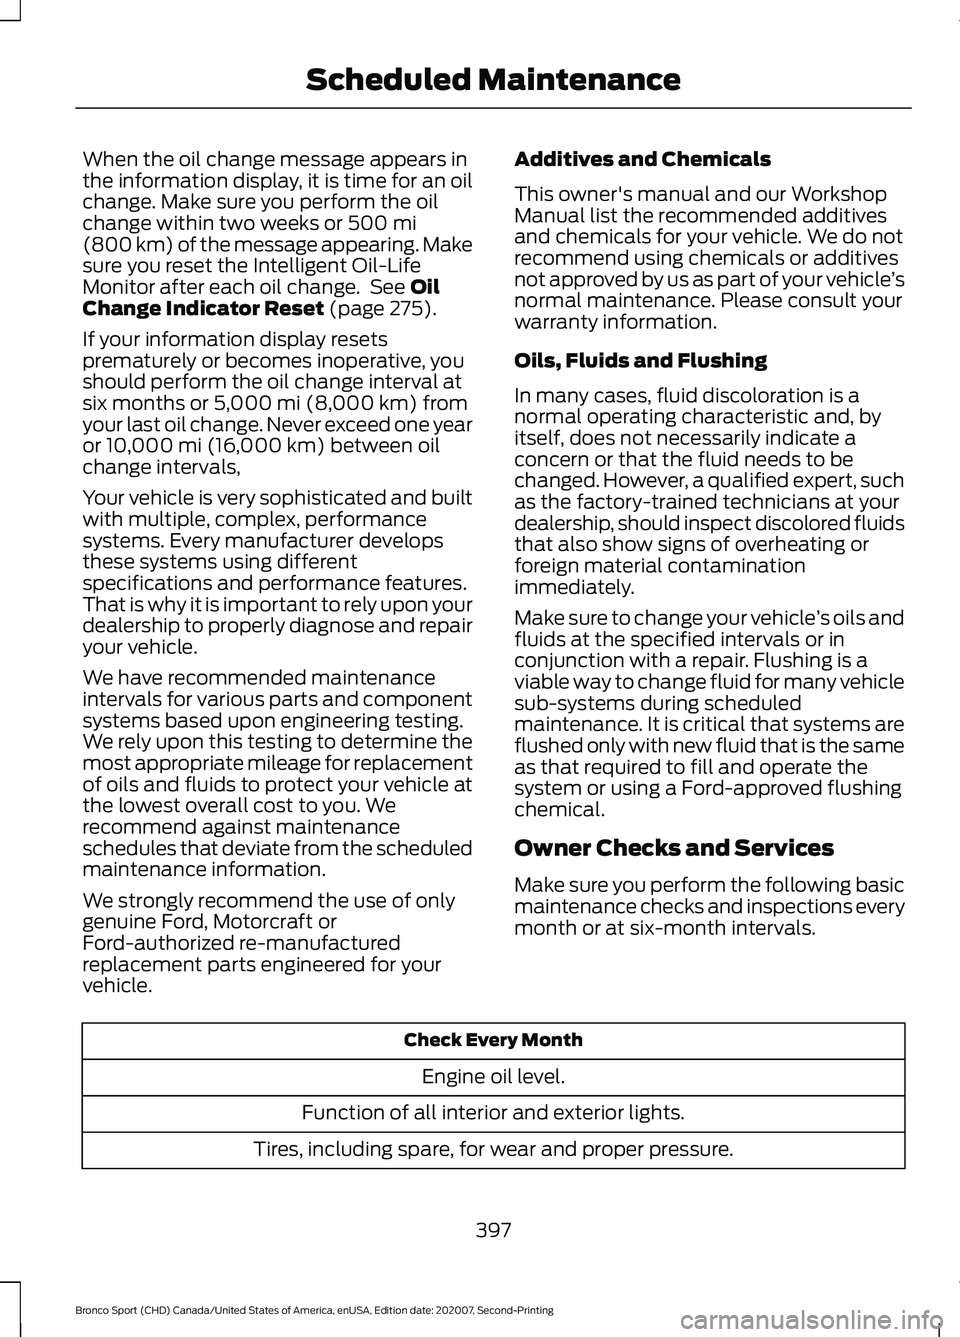
When the oil change message appears in
the information display, it is time for an oil
change. Make sure you perform the oil
change within two weeks or 500 mi
(800 km) of the message appearing. Make
sure you reset the Intelligent Oil-Life
Monitor after each oil change. See
Oil
Change Indicator Reset (page 275).
If your information display resets
prematurely or becomes inoperative, you
should perform the oil change interval at
six months or
5,000 mi (8,000 km) from
your last oil change. Never exceed one year
or
10,000 mi (16,000 km) between oil
change intervals,
Your vehicle is very sophisticated and built
with multiple, complex, performance
systems. Every manufacturer develops
these systems using different
specifications and performance features.
That is why it is important to rely upon your
dealership to properly diagnose and repair
your vehicle.
We have recommended maintenance
intervals for various parts and component
systems based upon engineering testing.
We rely upon this testing to determine the
most appropriate mileage for replacement
of oils and fluids to protect your vehicle at
the lowest overall cost to you. We
recommend against maintenance
schedules that deviate from the scheduled
maintenance information.
We strongly recommend the use of only
genuine Ford, Motorcraft or
Ford-authorized re-manufactured
replacement parts engineered for your
vehicle. Additives and Chemicals
This owner's manual and our Workshop
Manual list the recommended additives
and chemicals for your vehicle. We do not
recommend using chemicals or additives
not approved by us as part of your vehicle
’s
normal maintenance. Please consult your
warranty information.
Oils, Fluids and Flushing
In many cases, fluid discoloration is a
normal operating characteristic and, by
itself, does not necessarily indicate a
concern or that the fluid needs to be
changed. However, a qualified expert, such
as the factory-trained technicians at your
dealership, should inspect discolored fluids
that also show signs of overheating or
foreign material contamination
immediately.
Make sure to change your vehicle ’s oils and
fluids at the specified intervals or in
conjunction with a repair. Flushing is a
viable way to change fluid for many vehicle
sub-systems during scheduled
maintenance. It is critical that systems are
flushed only with new fluid that is the same
as that required to fill and operate the
system or using a Ford-approved flushing
chemical.
Owner Checks and Services
Make sure you perform the following basic
maintenance checks and inspections every
month or at six-month intervals. Check Every Month
Engine oil level.
Function of all interior and exterior lights.
Tires, including spare, for wear and proper pressure.
397
Bronco Sport (CHD) Canada/United States of America, enUSA, Edition date: 202007, Second-Printing Scheduled Maintenance
Page 402 of 471
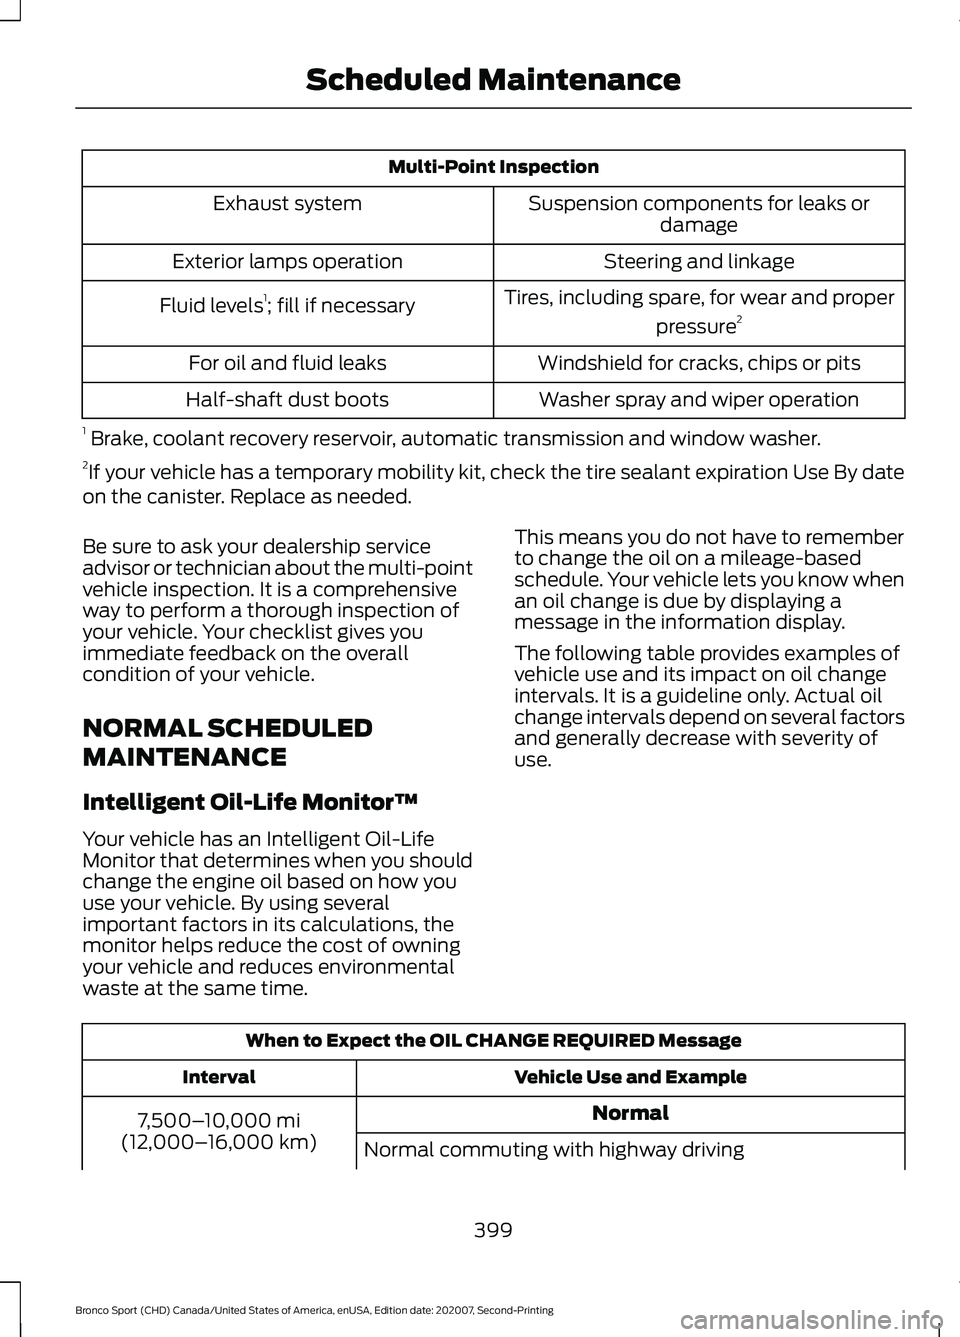
Multi-Point Inspection
Suspension components for leaks ordamage
Exhaust system
Steering and linkage
Exterior lamps operation
Tires, including spare, for wear and properpressure2
Fluid levels 1
; fill if necessary
Windshield for cracks, chips or pits
For oil and fluid leaks
Washer spray and wiper operation
Half-shaft dust boots
1 Brake, coolant recovery reservoir, automatic transmission and window washer.
2 If your vehicle has a temporary mobility kit, check the tire sealant expiration Use By date
on the canister. Replace as needed.
Be sure to ask your dealership service
advisor or technician about the multi-point
vehicle inspection. It is a comprehensive
way to perform a thorough inspection of
your vehicle. Your checklist gives you
immediate feedback on the overall
condition of your vehicle.
NORMAL SCHEDULED
MAINTENANCE
Intelligent Oil-Life Monitor™
Your vehicle has an Intelligent Oil-Life
Monitor that determines when you should
change the engine oil based on how you
use your vehicle. By using several
important factors in its calculations, the
monitor helps reduce the cost of owning
your vehicle and reduces environmental
waste at the same time. This means you do not have to remember
to change the oil on a mileage-based
schedule. Your vehicle lets you know when
an oil change is due by displaying a
message in the information display.
The following table provides examples of
vehicle use and its impact on oil change
intervals. It is a guideline only. Actual oil
change intervals depend on several factors
and generally decrease with severity of
use.
When to Expect the OIL CHANGE REQUIRED Message
Vehicle Use and Example
Interval
Normal
7,500– 10,000 mi
(12,000– 16,000 km)
Normal commuting with highway driving
399
Bronco Sport (CHD) Canada/United States of America, enUSA, Edition date: 202007, Second-Printing Scheduled Maintenance
Page 403 of 471
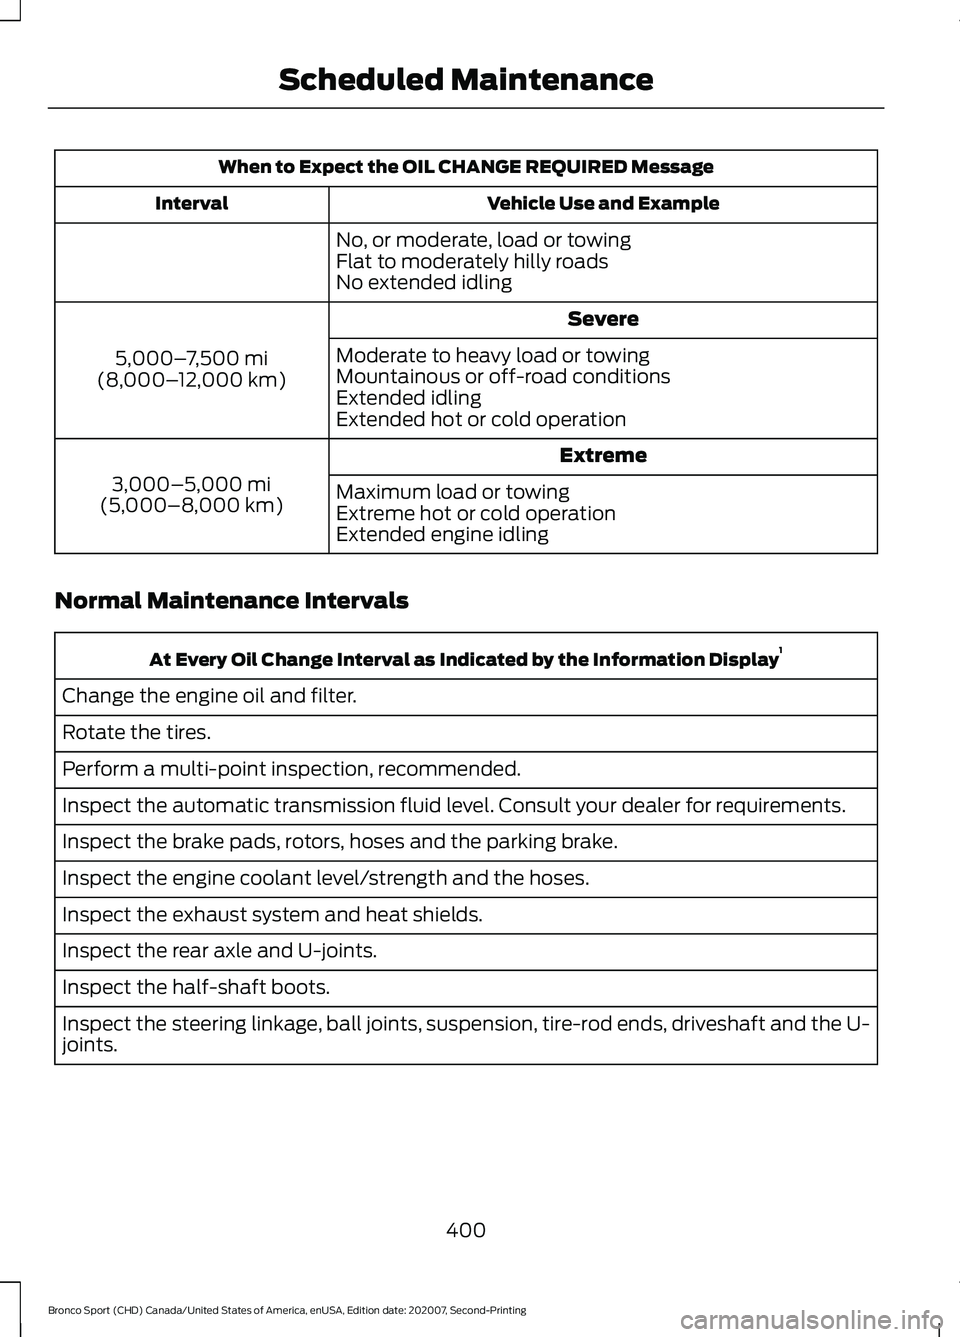
When to Expect the OIL CHANGE REQUIRED Message
Vehicle Use and Example
Interval
No, or moderate, load or towing
Flat to moderately hilly roads
No extended idling Severe
5,000– 7,500 mi
(8,000– 12,000 km) Moderate to heavy load or towing
Mountainous or off-road conditions
Extended idling
Extended hot or cold operation
Extreme
3,000–5,000 mi
(5,000–8,000 km) Maximum load or towing
Extreme hot or cold operation
Extended engine idling
Normal Maintenance Intervals At Every Oil Change Interval as Indicated by the Information Display
1
Change the engine oil and filter.
Rotate the tires.
Perform a multi-point inspection, recommended.
Inspect the automatic transmission fluid level. Consult your dealer for requirements.
Inspect the brake pads, rotors, hoses and the parking brake.
Inspect the engine coolant level/strength and the hoses.
Inspect the exhaust system and heat shields.
Inspect the rear axle and U-joints.
Inspect the half-shaft boots.
Inspect the steering linkage, ball joints, suspension, tire-rod ends, driveshaft and the U-
joints.
400
Bronco Sport (CHD) Canada/United States of America, enUSA, Edition date: 202007, Second-Printing Scheduled Maintenance
Page 404 of 471

At Every Oil Change Interval as Indicated by the Information Display
1
Inspect the tires, tire wear and measure the tread depth.
Inspect the wheels and related components for abnormal noise, wear, looseness or
drag.
1 Do not exceed one year or 10,000 mi (16,000 km) between service intervals. Brake Fluid Maintenance
1
Change the brake fluid. 2
Every 3 Years
1 Perform this maintenance item every 3 years. Do not exceed the designated time for the
interval.
2 Brake fluid servicing requires special equipment available at your authorized dealer. Other Maintenance Items
1
Replace the cabin air filter.
Every
20,000 mi
(32,000 km)
Replace the engine air filter.
Every
30,000 mi
(48,000 km)
Replace the spark plugs.
Every
100,000 mi
(160,000 km) Inspect the accessory drive belt(s). 2
Change the automatic transmission fluid.
Every
150,000 mi
(240,000 km) Replace the accessory drive belt(s). 3
Replace the timing belt (1.5L engine).
Change the engine coolant. 4
At
200,000 mi
(322,000 km)
1 Perform these maintenance items within
3,000 mi (4,800 km) of the last engine oil and
filter change. Do not exceed the designated distance for the interval.
2 After initial inspection, inspect every other oil change until replaced.
3 If not replaced within the last
100,000 mi (160,000 km).
4 Initial replacement at 10 years or
200,000 mi (322,000 km), then every five years or
100,000 mi (160,000 km).
401
Bronco Sport (CHD) Canada/United States of America, enUSA, Edition date: 202007, Second-Printing Scheduled Maintenance