2021 CHRYSLER 300 wheel
[x] Cancel search: wheelPage 4 of 268
2
INTRODUCTION
SYMBOLS KEY ...........................................................8
VEHICLE MODIFICATIONS/ALTERATIONS .. ...........8
SYMBOL GLOSSARY.. ...............................................8
GETTING TO KNOW YOUR VEHICLE
KEYS ....................................................................... 12
Key Fob .............................................................12
S
ENTRY KEY . . ......................................................... 14
IGNITION SWITCH .. ................................................ 15
Keyless Enter ‘n Go™ — Ignition.. ....................15
REMOTE START — IF EQUIPPED . . ........................ 16
How To Use Remote Start .. ..............................16
To Exit Remote Start Mode . . ...........................17
Remote Start Front Defrost Activation —
If Equipped. .
......................................................17
Remote Start Comfort Systems —
If Equipped. .
......................................................17
Remote Start Cancel Message . . ......................18
VEHICLE SECURITY SYSTEM — IF EQUIPPED . . ... 18
To Arm The System .. ........................................18
To Disarm The System . . ...................................19
Rearming Of The System . . ...............................19
Security System Manual Override . . .................19
Tamper Alert . . ...................................................19 DOORS .
...................................................................19
M
anual Door Locks .. ........................................19
Power Door Locks . . .........................................20
Keyless Enter ‘n Go™ — Passive Entry . . .........20
Automatic Unlock Doors On Exit. . ....................22
Automatic Door Locks — If Equipped . . ............22
Child-Protection Door Lock System —
Rear Doors . .
......................................................23
STEERING WHEEL . . ................................................23
Manual Tilt/Telescoping Steering Column —
If Equipped. .
......................................................23
Power Tilt/Telescoping Steering Column —
If Equipped. .
......................................................24
Heated Steering Wheel — If Equipped . . ..........24
UCONNECT VOICE RECOGNITION QUICK TIPS . . .25
Introducing Uconnect .. .....................................25
Basic Voice Commands . . .................................25
Get Started . . .....................................................25
Additional Information . . ...................................25
DRIVER MEMORY SETTINGS — IF EQUIPPED . . ...26
Programming The Memory Feature .. ..............26
Linking And Unlinking The Key Fob To
Memory . ............................................................27
M
emory Position Recall . . .................................27
SEATS . ....................................................................27
M anual Adjustment (Rear Seats) .. ..................27
Power Adjustment (Front Seats) . . ..................28
Heated Seats — If Equipped . . .........................30
Front Ventilated Seats — If Equipped . . ..........31
Head Restraints . . ............................................32 MIRRORS .
.............................................................. 34
I
nside Rearview Mirror.. ................................... 34
Illuminated Vanity Mirrors . . ............................. 34
Outside Mirrors.................................................3 5
D river's Outside Automatic Dimming
Mirror — If Equipped. .
....................................... 35
Outside Mirrors With Turn Signal And
Approach Lighting — If Equipped . .
.................. 35
Power Mirrors . . ................................................. 35
Power Folding Outside Mirrors —
If Equipped . .
.....................................................36
Heated Mirrors — If Equipped . . ....................... 36
Tilt Side Mirrors In Reverse — If Equipped . . ... 36
UNIVERSAL GARAGE DOOR OPENER
(HOMELINK®) . .
..................................................... 37
Before You Begin Programming
HomeLink® . .
.................................................... 37
Erasing All The HomeLink® Channels . . .......... 37
Identifying Whether You Have A Rolling
Code Or Non-Rolling Code Device . .
................. 37
Programming HomeLink® To A Garage
Door Opener . .
................................................... 38
Programming HomeLink® To A
Miscellaneous Device . .
.................................... 38
Reprogramming A Single HomeLink®
Button . .............................................................. 39
C
anadian/Gate Operator Programming . . ....... 39
Page 7 of 268

5
SAFETY
SAFETY FEATURES .............................................. 137
Anti-Lock Brake System (ABS) .. ................... 137
Electronic Brake Control (EBC) System . . ..... 138
AUXILIARY DRIVING SYSTEMS . . ........................ 142
Blind Spot Monitoring (BSM) —
If Equipped. .
................................................... 142
Forward Collision Warning (FCW) With
Mitigation Operation — If Equipped. .
............ 146
Tire Pressure Monitoring System (TPMS) . . .. 148
OCCUPANT RESTRAINT SYSTEMS . . .................. 151
Occupant Restraint Systems Features .. ..... 151
Important Safety Precautions. . ..................... 152
Seat Belt Systems . . ...................................... 152
Supplemental Restraint Systems (SRS) . . .... 158
Child Restraints . . ........................................... 166
SAFETY TIPS . . ....................................................... 176
Transporting Passengers .. ............................ 176
Transporting Pets . . ........................................ 176
Safety Checks You Should Make Inside
The Vehicle . .
................................................. 176
Periodic Safety Checks You Should Make
Outside The Vehicle . .
.................................... 177
Exhaust Gas . . ................................................ 178
Carbon Monoxide Warnings . . ....................... 178
IN CASE OF EMERGENCY
HAZARD WARNING FLASHERS......................... 179
ASSIST AND SOS MIRROR — IF EQUIPPED .. ... 179
JACKING AND TIRE CHANGING .. ....................... 182
Preparations For Jacking .. ........................... 182
Jack Location/Spare Tire Stowage . . ............ 183
Jacking And Changing A Tire . . ..................... 184
JUMP STARTING . . ............................................... 186
Preparations For Jump Start .. ...................... 187
Jump Starting Procedure . . ............................ 188
REFUELING IN AN EMERGENCY –
IF EQUIPPED . .
..................................................... 189
IF YOUR ENGINE OVERHEATS .. ........................ 190
MANUAL PARK RELEASE .. ................................ 190
FREEING A STUCK VEHICLE .. ............................ 192
TOWING A DISABLED VEHICLE .. ....................... 193
All Wheel Drive (AWD) Models .. .................... 194
Rear Wheel Drive (RWD) Models . . ............... 194
ENHANCED ACCIDENT RESPONSE SYSTEM
(EARS) . ................................................................. 194
E
VENT DATA RECORDER (EDR) .. ...................... 194
SERVICING AND MAINTENANCE
SCHEDULED SERVICING ................................... 195
Maintenance Plan .. ....................................... 196
ENGINE COMPARTMENT . . .................................. 199
3.6L Engine .. ................................................ 199
5.7L Engine . . ................................................ 200
Checking Oil Level . . ....................................... 201 Adding Washer Fluid .
.
................................... 201
Maintenance-Free Battery . . ......................... 201
Pressure Washing . . ....................................... 202
VEHICLE MAINTENANCE . . .................................. 202
Engine Oil ...................................................... 202
E ngine Oil Filter . . ........................................... 203
Engine Air Cleaner Filter . . ............................. 203
Air Conditioner Maintenance. . ...................... 204
Accessory Drive Belt Inspection . . ................. 205
Body Lubrication . . ......................................... 206
Windshield Wiper Blades. . ............................ 206
Exhaust System . . ........................................... 208
Cooling System . . ........................................... 209
Brake System . . ............................................. 212
Automatic Transmission . . ............................ 212
All Wheel Drive (AWD) — If Equipped . . ........ 213
Rear Axle. ....................................................... 213
F uses. ............................................................. 214
B ulb Replacement . . ...................................... 221
TIRES . .................................................................... 225
T ire Safety Information .. ............................... 225
Tires — General Information . . ...................... 232
Tire Types. ...................................................... 235
S pare Tires — If Equipped. . ........................... 236
Wheel And Wheel Trim Care. . ....................... 238
Snow Traction Devices. . ................................ 239
Tire Rotation Recommendations . . .............. 240
Page 8 of 268

6
DEPARTMENT OF TRANSPORTATION
UNIFORM TIRE QUALITY GRADES .. .................. 241
Treadwear ...................................................... 241
T raction Grades . . ........................................... 241
Temperature Grades . . ................................... 241
VEHICLE STORAGE . . ............................................ 242
BODYWORK .. ........................................................ 242
Protection From Atmospheric Agents ..
........ 242
Body And Underbody Maintenance. . ............ 242
Preserving The Bodywork . . ........................... 242
INTERIORS . . ......................................................... 243
Seats And Fabric Parts.. ................................ 243
Plastic And Coated Parts . . ............................ 243
Leather Surfaces . . ......................................... 244
Glass Surfaces . . ............................................ 244
TECHNICAL SPECIFICATIONS
VEHICLE IDENTIFICATION NUMBER (VIN)......... 245
BRAKE SYSTEM .. ................................................ 245
WHEEL AND TIRE TORQUE SPECIFICATIONS .. 245
Torque Specifications .. ................................. 245 FUEL REQUIREMENTS .
.
...................................... 246
3.6L Engine .. ................................................. 246
5.7L Engine . . ................................................. 246
Reformulated Gasoline . . ............................... 246
Materials Added To Fuel . . ............................. 246
Gasoline/Oxygenate Blends . . ....................... 247
Do Not Use E-85 In Non-Flex Fuel
Vehicles. ......................................................... 247
C
NG And LP Fuel System Modifications . . .... 247
Methylcyclopentadienyl Manganese
Tricarbonyl (MMT) In Gasoline. .
.................... 247
Fuel System Cautions . . ................................. 248
FLUID CAPACITIES . . ............................................ 248
ENGINE FLUIDS AND LUBRICANTS.. ................. 249
CHASSIS FLUIDS AND LUBRICANTS .. .............. 250
CUSTOMER ASSISTANCE
SUGGESTIONS FOR OBTAINING SERVICE
FOR YOUR VEHICLE .. ......................................... 251
Prepare For The Appointment .. .................... 251
Prepare A List . . .............................................. 251
Be Reasonable With Requests. . ................... 251IF YOU NEED ASSISTANCE .
.
.............................. 251
FCA US LLC Customer Center.. ..................... 251
FCA Canada Inc. Customer Center . . ............ 251
Mexico. ........................................................... 251
P uerto Rico And US Virgin Islands . . ............. 252
Customer Assistance For The Hearing Or
Speech Impaired
(TDD/TTY) . ..................................................... 252
S
ervice Contract . . ......................................... 252
WARRANTY INFORMATION . . .............................. 252
MOPAR® PARTS .. ............................................... 253
REPORTING SAFETY DEFECTS .. ........................ 253
In The 50 United States And
Washington, D.C.. .
......................................... 253
In Canada . ..................................................... 253
P
UBLICATION ORDER FORMS . . ........................ 253
GENERAL INFORMATION.. .................................. 254
Page 19 of 268

GETTING TO KNOW YOUR VEHICLE 17
For security, power window operation is
disabled when the vehicle is in the Remote Start
mode.
Remote Start can only be used twice. The igni -
tion must be placed in the ON/RUN position
b e
fore the Remote Start sequence can be
repeated for a third cycle.
All of the following conditions must be met before
t h
e engine will remote start:
Gear selector in PARK
Doors closed
Hood closed
Trunk closed
Hazard switch off
Brake switch inactive (brake pedal not pressed)
Battery at an acceptable charge level
PANIC button not pushed
System not disabled from previous Remote
Start event
Vehicle Security Light is flashing
Ignition in OFF position
Fuel level meets minimum requirement
Vehicle Security system is not signaling an intru -
sion
Malfunction Indicator Light is not illuminated
TO EXIT REMOTE START MODE
To drive the vehicle after starting the Remote Start
system, either push and release the unlock button
on the key fob to unlock the doors, or unlock the
vehicle using Keyless Enter ‘n Go™ — Passive Entry
via the door handles, and disarm the Vehicle
Security system (if equipped). Then, prior to the
end of the 15 minute cycle, push and release the
S T
ART/STOP ignition button.
The Remote Start system will turn the engine off
wi
th another push and release of the Remote Start
button on the key fob, or if the engine is allowed to
run for the entire 15 minute cycle. Once the
i g
nition is placed in the ON/RUN position, the
climate controls will resume the previously set
operations (temperature, blower control, etc.).
NOTE:
To avoid unintentional shutdowns, the system
will disable for two seconds after receiving a
valid Remote Start request.
For vehicles equipped with the Keyless Enter ‘n
Go™ — Passive Entry feature, the message
“Remote Start Active — Push Start Button” will
display in the instrument cluster display until
you push the START/STOP ignition button.
REMOTE START FRONT DEFROST
A
CTIVATION — IF EQUIPPED
When Remote Start is active, and the outside
ambient temperature is 40°F (4.5°C) or below, the
system will automatically activate front defrost for
15 minutes or less. The time is dependent on the
a m
bient temperature. Once the timer expires, the
system will automatically adjust the settings
depending on ambient conditions. See “Remote
Start Comfort Systems — If Equipped” in the next
section for detailed operation.
REMOTE START COMFORT SYSTEMS —
I
F EQUIPPED
When Remote Start is activated, the front and rear
defrost will automatically turn on in cold weather.
The heated steering wheel and driver heated seat
feature will turn on if selected in the comfort menu
screen within Uconnect Settings
Ú page 122.
WARNING!
Do not start or run an engine in a closed
garage or confined area. Exhaust gas contains
Carbon Monoxide (CO) which is odorless and
colorless. Carbon Monoxide is poisonous and
can cause serious injury or death when
inhaled.
Keep key fobs away from children. Operation
of the Remote Start system, windows, door
locks or other controls could cause serious
injury or death.
2
Page 25 of 268
GETTING TO KNOW YOUR VEHICLE 23
CHILD-PROTECTION DOOR LOCK
S
YSTEM — REAR DOORS
To provide a safer environment for small children
riding in the rear seats, the rear doors are
equipped with Child-Protection Door Lock system.
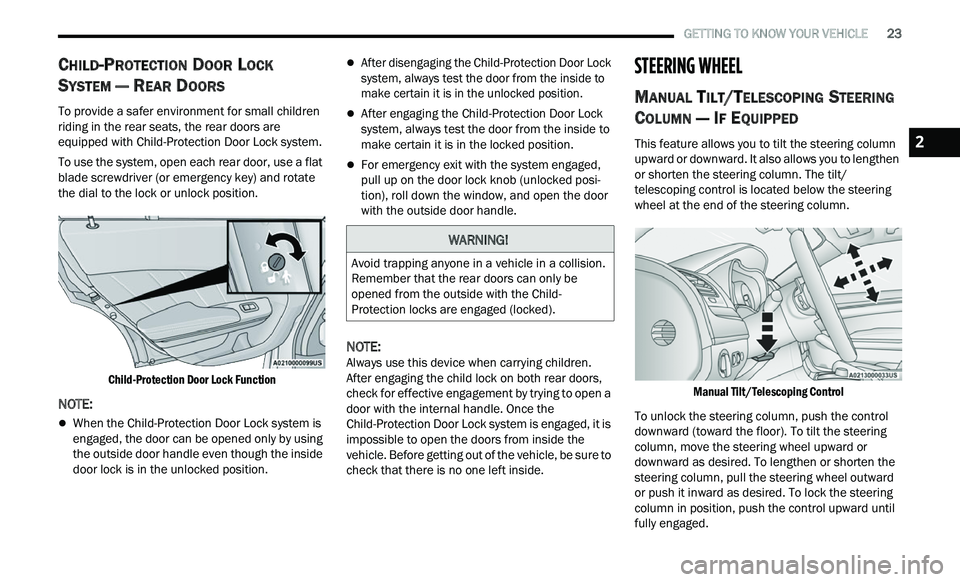
To use the system, open each rear door, use a flat
b l
ade screwdriver (or emergency key) and rotate
the dial to the lock or unlock position.
Child-Protection Door Lock Function
NOTE:
When the Child-Protection Door Lock system is
engaged, the door can be opened only by using
the outside door handle even though the inside
door lock is in the unlocked position.
After disengaging the Child-Protection Door Lock
system, always test the door from the inside to
make certain it is in the unlocked position.
After engaging the Child-Protection Door Lock
system, always test the door from the inside to
make certain it is in the locked position.
For emergency exit with the system engaged,
pull up on the door lock knob (unlocked posi -
tion), roll down the window, and open the door
w i
th the outside door handle.
NOTE:
Always use this device when carrying children.
A f
ter engaging the child lock on both rear doors,
check for effective engagement by trying to open a
door with the internal handle. Once the
Child-Protection Door Lock system is engaged, it is
impossible to open the doors from inside the
vehicle. Before getting out of the vehicle, be sure to
check that there is no one left inside.
STEERING WHEEL
MANUAL TILT/TELESCOPING STEERING
C
OLUMN — IF EQUIPPED
This feature allows you to tilt the steering column
upward or downward. It also allows you to lengthen
or shorten the steering column. The tilt/
telescoping control is located below the steering
wheel at the end of the steering column.
Manual Tilt/Telescoping Control
To unlock the steering column, push the control
dow
nward (toward the floor). To tilt the steering
column, move the steering wheel upward or
downward as desired. To lengthen or shorten the
steering column, pull the steering wheel outward
or push it inward as desired. To lock the steering
column in position, push the control upward until
fully engaged.
WARNING!
Avoid trapping anyone in a vehicle in a collision.
Remember that the rear doors can only be
opened from the outside with the Child-
Protection locks are engaged (locked).
2
Page 26 of 268
24 GETTING TO KNOW YOUR VEHICLE
POWER TILT/TELESCOPING STEERING
C
OLUMN — IF EQUIPPED
This feature allows you to tilt the steering column
upward or downward. It also allows you to lengthen
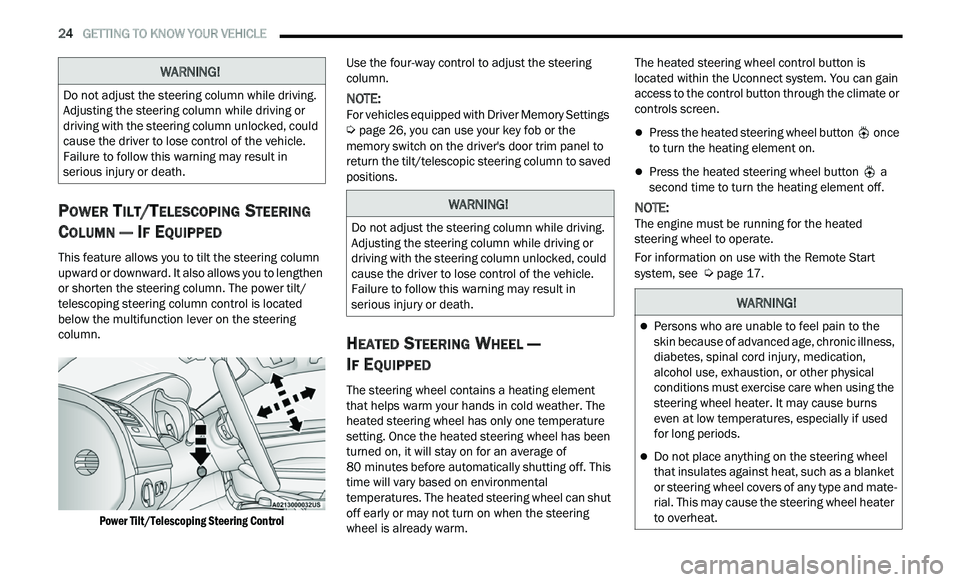
or shorten the steering column. The power tilt/
telescoping steering column control is located
below the multifunction lever on the steering
column.
Power Tilt/Telescoping Steering Control
Use the four-way control to adjust the steering
c
ol
umn.
NOTE:
For vehicles equipped with Driver Memory Settings
Ú page 26, you can use your key fob or the
memory switch on the driver's door trim panel to
r e
turn the tilt/telescopic steering column to saved
positions.
HEATED STEERING WHEEL —
I
F EQUIPPED
The steering wheel contains a heating element
that helps warm your hands in cold weather. The
heated steering wheel has only one temperature
setting. Once the heated steering wheel has been
turned on, it will stay on for an average of
80 minutes before automatically shutting off. This
t i
me will vary based on environmental
temperatures. The heated steering wheel can shut
off early or may not turn on when the steering
wheel is already warm. The heated steering wheel control button is
l
oc
ated within the Uconnect system. You can gain
access to the control button through the climate or
controls screen.
Press the heated steering wheel button once
to turn the heating element on.
Press the heated steering wheel button a
second time to turn the heating element off.
NOTE:
The engine must be running for the heated
s t
eering wheel to operate.
For information on use with the Remote Start
sy
stem, see Ú page 17.
WARNING!
Do not adjust the steering column while driving.
Adjusting the steering column while driving or
driving with the steering column unlocked, could
cause the driver to lose control of the vehicle.
Failure to follow this warning may result in
serious injury or death.
WARNING!
Do not adjust the steering column while driving.
Adjusting the steering column while driving or
driving with the steering column unlocked, could
cause the driver to lose control of the vehicle.
Failure to follow this warning may result in
serious injury or death.
WARNING!
Persons who are unable to feel pain to the
skin because of advanced age, chronic illness,
diabetes, spinal cord injury, medication,
alcohol use, exhaustion, or other physical
conditions must exercise care when using the
steering wheel heater. It may cause burns
even at low temperatures, especially if used
for long periods.
Do not place anything on the steering wheel
that insulates against heat, such as a blanket
or steering wheel covers of any type and mate
-
rial. This may cause the steering wheel heater
t o
overheat.
Page 47 of 268
GETTING TO KNOW YOUR VEHICLE 45
Instrument Panel Dimmer Control
Instrument Panel Dimmer Control
(V
ehicles Sold In Canada Only)
WINDSHIELD WIPERS AND WASHERS
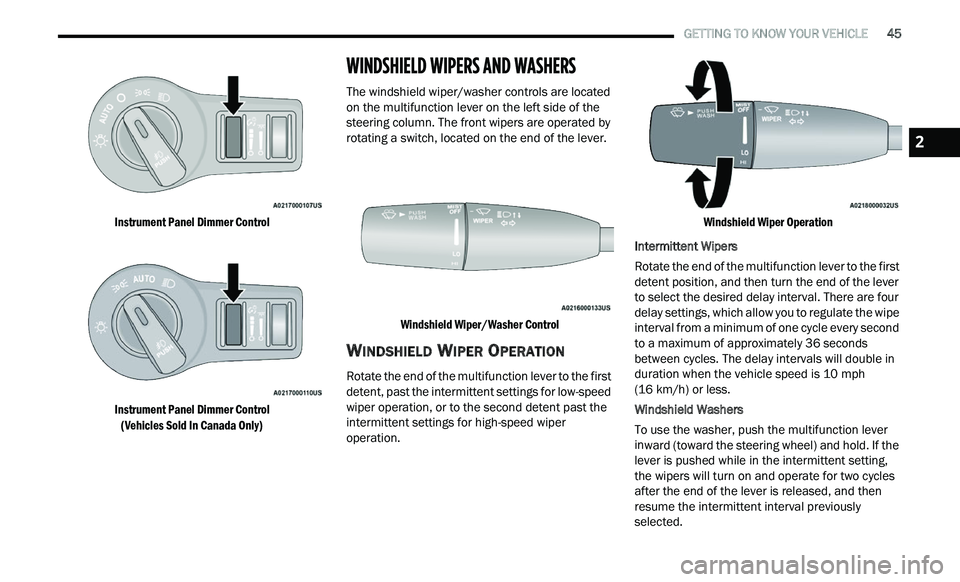
The windshield wiper/washer controls are located
on the multifunction lever on the left side of the
steering column. The front wipers are operated by
rotating a switch, located on the end of the lever.
Windshield Wiper/Washer Control
WINDSHIELD WIPER OPERATION
Rotate the end of the multifunction lever to the first
detent, past the intermittent settings for low-speed
wiper operation, or to the second detent past the
intermittent settings for high-speed wiper
operation.
Windshield Wiper Operation
Intermittent Wipers
Rotate the end of the multifunction lever to the first
de
tent position, and then turn the end of the lever
to select the desired delay interval. There are four
delay settings, which allow you to regulate the wipe
interval from a minimum of one cycle every second
to a maximum of approximately 36 seconds
between cycles. The delay intervals will double in
duration when the vehicle speed is 10 mph
( 1
6 km/h) or less.
Windshield Washers
To use the washer, push the multifunction lever
i n
ward (toward the steering wheel) and hold. If the
lever is pushed while in the intermittent setting,
the wipers will turn on and operate for two cycles
after the end of the lever is released, and then
resume the intermittent interval previously
selected.
2
Page 51 of 268
GETTING TO KNOW YOUR VEHICLE 49
The speeds can be selected using either the
blower control knob on the faceplate or the
buttons on the touchscreen.
Faceplate
The blower speed increases as you turn the blower
c
on
trol knob clockwise from the lowest blower
setting. The blower speed decreases as you turn
the blower control knob counterclockwise.
Touchscreen
Use the small blower icon to reduce the blower
s e
tting and the large blower icon to increase the
blower setting. Blower can also be selected by
pressing the blower bar area between the icons.
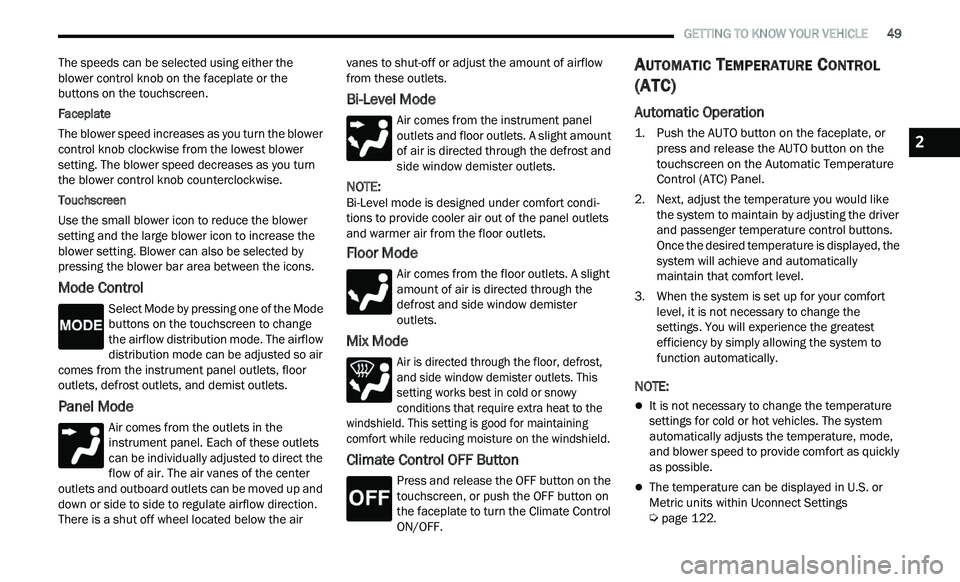
Mode Control
Select Mode by pressing one of the Mode
buttons on the touchscreen to change
t h
e airflow distribution mode. The airflow
distribution mode can be adjusted so air
comes from the instrument panel outlets, floor
outlets, defrost outlets, and demist outlets.
Panel Mode
Air comes from the outlets in the
instrument panel. Each of these outlets
c a
n be individually adjusted to direct the
flow of air. The air vanes of the center
outlets and outboard outlets can be moved up and
down or side to side to regulate airflow direction.
There is a shut off wheel located below the air vanes to shut-off or adjust the amount of airflow
from these outlets.
Bi-Level Mode
Air comes from the instrument panel
outlets and floor outlets. A slight amount
of
air is directed through the defrost and
side window demister outlets.
NOTE:
Bi-Level mode is designed under comfort condi -
tions to provide cooler air out of the panel outlets
a n
d warmer air from the floor outlets.
Floor Mode
Air comes from the floor outlets. A slight
amount of air is directed through the
de
frost and side window demister
outlets.
Mix Mode
Air is directed through the floor, defrost,
and side window demister outlets. This
s e
tting works best in cold or snowy
conditions that require extra heat to the
windshield. This setting is good for maintaining
comfort while reducing moisture on the windshield.
Climate Control OFF Button
Press and release the OFF button on the
touchscreen, or push the OFF button on
t h
e faceplate to turn the Climate Control
ON/OFF.
AUTOMATIC TEMPERATURE CONTROL
(ATC)
Automatic Operation
1. Push the AUTO button on the faceplate, or
press and release the AUTO button on the
touchscreen on the Automatic Temperature
Control (ATC) Panel.
2. Next, adjust the temperature you would like t
he system to maintain by adjusting the driver
and passenger temperature control buttons.
Once the desired temperature is displayed, the
system will achieve and automatically
maintain that comfort level.
3. When the system is set up for your comfort l
evel, it is not necessary to change the
settings. You will experience the greatest
efficiency by simply allowing the system to
function automatically.
NOTE:
It is not necessary to change the temperature
settings for cold or hot vehicles. The system
automatically adjusts the temperature, mode,
and blower speed to provide comfort as quickly
as possible.
The temperature can be displayed in U.S. or
Metric units within Uconnect Settings
Ú page 122.
2