2021 CHRYSLER 300 radio controls
[x] Cancel search: radio controlsPage 32 of 268

30 GETTING TO KNOW YOUR VEHICLE
Easy Entry/Exit Seat — If Equipped
This feature provides automatic driver seat
positioning to enhance driver mobility when
entering and exiting the vehicle.
The distance the driver seat moves depends on
wh
ere you have the driver seat positioned when
you place the vehicle’s ignition in the OFF position.
When you place the vehicle’s ignition in the OFF
position, the driver seat will move about
2.4 inches (60 mm) rearward if the driver seat
pos
ition is greater than or equal to 2.7 inches
( 6
7.7 mm) forward of the rear stop. The seat will
r e
turn to its previously set position when you
place the vehicle’s ignition in the ACC or RUN
position.
The Easy Entry/Easy Exit feature is disabled
when the driver seat position is less than 0.9 of
an inch (22.7 mm) forward of the rear stop. At
th
is position, there is no benefit to the driver by
moving the seat for Easy Exit or Easy Entry.
When enabled in Uconnect Settings, Easy Entry
a n
d Easy Exit positions are stored in each memory
setting profile
Ú page 26.
NOTE:
The Easy Entry/Exit feature is enabled or disabled
t h
rough the programmable features in the
Uconnect system
Ú page 122.
HEATED SEATS — IF EQUIPPED
On some models, the front and rear seats may be
equipped with heaters located in the seat cushions
and seatbacks.
Front Heated Seats
The front heated seat control buttons are located
within the climate or controls screen of the
touchscreen.
You can choose from HI, LO, or OFF heat settings.
Th
e indicator arrows in touchscreen buttons
indicate the level of heat in use. Two indicator arrows will illuminate for HI, and one for LO.
Turning the heating elements off will return the
user to the radio screen.
Press the heated seat button
once to turn
the HI setting on.
Press the heated seat button a second time
to turn the LO setting on.
Press the heated seat button a third time to
turn the heating elements off.
If the HI-level setting is selected, the system will
a u
tomatically switch to LO-level after
approximately 60 minutes of continuous
ope
ration. At that time, the display will change
from HI to LO, indicating the change. The LO-level
setting will turn off automatically after
approximately 45 minutes.
NOTE:
Once a heat setting is selected, heat will be felt
within two to five minutes.
The engine must be running for the heated
seats to operate.
For information on use with the Remote Start
sy
stem, see Ú page 17.
WARNING!
Persons who are unable to feel pain to the
skin because of advanced age, chronic illness,
diabetes, spinal cord injury, medication,
alcohol use, exhaustion or other physical
condition must exercise care when using the
seat heater. It may cause burns even at low
temperatures, especially if used for long
periods of time.
Do not place anything on the seat or seatback
that insulates against heat, such as a blanket
or cushion. This may cause the seat heater to
overheat. Sitting in a seat that has been over
-
heated could cause serious burns due to the
i n
creased surface temperature of the seat.
Page 46 of 268

44 GETTING TO KNOW YOUR VEHICLE
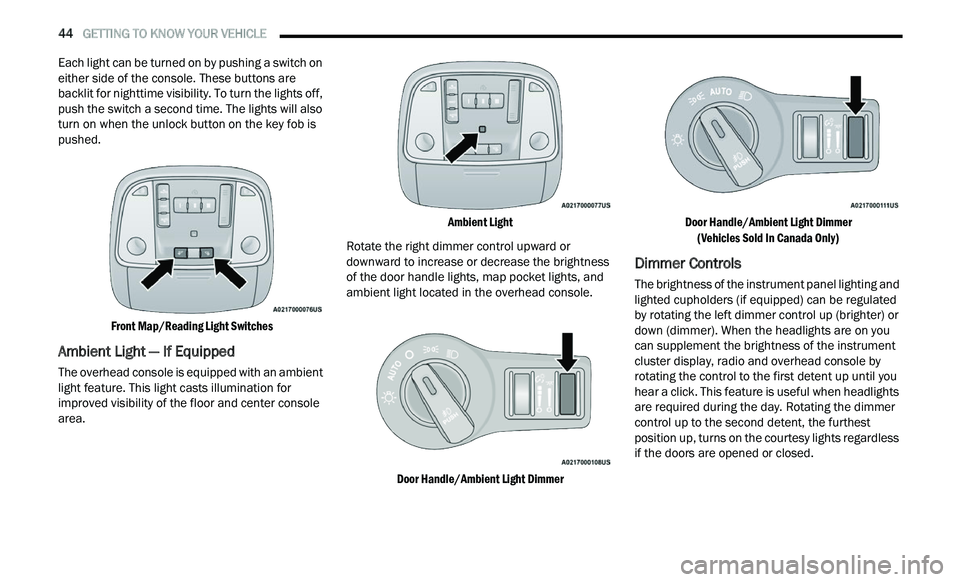
Each light can be turned on by pushing a switch on
either side of the console. These buttons are
backlit for nighttime visibility. To turn the lights off,
push the switch a second time. The lights will also
turn on when the unlock button on the key fob is
pushed.
Front Map/Reading Light Switches
Ambient Light — If Equipped
The overhead console is equipped with an ambient
light feature. This light casts illumination for
improved visibility of the floor and center console
area.
Ambient Light
Rotate the right dimmer control upward or
d ow
nward to increase or decrease the brightness
of the door handle lights, map pocket lights, and
ambient light located in the overhead console.
Door Handle/Ambient Light Dimmer Door Handle/Ambient Light Dimmer
(V
ehicles Sold In Canada Only)
Dimmer Controls
The brightness of the instrument panel lighting and
lighted cupholders (if equipped) can be regulated
by rotating the left dimmer control up (brighter) or
down (dimmer). When the headlights are on you
can supplement the brightness of the instrument
cluster display, radio and overhead console by
rotating the control to the first detent up until you
hear a click. This feature is useful when headlights
are required during the day. Rotating the dimmer
control up to the second detent, the furthest
position up, turns on the courtesy lights regardless
if the doors are opened or closed.
Page 49 of 268

GETTING TO KNOW YOUR VEHICLE 47
The Rain Sensing system has protection features
for the wiper blades and arms, and will not operate
under the following conditions:
Low Ambient Temperature — When the ignition
is first placed in the ON position, the Rain
Sensing system will not operate until the wiper
switch is moved, vehicle speed is greater than
3 mph (5 km/h), or the outside temperature is
gr
eater than 32°F (0°C).
Transmission In NEUTRAL Position — When the
ignition is ON, and the automatic transmission
is in the NEUTRAL position, the Rain Sensing
system will not operate until the wiper switch is
moved, vehicle speed is greater than 3 mph
(5
km/h), or the gear selector is moved out of
t h
e NEUTRAL position.
Remote Start Mode Inhibit — On vehicles
equipped with a Remote Start system, Rain
Sensing wipers are not operational when the
vehicle is in Remote Start mode.
CLIMATE CONTROLS
The Climate Control system allows you to regulate
the temperature, air flow, and direction of air
circulating throughout the vehicle. The controls are
located on the touchscreen (if equipped) and on
the instrument panel below the radio.
AUTOMATIC CLIMATE CONTROL
D
ESCRIPTIONS AND FUNCTIONS
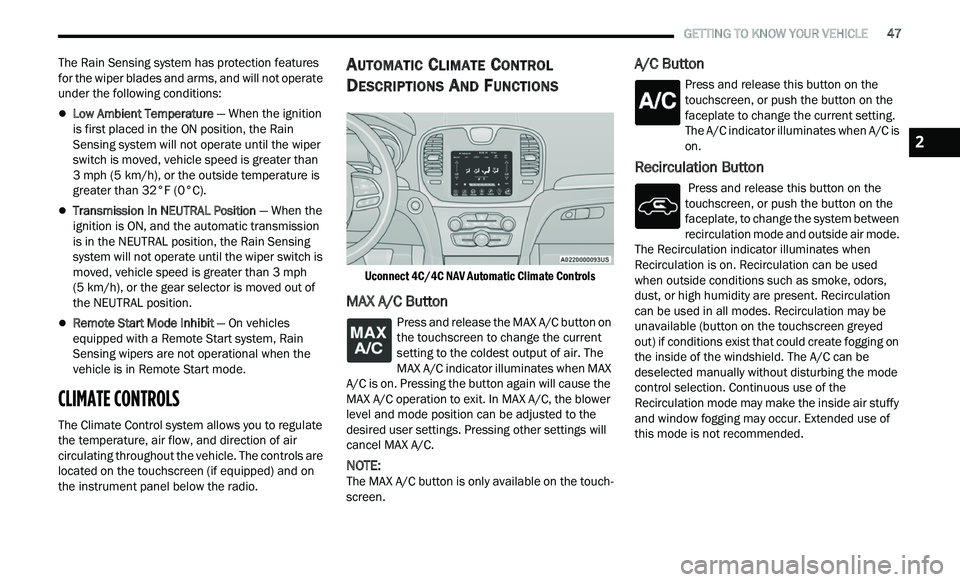
Uconnect 4C/4C NAV Automatic Climate Controls
MAX A/C Button
Press and release the MAX A/C button on
the touchscreen to change the current
s e
tting to the coldest output of air. The
MAX A/C indicator illuminates when MAX
A/C is on. Pressing the button again will cause the
MAX A/C operation to exit. In MAX A/C, the blower
level and mode position can be adjusted to the
desired user settings. Pressing other settings will
cancel MAX A/C.
NOTE:
The MAX A/C button is only available on the touch -
screen.
A/C Button
Press and release this button on the
touchscreen, or push the button on the
f a
ceplate to change the current setting.
The A/C indicator illuminates when A/C is
on.
Recirculation Button
Press and release this button on the
touchscreen, or push the button on the
f a
ceplate, to change the system between
recirculation mode and outside air mode.
The Recirculation indicator illuminates when
Recirculation is on. Recirculation can be used
when outside conditions such as smoke, odors,
dust, or high humidity are present. Recirculation
can be used in all modes. Recirculation may be
unavailable (button on the touchscreen greyed
out) if conditions exist that could create fogging on
the inside of the windshield. The A/C can be
deselected manually without disturbing the mode
control selection. Continuous use of the
Recirculation mode may make the inside air stuffy
and window fogging may occur. Extended use of
this mode is not recommended.
2
Page 112 of 268

110 STARTING AND OPERATING
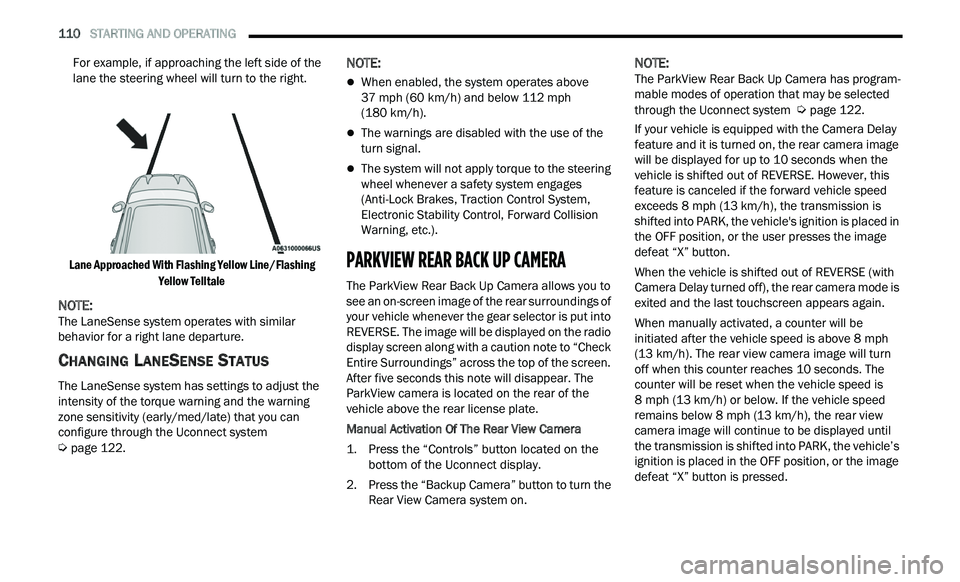
For example, if approaching the left side of the
lane the steering wheel will turn to the right.
Lane Approached With Flashing Yellow Line/Flashing Ye
llow Telltale
NOTE:
The LaneSense system operates with similar
b e
havior for a right lane departure.
CHANGING LANESENSE STATUS
The LaneSense system has settings to adjust the
intensity of the torque warning and the warning
zone sensitivity (early/med/late) that you can
configure through the Uconnect system
Ú page 122.
NOTE:
When enabled, the system operates above
37
mph (60 km/h) and below 112 mph
( 1
80 km/h).
The warnings are disabled with the use of the
turn signal.
The system will not apply torque to the steering
wheel whenever a safety system engages
(Anti-Lock Brakes, Traction Control System,
Electronic Stability Control, Forward Collision
Warning, etc.).
PARKVIEW REAR BACK UP CAMERA
The ParkView Rear Back Up Camera allows you to
see an on-screen image of the rear surroundings of
your vehicle whenever the gear selector is put into
REVERSE. The image will be displayed on the radio
display screen along with a caution note to “Check
Entire Surroundings” across the top of the screen.
After five seconds this note will disappear. The
ParkView camera is located on the rear of the
vehicle above the rear license plate.
Manual Activation Of The Rear View Camera
1. P
ress the “Controls” button located on the
b
ottom of the Uconnect display.
2. Press the “Backup Camera” button to turn the R
ear View Camera system on.
NOTE:
The ParkView Rear Back Up Camera has program -
mable modes of operation that may be selected
t h
rough the Uconnect system Ú page 122.
If your vehicle is equipped with the Camera Delay
f e
ature and it is turned on, the rear camera image
will be displayed for up to 10 seconds when the
vehicle is shifted out of REVERSE. However, this
feature is canceled if the forward vehicle speed
exceeds 8 mph (13 km/h), the transmission is
s h
ifted into PARK, the vehicle's ignition is placed in
the OFF position, or the user presses the image
defeat “X” button.
When the vehicle is shifted out of REVERSE (with
Ca
mera Delay turned off), the rear camera mode is
exited and the last touchscreen appears again.
When manually activated, a counter will be
i n
itiated after the vehicle speed is above 8 mph
( 1
3 km/h). The rear view camera image will turn
of f
when this counter reaches 10 seconds. The
counter will be reset when the vehicle speed is
8 mph (13 km/h) or below. If the vehicle speed
r e
mains below 8 mph (13 km/h), the rear view
c a
mera image will continue to be displayed until
the transmission is shifted into PARK, the vehicle’s
ignition is placed in the OFF position, or the image
defeat “X” button is pressed.