Page 25 of 268

GETTING TO KNOW YOUR VEHICLE 23
CHILD-PROTECTION DOOR LOCK
S
YSTEM — REAR DOORS
To provide a safer environment for small children
riding in the rear seats, the rear doors are
equipped with Child-Protection Door Lock system.
To use the system, open each rear door, use a flat
b l
ade screwdriver (or emergency key) and rotate
the dial to the lock or unlock position.
Child-Protection Door Lock Function
NOTE:
When the Child-Protection Door Lock system is
engaged, the door can be opened only by using
the outside door handle even though the inside
door lock is in the unlocked position.
After disengaging the Child-Protection Door Lock
system, always test the door from the inside to
make certain it is in the unlocked position.
After engaging the Child-Protection Door Lock
system, always test the door from the inside to
make certain it is in the locked position.
For emergency exit with the system engaged,
pull up on the door lock knob (unlocked posi -
tion), roll down the window, and open the door
w i
th the outside door handle.
NOTE:
Always use this device when carrying children.
A f
ter engaging the child lock on both rear doors,
check for effective engagement by trying to open a
door with the internal handle. Once the
Child-Protection Door Lock system is engaged, it is
impossible to open the doors from inside the
vehicle. Before getting out of the vehicle, be sure to
check that there is no one left inside.
STEERING WHEEL
MANUAL TILT/TELESCOPING STEERING
C
OLUMN — IF EQUIPPED
This feature allows you to tilt the steering column
upward or downward. It also allows you to lengthen
or shorten the steering column. The tilt/
telescoping control is located below the steering
wheel at the end of the steering column.
Manual Tilt/Telescoping Control
To unlock the steering column, push the control
dow
nward (toward the floor). To tilt the steering
column, move the steering wheel upward or
downward as desired. To lengthen or shorten the
steering column, pull the steering wheel outward
or push it inward as desired. To lock the steering
column in position, push the control upward until
fully engaged.
WARNING!
Avoid trapping anyone in a vehicle in a collision.
Remember that the rear doors can only be
opened from the outside with the Child-
Protection locks are engaged (locked).
2
Page 26 of 268

24 GETTING TO KNOW YOUR VEHICLE
POWER TILT/TELESCOPING STEERING
C
OLUMN — IF EQUIPPED
This feature allows you to tilt the steering column
upward or downward. It also allows you to lengthen
or shorten the steering column. The power tilt/
telescoping steering column control is located
below the multifunction lever on the steering
column.
Power Tilt/Telescoping Steering Control
Use the four-way control to adjust the steering
c
ol
umn.
NOTE:
For vehicles equipped with Driver Memory Settings
Ú page 26, you can use your key fob or the
memory switch on the driver's door trim panel to
r e
turn the tilt/telescopic steering column to saved
positions.
HEATED STEERING WHEEL —
I
F EQUIPPED
The steering wheel contains a heating element
that helps warm your hands in cold weather. The
heated steering wheel has only one temperature
setting. Once the heated steering wheel has been
turned on, it will stay on for an average of
80 minutes before automatically shutting off. This
t i
me will vary based on environmental
temperatures. The heated steering wheel can shut
off early or may not turn on when the steering
wheel is already warm. The heated steering wheel control button is
l
oc
ated within the Uconnect system. You can gain
access to the control button through the climate or
controls screen.
Press the heated steering wheel button once
to turn the heating element on.
Press the heated steering wheel button a
second time to turn the heating element off.
NOTE:
The engine must be running for the heated
s t
eering wheel to operate.
For information on use with the Remote Start
sy
stem, see Ú page 17.
WARNING!
Do not adjust the steering column while driving.
Adjusting the steering column while driving or
driving with the steering column unlocked, could
cause the driver to lose control of the vehicle.
Failure to follow this warning may result in
serious injury or death.
WARNING!
Do not adjust the steering column while driving.
Adjusting the steering column while driving or
driving with the steering column unlocked, could
cause the driver to lose control of the vehicle.
Failure to follow this warning may result in
serious injury or death.
WARNING!
Persons who are unable to feel pain to the
skin because of advanced age, chronic illness,
diabetes, spinal cord injury, medication,
alcohol use, exhaustion, or other physical
conditions must exercise care when using the
steering wheel heater. It may cause burns
even at low temperatures, especially if used
for long periods.
Do not place anything on the steering wheel
that insulates against heat, such as a blanket
or steering wheel covers of any type and mate
-
rial. This may cause the steering wheel heater
t o
overheat.
Page 27 of 268
 with
these helpful quick tips. It provides the key V")
GETTING TO KNOW YOUR VEHICLE 25
UCONNECT VOICE RECOGNITION QUICK TIPS
INTRODUCING UCONNECT
Start using Uconnect Voice Recognition (VR) with
these helpful quick tips. It provides the key Voice
Commands and tips you need to know to control
your Uconnect system.
NOTE:
The NAV icon on the bottom bar or in the Apps
m e
nus of your touchscreen means you have the
Uconnect 4C NAV system. If not, you have a
Uconnect 4C system.
Voice Recognition
BASIC VOICE COMMANDS
The basic Voice Commands below can be given at
any point while using your Uconnect system.
Push the VR button . After the beep, say:
“Cancel ” to stop a current voice session
“Help ” to hear a list of suggested Voice
Commands
“ Repeat ” to listen to the system prompts again
Notice the visual cues that inform you of your voice
r e
cognition system’s status. Cues appear on the
touchscreen.
GET STARTED
The VR button is used to activate/deactivate your
VR system.
Helpful hints for using VR:
Reduce background noise. Wind and passenger
conversations are examples of noise that may
impact recognition.
Speak clearly at a normal pace and volume
while facing straight ahead.
Each time you give a Voice Command, you must
first push the VR button, wait until after the
beep, then say your Voice Command.
You can interrupt the help message or system
prompts by pushing the VR button and saying a
Voice Command from the current category.
Uconnect Voice Command Buttons
ADDITIONAL INFORMATION
© 2021 FCA US LLC. All rights reserved. Mopar and
Uconnect are registered trademarks and Mopar
Owner Connect is a trademark of FCA US LLC.
Android™ is a trademark of Google Inc. SiriusXM®
and all related marks and logos are trademarks of
SiriusXM® Radio Inc.
1 — Push To Start Or Answer A Phone Call And
Send Or Receive A Text
2 — Push The VR Button To Begin Radio, Media,
And Climate Functions
2
Page 28 of 268

Canadian residents visit w")
26 GETTING TO KNOW YOUR VEHICLE
Uconnect System Support:
US residents visit www.DriveUconnect.com or
call: 1-877-855-8400 (24 hours a day 7 days a
w e
ek)
Canadian residents visit www.DriveUconnect.ca
or call: 1-800-465-2001 (English) or
1 -
800-387-9983 (French)
SiriusXM Guardian™ services support:
US residents visit www.driveuconnect.com/
sirius-xm-guardian or call: 1-844-796-4827
Canadian residents visit https://www.driveuco-
nnect.ca/en/sirius-xm-guardian or call:
1-877-324-9091
DRIVER MEMORY SETTINGS — IF EQUIPPED
This feature allows the driver to save up to two
different memory profiles for easy recall through a
memory switch. Each memory profile saves
desired position settings for the following features:
Driver seat
Easy Entry/Exit seat operation (if equipped)
Side mirrors
Power tilt and telescopic steering column (if
equipped)
A set of desired radio station presets
NOTE:
Your vehicle is equipped with two key fobs, each
can be linked to either memory position 1 or 2.
Be sure to program the radio presets prior to
programming the memory settings.
The memory settings switch is located on the
dr
iver’s door trim panel. The switch consists of
three buttons:
The set (S) button, which is used to activate the
memory save function.
The (1) and (2) buttons which are used to recall
either of two saved memory profiles.
Memory Switch
PROGRAMMING THE MEMORY FEATURE
To create a new memory profile, perform the
following:
NOTE:
Saving a new memory profile will erase the
s e
lected profile from memory.
1. Place the vehicle’s ignition in the ON/RUN p
osition (do not start the engine).
2. Adjust all memory profile settings to desired p
references (i.e., seat, side mirror, power tilt
and telescopic steering column [if equipped],
and radio station presets).
3. Push and release the set (S) button on the m
emory switch, and then push the desired
memory button (1 or 2) within five seconds.
The instrument cluster display will display
which memory position has been set.
NOTE:
Memory profiles can be set without the vehicle in
P A
RK, but the vehicle must be in PARK to recall a
memory profile.
Page 29 of 268

LINKING AND UNLINKING THE KEY FOB
T
O MEMORY
Your key fobs can be programmed to recall one of
two saved memory profiles.
NOTE:
Before programmi")
GETTING TO KNOW YOUR VEHICLE 27
(Continued)
LINKING AND UNLINKING THE KEY FOB
T
O MEMORY
Your key fobs can be programmed to recall one of
two saved memory profiles.
NOTE:
Before programming your key fobs you must select
t h
e “Memory Linked To Fob” feature through the
Uconnect system
Ú page 122.
To program your key fobs, perform the following:
1. P lace the vehicle’s ignition in the OFF
p
osition.
2. Select a desired memory profile, 1 or 2.
3
. O nce the profile has been recalled, push and
r
elease the set (S) button on the memory
switch.
4. W ithin five seconds, push and release button
(
1) or (2) accordingly. “Memory Profile Set”
(1 or 2) will display in the instrument cluster.
5. P ush and release the lock button on the key
f
ob within 10 seconds.
NOTE:
Your key fob can be unlinked from your memory
s e
ttings by pushing the set (S) button, followed by
pushing the unlock button on the key fob within
10 seconds.
MEMORY POSITION RECALL
NOTE:
If a recall is attempted when the vehicle is not in
P A
RK, a message will be displayed in the
instrument cluster display.
To recall the memory settings for driver one or two,
p u
sh the desired memory button number (1 or 2)
or the unlock button on the key fob linked to the
desired memory position.
A recall can be canceled by pushing any of the
me
mory buttons (S, 1, or 2) during a recall. When
a recall is canceled, the driver seat will stop
moving. A delay of one second will occur before
another recall can be selected.
SEATS
Seats are a part of the Occupant Restraint system
of the vehicle.
MANUAL ADJUSTMENT (REAR SEATS)
Folding Rear Seat
The rear seatbacks can be folded forward to
provide an additional storage area. To fold the rear
seatback, pull on the loops located on the upper
seatback.
NOTE:
These loops can be tucked away when not in use.
WARNING!
It is dangerous to ride in a cargo area, inside
or outside of a vehicle. In a collision, people
riding in these areas are more likely to be seri -
ously injured or killed.
Do not allow people to ride in any area of your
vehicle that is not equipped with seats and
seat belts. In a collision, people riding in these
areas are more likely to be seriously injured or
killed.
Be sure everyone in your vehicle is in a seat
and using a seat belt properly.
WARNING!
2
Page 30 of 268

Rear Seatback Loop
After releasing the seatback, it can be folded
for
ward.
Folded Rear Seatback
NOTE:
You may experience deformation in the")
28 GETTING TO KNOW YOUR VEHICLE
(Continued)
Rear Seatback Loop
After releasing the seatback, it can be folded
for
ward.
Folded Rear Seatback
NOTE:
You may experience deformation in the seat
c u
shion from the seat belt buckles if the seats are
left folded for an extended period of time. This is normal and by simply unfolding the seats to the
open position, over time the seat cushion will
return to its normal shape.
When the seatback is folded to the upright
p
os
ition, make sure it is latched by strongly pulling
on the top of the seatback above the seat strap.
POWER ADJUSTMENT (FRONT SEATS)
Your vehicle may be equipped with eight-way
power driver and front passenger seats. The power
seat switches are located on the outboard side of
the seat. There are two switches that control the
movement of the seat cushion and the seatback.
Power Seat Switches
WARNING!
Be certain that the seatback is securely
locked into position. If the seatback is not
securely locked into position, the seat will not
provide the proper stability for child seats
and/or passengers. An improperly latched
seat could cause serious injury.
The cargo area in the rear of the vehicle (with
the rear seatbacks in the locked-up or folded
down position) should not be used as a play
area by children when the vehicle is in motion.
They could be seriously injured in a collision.
Children should be seated and using the
proper restraint system.
1 — Seatback Control (If Equipped)
2 — Seat Control
WARNING!
Adjusting a seat while driving may be
dangerous. Moving a seat while driving could
result in loss of control which could cause a
collision and serious injury or death.
Seats should be adjusted before fastening the
seat belts and while the vehicle is parked.
Serious injury or death could result from a
poorly adjusted seat belt.
Page 31 of 268

GETTING TO KNOW YOUR VEHICLE 29
Adjusting The Seat Forward Or Rearward
The seat can be adjusted both forward and
rearward by using the power seat switch. The seat
will move in the direction of the switch. Release the
switch when the desired position has been
reached.
Adjusting The Seat Up Or Down
The height of the seats can be adjusted up or down
by using the power seat switch. The seat will move
in the direction of the switch. Release the switch
when the desired position has been reached.
Tilting The Seat Up Or Down
The angle of the seat cushion can be adjusted up
or down using the power seat switch. The front of
the seat cushion will move in the direction of the
switch. Release the switch when the desired
position has been reached.
Reclining The Seatback
The angle of the seatback can be adjusted forward
or rearward by using the power seat switch. The
seat will move in the direction of the switch.
Release the switch when the desired position is
reached.Power Lumbar — If Equipped
Vehicles equipped with power driver or passenger
seats may also be equipped with power lumbar.
The power lumbar switch is located on the
outboard side of the power seat. Push the switch
forward to increase the lumbar support. Push the
switch rearward to decrease the lumbar support.
Pushing upward or downward on the switch will
raise and lower the position of the support.
Power Lumbar Switch
Do not ride with the seatback reclined so that
the shoulder belt is no longer resting against
your chest. In a collision you could slide under
the seat belt, which could result in serious
injury or death.
CAUTION!
Do not place any article under a power seat or
impede its ability to move as it may cause
damage to the seat controls. Seat travel may
become limited if movement is stopped by an
obstruction in the seat's path.
WARNING!
WARNING!
Adjusting a seat while driving may be
dangerous. Moving a seat while driving could
result in loss of control which could cause a
collision and serious injury or death.
Seats should be adjusted before fastening the
seat belts and while the vehicle is parked.
Serious injury or death could result from a
poorly adjusted seat belt.
Do not ride with the seatback reclined so that
the shoulder belt is no longer resting against
your chest. In a collision you could slide under
the seat belt, which could result in serious
injury or death.
CAUTION!
Do not place any article under a power seat or
impede its ability to move as it may cause
damage to the seat controls. Seat travel may
become limited if movement is stopped by an
obstruction in the seat’s path.
2
Page 32 of 268

30 GETTING TO KNOW YOUR VEHICLE
Easy Entry/Exit Seat — If Equipped
This feature provides automatic driver seat
positioning to enhance driver mobility when
entering and exiting the vehicle.
The distance the driver seat moves depends on
wh
ere you have the driver seat positioned when
you place the vehicle’s ignition in the OFF position.
When you place the vehicle’s ignition in the OFF
position, the driver seat will move about
2.4 inches (60 mm) rearward if the driver seat
pos
ition is greater than or equal to 2.7 inches
( 6
7.7 mm) forward of the rear stop. The seat will
r e
turn to its previously set position when you
place the vehicle’s ignition in the ACC or RUN
position.
The Easy Entry/Easy Exit feature is disabled
when the driver seat position is less than 0.9 of
an inch (22.7 mm) forward of the rear stop. At
th
is position, there is no benefit to the driver by
moving the seat for Easy Exit or Easy Entry.
When enabled in Uconnect Settings, Easy Entry
a n
d Easy Exit positions are stored in each memory
setting profile
Ú page 26.
NOTE:
The Easy Entry/Exit feature is enabled or disabled
t h
rough the programmable features in the
Uconnect system
Ú page 122.
HEATED SEATS — IF EQUIPPED
On some models, the front and rear seats may be
equipped with heaters located in the seat cushions
and seatbacks.
Front Heated Seats
The front heated seat control buttons are located
within the climate or controls screen of the
touchscreen.
You can choose from HI, LO, or OFF heat settings.
Th
e indicator arrows in touchscreen buttons
indicate the level of heat in use. Two indicator arrows will illuminate for HI, and one for LO.
Turning the heating elements off will return the
user to the radio screen.
Press the heated seat button
once to turn
the HI setting on.
Press the heated seat button a second time
to turn the LO setting on.
Press the heated seat button a third time to
turn the heating elements off.
If the HI-level setting is selected, the system will
a u
tomatically switch to LO-level after
approximately 60 minutes of continuous
ope
ration. At that time, the display will change
from HI to LO, indicating the change. The LO-level
setting will turn off automatically after
approximately 45 minutes.
NOTE:
Once a heat setting is selected, heat will be felt
within two to five minutes.
The engine must be running for the heated
seats to operate.
For information on use with the Remote Start
sy
stem, see Ú page 17.
WARNING!
Persons who are unable to feel pain to the
skin because of advanced age, chronic illness,
diabetes, spinal cord injury, medication,
alcohol use, exhaustion or other physical
condition must exercise care when using the
seat heater. It may cause burns even at low
temperatures, especially if used for long
periods of time.
Do not place anything on the seat or seatback
that insulates against heat, such as a blanket
or cushion. This may cause the seat heater to
overheat. Sitting in a seat that has been over
-
heated could cause serious burns due to the
i n
creased surface temperature of the seat.
 1
1 2
2 3
3 4
4 5
5 6
6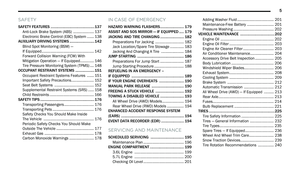 7
7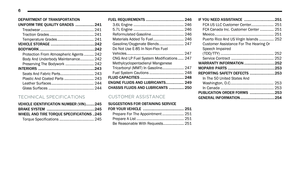 8
8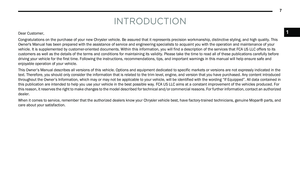 9
9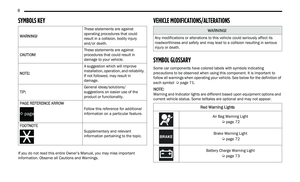 10
10 11
11 12
12 13
13 14
14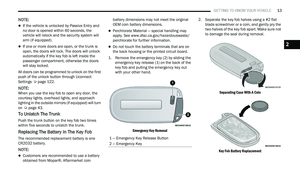 15
15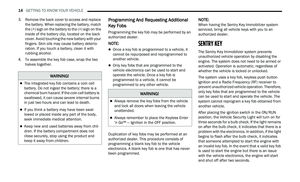 16
16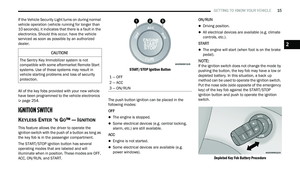 17
17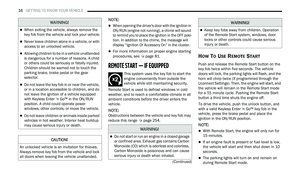 18
18 19
19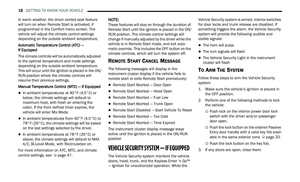 20
20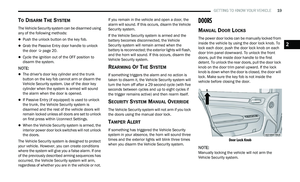 21
21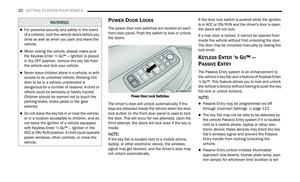 22
22 23
23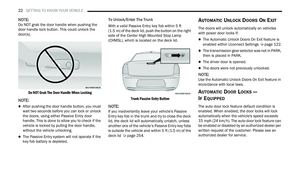 24
24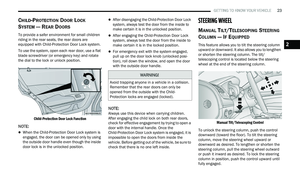 25
25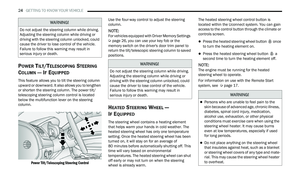 26
26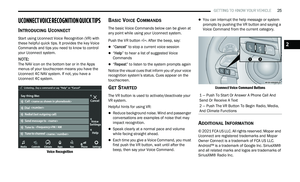 27
27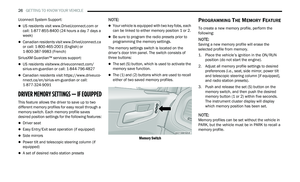 28
28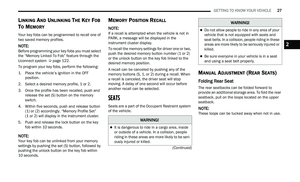 29
29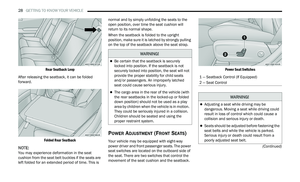 30
30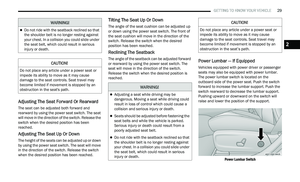 31
31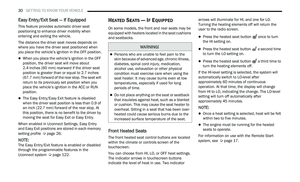 32
32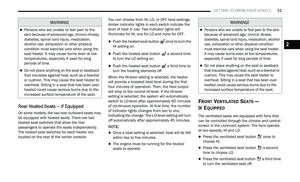 33
33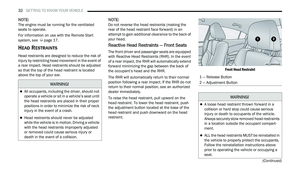 34
34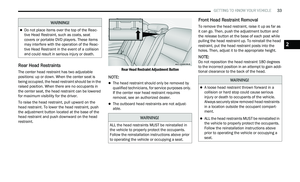 35
35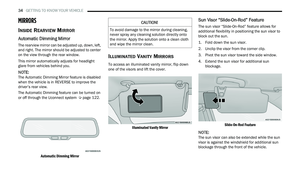 36
36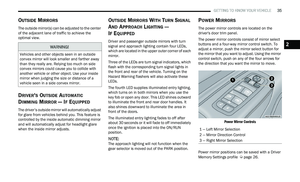 37
37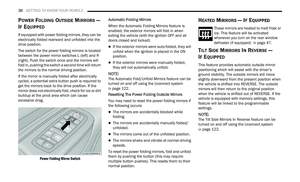 38
38 39
39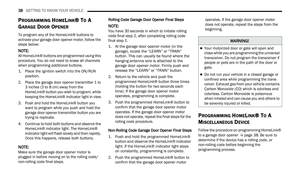 40
40 41
41 42
42 43
43 44
44 45
45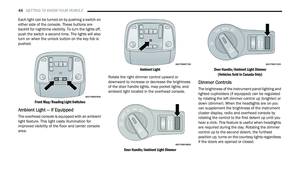 46
46 47
47 48
48 49
49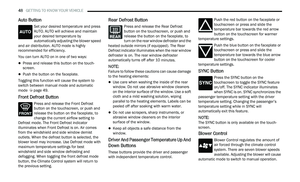 50
50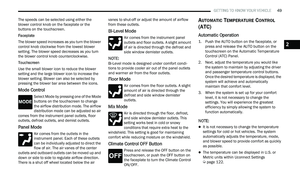 51
51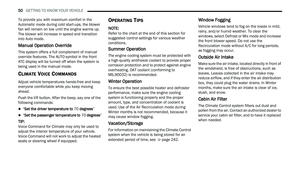 52
52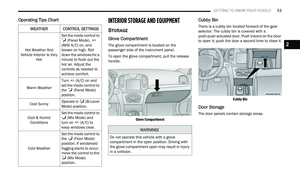 53
53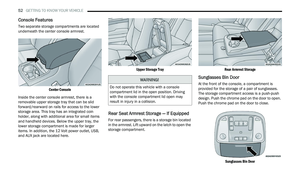 54
54 55
55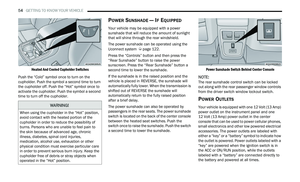 56
56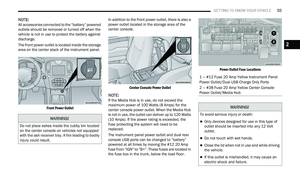 57
57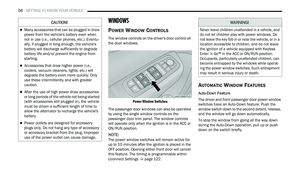 58
58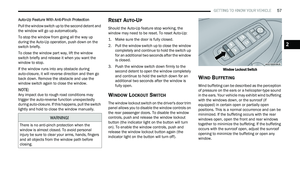 59
59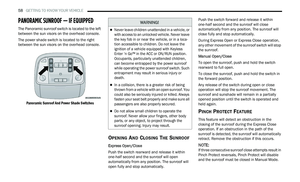 60
60 61
61 62
62 63
63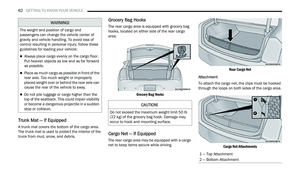 64
64 65
65 66
66 67
67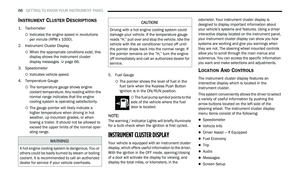 68
68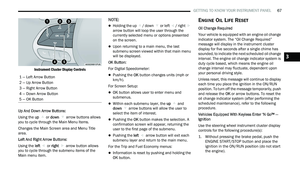 69
69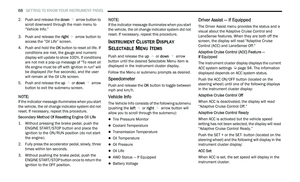 70
70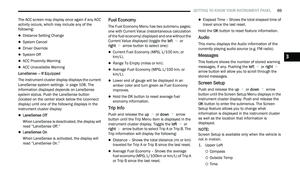 71
71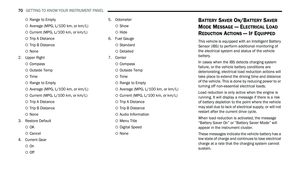 72
72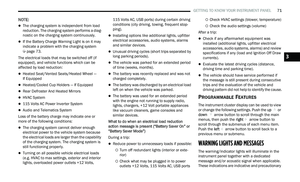 73
73 74
74 75
75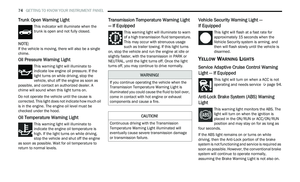 76
76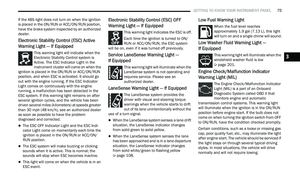 77
77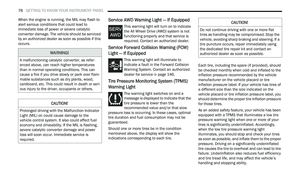 78
78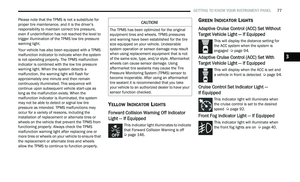 79
79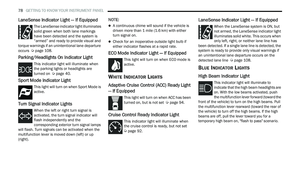 80
80 81
81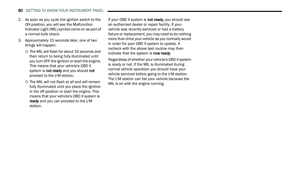 82
82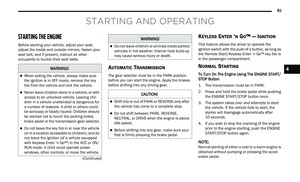 83
83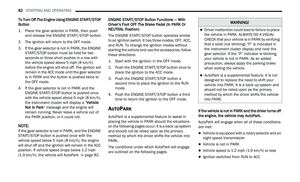 84
84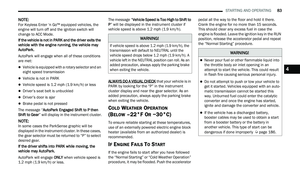 85
85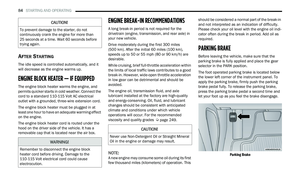 86
86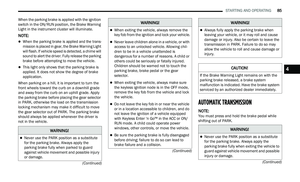 87
87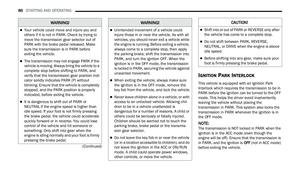 88
88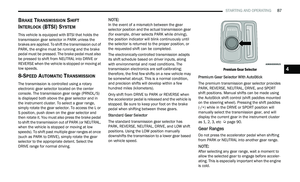 89
89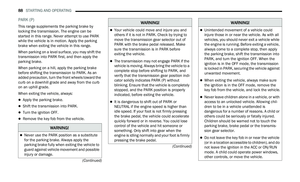 90
90 91
91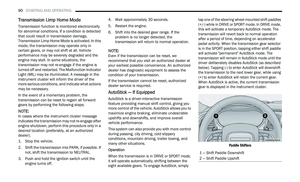 92
92 93
93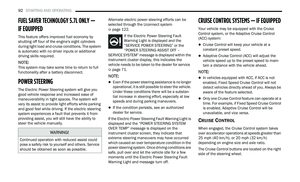 94
94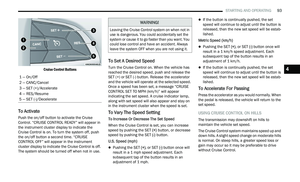 95
95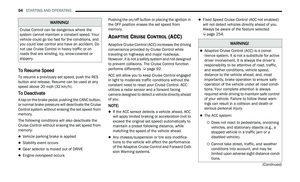 96
96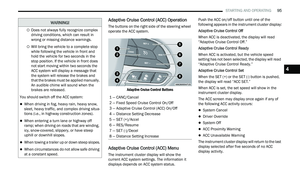 97
97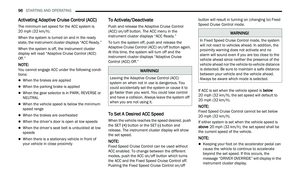 98
98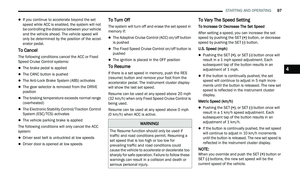 99
99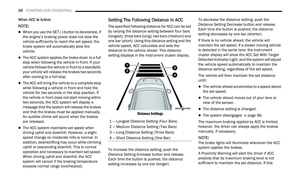 100
100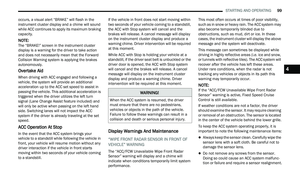 101
101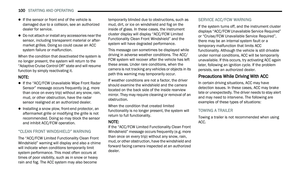 102
102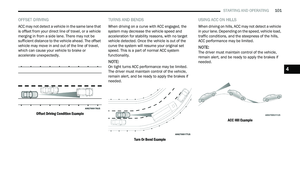 103
103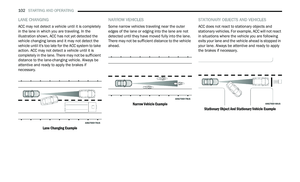 104
104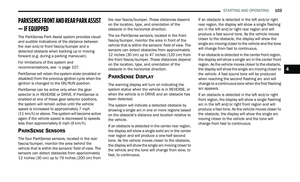 105
105 106
106 107
107 108
108 109
109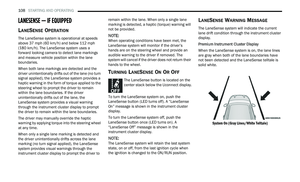 110
110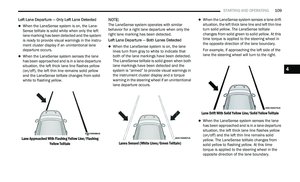 111
111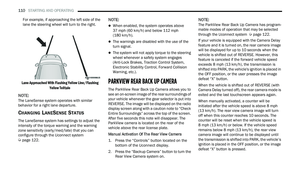 112
112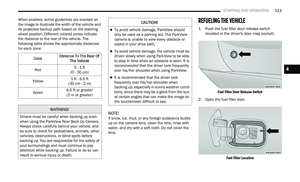 113
113 114
114 115
115 116
116 117
117 118
118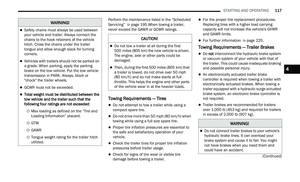 119
119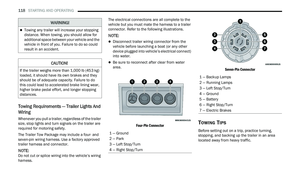 120
120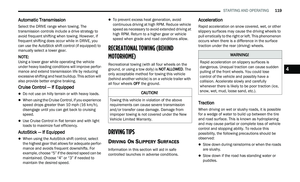 121
121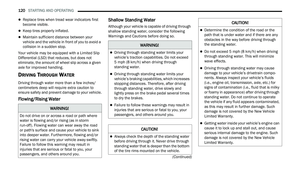 122
122 123
123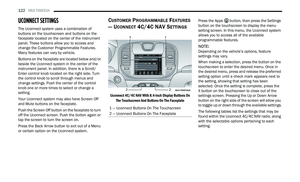 124
124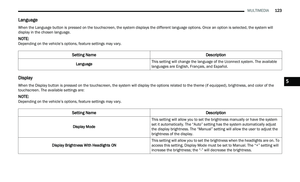 125
125 126
126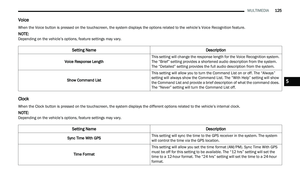 127
127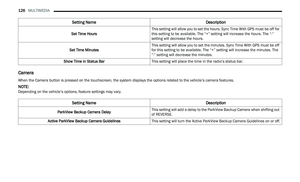 128
128 129
129 130
130 131
131 132
132 133
133 134
134 135
135 136
136 137
137 138
138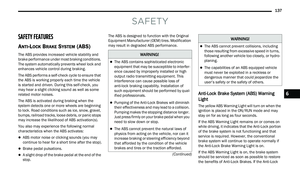 139
139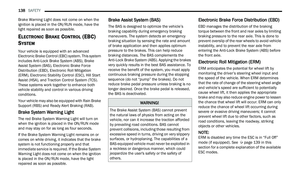 140
140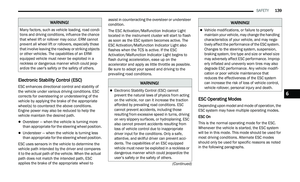 141
141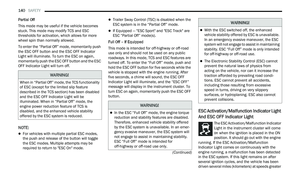 142
142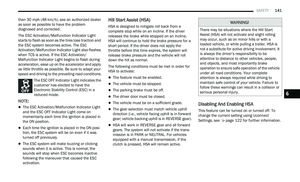 143
143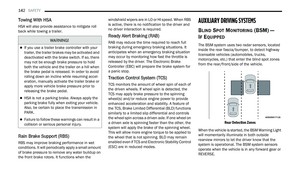 144
144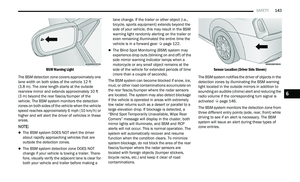 145
145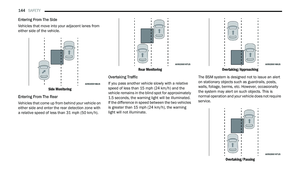 146
146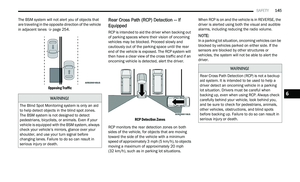 147
147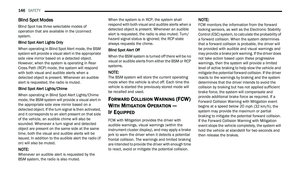 148
148 149
149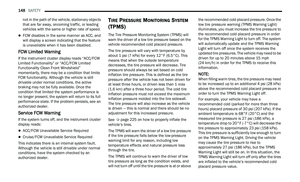 150
150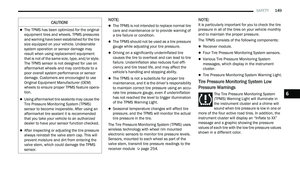 151
151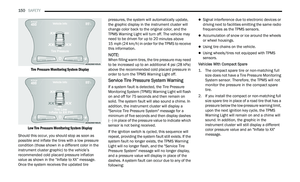 152
152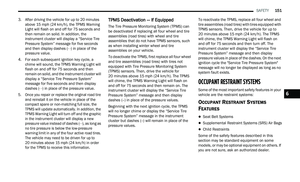 153
153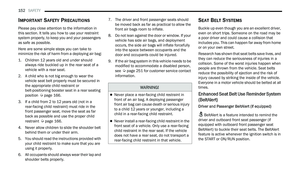 154
154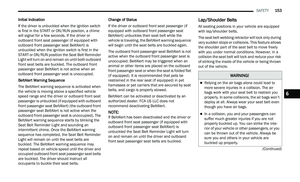 155
155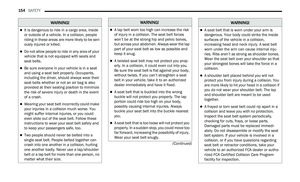 156
156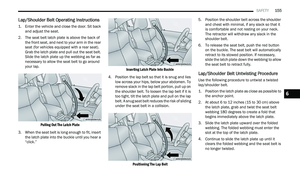 157
157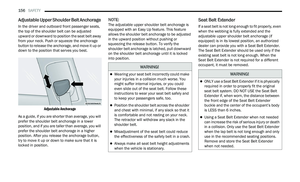 158
158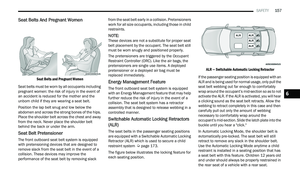 159
159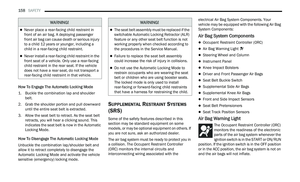 160
160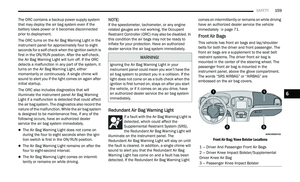 161
161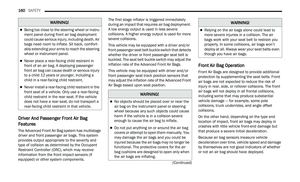 162
162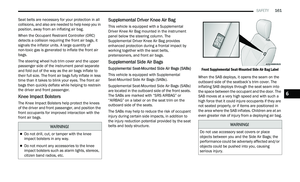 163
163 164
164 165
165 166
166 167
167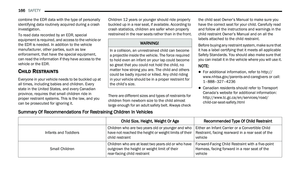 168
168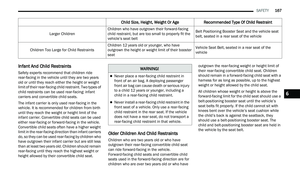 169
169 170
170 171
171 172
172 173
173 174
174 175
175 176
176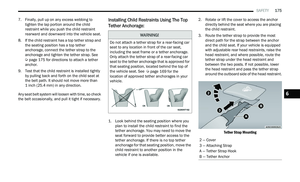 177
177 178
178 179
179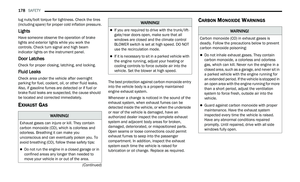 180
180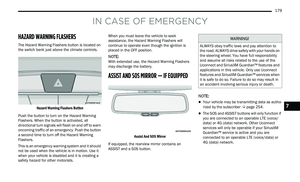 181
181 182
182 183
183 184
184 185
185 186
186 187
187 188
188 189
189 190
190 191
191 192
192 193
193 194
194 195
195 196
196 197
197 198
198 199
199 200
200 201
201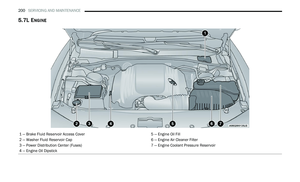 202
202 203
203 204
204 205
205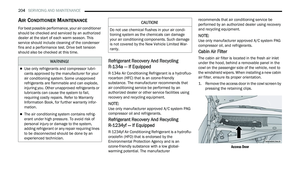 206
206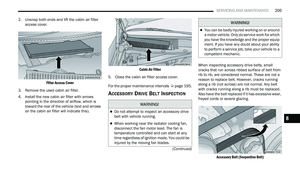 207
207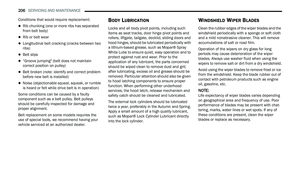 208
208 209
209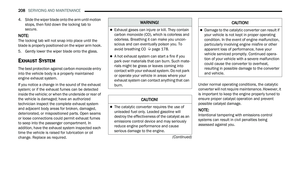 210
210 211
211 212
212 213
213 214
214 215
215 216
216 217
217 218
218 219
219 220
220 221
221 222
222 223
223 224
224 225
225 226
226 227
227 228
228 229
229 230
230 231
231 232
232 233
233 234
234 235
235 236
236 237
237 238
238 239
239 240
240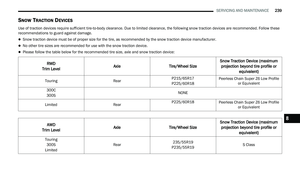 241
241 242
242 243
243 244
244 245
245 246
246 247
247 248
248 249
249 250
250 251
251 252
252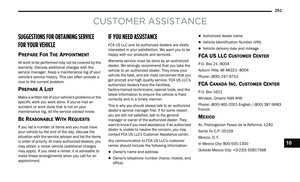 253
253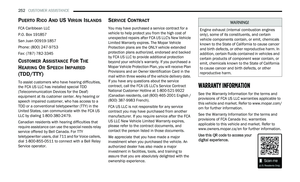 254
254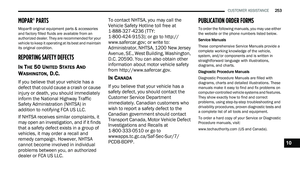 255
255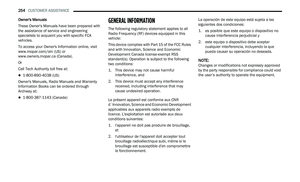 256
256 257
257 258
258 259
259 260
260 261
261 262
262 263
263 264
264 265
265 266
266 267
267