2021 ALFA ROMEO STELVIO sport mode
[x] Cancel search: sport modePage 14 of 280

12
JUMP STARTING .................................... 201
Remote Battery Connection Posts......202
Jump Starting Procedure.....................203
Bump Starting ..................................204
ENGINE OVERHEATING ......................... 204 MANUAL PARK RELEASE ...................... 205TOWING A DISABLED VEHICLE ............. 205
Four-Wheel Drive (AWD) Models .........206
TOW EYES .............................................. 206
ENHANCED ACCIDENT RESPONSE
SYSTEM (EARS) ..................................... 207EVENT DATA RECORDER (EDR) ............ 207
SERVICING AND MAINTENANCE
SCHEDULED SERVICING ....................... 208
Periodic Checks ...................................208
Heavy Usage Of The Vehicle ...............208
Maintenance Plan (2.0L Engine) ........209
Maintenance Plan (2.9L Engine) ........212
ENGINE COMPARTMENT....................... 214
Checking Levels — 2.0L Engine .......... 214
Checking Levels — 2.9L Engine .......... 215
Engine Oil ............................................. 215
Engine Coolant Fluid............................216
Washer Fluid For Windshield/
Headlights ............................................ 217 Brake Fluid ...........................................217
Automatic Transmission Activation
System Oil ............................................ 217 Useful Advice For Extending The Life Of
Your Battery..........................................217 Battery ..................................................217
Pressure Washing ................................ 218
BATTERY RECHARGING ......................... 218
Important Notes .................................. 218
VEHICLE MAINTENANCE ........................ 219
Engine Oil ............................................. 219
Engine Oil Filter ................................... 220
Engine Air Cleaner Filter ..................... 220
Air Conditioning System
Maintenance........................................ 220 Lubricating Moving Parts Of The
Bodywork ............................................. 220 Windshield Wiper................................. 221
Exhaust System ................................... 222
Cooling System .................................... 223
Braking System.................................... 224
Automatic Transmission ..................... 225
Replacing The Battery ......................... 225
Fuses .................................................... 225
Bulb Replacement ............................... 229
TIRES ...................................................... 233
Tire Safety Information .................... 233
Tires — General Information .............. 239
Spare Tires — If Equipped .................. 244
Wheel And Wheel Trim Care ............ 245
Tire Types ............................................. 246
Tire Chains and Traction Devices ....... 247
Tire Rotation Recommendations........ 247
DEPARTMENT OF TRANSPORTATION
UNIFORM TIRE QUALITY GRADES ......... 248
Treadwear ............................................ 248
Traction Grades ................................... 248
Temperature Grades ........................... 248
STORING THE VEHICLE ......................... 249 BODYWORK ........................................... 249
Protection Against Atmospheric
Agents .................................................. 249 Corrosion Warranty ............................. 250
Preserving The Bodywork .................. 250
INTERIORS ............................................. 251
Seats And Fabric Parts ....................... 251
Leather Seats ...................................... 251
Plastic And Coated Parts .................... 251
Alcantara Parts — If Equipped ............ 251
Genuine Leather Parts........................ 251
Carbon Fiber Parts .............................. 252
TECHNICAL SPECIFICATIONS
VEHICLE IDENTIFICATION
NUMBER (VIN) ....................................... 253
Vehicle Identification Number............ 253
Vehicle Identification Number
(VIN) Plate ............................................ 253
ENGINE .................................................. 254
POWER SUPPLY ..................................... 255 TRANSMISSION ..................................... 255BRAKES.................................................. 255
SUSPENSION ......................................... 256
STEERING .............................................. 256
DIMENSIONS ......................................... 257
Luggage Compartment Volume ......... 259
WEIGHTS ................................................ 259
21_GU_OM_EN_USC_t.book Page 12
Page 72 of 280
GETTING TO KNOW YOUR INSTRUMENT PANEL
70
7. Traffic Sign Recognition (TSR) InformationDisplay
8. Time
9. External Temperature
10. Main Display: Vehicle Speed Display, Trip Computer Information, etc...
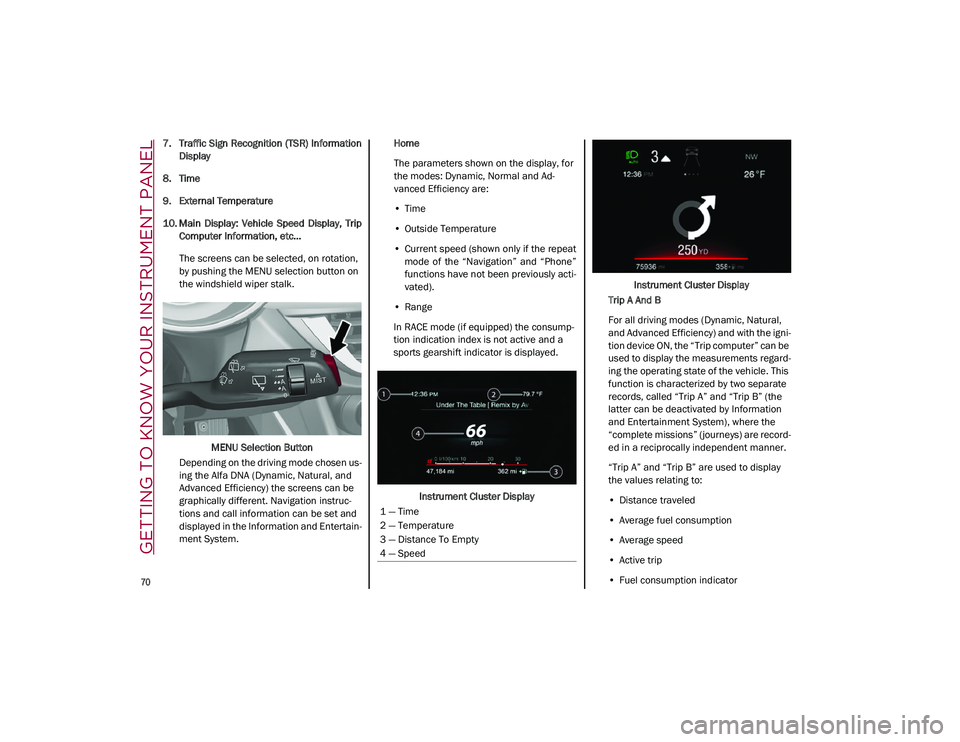
The screens can be selected, on rotation,
by pushing the MENU selection button on
the windshield wiper stalk.
MENU Selection Button
Depending on the driving mode chosen us -
ing the Alfa DNA (Dynamic, Natural, and
Advanced Efficiency) the screens can be
graphically different. Navigation instruc -
tions and call information can be set and
displayed in the Information and Entertain -
ment System. Home
The parameters shown on the display, for
the modes: Dynamic, Normal and Ad
-
vanced Efficiency are:
• Time
• Outside Temperature
• Current speed (shown only if the repeat
mode of the “Navigation” and “Phone”
functions have not been previously acti-
vated).
• Range
In RACE mode (if equipped) the consump -
tion indication index is not active and a
sports gearshift indicator is displayed.
Instrument Cluster Display Instrument Cluster Display
Trip A And B
For all driving modes (Dynamic, Natural,
and Advanced Efficiency) and with the igni -
tion device ON, the “Trip computer” can be
used to display the measurements regard -
ing the operating state of the vehicle. This
function is characterized by two separate
records, called “Trip A” and “Trip B” (the
latter can be deactivated by Information
and Entertainment System), where the
“complete missions” (journeys) are record -
ed in a reciprocally independent manner.
“Trip A” and “Trip B” are used to display
the values relating to:
• Distance traveled
• Average fuel consumption
• Average speed
• Active trip
• Fuel consumption indicator
1 — Time
2 — Temperature
3 — Distance To Empty
4 — Speed
21_GU_OM_EN_USC_t.book Page 70
Page 92 of 280
STARTING AND OPERATING
90
For the first 1,500 miles (2,414 km):
Do not participate in track events, sport
driving schools, or similar activities during
the first 1,500 miles (2,414 km).
NOTE:
Monitor engine oil with every refueling and add
if necessary. Oil and fuel consumption may be
higher through the first oil change interval.
ELECTRIC PARK BRAKE (EPB)
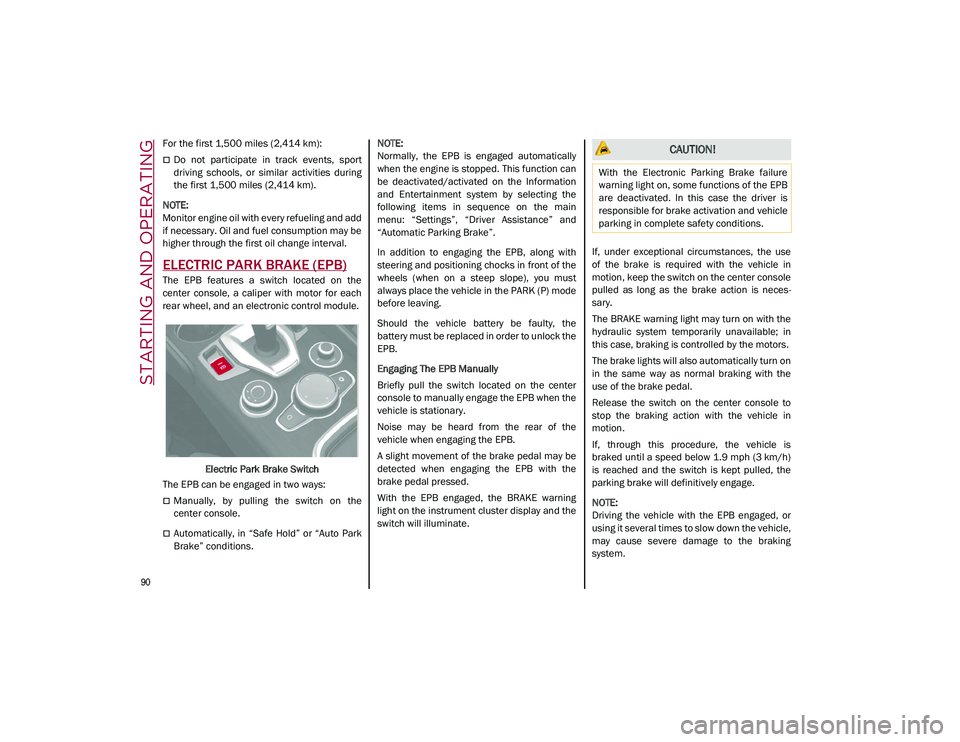
The EPB features a switch located on the
center console, a caliper with motor for each
rear wheel, and an electronic control module.
Electric Park Brake Switch
The EPB can be engaged in two ways:
Manually, by pulling the switch on the
center console.
Automatically, in “Safe Hold” or “Auto Park
Brake” conditions.
NOTE:
Normally, the EPB is engaged automatically
when the engine is stopped. This function can
be deactivated/activated on the Information
and Entertainment system by selecting the
following items in sequence on the main
menu: “Settings”, “Driver Assistance” and
“Automatic Parking Brake”.
In addition to engaging the EPB, along with
steering and positioning chocks in front of the
wheels (when on a steep slope), you must
always place the vehicle in the PARK (P) mode
before leaving.
Should the vehicle battery be faulty, the
battery must be replaced in order to unlock the
EPB.
Engaging The EPB Manually
Briefly pull the switch located on the center
console to manually engage the EPB when the
vehicle is stationary.
Noise may be heard from the rear of the
vehicle when engaging the EPB.
A slight movement of the brake pedal may be
detected when engaging the EPB with the
brake pedal pressed.
With the EPB engaged, the BRAKE warning
light on the instrument cluster display and the
switch will illuminate.
If, under exceptional circumstances, the use
of the brake is required with the vehicle in
motion, keep the switch on the center console
pulled as long as the brake action is neces
-
sary.
The BRAKE warning light may turn on with the
hydraulic system temporarily unavailable; in
this case, braking is controlled by the motors.
The brake lights will also automatically turn on
in the same way as normal braking with the
use of the brake pedal.
Release the switch on the center console to
stop the braking action with the vehicle in
motion.
If, through this procedure, the vehicle is
braked until a speed below 1.9 mph (3 km/h)
is reached and the switch is kept pulled, the
parking brake will definitively engage.
NOTE:
Driving the vehicle with the EPB engaged, or
using it several times to slow down the vehicle,
may cause severe damage to the braking
system.
CAUTION!
With the Electronic Parking Brake failure
warning light on, some functions of the EPB
are deactivated. In this case the driver is
responsible for brake activation and vehicle
parking in complete safety conditions.
21_GU_OM_EN_USC_t.book Page 90
Page 97 of 280
95
REVERSE (R)
Select this mode only with the vehicle at a
standstill.NEUTRAL (N)
Use this range when the vehicle is standing for
prolonged periods with the engine running.
The engine may be started in this range. Apply
the EPB and shift the transmission into PARK
(P) if you must leave the vehicle.
DRIVE (D)
Use this mode in normal driving conditions.
Shifting from DRIVE (D) to PARK (P) or REVERSE
(R) modes must take place only after releasing the
accelerator pedal, with vehicle at a standstill and
brake pedal pressed.
This mode ensures automatic engagement of the
most suitable gears for driving needs and
maximum fuel economy in terms of consumption.
In this position, the transmission shifts the gears
automatically, selecting the most suitable for
forward driving among those available as you go.
In this way the vehicle's optimal driving charac
-
teristics are provided for all conditions.
AutoStick
In the case of frequent shifting (e.g. for sport
driving, when the vehicle is driven with a heavy
load, on slopes, when towing heavy trailers), it is
recommended to use the AutoStick (sequential
shifting) mode to select and keep a lower fixed
ratio.
In these conditions, the use of a lower gear
improves vehicle performance and prevents over
-
heating.
It is possible to shift from DRIVE (D) mode to Auto -
Stick mode regardless of vehicle speed.
Activation
Starting from DRIVE (D) mode, to activate the
sequential drive mode, move the gear selector to
the left (– and + indication of the trim). The gear
engaged will be shown on the display.
Shifting is made by moving the gear selector
forward, toward symbol – or backward, toward
symbol +.
Steering Column Mounted Shift Paddles — If
Equipped
The gear can be manually shifted also by using
the paddles behind the steering wheel, pull
the right paddle (+) toward the steering wheel
and release it to engage a higher gear,
perform the same operation with the left
paddle (-) to engage a lower gear.
Never leave children alone in a vehicle, or
with access to an unlocked vehicle.
Allowing children to be in a vehicle unat -
tended is dangerous for a number of
reasons. A child or others could be seri -
ously or fatally injured. Children should be
warned not to touch the park brake, brake
pedal or the transmission gear selector.
Do not leave the key fob in or near the
vehicle (or in a location accessible to chil -
dren), and do not leave the ignition in the
ACC mode. A child could operate power
windows, other controls, or move the
vehicle.
CAUTION!
Before moving the transmission gear
selector out of PARK, you must push the
ignition button to cycle from OFF mode to
the ACC mode, and also press the brake
pedal. Otherwise, damage to the gear
selector could result.
DO NOT race the engine when shifting
from PARK or NEUTRAL into another gear
range, as this can damage the drivetrain.
WARNING! (Continued)
WARNING!
Do not coast in NEUTRAL and never turn off
the ignition to coast down a hill. These are
unsafe practices that limit your response to
changing traffic or road conditions. You
might lose control of the vehicle and have a
collision.
21_GU_OM_EN_USC_t.book Page 95
Page 100 of 280
STARTING AND OPERATING
98
ALFA DNA SELECTOR
Alfa DNA System
This vehicle is equipped with an Alfa DNA
system selector (located on the center
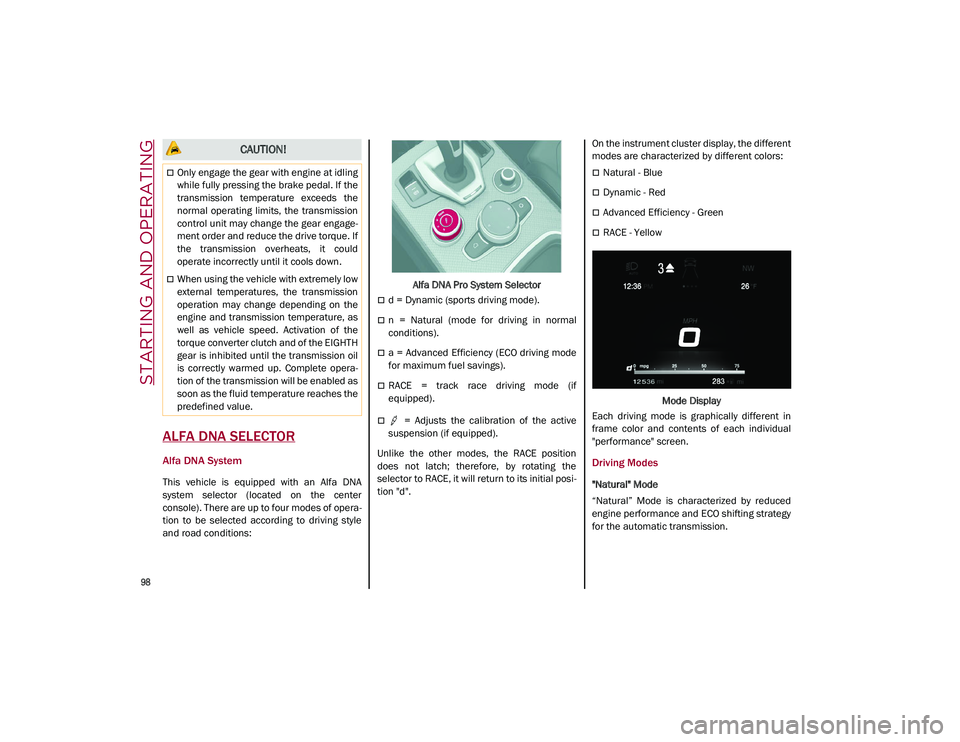
console). There are up to four modes of opera-
tion to be selected according to driving style
and road conditions: Alfa DNA Pro System Selector
d = Dynamic (sports driving mode).
n = Natural (mode for driving in normal
conditions).
a = Advanced Efficiency (ECO driving mode
for maximum fuel savings).
RACE = track race driving mode (if
equipped).
= Adjusts the calibration of the active
suspension (if equipped).
Unlike the other modes, the RACE position
does not latch; therefore, by rotating the
selector to RACE, it will return to its initial posi -
tion "d". On the instrument cluster display, the different
modes are characterized by different colors:
Natural - Blue
Dynamic - Red
Advanced Efficiency - Green
RACE - Yellow
Mode Display
Each driving mode is graphically different in
frame color and contents of each individual
"performance" screen.
Driving Modes
"Natural" Mode
“Natural” Mode is characterized by reduced
engine performance and ECO shifting strategy
for the automatic transmission.
CAUTION!
Only engage the gear with engine at idling
while fully pressing the brake pedal. If the
transmission temperature exceeds the
normal operating limits, the transmission
control unit may change the gear engage -
ment order and reduce the drive torque. If
the transmission overheats, it could
operate incorrectly until it cools down.
When using the vehicle with extremely low
external temperatures, the transmission
operation may change depending on the
engine and transmission temperature, as
well as vehicle speed. Activation of the
torque converter clutch and of the EIGHTH
gear is inhibited until the transmission oil
is correctly warmed up. Complete opera -
tion of the transmission will be enabled as
soon as the fluid temperature reaches the
predefined value.
21_GU_OM_EN_USC_t.book Page 98
Page 101 of 280
99
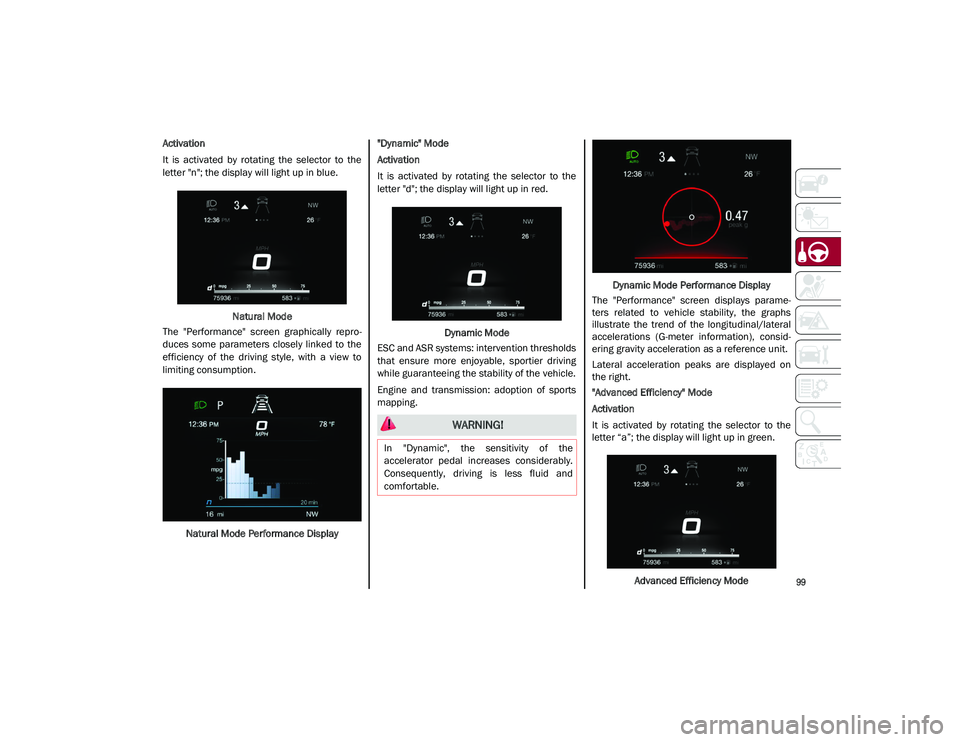
Activation
It is activated by rotating the selector to the
letter "n"; the display will light up in blue.Natural Mode
The "Performance" screen graphically repro -
duces some parameters closely linked to the
efficiency of the driving style, with a view to
limiting consumption.
Natural Mode Performance Display "Dynamic" Mode
Activation
It is activated by rotating the selector to the
letter "d"; the display will light up in red.
Dynamic Mode
ESC and ASR systems: intervention thresholds
that ensure more enjoyable, sportier driving
while guaranteeing the stability of the vehicle.
Engine and transmission: adoption of sports
mapping. Dynamic Mode Performance Display
The "Performance" screen displays parame -
ters related to vehicle stability, the graphs
illustrate the trend of the longitudinal/lateral
accelerations (G-meter information), consid -
ering gravity acceleration as a reference unit.
Lateral acceleration peaks are displayed on
the right.
"Advanced Efficiency" Mode
Activation
It is activated by rotating the selector to the
letter “a”; the display will light up in green.
Advanced Efficiency Mode
WARNING!
In "Dynamic", the sensitivity of the
accelerator pedal increases considerably.
Consequently, driving is less fluid and
comfortable.
21_GU_OM_EN_USC_t.book Page 99
Page 102 of 280
STARTING AND OPERATING
100
ESC and ASR systems: intervention thresholds
aimed at ensuring maximum safety in low-grip
driving conditions. It is advisable to select
“Advanced Efficiency” mode in the presence
of low-grip road surfaces.
Engine and transmission: standard response.
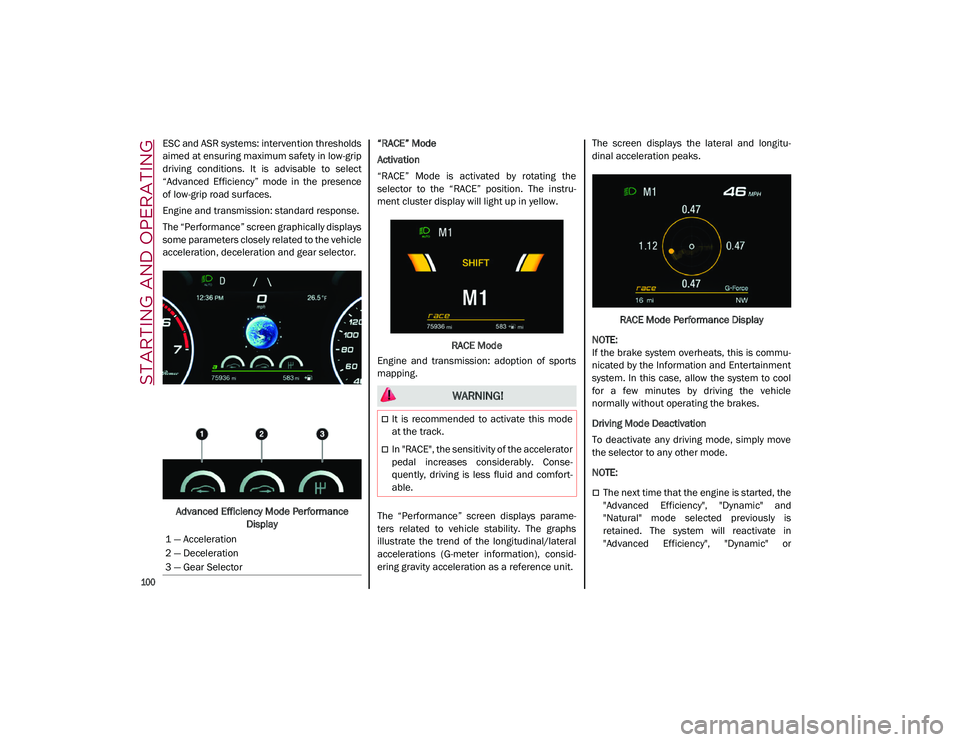
The “Performance” screen graphically displays
some parameters closely related to the vehicle
acceleration, deceleration and gear selector.Advanced Efficiency Mode Performance Display “RACE” Mode
Activation
“RACE” Mode is activated by rotating the
selector to the “RACE” position. The instru-
ment cluster display will light up in yellow.
RACE Mode
Engine and transmission: adoption of sports
mapping.
The “Performance” screen displays parame -
ters related to vehicle stability. The graphs
illustrate the trend of the longitudinal/lateral
accelerations (G-meter information), consid -
ering gravity acceleration as a reference unit. The screen displays the lateral and longitu
-
dinal acceleration peaks.
RACE Mode Performance Display
NOTE:
If the brake system overheats, this is commu -
nicated by the Information and Entertainment
system. In this case, allow the system to cool
for a few minutes by driving the vehicle
normally without operating the brakes.
Driving Mode Deactivation
To deactivate any driving mode, simply move
the selector to any other mode.
NOTE:
The next time that the engine is started, the
"Advanced Efficiency", "Dynamic" and
"Natural" mode selected previously is
retained. The system will reactivate in
"Advanced Efficiency", "Dynamic" or
1 — Acceleration
2 — Deceleration
3 — Gear Selector
WARNING!
It is recommended to activate this mode
at the track.
In "RACE", the sensitivity of the accelerator
pedal increases considerably. Conse
-
quently, driving is less fluid and comfort -
able.
21_GU_OM_EN_USC_t.book Page 100
Page 103 of 280
101
"Natural" mode, depending on which mode
was selected before the engine was
stopped.
When the engine is started again, the
"RACE" mode selected previously is not
retained. The system will reactivate in
"Dynamic" mode.
ALFA ACTIVE SUSPENSION
(AAS) — IF EQUIPPED
The vehicle's electronic suspension manage-
ment system is aimed at optimizing the
vehicle's performance.
The system continuously monitors the
damping of the suspensions through the actu -
ator installed on each shock absorber. This
way, the calibration of the shock absorbers
can be adjusted to the conditions of the road
surface and to the dynamic conditions of the
vehicle, improving its comfort and road
holding.
The driver can choose, even while driving,
(only in “Dynamic” mode), between two types
of suspension calibration: a more sporty or a
more comfortable one.
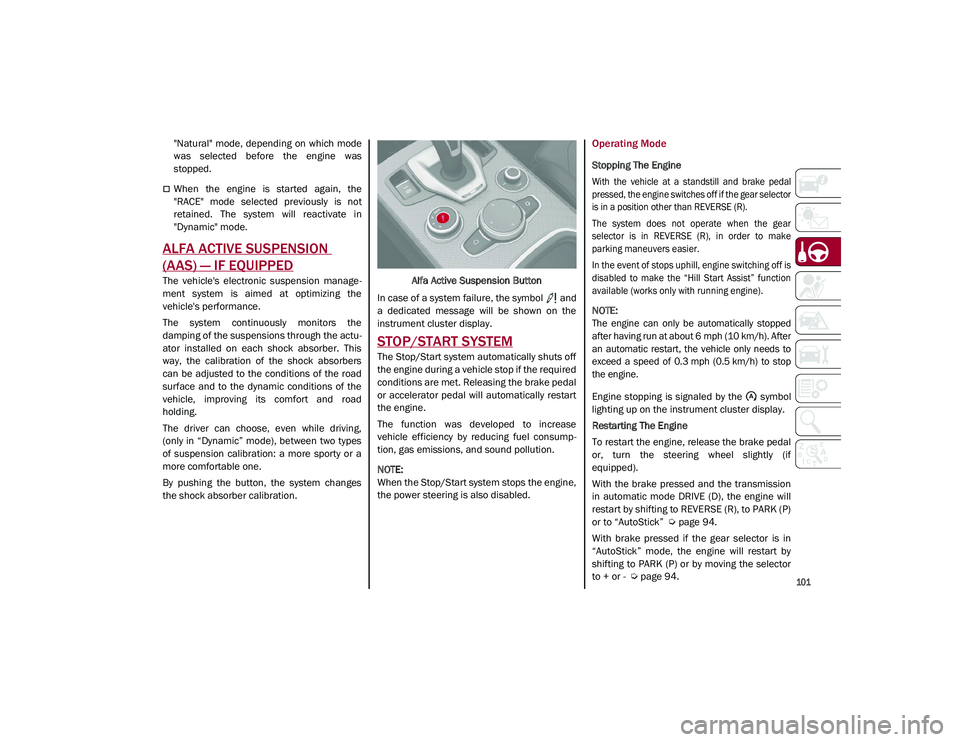
By pushing the button, the system changes
the shock absorber calibration. Alfa Active Suspension Button
In case of a system failure, the symbol and
a dedicated message will be shown on the
instrument cluster display.
STOP/START SYSTEM
The Stop/Start system automatically shuts off
the engine during a vehicle stop if the required
conditions are met. Releasing the brake pedal
or accelerator pedal will automatically restart
the engine.
The function was developed to increase
vehicle efficiency by reducing fuel consump -
tion, gas emissions, and sound pollution.
NOTE:
When the Stop/Start system stops the engine,
the power steering is also disabled.
Operating Mode
Stopping The Engine
With the vehicle at a standstill and brake pedal
pressed, the engine switches off if the gear selector
is in a position other than REVERSE (R).
The system does not operate when the gear
selector is in REVERSE (R), in order to make
parking maneuvers easier.
In the event of stops uphill, engine switching off is
disabled to make the “Hill Start Assist” function
available (works only with running engine).
NOTE:
The engine can only be automatically stopped
after having run at about 6 mph (10 km/h). After
an automatic restart, the vehicle only needs to
exceed a speed of 0.3 mph (0.5 km/h) to stop
the engine.
Engine stopping is signaled by the symbol
lighting up on the instrument cluster display.
Restarting The Engine
To restart the engine, release the brake pedal
or, turn the steering wheel slightly (if
equipped).
With the brake pressed and the transmission
in automatic mode DRIVE (D), the engine will
restart by shifting to REVERSE (R), to PARK (P)
or to “AutoStick”
Ú
page 94.
With brake pressed if the gear selector is in
“AutoStick” mode, the engine will restart by
shifting to PARK (P) or by moving the selector
to + or -
Ú
page 94.
21_GU_OM_EN_USC_t.book Page 101