2021 ALFA ROMEO STELVIO radio
[x] Cancel search: radioPage 75 of 280
73
To access the settings list in the radio, proceed
as follows:
Press the Home button to access the main
menu.
Select Settings from the main menu using
the Rotary Knob or by pressing Settings on
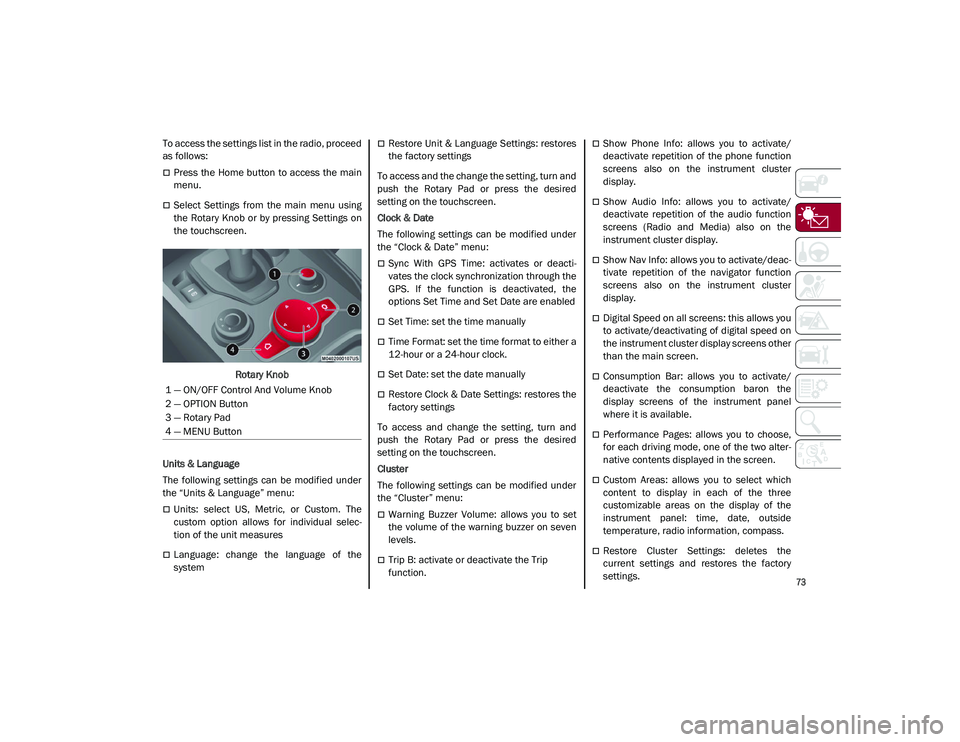
the touchscreen.Rotary Knob
Units & Language
The following settings can be modified under
the “Units & Language” menu:
Units: select US, Metric, or Custom. The
custom option allows for individual selec -
tion of the unit measures
Language: change the language of the
system
Restore Unit & Language Settings: restores
the factory settings
To access and the change the setting, turn and
push the Rotary Pad or press the desired
setting on the touchscreen.
Clock & Date
The following settings can be modified under
the “Clock & Date” menu:
Sync With GPS Time: activates or deacti -
vates the clock synchronization through the
GPS. If the function is deactivated, the
options Set Time and Set Date are enabled
Set Time: set the time manually
Time Format: set the time format to either a
12-hour or a 24-hour clock.
Set Date: set the date manually
Restore Clock & Date Settings: restores the
factory settings
To access and change the setting, turn and
push the Rotary Pad or press the desired
setting on the touchscreen.
Cluster
The following settings can be modified under
the “Cluster” menu:
Warning Buzzer Volume: allows you to set
the volume of the warning buzzer on seven
levels.
Trip B: activate or deactivate the Trip
function.
Show Phone Info: allows you to activate/
deactivate repetition of the phone function
screens also on the instrument cluster
display.
Show Audio Info: allows you to activate/
deactivate repetition of the audio function
screens (Radio and Media) also on the
instrument cluster display.
Show Nav Info: allows you to activate/deac -
tivate repetition of the navigator function
screens also on the instrument cluster
display.
Digital Speed on all screens: this allows you
to activate/deactivating of digital speed on
the instrument cluster display screens other
than the main screen.
Consumption Bar: allows you to activate/
deactivate the consumption baron the
display screens of the instrument panel
where it is available.
Performance Pages: allows you to choose,
for each driving mode, one of the two alter -
native contents displayed in the screen.
Custom Areas: allows you to select which
content to display in each of the three
customizable areas on the display of the
instrument panel: time, date, outside
temperature, radio information, compass.
Restore Cluster Settings: deletes the
current settings and restores the factory
settings.
1 — ON/OFF Control And Volume Knob
2 — OPTION Button
3 — Rotary Pad
4 — MENU Button
21_GU_OM_EN_USC_t.book Page 73
Page 105 of 280
103
Irregular Operation
In the event of malfunction, the Stop/Start
system is deactivated.
For failure indications
Ú
page 74.
Vehicle Inactivity
In the event of vehicle inactivity (or if the
battery is replaced), special attention must be
paid to the disconnection of the battery power
supply.
Proceed as follows:
Remove connector from socket to disconnect
sensor (battery status monitoring) installed on
the negative pole of the battery. This sensor
should never be disconnected from the pole
except if the battery is replaced.
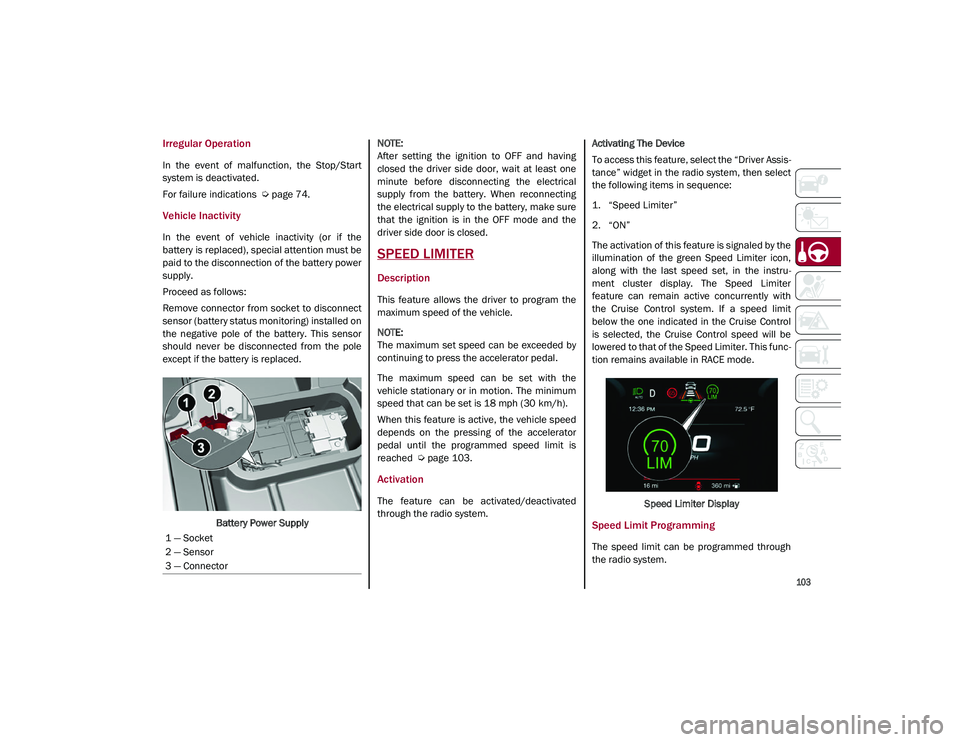
Battery Power Supply
NOTE:
After setting the ignition to OFF and having
closed the driver side door, wait at least one
minute before disconnecting the electrical
supply from the battery. When reconnecting
the electrical supply to the battery, make sure
that the ignition is in the OFF mode and the
driver side door is closed.
SPEED LIMITER
Description
This feature allows the driver to program the
maximum speed of the vehicle.
NOTE:
The maximum set speed can be exceeded by
continuing to press the accelerator pedal.
The maximum speed can be set with the
vehicle stationary or in motion. The minimum
speed that can be set is 18 mph (30 km/h).
When this feature is active, the vehicle speed
depends on the pressing of the accelerator
pedal until the programmed speed limit is
reached
Ú
page 103.
Activation
The feature can be activated/deactivated
through the radio system. Activating The Device
To access this feature, select the “Driver Assis
-
tance” widget in the radio system, then select
the following items in sequence:
1. “Speed Limiter”
2. “ON”
The activation of this feature is signaled by the
illumination of the green Speed Limiter icon,
along with the last speed set, in the instru -
ment cluster display. The Speed Limiter
feature can remain active concurrently with
the Cruise Control system. If a speed limit
below the one indicated in the Cruise Control
is selected, the Cruise Control speed will be
lowered to that of the Speed Limiter. This func -
tion remains available in RACE mode.
Speed Limiter Display
Speed Limit Programming
The speed limit can be programmed through
the radio system.
1 — Socket
2 — Sensor
3 — Connector
21_GU_OM_EN_USC_t.book Page 103
Page 106 of 280
STARTING AND OPERATING
104
To access the function on the main menu,
select the following items in order:
1. “Driver Assistance”
2. “Speed Limiter - Set Speed”
By turning the Rotary Pad, the speed increases
by 5 mph (5 km/h), from a minimum of
18 mph (30 km/h) to a maximum of 112 mph
(180 km/h).
Exceeding The Programmed Speed
By fully pressing the accelerator pedal, the
programmed speed can be exceeded even
with the device active (e.g. in the event of over-
taking).
The device is disabled until the speed drops
below the set limit, after which it reactivates
automatically.
Programmed Speed Icon Flashing
The programmed speed will flash in the
following scenarios:
When the accelerator pedal has been fully
pressed and the vehicle has exceeded the
programmed speed.
Activating the system after setting a limit
below the effective speed of the vehicle.
In the event of overtake acceleration.
Deactivation
The feature can be activated/deactivated
through the radio system.
Deactivating The Device
To access this feature, select the “Driver Assis -
tance” widget in the radio system, then select
the following items in sequence:
1. “Speed Limiter”
2. “OFF”
Automatic Deactivation Of The Device
The device deactivates automatically in the
event of fault in the system. In this case,
contact an authorized dealer.
Temporary Signal Loss
When the devices loses the signal, the white
symbol without the speed indication illumi -
nates on the display.
System Failure
If there is a system failure, the amber symbol
illuminates on the display.
CRUISE CONTROL SYSTEMS — IF
EQUIPPED
Cruise Control — If Equipped
When engaged, the Cruise Control takes over
accelerator operations at speeds greater than
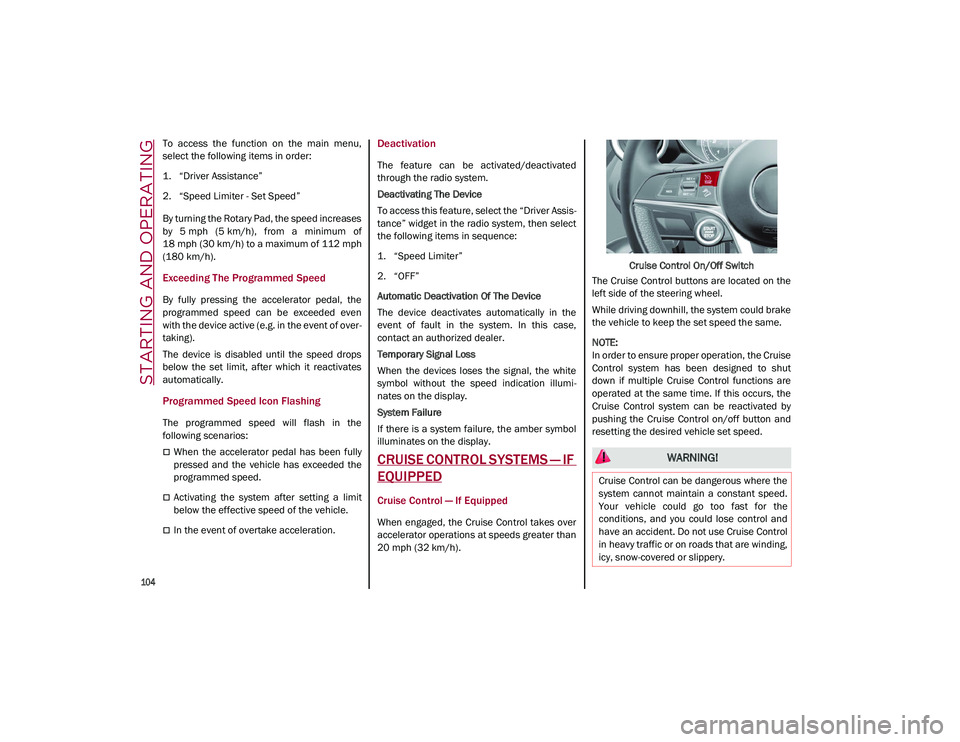
20 mph (32 km/h). Cruise Control On/Off Switch
The Cruise Control buttons are located on the
left side of the steering wheel.
While driving downhill, the system could brake
the vehicle to keep the set speed the same.
NOTE:
In order to ensure proper operation, the Cruise
Control system has been designed to shut
down if multiple Cruise Control functions are
operated at the same time. If this occurs, the
Cruise Control system can be reactivated by
pushing the Cruise Control on/off button and
resetting the desired vehicle set speed.
WARNING!
Cruise Control can be dangerous where the
system cannot maintain a constant speed.
Your vehicle could go too fast for the
conditions, and you could lose control and
have an accident. Do not use Cruise Control
in heavy traffic or on roads that are winding,
icy, snow-covered or slippery.
21_GU_OM_EN_USC_t.book Page 104
Page 107 of 280
105
To Activate
To activate the Cruise Control System, push
the on/off button located on the left side of the
steering wheel.
The activation of the system is signaled by the
white warning light illuminating in the instru-
ment cluster display.
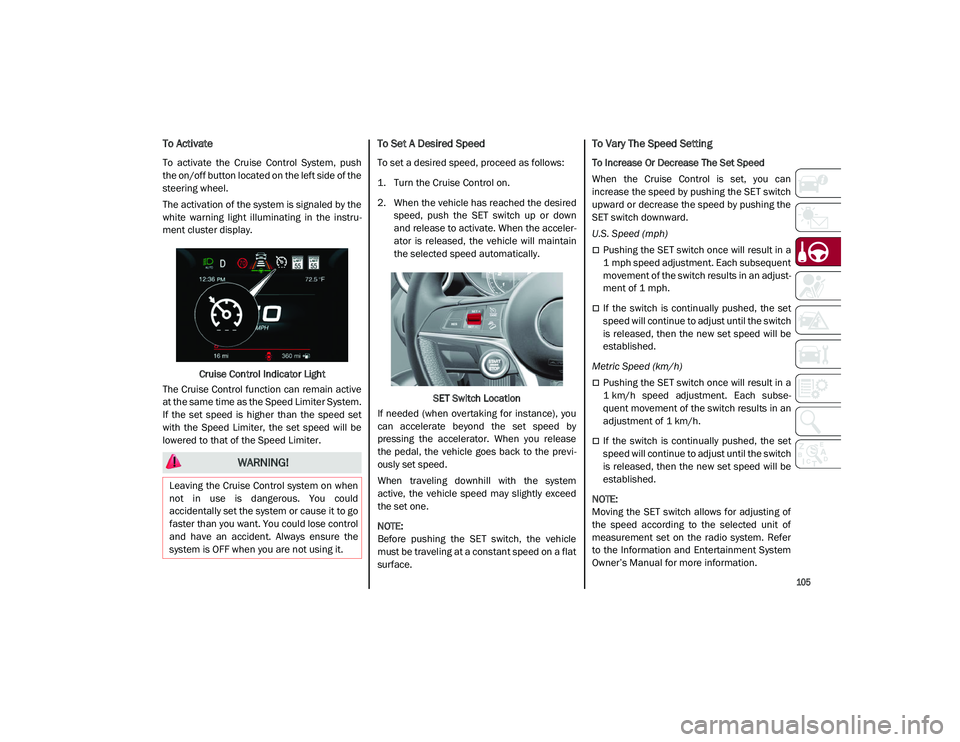
Cruise Control Indicator Light
The Cruise Control function can remain active
at the same time as the Speed Limiter System.
If the set speed is higher than the speed set
with the Speed Limiter, the set speed will be
lowered to that of the Speed Limiter.
To Set A Desired Speed
To set a desired speed, proceed as follows:
1. Turn the Cruise Control on.
2. When the vehicle has reached the desired speed, push the SET switch up or down
and release to activate. When the acceler -
ator is released, the vehicle will maintain
the selected speed automatically.
SET Switch Location
If needed (when overtaking for instance), you
can accelerate beyond the set speed by
pressing the accelerator. When you release
the pedal, the vehicle goes back to the previ -
ously set speed.
When traveling downhill with the system
active, the vehicle speed may slightly exceed
the set one.
NOTE:
Before pushing the SET switch, the vehicle
must be traveling at a constant speed on a flat
surface.
To Vary The Speed Setting
To Increase Or Decrease The Set Speed
When the Cruise Control is set, you can
increase the speed by pushing the SET switch
upward or decrease the speed by pushing the
SET switch downward.
U.S. Speed (mph)
Pushing the SET switch once will result in a
1 mph speed adjustment. Each subsequent
movement of the switch results in an adjust -
ment of 1 mph.
If the switch is continually pushed, the set
speed will continue to adjust until the switch
is released, then the new set speed will be
established.
Metric Speed (km/h)
Pushing the SET switch once will result in a
1 km/h speed adjustment. Each subse -
quent movement of the switch results in an
adjustment of 1 km/h.
If the switch is continually pushed, the set
speed will continue to adjust until the switch
is released, then the new set speed will be
established.
NOTE:
Moving the SET switch allows for adjusting of
the speed according to the selected unit of
measurement set on the radio system. Refer
to the Information and Entertainment System
Owner’s Manual for more information.
WARNING!
Leaving the Cruise Control system on when
not in use is dangerous. You could
accidentally set the system or cause it to go
faster than you want. You could lose control
and have an accident. Always ensure the
system is OFF when you are not using it.
21_GU_OM_EN_USC_t.book Page 105
Page 111 of 280
109
To Pause/Deactivate
With the feature enabled (speed not set), push
the on/off button to disable.
With the feature active (speed set), push the
on/off button to pause. The display will show
the icon in white with the speed in brackets. To
deactivate the feature, push the on/off button
a second time.
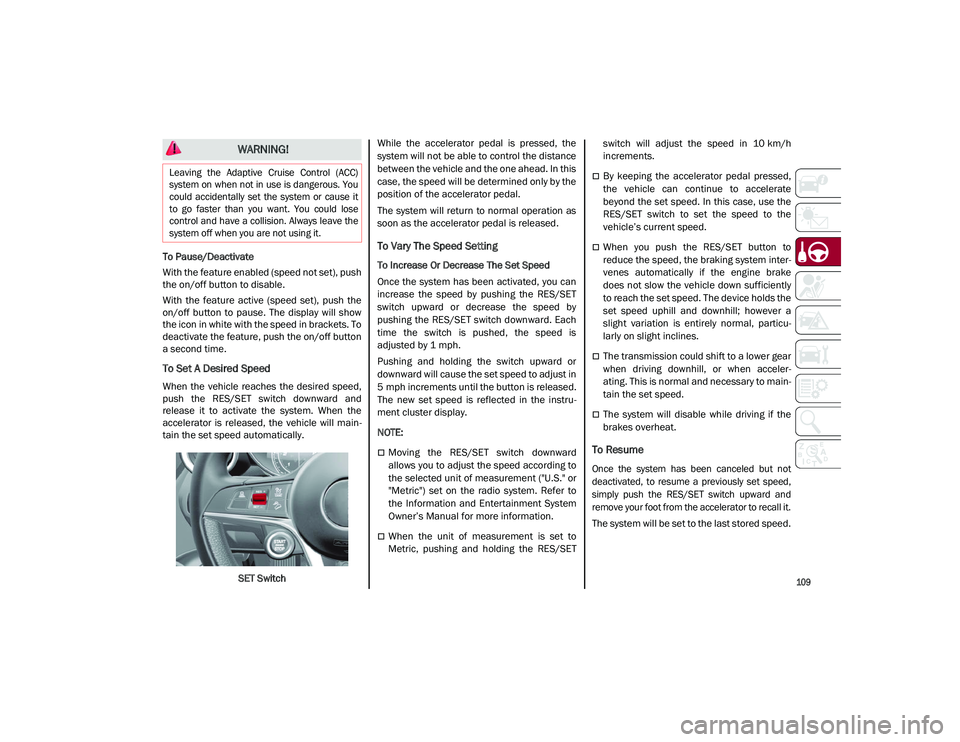
To Set A Desired Speed
When the vehicle reaches the desired speed,
push the RES/SET switch downward and
release it to activate the system. When the
accelerator is released, the vehicle will main-
tain the set speed automatically.
SET Switch While the accelerator pedal is pressed, the
system will not be able to control the distance
between the vehicle and the one ahead. In this
case, the speed will be determined only by the
position of the accelerator pedal.
The system will return to normal operation as
soon as the accelerator pedal is released.
To Vary The Speed Setting
To Increase Or Decrease The Set Speed
Once the system has been activated, you can
increase the speed by pushing the RES/SET
switch upward or decrease the speed by
pushing the RES/SET switch downward. Each
time the switch is pushed, the speed is
adjusted by 1 mph.
Pushing and holding the switch upward or
downward will cause the set speed to adjust in
5 mph increments until the button is released.
The new set speed is reflected in the instru
-
ment cluster display.
NOTE:
Moving the RES/SET switch downward
allows you to adjust the speed according to
the selected unit of measurement ("U.S." or
"Metric") set on the radio system. Refer to
the Information and Entertainment System
Owner’s Manual for more information.
When the unit of measurement is set to
Metric, pushing and holding the RES/SET switch will adjust the speed in 10 km/h
increments.
By keeping the accelerator pedal pressed,
the vehicle can continue to accelerate
beyond the set speed. In this case, use the
RES/SET switch to set the speed to the
vehicle’s current speed.
When you push the RES/SET button to
reduce the speed, the braking system inter
-
venes automatically if the engine brake
does not slow the vehicle down sufficiently
to reach the set speed. The device holds the
set speed uphill and downhill; however a
slight variation is entirely normal, particu -
larly on slight inclines.
The transmission could shift to a lower gear
when driving downhill, or when acceler -
ating. This is normal and necessary to main -
tain the set speed.
The system will disable while driving if the
brakes overheat.
To Resume
Once the system has been canceled but not
deactivated, to resume a previously set speed,
simply push the RES/SET switch upward and
remove your foot from the accelerator to recall it.
The system will be set to the last stored speed.
WARNING!
Leaving the Adaptive Cruise Control (ACC)
system on when not in use is dangerous. You
could accidentally set the system or cause it
to go faster than you want. You could lose
control and have a collision. Always leave the
system off when you are not using it.
21_GU_OM_EN_USC_t.book Page 109
Page 115 of 280
113
Stationary Objects And Vehicles
The ACC system can detect stationary vehicles
when the vehicle is traveling at speeds
between 2 mph and 35 mph (4 km/h and
60 km/h). The driver should always be atten -
tive and be ready to press the brakes if neces -
sary.
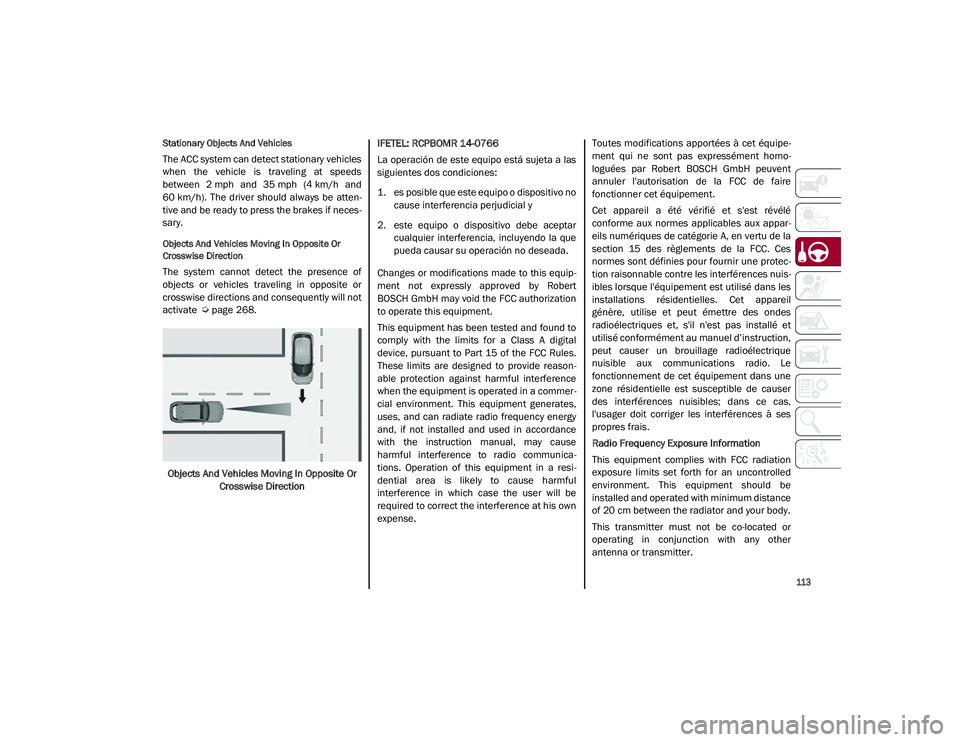
Objects And Vehicles Moving In Opposite Or
Crosswise Direction
The system cannot detect the presence of
objects or vehicles traveling in opposite or
crosswise directions and consequently will not
activate
Ú
page 268.
Objects And Vehicles Moving In Opposite Or Crosswise Direction IFETEL: RCPBOMR 14-0766
La operación de este equipo está sujeta a las
siguientes dos condiciones:
1. es posible que este equipo o dispositivo no
cause interferencia perjudicial y
2. este equipo o dispositivo debe aceptar cualquier interferencia, incluyendo la que
pueda causar su operación no deseada.
Changes or modifications made to this equip -
ment not expressly approved by Robert
BOSCH GmbH may void the FCC authorization
to operate this equipment.
This equipment has been tested and found to
comply with the limits for a Class A digital
device, pursuant to Part 15 of the FCC Rules.
These limits are designed to provide reason -
able protection against harmful interference
when the equipment is operated in a commer -
cial environment. This equipment generates,
uses, and can radiate radio frequency energy
and, if not installed and used in accordance
with the instruction manual, may cause
harmful interference to radio communica -
tions. Operation of this equipment in a resi -
dential area is likely to cause harmful
interference in which case the user will be
required to correct the interference at his own
expense. Toutes modifications apportées à cet équipe
-
ment qui ne sont pas expressément homo -
loguées par Robert BOSCH GmbH peuvent
annuler l'autorisation de la FCC de faire
fonctionner cet équipement.
Cet appareil a été vérifié et s'est révélé
conforme aux normes applicables aux appar -
eils numériques de catégorie A, en vertu de la
section 15 des règlements de la FCC. Ces
normes sont définies pour fournir une protec -
tion raisonnable contre les interférences nuis -
ibles lorsque l'équipement est utilisé dans les
installations résidentielles. Cet appareil
génère, utilise et peut émettre des ondes
radioélectriques et, s'il n'est pas installé et
utilisé conformément au manuel d’instruction,
peut causer un brouillage radioélectrique
nuisible aux communications radio. Le
fonctionnement de cet équipement dans une
zone résidentielle est susceptible de causer
des interférences nuisibles; dans ce cas,
l'usager doit corriger les interférences à ses
propres frais.
Radio Frequency Exposure Information
This equipment complies with FCC radiation
exposure limits set forth for an uncontrolled
environment. This equipment should be
installed and operated with minimum distance
of 20 cm between the radiator and your body.
This transmitter must not be co-located or
operating in conjunction with any other
antenna or transmitter.
21_GU_OM_EN_USC_t.book Page 113
Page 117 of 280
115
If the system detects that the driver’s hands
have been removed from the steering wheel,
the system will alert the driver to place their
hands back on the steering wheel
Ú
page 115.
If the vehicle crosses the lane boundary, the
steering wheel will vibrate and the dedicated
screen will appear in the instrument cluster
display.
NOTE:
The HAS system may take up to five seconds
to turn on once all conditions are met. During
this time, a grey indicator light will appear on
the instrument cluster display and the system
will automatically activate as soon as all of the
conditions are met with no intervention from
the driver.
The following conditions must be met before
the HAS system turns on:
The HAS system must be enabled by
pushing the button on the steering wheel
The vehicle must be on a highway
ACC must be activated
The right and left lane boundaries must be
visible
The vehicle speed must be between 0 and
90 mph (0 and 145 km/h)
The camera, radar, and radio system must
be functioning properly
The road lane width must be between 8.5 ft
and 13.7 ft (2.6 m and 4.2 m)
The turn signals must not be activated
The HAS system must be functioning prop -
erly
Other operating limits:
If the speed of ACC can be set to a higher
value (top speed 110 mph (180 km/h), HAS
is only available as long as the vehicle
speed is equal to or less than 90 mph
(145 km/h).
When the ACC speed is reduced and the
vehicle speed is less than 90 mph
(145 km/h), the system will automatically
reactivate.
If the ACC speed is set to 90 mph (145 km/h),
traveling downhill may increase the vehicle
speed. The HAS system will deactivate until
the speed returns to 90 mph (145 km/h).
Indications On The Display
The HAS system status can always be viewed
in the instrument cluster display.
The system status is indicated by the color of
the symbol on the display.
The HAS system uses sensors in the steering
wheel to detect if the driver’s hands are on it.
If the driver’s hands are not on the steering
wheel, a series of warnings will appear in the
instrument cluster display to alert the driver to
reposition their hands on the steering wheel. An acoustic signal will also sound. After a
period of time, the HAS system will disable if
the driver’s hands do not return to the steering
wheel.
After a period of time, the HAS system will
disable if the driver has not repositioned their
hands on the steering wheel.
When the system does not detect hands on
the steering wheel, it will warn the driver by
displaying a dedicated screen on the instru
-
ment cluster display.
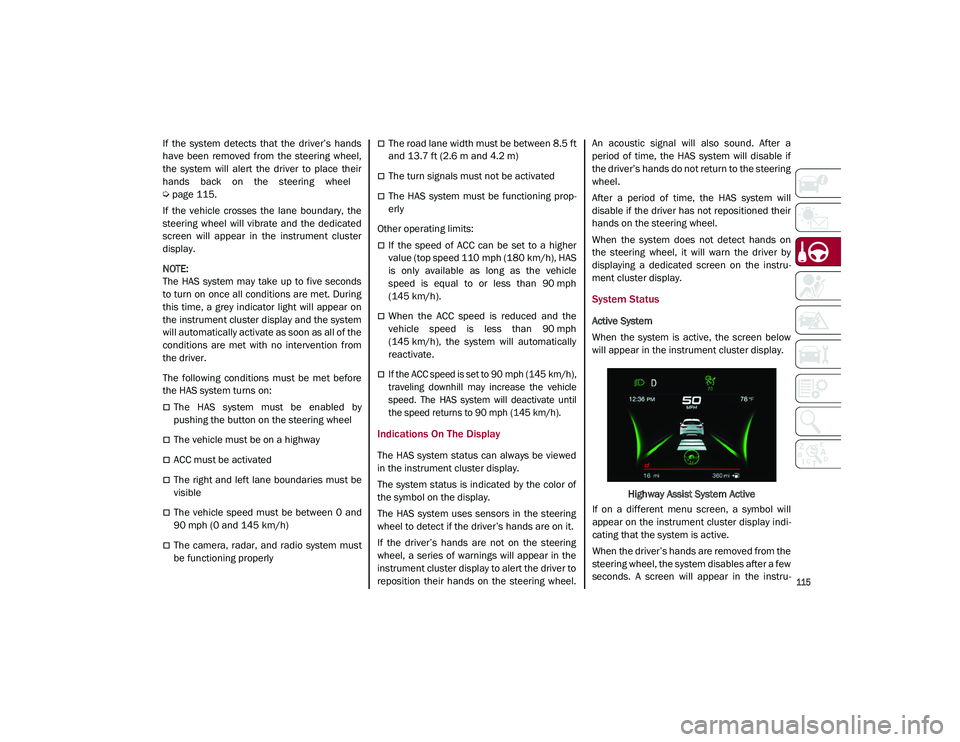
System Status
Active System
When the system is active, the screen below
will appear in the instrument cluster display.
Highway Assist System Active
If on a different menu screen, a symbol will
appear on the instrument cluster display indi -
cating that the system is active.
When the driver’s hands are removed from the
steering wheel, the system disables after a few
seconds. A screen will appear in the instru-
21_GU_OM_EN_USC_t.book Page 115
Page 118 of 280
STARTING AND OPERATING
116
ment cluster display warning the driver to
return their hands to the steering wheel.
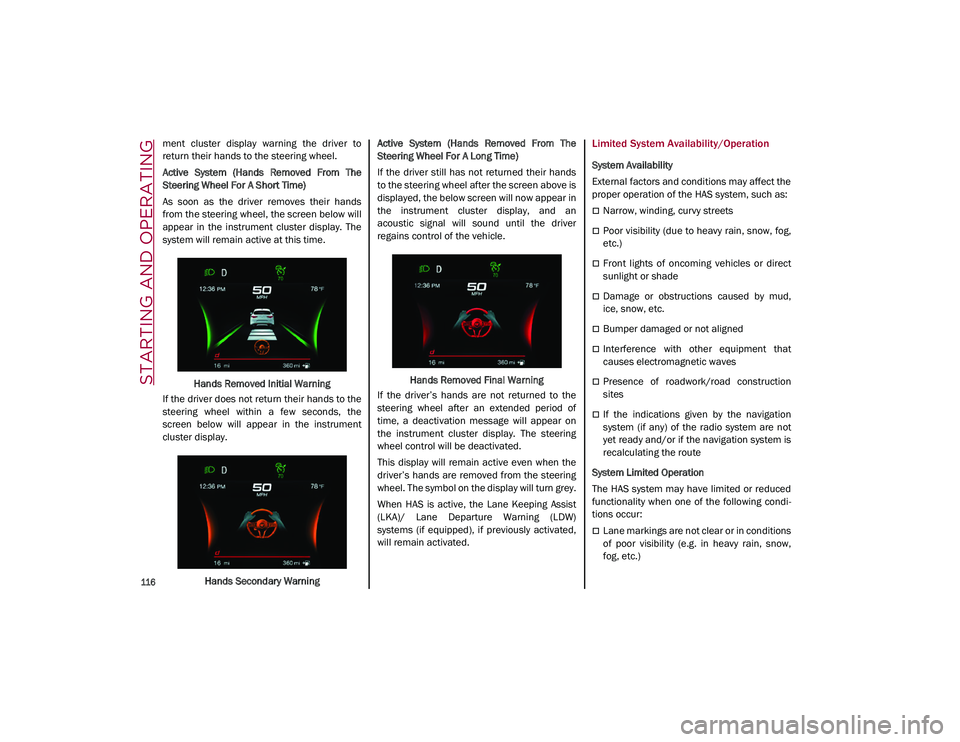
Active System (Hands Removed From The
Steering Wheel For A Short Time)
As soon as the driver removes their hands
from the steering wheel, the screen below will
appear in the instrument cluster display. The
system will remain active at this time.Hands Removed Initial Warning
If the driver does not return their hands to the
steering wheel within a few seconds, the
screen below will appear in the instrument
cluster display.
Hands Secondary Warning Active System (Hands Removed From The
Steering Wheel For A Long Time)
If the driver still has not returned their hands
to the steering wheel after the screen above is
displayed, the below screen will now appear in
the instrument cluster display, and an
acoustic signal will sound until the driver
regains control of the vehicle.
Hands Removed Final Warning
If the driver’s hands are not returned to the
steering wheel after an extended period of
time, a deactivation message will appear on
the instrument cluster display. The steering
wheel control will be deactivated.
This display will remain active even when the
driver’s hands are removed from the steering
wheel. The symbol on the display will turn grey.
When HAS is active, the Lane Keeping Assist
(LKA)/ Lane Departure Warning (LDW)
systems (if equipped), if previously activated,
will remain activated.Limited System Availability/Operation
System Availability
External factors and conditions may affect the
proper operation of the HAS system, such as:
Narrow, winding, curvy streets
Poor visibility (due to heavy rain, snow, fog,
etc.)
Front lights of oncoming vehicles or direct
sunlight or shade
Damage or obstructions caused by mud,
ice, snow, etc.
Bumper damaged or not aligned
Interference with other equipment that
causes electromagnetic waves
Presence of roadwork/road construction
sites
If the indications given by the navigation
system (if any) of the radio system are not
yet ready and/or if the navigation system is
recalculating the route
System Limited Operation
The HAS system may have limited or reduced
functionality when one of the following condi -
tions occur:
Lane markings are not clear or in conditions
of poor visibility (e.g. in heavy rain, snow,
fog, etc.)
21_GU_OM_EN_USC_t.book Page 116