Page 65 of 102

Periodic maintenance and adjustment
6-14
6
EAU85450
Why YamalubeYAMALUBE oil is a Genuine YAMAHA
Part born of the engineers’ passion
and belief that engine oil is an impor-
tant liquid engine component. We form
teams of specialists in the fields of me-
chanical engineering, chemistry, elec-
tronics and track testing, and have
them develop the engine together with
the oil it will use. Yamalube oils take full
advantage of the base oil’s qualities
and blend in the ideal balance of addi-
tives to make sure the final oil clears
our performance standards. Thus,
Yamalube mineral, semisynthetic and
synthetic oils have their own distinct
characters and value. Yamaha’s expe-
rience gained over many years of re-
search and development into oil since
the 1960’s helps make Yamalube the
best choice for your Yamaha engine.
EAUS1203
CoolantThe coolant level should be checked
regularly. In addition, the coolant must
be changed at the intervals specified in
the periodic maintenance chart.TIPIf genuine Yamaha coolant is not avail-
able, use an ethylene glycol antifreeze
containing corrosion inhibitors for alu-
minum engines and mix with distilled
water at a 1:1 ratio.
EAU20097
To check the coolant level
Since the coolant level varies with en-
gine temperature, check when the en-
gine is cold.
1. Park the vehicle on a level surface.2. With the vehicle in an upright posi-
tion, look at the coolant level in the
reservoir.
3. If the coolant is at or below the
minimum level mark, remove the
coolant reservoir cap. WARNING!
Remove only the coolant reser-
voir cap. Never attempt to re-
move the radiator cap when the
engine is hot.
[EWA15162]
Recommended coolant:
YAMALUBE coolant
Coolant quantity:
Coolant reservoir (max level mark):
0.25 L (0.26 US qt, 0.22 Imp.qt)
Radiator (including all routes):
1.60 L (1.69 US qt, 1.41 Imp.qt)
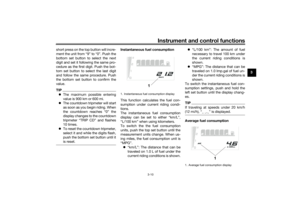
1. Coolant reservoir
2. Maximum level mark
3. Minimum level mark
LF
231
UBW3E0E0.book Page 14 Friday, May 24, 2019 11:01 AM
Page 66 of 102

Periodic maintenance and adjustment
6-15
64. Add coolant to the maximum level
mark. NOTICE: If coolant is not
available, use distilled water or
soft tap water instead. Do not
use hard water or salt water
since it is harmful to the engine.
If water has been used instead
of coolant, replace it with cool-
ant as soon as possible, other-
wise the cooling system will not
be protected against frost and
corrosion. If water has been
added to the coolant, have a
Yamaha dealer check the anti-
freeze content of the coolant as
soon as possible, otherwise the
effectiveness of the coolant will
be reduced.
[ECA10473]
5. Install the coolant reservoir cap.
EAU33032
Changing the coolant
The coolant must be changed at the in-
tervals specified in the periodic main-
tenance and lubrication chart. Have a
Yamaha dealer change the coolant.
WARNING! Never attempt to remove
the radiator cap when the engine is
hot.
[EWA10382]EAUM4160
Replacing the air filter ele-
ment and cleaning the check
hoseThe air filter element must be replaced
at the intervals specified in the periodic
maintenance chart. Replace the air fil-
ter element more frequently if you often
ride the rain or dusty areas. In addition,
the air filter check hose should be fre-
quently checked and cleaned if neces-
sary.
To replace the air filter element
1. Remove the passenger seat. (See
page 3-19.)
2. Remove the rider seat. (See page
3-19.)
3. Remove the air filter case cover by
removing the screws, remove the
screw securing the air filter ele-
ment and then pull it out.
1. Coolant reservoir cap
1
UBW3E0E0.book Page 15 Friday, May 24, 2019 11:01 AM
Page 67 of 102

Periodic maintenance and adjustment
6-16
6
4. Check the air filter for damage or
dirt and replace it if necessary.
NOTICE
ECA21220
The air filter element must be
replaced at the intervals speci-
fied in the periodic maintenance
chart.
The air filter element should be
replaced more frequently if of-
ten ride in the rain or dusty ar-
eas.
The air filter cannot be cleaned
by blowing it with compressed
air. It must be replaced.5. Insert the air filter element into the
air filter case and secure it with the
screw. NOTICE: Make sure that
the air filter element is properlyseated in the air filter case. The
engine should never be operat-
ed without the air filter element
installed, otherwise the pis-
ton(s) and/or cylinder(s) may
become excessively worn.
[ECA10482]
6. Install the air filter case cover by
installing the screws.
7. Install the seats.
To clean the air filter check hose
1. Remove the air filter check hose
under the air filter case.
2. Remove the hose, clean it, and
then install it in its original position.
1. Air filter case cover
2. Screw
1. Screw
2. Air filter element
1
21
2
1. Air filter element
1
1. Air filter check hose
1
UBW3E0E0.book Page 16 Friday, May 24, 2019 11:01 AM
Page 68 of 102

Periodic maintenance and adjustment
6-17
6
EAU21386
Checking the throttle grip free
playMeasure the throttle grip free play as
shown.
Periodically check the throttle grip free
play and, if necessary, have a Yamaha
dealer adjust it.
EAU21403
Valve clearanceThe valves are an important engine
component, and since valve clearance
changes with use, they must be
checked and adjusted at the intervals
specified in the periodic maintenance
chart. Unadjusted valves can result in
improper air-fuel mixture, engine
noise, and eventually engine damage.
To prevent this from occurring, have
your Yamaha dealer check and adjust
the valve clearance at regular intervals.TIPThis service must be performed when
the engine is cold.
EAU88380
TiresTires are the only contact between the
vehicle and the road. Safety in all con-
ditions of riding depends on a relatively
small area of road contact. Therefore, it
is essential to maintain the tires in good
condition at all times and replace them
at the appropriate time with the speci-
fied tires.
Tire air pressure
The tire air pressure should be
checked and, if necessary, adjusted
before each ride.
WARNING
EWA10504
Operation of this vehicle with im-
proper tire pressure may cause se-
vere injury or death from loss of
control.
The tire air pressure must be
checked and adjusted on cold
tires (i.e., when the temperature
of the tires equals the ambient
temperature).
The tire air pressure must be
adjusted in accordance with the
riding speed and with the total
1. Throttle grip free playThrottle grip free play:
3.0–5.0 mm (0.12–0.20 in)
1
UBW3E0E0.book Page 17 Friday, May 24, 2019 11:01 AM
Page 69 of 102

Periodic maintenance and adjustment
6-18
6 weight of rider, passenger, car-
go, and accessories approved
for this model.
WARNING
EWA10512
Never overload your vehicle. Opera-
tion of an overloaded vehicle could
cause an accident.
Tire inspection
The tires must be checked before each
ride. If the center tread depth reaches
the specified limit, if the tire has a nail
or glass fragments in it, or if the side-
wall is cracked, have a Yamaha dealer
replace the tire immediately.TIPThe tire tread depth limits may differ
from country to country. Always com-
ply with the local regulations.
WARNING
EWA17960
It is dangerous to ride with a
worn-out tire. When a tire tread
depth reaches the specified lim-
it, have a Yamaha dealer re-
place the tire immediately.
The replacement of all wheel
and brake-related parts, includ-
ing the tires, should be left to a
Yamaha dealer, who has the
necessary professional knowl-
edge and experience.
It is not recommended to patch
a punctured tube. If unavoid-
able, however, patch the tube
very carefully and replace it as
soon as possible with a high-
quality product.
Ride at moderate speeds after
changing a tire since the tire
surface must first be “broken
in” for it to develop its optimal
characteristics.Tire information
This model is equipped with tube tires.
Cold tire air pressure:
1 person:
Front:
220 kPa (2.20 kgf/cm², 32 psi)
Rear:
250 kPa (2.50 kgf/cm², 36 psi)
2 persons:
Front:
220 kPa (2.20 kgf/cm², 32 psi)
Rear:
250 kPa (2.50 kgf/cm², 36 psi)
Off-road riding:
Front:
200 kPa (2.00 kgf/cm², 29 psi)
Rear:
200 kPa (2.00 kgf/cm², 29 psi)
Maximum load:
Veh ic le:
190 kg (419 lb)
The vehicle’s maximum load is the
combined weight of the rider, pas-
senger, cargo, and any accessories.
1. Tire sidewall
2. Tire tread depth
Minimum tire tread depth (front and
rear):
1.6 mm (0.06 in)
12
UBW3E0E0.book Page 18 Friday, May 24, 2019 11:01 AM
Page 70 of 102

Periodic maintenance and adjustment
6-19
6Tires age, even if they have not been
used or have only been used occasion-
ally. Cracking of the tread and sidewall
rubber, sometimes accompanied by
carcass deformation, is an evidence of
ageing. Old and aged tires shall be
checked by tire specialists to ascertain
their suitability for further use.
WARNING
EWA10462
The front and rear tires should be of
the same make and design, other-
wise the handling characteristics of
the vehicle may be different, which
could lead to an accident.After extensive tests, only the tires list-
ed below have been approved for this
model by Yamaha.
EAU21945
Spoke wheelsTo maximize the performance, durabil-
ity, and safe operation of the vehicle,
note the following points.
Check each wheel for cracks, de-
formation and other damage. If
any damage is found, have the
wheel inspected by your Yamaha
dealer. Do not attempt to repair or
straighten a bent or damaged
wheel.
Check the spokes for looseness. If
any loose spokes are found, have
the wheel adjusted by your
Yamaha dealer. Improperly tight-
ened spokes can cause wheel
misalignment.
Have the wheel balanced whenev-
er the tire or tube has been re-
placed. An unbalanced wheel can
result in adverse handling charac-
teristics and shortened tire life.
WARNING
EWA10611
The wheels on this model are not
designed for use with tubeless tires.
Do not attempt to use tubeless tires
on this model.
EAU33893
Adjusting the clutch lever free
playMeasure the clutch lever free play as
shown.
Periodically check the clutch lever free
play and, if necessary, adjust it as fol-
lows.
To increase the clutch lever free play,
turn the clutch lever free play adjusting
bolt at the clutch lever in direction (a).
To decrease the clutch lever free play,
turn the adjusting bolt in direction (b).
Front tire:
Size:
90/90 - 21 M/C 54V M+S
Manufacturer/model:
PIRELLI/SCORPION RALLY STR
A
Rear tire:
Size:
150/70 R18 M/C 70V M+S
Manufacturer/model:
PIRELLI/SCORPION RALLY STR
1. Clutch lever free play adjusting bolt
2. Clutch lever free playClutch lever free play:
5.0–10.0 mm (0.20–0.39 in)
1
(a)
(b)
2
UBW3E0E0.book Page 19 Friday, May 24, 2019 11:01 AM
Page 71 of 102

Periodic maintenance and adjustment
6-20
6
TIPIf the specified clutch lever free play
cannot be obtained as described
above, proceed as follows.1. Fully turn the adjusting bolt at the
clutch lever in direction (a) to loos-
en the clutch cable.
2. Loosen the locknut at the crank-
case.
3. To increase the clutch lever free
play, turn the clutch lever free play
adjusting nut in direction (a). To
decrease the clutch lever free
play, turn the adjusting nut in di-
rection (b).
4. Tighten the locknut.
EAU37914
Checking the brake lever free
playThere should be no free play at the
brake lever end. If there is free play,
have a Yamaha dealer inspect the
brake system.
WARNING
EWA14212
A soft or spongy feeling in the brake
lever can indicate the presence of
air in the hydraulic system. If there is
air in the hydraulic system, have a
Yamaha dealer bleed the system be-
fore operating the vehicle. Air in the
hydraulic system will diminish thebraking performance, which may re-
sult in loss of control and an acci-
dent.
1. Locknut
2. Clutch lever free play adjusting nut
2
(b)
(a)
1
1. No brake lever free play
1
UBW3E0E0.book Page 20 Friday, May 24, 2019 11:01 AM
Page 72 of 102

Periodic maintenance and adjustment
6-21
6
EAU36505
Brake light switchesThe brake light should come on just
before braking takes effect. The brake
light is activated by switches connect-
ed to the brake lever and brake pedal.
Since the brake light switches are
components of the anti-lock brake sys-
tem, they should only be serviced by a
Yamaha dealer.
EAU22393
Checking the front and rear
brake padsThe front and rear brake pads must be
checked for wear at the intervals spec-
ified in the periodic maintenance and
lubrication chart.
EAU22433
Front brake pads
Each front brake pad is provided with
wear indicator grooves, which allow
you to check the brake pad wear with-
out having to disassemble the brake.
To check the brake pad wear, check
the wear indicator grooves. If a brake
pad has worn to the point that the wearindicator grooves have almost disap-
peared, have a Yamaha dealer replace
the brake pads as a set.
EAU46292
Rear brake pads
Each rear brake pad is provided with
wear indicator grooves, which allow
you to check the brake pad wear with-
out having to disassemble the brake.
To check the brake pad wear, check
the wear indicator grooves. If a brake
pad has worn to the point that a wear
indicator groove almost appears, have
a Yamaha dealer replace the brake
pads as a set.
1. Brake pad wear indicator groove
1 1
1. Brake pad wear indicator groove
1
UBW3E0E0.book Page 21 Friday, May 24, 2019 11:01 AM