Page 49 of 132
2.5L ENGINE
1Brake Fluid Reservoir
2 Main Fuse Box
3 Battery
4 Windshield Washer Tank
5 Engine Oil Filler Cap 6
Radiator Cap
7 Engine Coolant Reservoir
8 Engine Oil Filter
9 Engine Oil Dipstick
10 Air Cleaner Element
ENGINE COMPARTMENT
47
Page 50 of 132
2.4L TURBO ENGINE
1Brake Fluid Reservoir
2 Main Fuse Box
3 Battery
4 Windshield Washer Tank
5 Engine Oil Filler Cap 6
Radiator Cap
7 Engine Coolant Reservoir
8 Engine Oil Filter
9 Engine Oil Dipstick
10 Air Cleaner Element
ENGINE COMPARTMENT
48
Page 51 of 132

NEW VEHICLE BREAK-IN
The performance and long life of your Subaru are dependent on how you handle and care
for your Subaru while it is new.
Follow these instructions during the first 1,000 miles:
• Do not race the engine.
• Do not drive at one consistent engine or vehicle speed, either fast or slow.
• Avoid starting suddenly and rapid acceleration, except in an emergency.
• Avoid hard braking, except in an emergency.
ENGINE OIL
Use 0W-20 synthetic, with one of the follow specifications:
• API classification SN or SN PLUS with the words “RESOURCE CONSERVING”.
• ILSAC GF-5, which can be identified with the ILSAC certification mark (Starburst mark).
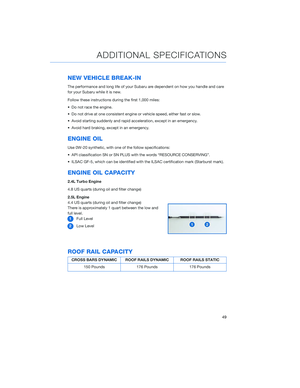
ENGINE OIL CAPACITY
2.4L Turbo Engine
4.8 US quarts (during oil and filter change)
2.5L Engine
4.4 US quarts (during oil and filter change)
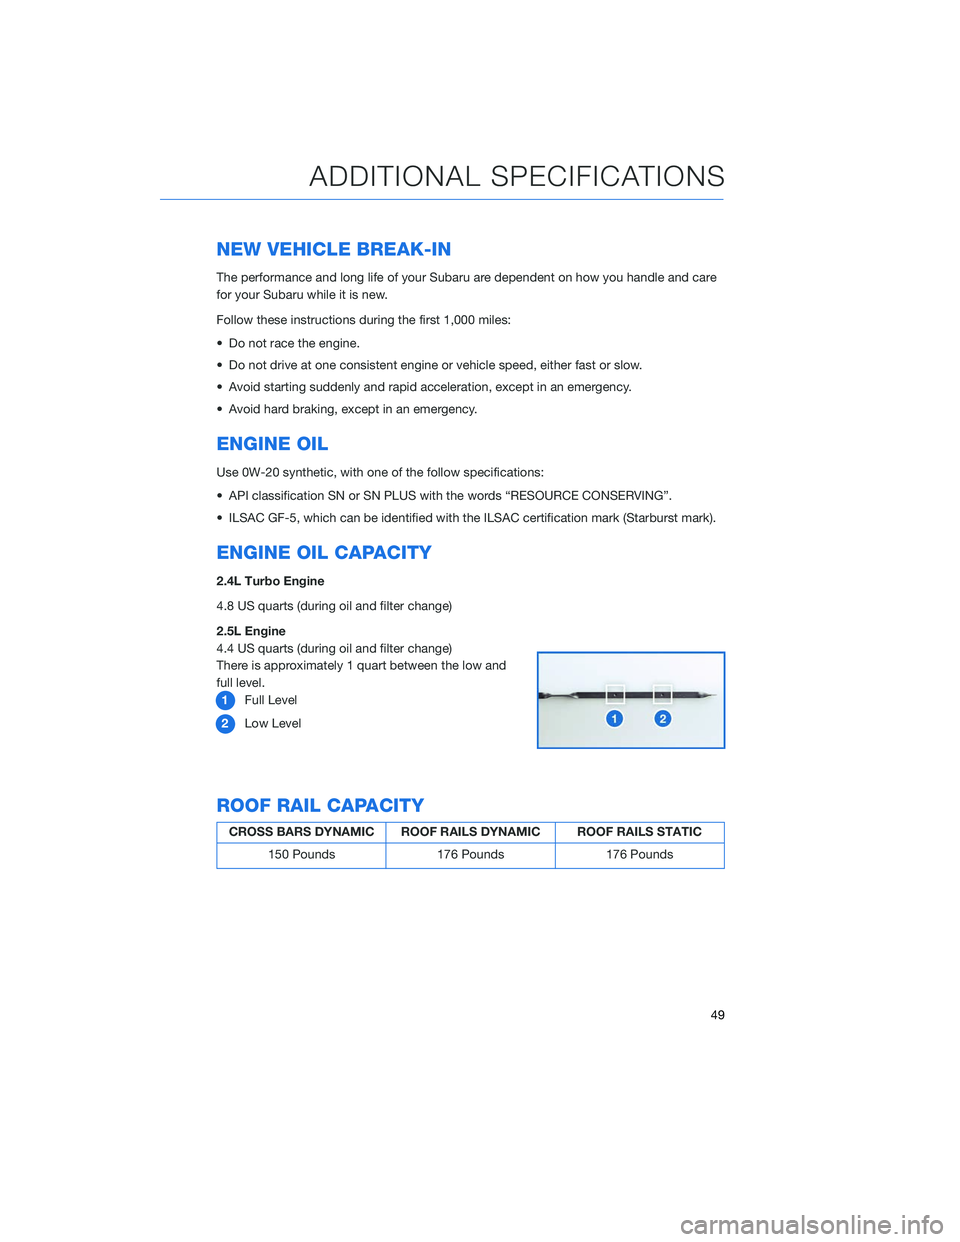
There is approximately 1 quart between the low and
full level.1 Full Level
2 Low Level
ROOF RAIL CAPACITY
CROSS BARS DYNAMIC ROOF RAILS DYNAMIC ROOF RAILS STATIC
150 Pounds 176 Pounds 176 Pounds
ADDITIONAL SPECIFICATIONS
49
Page 52 of 132
TRAILER TOWING CAPACITY
Maximum gross trailer weight:
• 2.4L models: 3,500 pounds
• 2.5L models: 2,700 pounds
• Ensure that the trailer tongue load is from 8 to 11% of the total trailer weight and doesnot exceed the maximum value of 350 pounds.
TIRE PRESSURE MONITORING SYSTEM (TPMS)
Your Subaru has a Tire Pressure Monitoring
System (TPMS). The individual tire pressure is
found in the Combination Meter Display
(CMD).
Tire pressure specification is on the tire
information placard located on the driver’s side
door pillar.
ADDITIONAL SPECIFICATIONS
50
Page 53 of 132
The tire pressure can be changed from kPi to PSi by using the Touchscreen.1 Start by selecting the “Home” button.
2 Select “Settings”.
3 Select “General”
4 Now select “Tire Pressure Units”.
5 Select your desired setting either “PSi” or
“kPa”.
ADDITIONAL SPECIFICATIONS
51
Page 54 of 132

OVERVIEW OF YOUR MULTIMEDIA SYSTEM
SUBARU STARLINK™ Multimedia combines the radio along with the ability to connect
your phone* through Bluetooth®to the radio for making calls, sending text messages and
listening to your favorite songs that are on your phone.
* *Compatible smartphone and application required. For applications to operate, latest version of each application required. Data provided by smartphone is displayed on the Touchscreen. Some state laws
prohibit the operation of handheld electronic devices while operating a vehicle. Smartphone apps
should only be launched when vehicle is safely parked. Your wireless carrier’s rates may apply.
Various Systems
Depending on your model and trim level, there are several types of SUBARU STARLINK™
Multimedia systems. Some of the functions described in this guide will vary by system.
• Dual 7–inch Multimedia
• 11.6–inch Multimedia Plus
• 11.6–inch Multimedia Navigation
Screen Layout
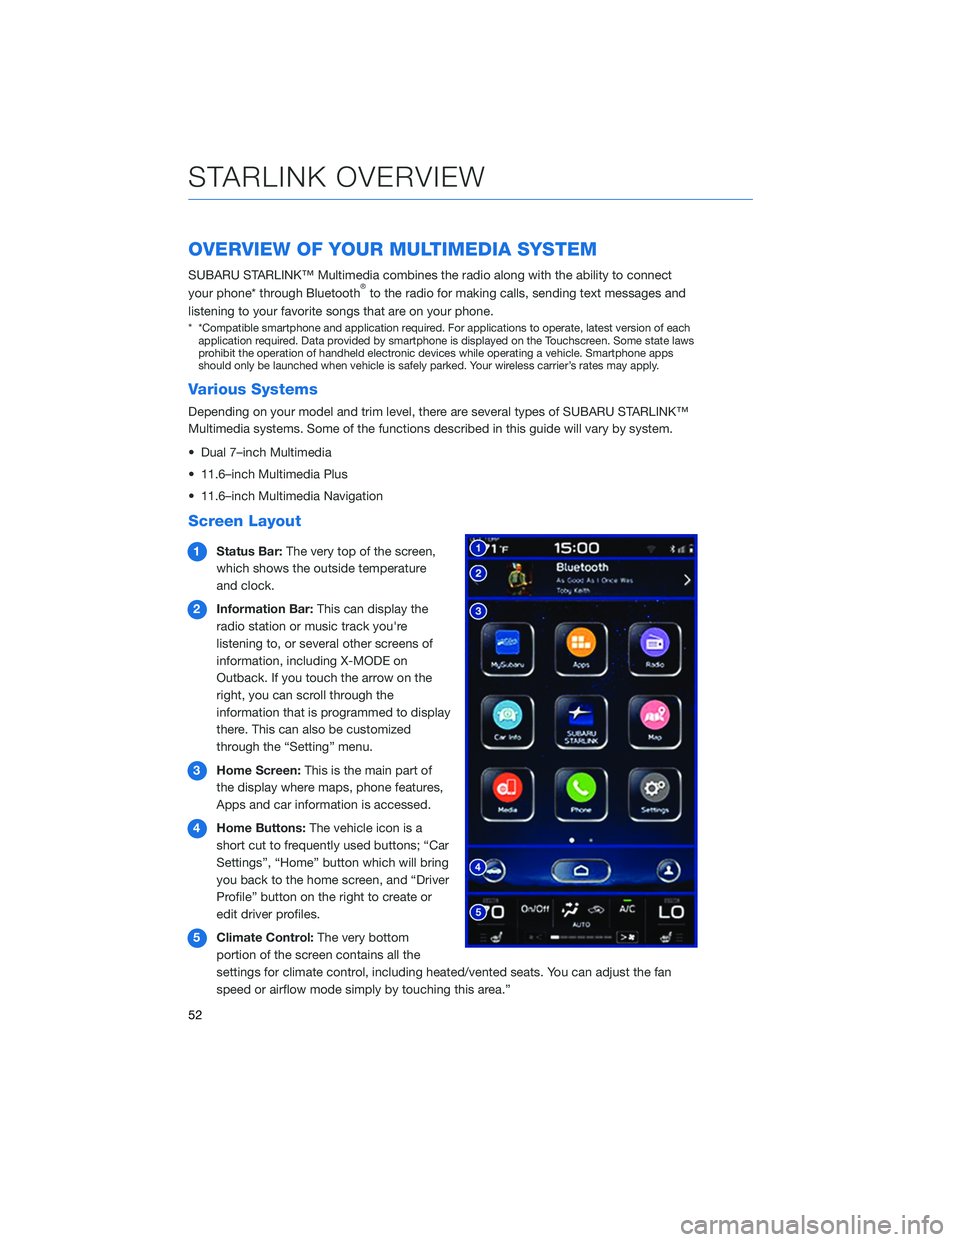
1 Status Bar: The very top of the screen,
which shows the outside temperature
and clock.
2 Information Bar: This can display the
radio station or music track you're
listening to, or several other screens of
information, including X-MODE on
Outback. If you touch the arrow on the
right, you can scroll through the
information that is programmed to display
there. This can also be customized
through the “Setting” menu.
3 Home Screen: This is the main part of
the display where maps, phone features,
Apps and car information is accessed.
4 Home Buttons: The vehicle icon is a
short cut to frequently used buttons; “Car
Settings”, “Home” button which will bring
you back to the home screen, and “Driver
Profile” button on the right to create or
edit driver profiles.
5 Climate Control: The very bottom
portion of the screen contains all the
settings for climate control, including heated/vented seats. You can adjust the fan
speed or airflow mode simply by touching this area.”
STARLINK OVERVIEW
52
Page 55 of 132

BUTTONS
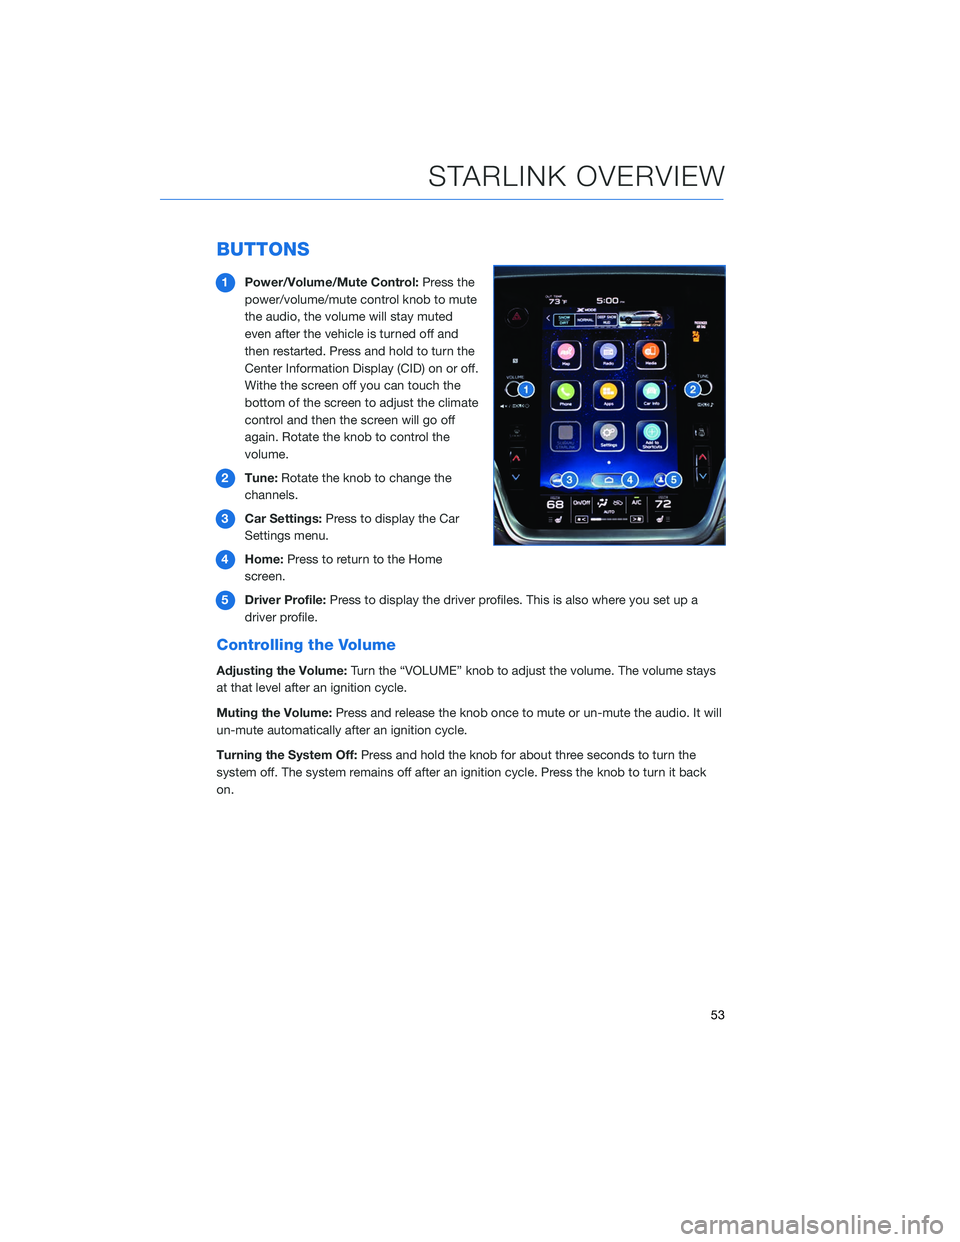
1Power/Volume/Mute Control: Press the
power/volume/mute control knob to mute
the audio, the volume will stay muted
even after the vehicle is turned off and
then restarted. Press and hold to turn the
Center Information Display (CID) on or off.
Withe the screen off you can touch the
bottom of the screen to adjust the climate
control and then the screen will go off
again. Rotate the knob to control the
volume.
2 Tune: Rotate the knob to change the
channels.
3 Car Settings: Press to display the Car
Settings menu.
4 Home: Press to return to the Home
screen.
5 Driver Profile: Press to display the driver profiles. This is also where you set up a
driver profile.
Controlling the Volume
Adjusting the Volume: Turn the “VOLUME” knob to adjust the volume. The volume stays
at that level after an ignition cycle.
Muting the Volume: Press and release the knob once to mute or un-mute the audio. It will
un-mute automatically after an ignition cycle.
Turning the System Off: Press and hold the knob for about three seconds to turn the
system off. The system remains off after an ignition cycle. Press the knob to turn it back
on.
STARLINK OVERVIEW
53
Page 56 of 132
TOUCHSCREEN
Operations are performed by touching the screen directly with your finger.
MOTIONACTION USE
Touch
Quickly touch and release
once.Changing and selecting various
settings
Double Touch with one
finger*
Quickly touch and release
twice with one finger.Enlarging the scale of the map
screen
Double Touch with two
fingers*
Quickly touch and release
twice with two fingers.Reducing the scale of the map
screen
Drag**
Touch and drag your
finger on the screen to
move the screen to the
desired position.•
Scrolling the lists
• Scrolling the map screen*
Swipe**
Quickly move the screen
by swiping with your
finger. •
Scrolling the lists
• Scrolling the map screen*
Pinch*
Move your two fingers
further apart (pinch-out)
to zoom in on the map.
Move your two fingers
closer together (pinch-in)
to zoom out on the map. Changing the scale of the map
screen
* 11.6-inch with Navi system only
** The operations may not be performed on all screens.
STARLINK OVERVIEW
54