2020 PEUGEOT PARTNER TEPEE AUX
[x] Cancel search: AUXPage 41 of 216
39
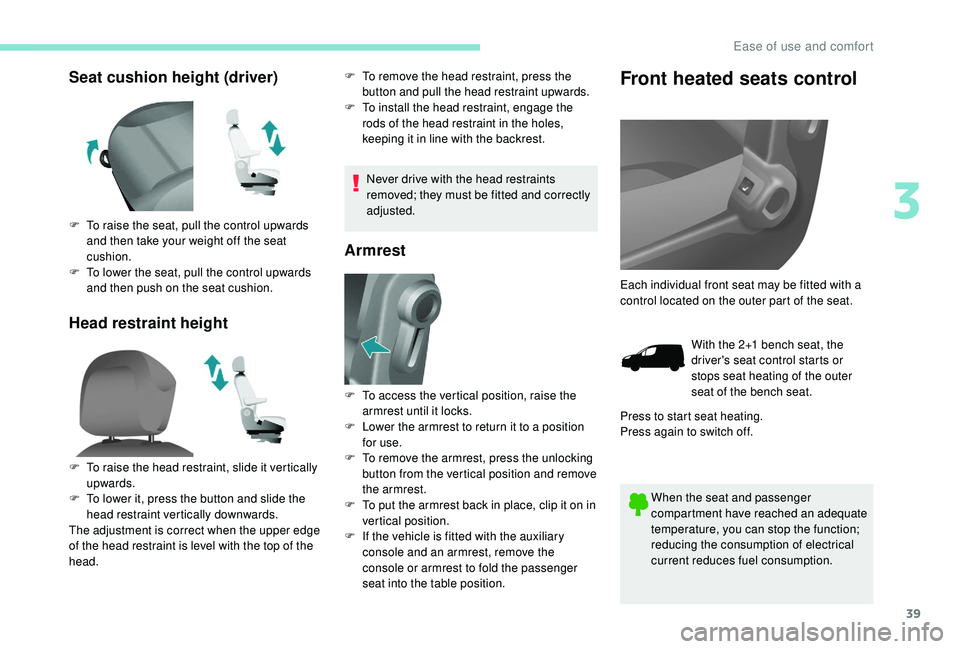
Seat cushion height (driver)
Head restraint heightF To remove the head restraint, press the button and pull the head restraint upwards.
F
T
o install the head restraint, engage the
rods of the head restraint in the holes,
keeping it in line with the backrest.
Never drive with the head restraints
removed; they must be fitted and correctly
adjusted.
Armrest
Front heated seats control
When the seat and passenger
compartment have reached an adequate
temperature, you can stop the function;
reducing the consumption of electrical
current reduces fuel consumption.
F
T
o raise the seat, pull the control upwards
and then take your weight off the seat
cushion.
F
T
o lower the seat, pull the control upwards
and then push on the seat cushion.
F
T
o raise the head restraint, slide it vertically
upwards.
F
T
o lower it, press the button and slide the
head restraint vertically downwards.
The adjustment is correct when the upper edge
of the head restraint is level with the top of the
head. F
T
o access the vertical position, raise the
armrest until it locks.
F
L
ower the armrest to return it to a position
for use.
F
T
o remove the armrest, press the unlocking
button from the vertical position and remove
the armrest.
F
T
o put the armrest back in place, clip it on in
vertical position.
F
I
f the vehicle is fitted with the auxiliary
console and an armrest, remove the
console or armrest to fold the passenger
seat into the table position. Each individual front seat may be fitted with a
control located on the outer part of the seat.
With the 2+1 bench seat, the
driver's seat control starts or
stops seat heating of the outer
seat of the bench seat.
Press to start seat heating.
Press again to switch off.
3
Ease of use and comfort
Page 178 of 216

2
* Depending on equipment. Press Menu to display the menu
carousel.
Volume adjustment (each source is
independent, including traffic announcements
(TA) and navigation instructions). Increase volume.
Decrease volume.
Mute by pressing the volume increase and
decrease buttons simultaneously. In very hot conditions, the volume may be
limited to protect the system. The return to
normal takes place when the temperature
in the passenger compartment drops.
The screen is of the "resistive" type, it is
necessary to press firmly, particularly for
"flick" gestures (scrolling through a list,
moving the map, etc.). A simple swipe will
not be enough. Pressing with more than
one finger is not recognised.
The screen can be used with gloves. This
technology allows use at all temperatures.
To clean the screen, use a soft non-
abrasive cloth (spectacles cloth) without
any additional product.
Do not use sharp objects on the screen.
Do not touch the screen with wet hands.
-
F
M/DAB*/AM* radio stations.
-
U
SB stick.
-
S
martphone via MirrorLink
TM or CarPlay®.
- T
elephone connected via Bluetooth®*
and Bluetooth® multimedia broadcast*
(streaming).
-
M
edia player connected via the auxiliary
socket (jack, cable not supplied). Restore the sound by pressing one of the two
volume buttons.
Steering mounted controls
Radio: select previous/next preset
station.
Media: select the genre/artist/
folder from the list depending on
classification.
Select the previous/next item in a
menu.
Radio: automatic search for a higher
frequency.
Media: select the next track.
Media, press and hold: fast for ward.
Skip in the list.
Change the audio source.
Confirm a selection.
Pick up/hang up the telephone.
Press for more than 2
seconds:
access the telephone menu.
Radio: automatic search for a lower
frequency.
Media: select the previous track.
Media, press and hold: rewind.
Skip in the list.
7-inch touch screen
Page 185 of 216
9
Select "List" in the primary page.
or
Select " Radio list " on the
secondary page.
Select a radio station from the list offered.
DAB/FM station tracking
"DAB" does not cover 100% of the
te r r i to r y.
When the digital radio signal is poor,
the "DAB/FM station tracking" allows
you to continue listening to the same
station, by automatically switching to the
corresponding FM analogue station (if
there is one). Press Radio Media to display the
primary page.
Press the secondary page. Select "Settings ".
Select " Radio".
Select " Digital/FM tracking " then "Confirm ". If "DAB/FM station tracking" is activated
there is a delay of a few seconds when the
system switches to analogue radio "FM",
sometimes with a change in volume.
Once the digital signal quality is restored,
the system automatically changes back
to " DA B ".
If the "DAB" station being listened to is
not available on "FM" ("
DAB/FM" option
greyed out), or "DAB/FM station tracking"
is not activated, the sound will cut out
while the digital signal is too weak.
Media
USB port
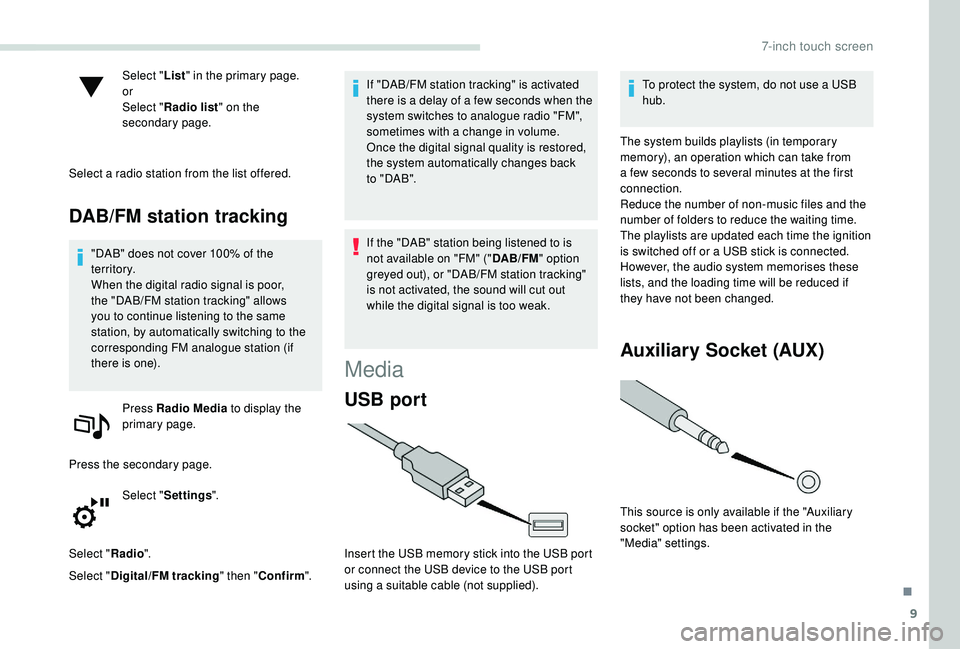
Insert the USB memory stick into the USB port
or connect the USB device to the USB port
using a suitable cable (not supplied). To protect the system, do not use a USB
hub.
The system builds playlists (in temporary
memory), an operation which can take from
a few seconds to several minutes at the first
connection.
Reduce the number of non-music files and the
number of folders to reduce the waiting time.
The playlists are updated each time the ignition
is switched off or a USB stick is connected.
However, the audio system memorises these
lists, and the loading time will be reduced if
they have not been changed.
Auxiliary Socket (AUX)
This source is only available if the "Auxiliary
socket" option has been activated in the
"Media" settings.
.
7-inch touch screen
Page 186 of 216
10
Connect the portable device (MP3 player, etc.)
to the jack socket using an audio cable (not
supplied).
First adjust the volume of your portable device
(to a high level). Then adjust the volume of your
audio system.
Operation of controls is via the portable device.
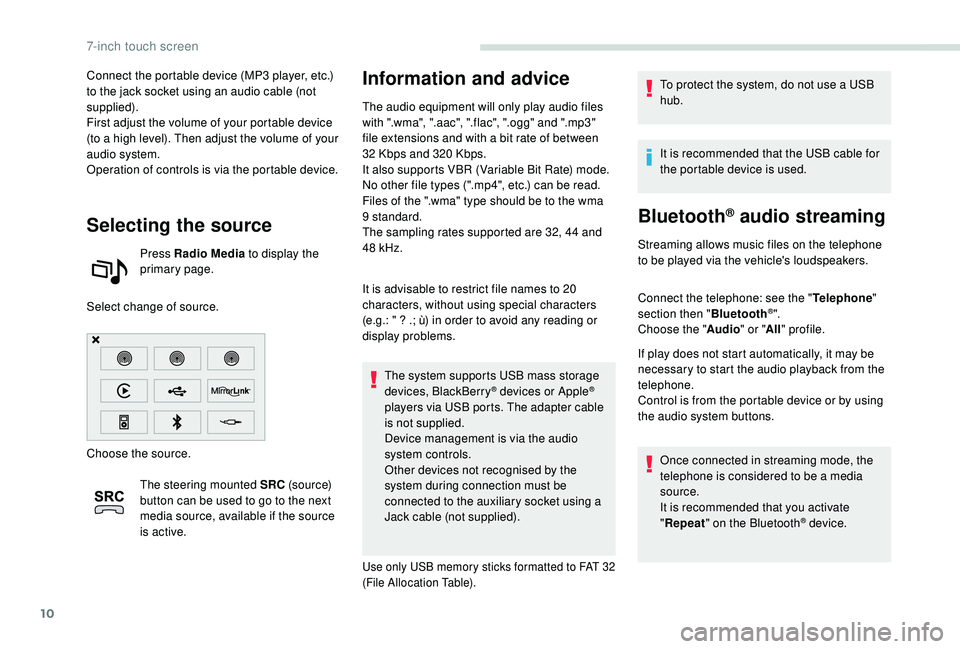
Selecting the source
Press Radio Media to display the
primary page.
Select change of source.
Choose the source. The steering mounted SRC (s o u r c e)
button can be used to go to the next
media source, available if the source
is active.
Information and advice
The audio equipment will only play audio files
with ".wma", ".aac", ".flac", ".ogg" and ".mp3"
file extensions and with a bit rate of between
32
Kbps and 320 Kbps.
It also supports VBR (Variable Bit Rate) mode.
No other file types (".mp4", etc.) can be read.
Files of the ".wma" type should be to the wma
9 standard.
The sampling rates supported are 32, 44 and
48
kHz.
It is advisable to restrict file names to 20
characters, without using special characters
(e.g.: " ? .; ù) in order to avoid any reading or
display problems. The system supports USB mass storage
devices, BlackBerry
® devices or Apple®
players via USB ports. The adapter cable
is not supplied.
Device management is via the audio
system controls.
Other devices not recognised by the
system during connection must be
connected to the auxiliary socket using a
Jack cable (not supplied).
Use only USB memory sticks formatted to FAT 32
(File Allocation Table).
To protect the system, do not use a USB
hub.
It is recommended that the USB cable for
the portable device is used.
Bluetooth® audio streaming
Streaming allows music files on the telephone
to be played via the vehicle's loudspeakers.
Connect the telephone: see the " Telephone"
section then " Bluetooth
®".
Choose the " Audio" or "All" profile.
If play does not start automatically, it may be
necessary to start the audio playback from the
telephone.
Control is from the portable device or by using
the audio system buttons.
Once connected in streaming mode, the
telephone is considered to be a media
source.
It is recommended that you activate
"Repeat " on the Bluetooth
® device.
7-inch touch screen
Page 199 of 216
1
Peugeot Connect Sound (RD5)
Audio system/Bluetooth®
Contents
First steps
1
S
teering mounted controls
2
M
enus
2
R
adio 3
Media
4
Telephone
6
Frequently asked questions
8T
he system is coded in such a way that it
will only operate in your vehicle.
As a safety measure, the driver must
only carry out operations which require
sustained attention when the vehicle is
stationary.
To avoid discharging the battery, the audio
system may switch off after a few minutes
if the engine is not running.
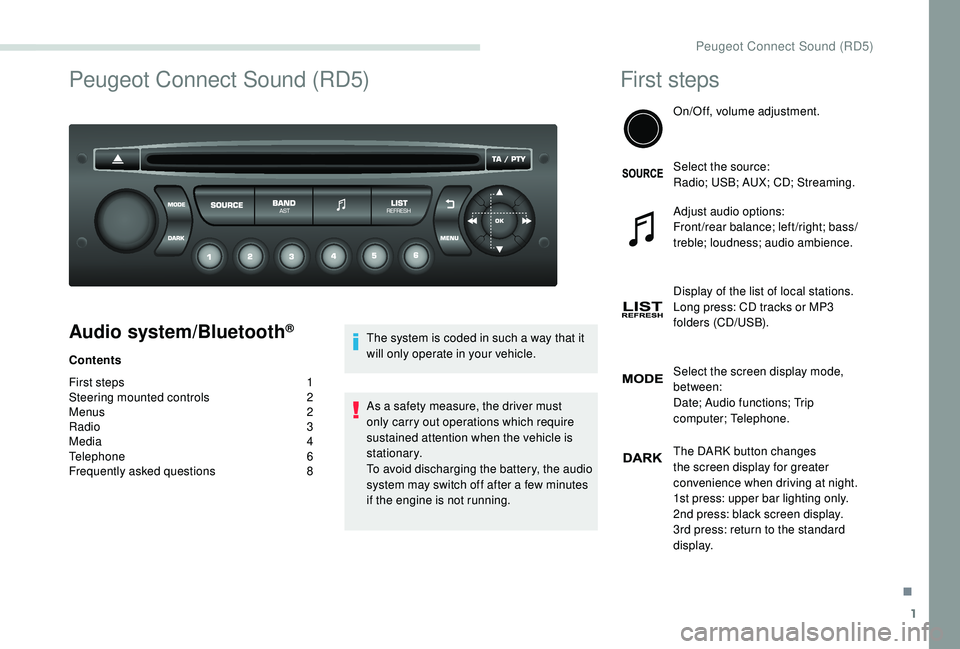
First steps
On/Off, volume adjustment.
Select the source:
Radio; USB; AUX; CD; Streaming.
Adjust audio options:
Front/rear balance; left/right; bass/
treble; loudness; audio ambience.
Display of the list of local stations.
Long press: CD tracks or MP3
folders (CD/USB).
Select the screen display mode,
between:
Date; Audio functions; Trip
computer; Telephone.
The DARK button changes
the screen display for greater
convenience when driving at night.
1st press: upper bar lighting only.
2nd press: black screen display.
3rd press: return to the standard
display.
.
Peugeot Connect Sound (RD5)
Page 201 of 216
3
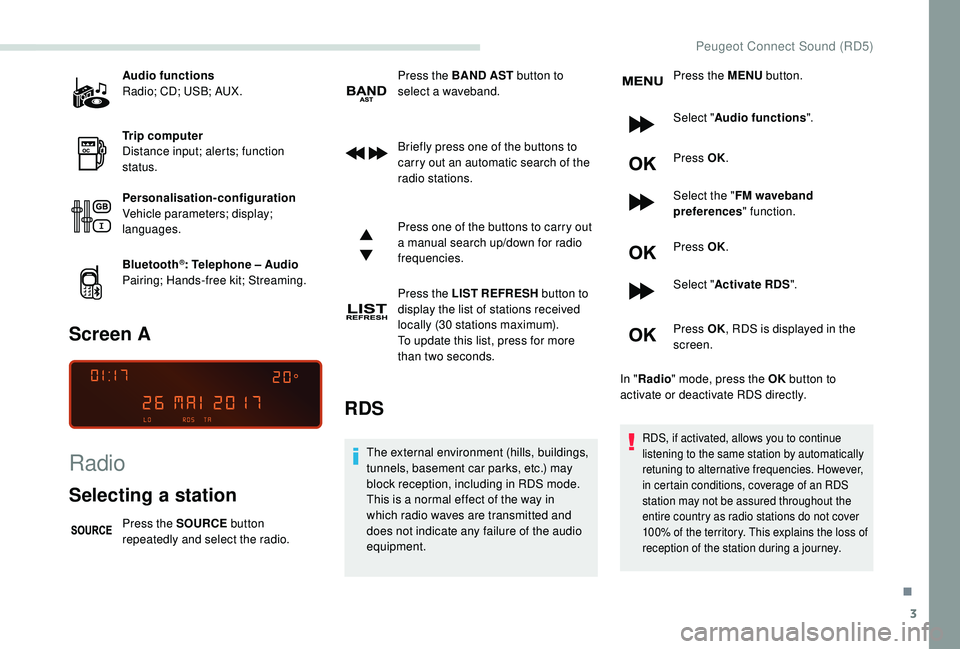
Audio functions
Radio; CD; USB; AUX.
Trip computer
Distance input; alerts; function
status.
Personalisation-configuration
Vehicle parameters; display;
languages.
Bluetooth
®: Telephone – Audio
Pairing; Hands-free kit; Streaming.
Screen A
Radio
Selecting a station
Press the SOURCE button
repeatedly and select the radio. Press the BAND
AST button to
select a waveband.
Briefly press one of the buttons to
carry out an automatic search of the
radio stations.
Press one of the buttons to carry out
a manual search up/down for radio
frequencies.
Press the LIST REFRESH button to
display the list of stations received
locally (30 stations maximum).
To update this list, press for more
than two seconds.
RDS
The external environment (hills, buildings,
tunnels, basement car parks, etc.) may
block reception, including in RDS mode.
This is a normal effect of the way in
which radio waves are transmitted and
does not indicate any failure of the audio
equipment. Press the MENU
button.
Select " Audio functions ".
Press OK.
Select the " FM waveband
preferences " function.
Press OK.
Select " Activate RDS ".
Press OK , RDS is displayed in the
screen.
In " Radio " mode, press the OK button to
activate or deactivate RDS directly.RDS, if activated, allows you to continue
listening to the same station by automatically
retuning to alternative frequencies. However,
in certain conditions, coverage of an RDS
station may not be assured throughout the
entire country as radio stations do not cover
100% of the territory. This explains the loss of
reception of the station during a journey.
.
Peugeot Connect Sound (RD5)
Page 203 of 216
5
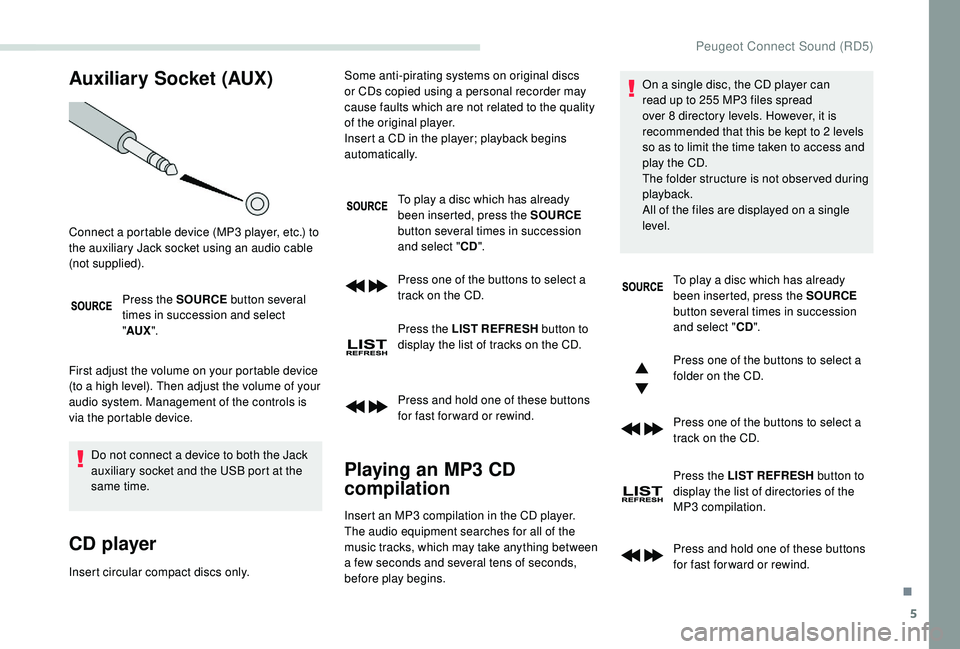
Auxiliary Socket (AUX)
Press the SOURCE button several
times in succession and select
" AUX ".
First adjust the volume on your portable device
(to a high level). Then adjust the volume of your
audio system. Management of the controls is
via the portable device. Do not connect a device to both the Jack
auxiliary socket and the USB port at the
same time.
CD player
Insert circular compact discs only. To play a disc which has already
been inserted, press the SOURCE
button several times in succession
and select " CD".
Press one of the buttons to select a
track on the CD.
Press the LIST REFRESH button to
display the list of tracks on the CD.
Press and hold one of these buttons
for fast for ward or rewind.
Playing an MP3 CD
compilation
Connect a portable device (MP3 player, etc.) to
the auxiliary Jack socket using an audio cable
(not supplied). Some anti-pirating systems on original discs
or CDs copied using a personal recorder may
cause faults which are not related to the quality
of the original player.
Insert a CD in the player; playback begins
automatically.
Insert an MP3 compilation in the CD player.
The audio equipment searches for all of the
music tracks, which may take anything between
a few seconds and several tens of seconds,
before play begins. On a single disc, the CD player can
read up to 255 MP3 files spread
over 8 directory levels. However, it is
recommended that this be kept to 2 levels
so as to limit the time taken to access and
play the CD.
The folder structure is not obser ved during
playback.
All of the files are displayed on a single
level.
To play a disc which has already
been inserted, press the SOURCE
button several times in succession
and select " CD".
Press one of the buttons to select a
folder on the CD.
Press one of the buttons to select a
track on the CD.
Press the LIST REFRESH button to
display the list of directories of the
MP3 compilation.
Press and hold one of these buttons
for fast for ward or rewind.
.
Peugeot Connect Sound (RD5)
Page 211 of 216
177
Socket, 12 V ....................................................64
S ocket, auxiliary ............................................ 9,
5
Socket, Jack
.................................................. 9, 5
Sockets, auxiliary
...............................
.............55
Speed limiter
.......................................... 11
5 -117
Stability control (ESC)..................................... 80
Starting a Diesel engine
............................... 12
8
Station, radio
...............................
..............7- 8, 3
Steering mounted controls, audio
.................... 2
S
teering wheel adjustment
.............................37
Stop & Start
................15, 69 , 108 -110 , 13 8, 15 8
Storage
............................................................ 55
Storage compartments
...................................54
TTable, writing ................................................... 55
Ta n k , f u e l ....................................................... 126
Telephone
..............................
............14 -16, 6-8
Time (setting)
............................................ 23 -24
TMC (Traffic info)
.............................................. 6
T
ouch screen ..................................................... 1
Towball, quickly detachable
..........................131
To w b a r
...............................
......103 -104 , 131-13 3
Towbar with quickly detachable towball
....... 13
1
Towed loads
.................................................. 161
Traction control (ASR)
........................12, 80 - 81
Traffic information (TA)
.................................6, 4
Traffic information (TMC)
..................................6
Tr a i l e r
...............
.............................. 103 -104, 131
Trip computer
............................................ 22-23
Tyre under-inflation detection
...........12, 112 -114
UUpdating risk areas ........................................... 5
Updating the date ............................................ 24
U
pdating the time
...............................
.......23 -24
UREA warning lamp
....................................... 21
USB
...................................................... 9 -10, 4, 6
VVentilation ....................................................... 69
Voice recognition ....................................... 13 -14
WWarning and indicator lamps ............................8
We ights ............... .......................................... 161
Window controls
....................................... 35-36
Wiper blades (changing)
...............................13 0
.
Alphabetical index