2020 PEUGEOT 5008 change wheel
[x] Cancel search: change wheelPage 9 of 308
7
Eco-driving
Eco-driving
Eco-driving refers to a range of everyday
practices that allow the motorist to optimise their
fuel consumption and CO
2emissions.
Optimise your use of the gearbox
With a manual gearbox, move off gently and
change up promptly. While accelerating, change
up early.
With an automatic gearbox, favour automatic
mode and avoid pressing the accelerator pedal
heavily or suddenly.
The gear efficiency indicator prompts you to
engage the most suitable gear: whenever this
indication is displayed on the instrument panel,
follow it straight away.
With an automatic gearbox, this indicator
appears only in manual mode.
Drive smoothly
Maintain a safe distance between vehicles, use
engine braking rather than the brake pedal and
press the accelerator gradually. These attitudes
help to save fuel, reduce CO
2 emissions and
decrease general traffic noise.
If the vehicle has the steering-mounted
"CRUISE" control, use cruise control at speeds
above 25 mph (40
km/h) when the traffic is
flowing well.
Use electrical equipment wisely
Before moving off, if the passenger compartment
is too warm, ventilate it by opening the windows
and air vents before using the air conditioning.
At speeds above 31
mph (50 km/h), close the
windows and leave the air vents open.
Consider using equipment that can help keep
the temperature in the passenger compartment
down (sunroof blind and window blinds, etc.).
Unless automatically regulated, switch off the air
conditioning as soon as the desired temperature
has been reached.
Switch off the demisting and defrosting functions,
if they are not managed automatically.
Switch off the heated seat as soon as possible.
Switch off the headlamps and foglamps when
the visibility conditions do not require their use.
Avoid running the engine before moving off,
particularly in winter; your vehicle will warm up
much faster while driving.
As a passenger, avoid connecting your
multimedia devices (film, music, video game,
etc.) to help reduce consumption of electrical
energy, and hence fuel.
Disconnect all portable devices before leaving
the vehicle.
Limit the causes of excess consumption
Spread loads throughout the vehicle; place the
heaviest items in the boot, as close as possible
to the rear seats.
Limit the loads carried in the vehicle and
minimise wind resistance (roof bars, roof rack, bicycle carrier, trailer, etc.). Preferably, use a
roof box.
Remove roof bars and roof racks after use.
At the end of winter, remove snow tyres and refit
summer tyres.
Avoid using the Dynamic Pack for too long, in
order to limit your fuel consumption.
Comply with servicing instructions
Check tyre pressures regularly, with the tyres
cold, referring to the label in the door aperture on
the driver's side.
Carry out this check in particular:
–
before a long journey
.
–
at each change of season.
–
after a long period out of use.
Do not overlook the spare wheel and, where
applicable, the tyres on your trailer or caravan.
Have your vehicle serviced regularly (engine oil,
oil filter
, air filter, passenger compartment filter,
etc.) and observe the schedule of operations in
the manufacturer's service schedule.
With a BlueHDi Diesel engine, if the SCR system
is faulty, your vehicle will emit pollution. Visit
a PEUGEOT dealer or a qualified workshop
as soon as possible to restore your vehicle’s
nitrogen oxide emissions to regulatory
compliance.
When filling the fuel tank, do not continue after
the third nozzle cut-out, to avoid overflow.
You will only see the fuel consumption of your
new vehicle settle down to a consistent average
after the first 1,900 miles (3,000 kilometres).
Page 42 of 308
40
Access
Recommendations on the hands-free
function ("Hands-Free Tailgate Access")
If it does not work, check that the electronic key
is not exposed to a source of electromagnetic
interference (e.g. smartphone).
The function may be deactivated or affected if
there is rain or snow.
The function may not work correctly with a
prosthetic leg.
In some circumstances, the tailgate may open or
close by itself, particularly when:
–
hitching up or removing a trailer;
–
fitting or removing a bicycle carrier;
–
loading or unloading bicycles on / from a
bicycle carrier;
–
depositing or lifting something behind the
vehicle;
–
an animal approaches the rear bumper;
–
washing the vehicle;
–
maintenance is performed on the vehicle;
–
accessing the spare wheel.
T
o avoid such operating problems, keep the
electronic key away from the recognition zone or
deactivate the hands-free function.
The installation of a towing device may disturb the detection system.
Memorising an opening
position
To memorise a position, in order to limit the
motorised tailgate opening angle:
► move the tailgate to the desired position
manually or by pressing the button.
►
press button
C or the exterior control B for
more than 3 seconds (memorisation is confirmed
by a brief audible signal).
Memorising is not available until the
height of opening is more than or equal
to 1 metre between the low position and the
high position of the tailgate.
To delete the memorised position:
►
open the tailgate to any position.
►
press button
C or the exterior control B for
more than 3 seconds (deletion is confirmed by a
long audible signal).
Manual operation
The tailgate can be manoeuvred by hand, even
with motorised operation activated.
The tailgate must be stationary.
When opening and closing the motorised tailgate
manually, there is no assistance from gas struts.
Resistance to opening and closing is therefore
entirely normal.
Repeatedly opening and closing the
motorised tailgate can cause overheating
of its electric motor, after which opening and
closing will not be possible.
Allow at least 10 minutes for the electric
motor to cool down before operating the
tailgate again.
If you are unable to wait, operate it manually.
Manual closing of the
motorised tailgate in case of
failure
This operation is only necessary in the case of
failure of the tailgate motor .
If the failure originates from the battery, it is
recommended to recharge it or change it with the
tailgate closed.
In this situation, a significant force may be
needed to close the tailgate.
►
Close it gently without slamming, as slowly as
possible, by pushing at the centre of the tailgate.
Do not lower the tailgate by pushing at
one of its sides - risk of damage!
Precautions in use
To avoid unintentionally opening the tailgate while operating the towing
device:
–
Deactivate the “Hands-Free
Tailgate
Access” function in advance in the vehicle
configuration menu.
–
Or remove the electronic key from the
recognition zone, with the tailgate closed.
For more information on the T
owing device
with quickly detachable towball , refer to the
corresponding section.
In wintry conditions
To avoid any operating problems, remove
the snow or wait until the ice melts before
requesting motorised opening of the tailgate.
When washing
When washing the vehicle in an
automatic car wash, do not forget to lock
the vehicle to prevent any risk of unwanted
opening.
Electric windows
1. Left-hand front
2. Right-hand front
3. Right-hand rear
4. Left-hand rear
5. Deactivation of the electric window controls
located by the rear seats
Manual operation
► To open/close the window, press/pull the
switch without passing the point of resistance;
the window stops as soon as the switch is
released.
Page 50 of 308
48
Ease of use and comfort
► Enter the vehicle and switch the ignition on.
► Adjust your seat and the door mirrors.
►
Press button
M, then press button 1 or 2
within 4 seconds.
An audible signal confirms the memorisation.
Memorising a new position cancels the previous
position.
Recalling a stored position
Ignition on or engine running
► Press button 1 or 2 to recall the
corresponding position.
An audible signal sounds when the adjustment
is finished.
You can interrupt the current movement by
pressing button M, 1 or 2 or by using one of the
seat adjustment controls.
A stored position cannot be recalled while
driving.
Recalling stored positions is deactivated 45
seconds after switching off the ignition.
Heated seats
The function is active only with the engine
running.
On/Off
► Press the button corresponding to your seat.
► Each press changes the heating level; the
corresponding number of indicator lamps come
on.
►
T
o stop heating, press the button again until
all the indicator lamps are off.
The system status is memorised when the
ignition is switched off.
Do not use the function when the seat
is not occupied.
Reduce the heating intensity as soon as
possible.
When the seat and passenger compartment
have reached a satisfactory temperature,
switch the function off; reducing electricity
consumption in turn decreases fuel
consumption.
Prolonged use of the heated seats is not
recommended for those with sensitive
skin.
There is a risk of burns for people whose
perception of heat is impaired (illness, taking
medication, etc.).
To keep the heated pad intact and to prevent
a short circuit:
–
do not place sharp or heavy objects on the
seat,
– do not kneel or stand on the seat,
– do not spill liquids onto the seat,
–
never use the heating function if the seat
is wet.
Multipoint massage
System with a choice of type of massage and
adjustment of its intensity.
This system operates with the engine running, as
well as in STOP mode of the
Stop & Start.
The massage settings are adjusted via the touch screen.
From the front seat:
► Press this button; its green indicator
lamp comes on.
The settings page is displayed on the touch
screen with the last memorised settings.
If the settings suit you and you make no
changes, the display returns to its previous state,
and the function activates immediately
.
Seats must be adjusted one after another,
starting with the driver's seat.
To modify the settings:
►
Begin with the driver
’s seat.
►
Select a massage intensity from the three
levels offered: " 1
" (Low), "2" (Normal) or "3"
(High).
►
Select another type of massage from those
offered.
►
W
ait for the driver's seat settings page to
disappear.
► Next, proceed with the passenger's seat in
the same way.
The changes are applied immediately.
Once activated, the system starts a one hour
massage cycle, made up of sequences of 6
minutes of massage followed by 3 minutes at
rest.
The system automatically stops at the end of the
cycle; the indicator lamp for the button goes off.
Steering wheel
adjustment
► When stationary, pull the control to release
the steering wheel.
► Adjust the height and reach to suit your
driving position.
► Push the control lever to lock the steering
wheel.
As a safety measure, these adjustments must only be carried out with the vehicle
stationary.
Page 51 of 308
49
Ease of use and comfort
3► Next, proceed with the passenger's seat in
the same way .
The changes are applied immediately.
Once activated, the system starts a one hour
massage cycle, made up of sequences of 6
minutes of massage followed by 3 minutes at
rest.
The system automatically stops at the end of the
cycle; the indicator lamp for the button goes off.
Steering wheel
adjustment
► When stationary , pull the control to release
the steering wheel.
►
Adjust the height and reach to suit your
driving position.
►
Push the control lever to lock the steering
wheel.
As a safety measure, these adjustments must only be carried out with the vehicle
stationary.
Mirrors
Door mirrors
As a safety measure, the mirrors should be adjusted to reduce the "blind spots".
The objects that you see in the mirrors are
in fact closer than they appear. Take this
into account in order to correctly judge the
distance of vehicles approaching from behind.
Demisting/Defrosting
If the vehicle is so equipped, demisting/
defrosting of the heated door mirrors is
performed when the heated rear screen is
switched on.
For more information on Rear screen
demisting/defrosting , refer to the
corresponding section.
Adjustment
► Move control A to the right or to the left to
select the corresponding mirror.
►
Move control
B in any of the four directions
to adjust.
►
Return control A
to its central position.
Manual folding
The mirrors can be folded manually (parking
obstruction, narrow garage, etc.).
►
T
urn the mirror towards the vehicle.
Electric folding
Depending on equipment, the mirrors can be
folded electrically, when the vehicle is parked.
► From the inside, with the
ignition on, place control A
in the
central position.
►
Pull control A
backwards.
►
Lock the vehicle from the outside.
Electric unfolding
► From outside: unlock the vehicle.
► From inside: with the ignition on, place
control
A in the central position and then pull it
rearwards.
Depending on version, the automatic
door mirror folding/unfolding function is
Page 78 of 308
76
Ease of use and comfort
Behind the rear seats
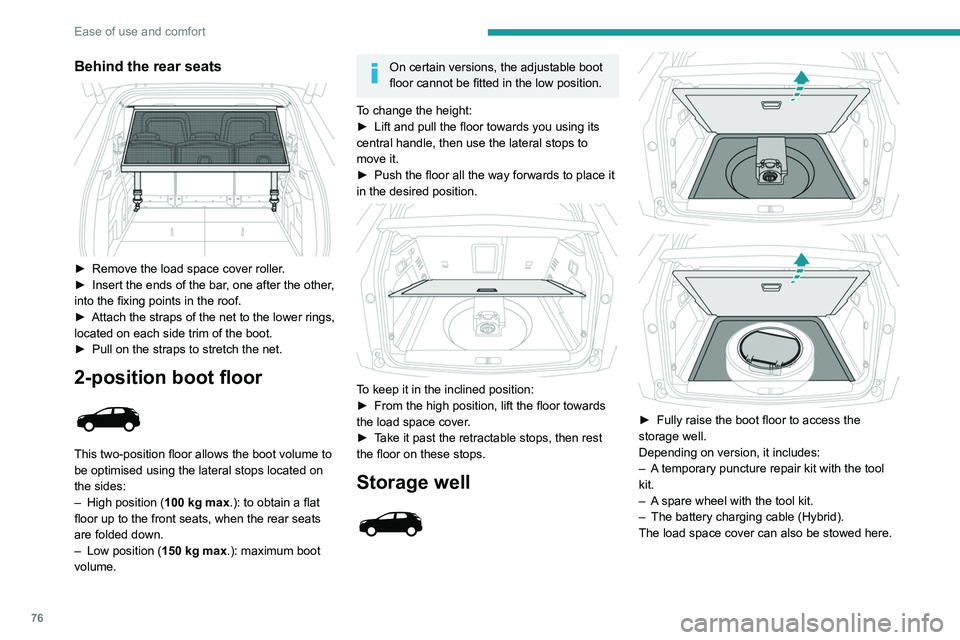
► Remove the load space cover roller.
► Insert the ends of the bar , one after the other,
into the fixing points in the roof.
►
Attach the straps of the net to the lower rings,
located on each side trim of the boot.
►
Pull on the straps to stretch the net.
2-position boot floor
This two-position floor allows the boot volume to
be optimised using the lateral stops located on
the sides:
–
High position ( 100
kg max.): to obtain a flat
floor up to the front seats, when the rear seats
are folded down.
–
Low position ( 150
kg max.): maximum boot
volume.
On certain versions, the adjustable boot
floor cannot be fitted in the low position.
To change the height:
►
Lift and pull the floor towards you using its
central handle, then use the lateral stops to
move it.
►
Push the floor all the way forwards to place it
in the desired position.
To keep it in the inclined position:
► From the high position, lift the floor towards
the load space cover
.
►
T
ake it past the retractable stops, then rest
the floor on these stops.
Storage well
► Fully raise the boot floor to access the
storage well.
Depending on version, it includes:
–
A
temporary puncture repair kit with the tool
kit.
–
A
spare wheel with the tool kit.
–
The battery charging cable (Hybrid).
The load space cover can also be stowed here.
12 V accessory socket
► To connect a 12 V accessory (maximum
power: 120 W), lift the cover and plug in a
suitable adaptor.
► Switch on the ignition.
The connection of an electrical device
not approved by PEUGEOT, such as a
USB charger, may adversely affect the
operation of vehicle electrical systems,
causing faults such as poor radio reception or
interference with displays in the screens.
Boot lamp
It comes on automatically when the boot is
opened and goes off automatically when the
boot is closed.
The lighting time varies according to the
circumstances:
– When the ignition is off, approximately 10
minutes.
– In energy saving mode, approximately 30
seconds.
– With the engine running, unlimited.
Page 84 of 308
82
Lighting and visibility
The system becomes operational when the vehicle exceeds 16 mph (25 km/h).
When the speed falls below 9 mph (15 km/h),
the function is no longer operational.
Activation/Deactivation
It is set via the Driving / Vehicle touch
screen menu.
The state of the system stays in the memory
when switching off the ignition.
Operation
If the ambient light level is sufficient and/or the
traffic conditions do not allow the main beam
headlamps to be lit:
– The dipped beam head lamps
remain lit. These indicator lamps
come on on the instrument panel.
If the ambient light level is very low and traffic
conditions permit:
– The main beam headla mps
come on automatically. These
indicator lamps come on on the instrument
panel.
The function is deactivated if the fog lamps are
switched on or the system detects dense fog.
When the fog lamps are switched off or the
vehicle leaves the area of dense fog, the function
is automatically reactivated.
This indicator lamp goes out when the function is deactivated.
Pause
If the situation requires a change of headlamp
beam, the driver can take over at any time.
►
A
"headlamp flash" pauses the function:
•
if the "AUT
O" and "Dipped beam" indicator
lamps were on, the system changes to main
beam,
•
if the "AUT
O" and "Main beam" indicator
lamps were on, the system changes to
dipped beam.
To reactivate the system, flash the headlamps
again.
The system may be disrupted or not work correctly:
–
When visibility conditions are poor
(snowfall, heavy rain, etc.).
–
If the windscreen in front of the camera is
dirty
, misted or obscured (for example, by a
sticker).
–
If the vehicle is facing highly reflective
signs.
When the system detects thick fog, it
temporarily deactivates the function.
The system is not able to detect:
–
Road users that do not have their own
lighting, such as pedestrians.
–
V
ehicles whose lighting is obscured (for
example, vehicles driving behind a safety
barrier on a motorway).
–
V
ehicles at the top or bottom of a steep
slope, on winding roads, on crossroads.
Clean the windscreen regularly,
particularly the area in front of the
camera.
The internal surface of the windscreen can
also become misted around the camera.
In humid and cold weather, demist the
windscreen regularly.
Do not allow snow to accumulate on the
bonnet or roof of the vehicle as this could
obstruct the detection camera.
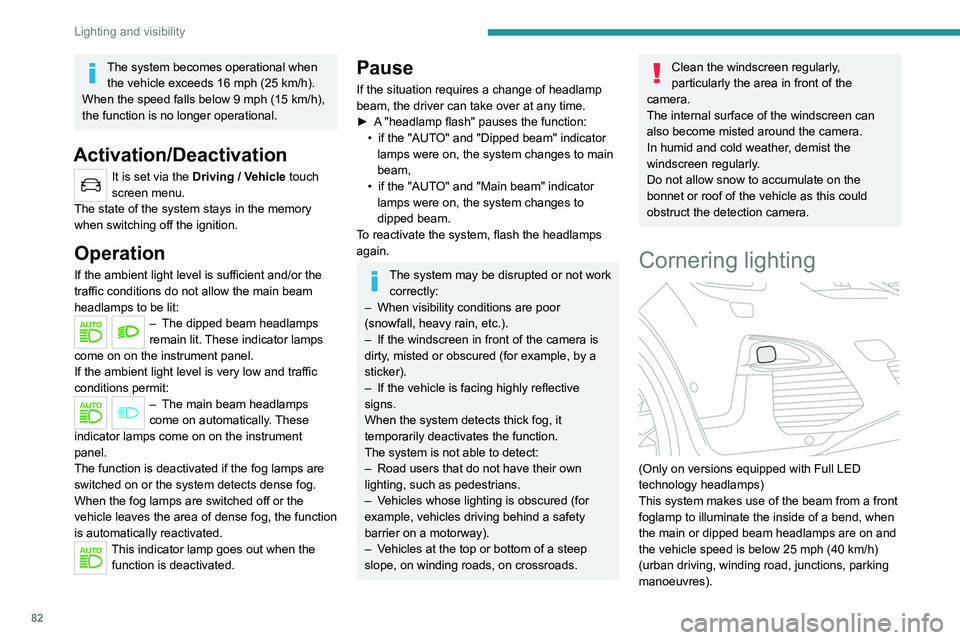
Cornering lighting
(Only on versions equipped with Full LED
technology headlamps)
This system makes use of the beam from a front
foglamp to illuminate the inside of a bend, when
the main or dipped beam headlamps are on and
the vehicle speed is below 25 mph (40
km/h)
(urban driving, winding road, junctions, parking
manoeuvres).
Without/With cornering lighting
Activation / Deactivation
It is set via the Driving / Vehicle touch
screen menu.
Switching on / off
This system starts:
– when the corresponding direction indicator is
switched on.
or
– from a certain angle of rotation of the steering
wheel.
It becomes inactive:
– below a certain angle of rotation of the
steering wheel.
– above 25 mph (40 km/h).
– when reverse gear is engaged.
Wiper control stalk
In wintry conditions, remove snow, ice or
frost present on the windscreen, around
Page 94 of 308
92
Safety
regain grip. At the same time, the wheel with the
most grip is controlled in such a way as to
transmit as much torque as possible.
When moving, the system optimises wheel spin
to respond to the driver's requirements as fully
as possible.
(mode active up to 31 mph (50 km/h))
Sand
This mode allows little spin on the two driving wheels at the same time to allow
the vehicle to move forward and limit the risks of
getting stuck in the sand.
(mode active up to 75 mph (120 km/h))
Do not use the other modes on sand as
the vehicle may become stuck.
You can deactivate the ASR and DSC systems by turning the knob
to the "OFF " position.
The ASR and DSC systems will no longer
act on the operation of the engine or of the
brakes in the event of a change of trajectory.
These systems are reactivated automatically
from 31 mph (50 km/h) and whenever the
ignition is switched on.
Recommendations
The vehicle is designed principally to
drive on tarmac roads, but it allows you to
occasionally drive on other less passable
terrain.
To ensure complete safety while driving with
a Towing device , refer to the corresponding
section.
Malfunction
If a fault occurs, this warning lamp comes
on in the instrument panel, accompanied
by a message and an audible signal.
If you wish to continue towing a trailer, reduce
your speed and drive carefully!
Contact a PEUGEOT dealer or a qualified
workshop to have the system checked.
The trailer stability assist system offers enhanced safety in normal driving,
provided that the recommendations on towing
a trailer are observed. It should not
encourage the driver to take risks, such as
towing a trailer in adverse operating
conditions (overloading, failure to observe the
trailer nose weight, worn or under-inflated
tyres, faulty braking system, etc.), or to drive
at excessive speeds.
In certain cases, the system may not detect
trailer snaking, particularly with a light trailer.
When driving on slippery or poor surfaces, the
system may not be able to prevent sudden
trailer snaking.
Advanced Grip Control
(Depending on version)
A special, patented traction control system,
which improves driveability on snow, mud and
sand.
This system, optimised for operation in a range
of conditions, enables you to manoeuvre in most
slippery conditions (encountered during normal
passenger car use).
This system, which can be combined with all-
season M+S (Mud and Snow) tyres, offers a
compromise between safety, grip and driveability.
The accelerator pedal should be pressed
sufficiently to allow the system to harness the
power of the engine. Operation at high engine
speeds is completely normal.
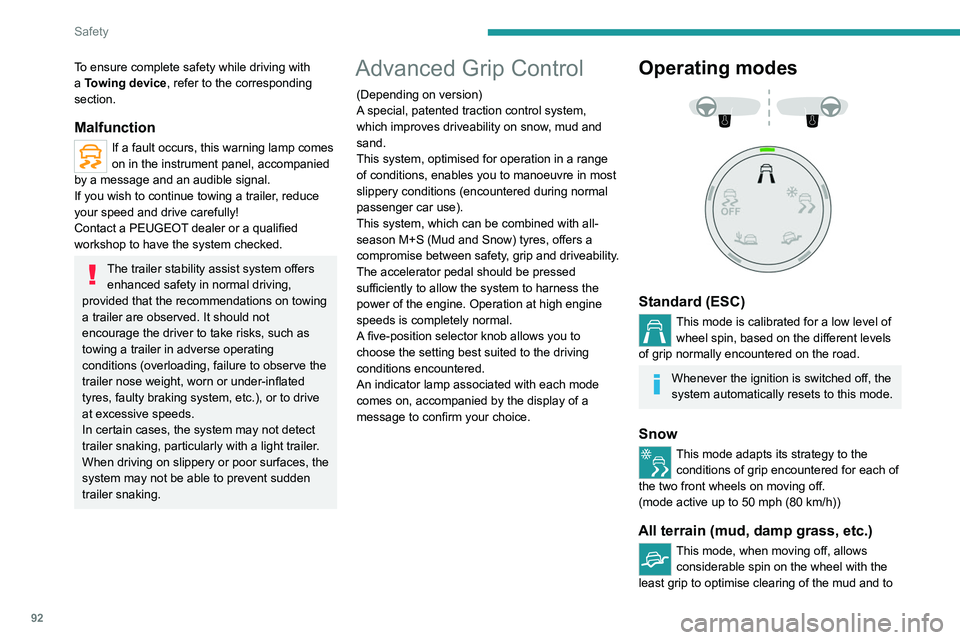
A five-position selector knob allows you to
choose the setting best suited to the driving
conditions encountered.
An indicator lamp associated with each mode
comes on, accompanied by the display of a
message to confirm your choice.
Operating modes
Standard (ESC)
This mode is calibrated for a low level of wheel spin, based on the different levels
of grip normally encountered on the road.
Whenever the ignition is switched off, the
system automatically resets to this mode.
Snow
This mode adapts its strategy to the conditions of grip encountered for each of
the two front wheels on moving off.
(mode active up to 50 mph (80
km/h))
All terrain (mud, damp grass, etc.)
This mode, when moving off, allows considerable spin on the wheel with the
least grip to optimise clearing of the mud and to
Page 95 of 308
93
Safety
5regain grip. At the same time, the wheel with the
most grip is controlled in such a way as to
transmit as much torque as possible.
When moving, the system optimises wheel spin
to respond to the driver's requirements as fully
as possible.
(mode active up to 31 mph (50 km/h))
Sand
This mode allows little spin on the two driving wheels at the same time to allow
the vehicle to move forward and limit the risks of
getting stuck in the sand.
(mode active up to 75 mph (120
km/h))
Do not use the other modes on sand as
the vehicle may become stuck.
You can deactivate the ASR and DSC systems by turning the knob
to the "OFF " position.
The ASR and DSC systems will no longer
act on the operation of the engine or of the
brakes in the event of a change of trajectory.
These systems are reactivated automatically
from 31 mph (50
km/h) and whenever the
ignition is switched on.
Recommendations
The vehicle is designed principally to
drive on tarmac roads, but it allows you to
occasionally drive on other less passable
terrain.
However, it does not permit off-road driving
such as:
–
driving on terrain which could damage the
underbody or strip away components (fuel
pipe, fuel cooler
, etc.) due to obstacles or
stones in particular,
–
driving on terrain with steep gradients and
poor grip,
–
crossing a waterway
.
Hill Assist Descent
Control
System that provides assistance when
descending on loose or soft surfaces (gravel,
mud, etc.) or a steep gradient.
This system reduces the risk of slip or loss of
control of the vehicle when descending, whether
going forward or in reverse.
During a descent, it assists the driver in
maintaining a constant speed, depending on the
gear engaged, while progressively releasing the
brakes.
For the system to activate, the slope
must be greater than 5 %.
The system can be used with the gearbox in
neutral.
Otherwise engage a gear corresponding to
the speed to prevent the engine stalling.
With an automatic gearbox, the system can
be used with the selector at N, D or R.
When the system is regulating, the Active
Safety Brake system is automatically
deactivated.
The system is not available: – if the speed of the vehicle is above 43
mph (70
km/h),
–
if the speed of the vehicle is being
controlled by the
Adaptive Cruise Control,
depending on the type of gearbox.
Switching on
By default, the system is not selected.
The state of the function is not saved when the
ignition is switched off.
The driver can select the system when the
engine is running, when the vehicle is stationary
or when moving at speeds up to approximately
31 mph (50
km/h).
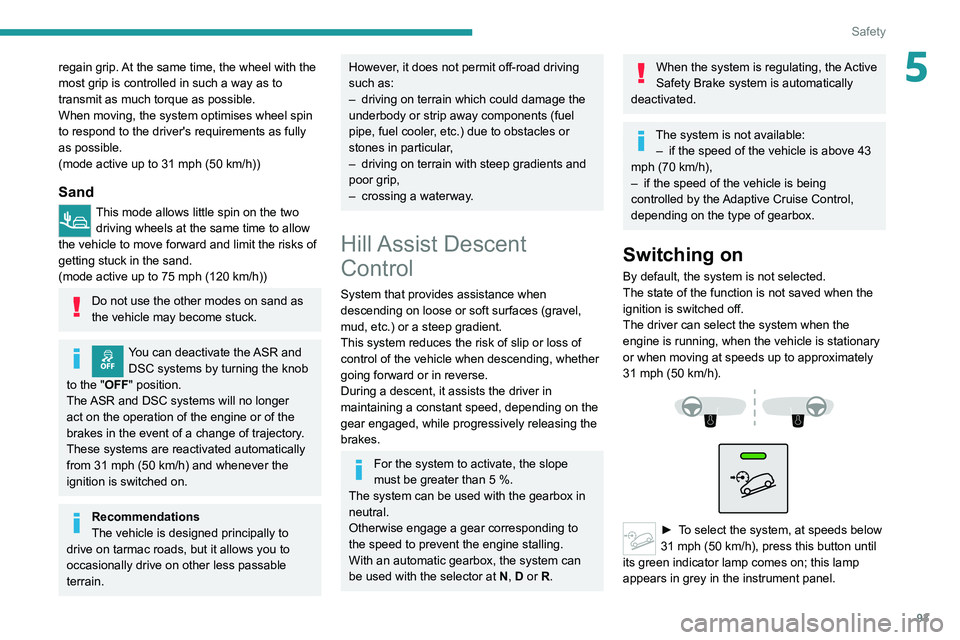
► To select the system, at speeds below
31 mph (50 km/h), press this button until
its green indicator lamp comes on; this lamp
appears in grey in the instrument panel.