2020 PEUGEOT 5008 weight
[x] Cancel search: weightPage 111 of 308
109
Safety
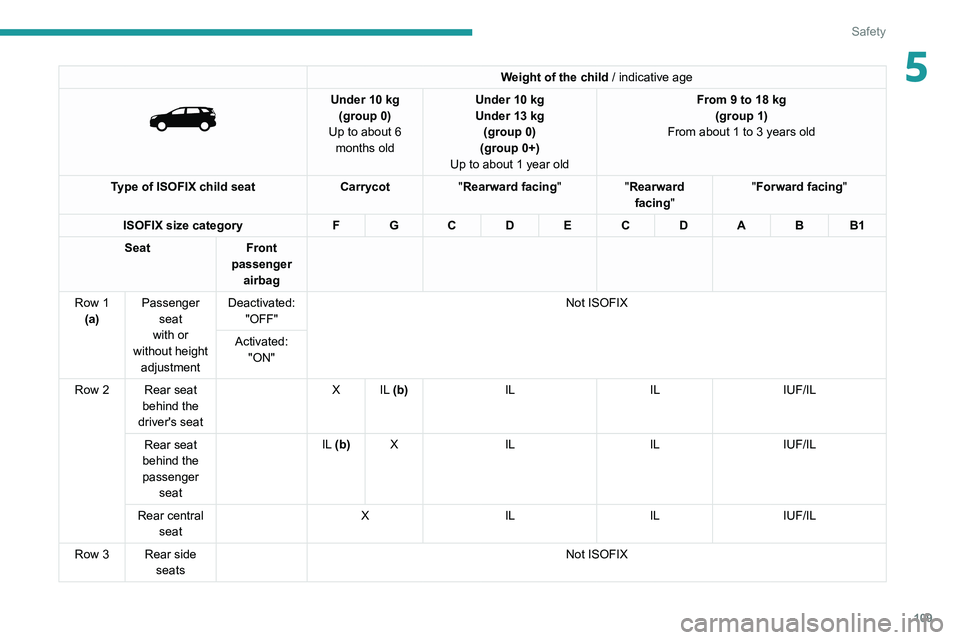
5Weight of the child / indicative age
Under 10 kg
(group 0)
Up to about 6 months old Under 10
kg
Under 13 kg
(group 0)
(group 0+)
Up to about 1 year old From 9 to 18
kg
(group 1)
From about 1 to 3 years old
Type of ISOFIX child seat Carrycot"Rearward facing" "Rearward
facing" "Forward facing
"
ISOFIX size category F G C D E C D A B B1
Seat Front
passenger airbag
Row 1 (a) Passenger
seat
with or
without height adjustment Deactivated:
"OFF" Not ISOFIX
Activated: "ON"
Row 2 Rear seat behind the
driver's seat X
IL (b) IL ILIUF/IL
Rear seat
behind the
passenger seat IL (b)
X IL ILIUF/IL
Rear central seat X
IL ILIUF/IL
Row 3 Rear side seats Not ISOFIX
Page 112 of 308
11 0
Safety
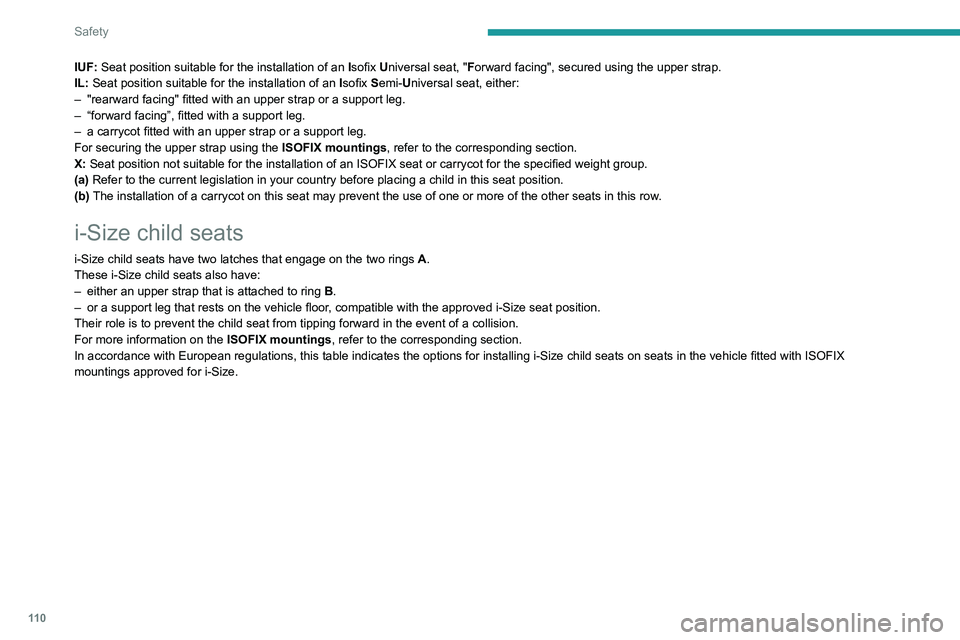
IUF: Seat position suitable for the installation of an Isofix Universal seat, "Forward facing", secured using the upper strap.
IL: Seat position suitable for the installation of an Isofix Semi-Universal seat, either:
–
"rearward facing" fitted with an upper strap or a support leg.
–
“forward facing”, fitted with a support leg.
–
a carrycot fitted with an upper strap or a support leg.
For securing the upper strap using the ISOFIX mountings, refer to the corresponding section.
X:
Seat position not suitable for the installation of an ISOFIX seat or carrycot for the specified weight group.
(a) Refer to the current legislation in your country before placing a child\
in this seat position.
(b)
The installation of a carrycot on this seat may prevent the use of one o\
r more of the other seats in this row
.
i-Size child seats
i-Size child seats have two latches that engage on the two rings A.
These i-Size child seats also have:
–
either an upper strap that is attached to ring B
.
–
or a support leg that rests on the vehicle floor
, compatible with the approved i-Size seat position.
Their role is to prevent the child seat from tipping forward in the even\
t of a collision.
For more information on the ISOFIX mountings, refer to the corresponding section.
In accordance with European regulations, this table indicates the options for installing i-Size child seats on seats in the vehicle fitted with ISOFIX
mountings approved for i-Size.
Page 115 of 308
11 3
Driving
6Driving recommendations
► Observe the driving regulations and remain
vigilant whatever the traffic conditions.
►
Monitor your environment and keep your
hands on the wheel to be able to react to
anything that may happen any time.
►
Drive smoothly
, anticipate the need for
braking and maintain a longer safety distance,
especially in bad weather.
►
Stop the vehicle to carry out operations that
require close attention (such as adjustments).
►
During long trips, take a break every two
hours.
Important!
Never leave the engine running in a
closed space without sufficient
ventilation. Internal combustion engines emit
toxic exhaust gases such as carbon
monoxide. Danger of poisoning and death!
In severe wintry conditions (temperature
below -23°C), let the engine run for 4
minutes before moving off, to ensure the
correct operation and durability of the
mechanical components of your vehicle
(engine and gearbox).
Never drive with the parking brake
applied . Risk of overheating and
damage to the braking system!
Do not park the vehicle or leave the
engine running on a flammable
surface (dry grass, dead leaves, etc.). The
exhaust system of your vehicle is very hot,
even several minutes after the engine stops.
Risk of fire!
Never leave a vehicle unattended with
the engine running. If you have to leave
your vehicle with the engine running, apply
the parking brake and put the gearbox into
neutral or position N or P (depending on the
type of gearbox).
Never leave children inside the vehicle
unsupervised.
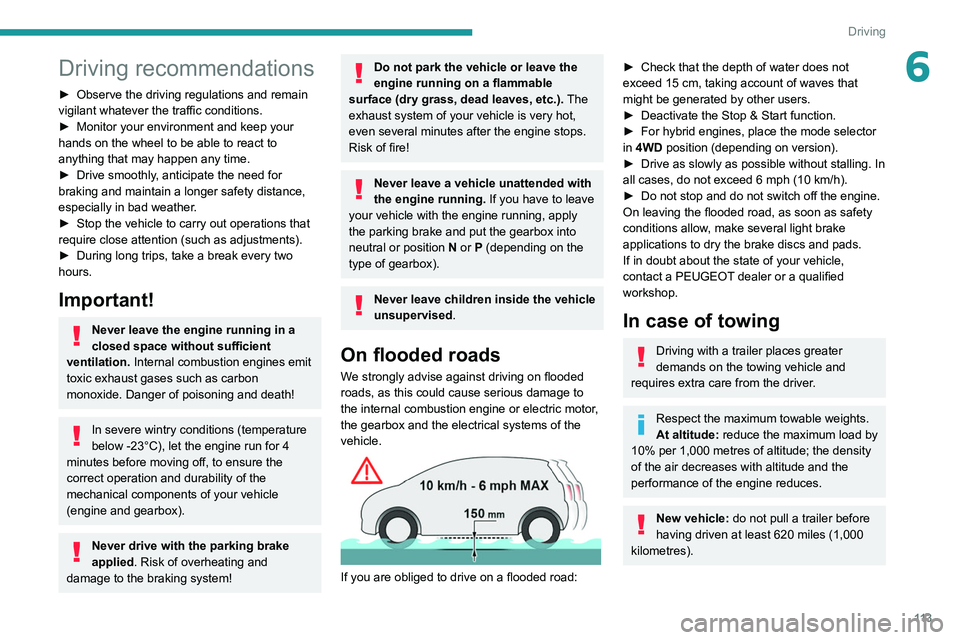
On flooded roads
We strongly advise against driving on flooded
roads, as this could cause serious damage to
the internal combustion engine or electric motor,
the gearbox and the electrical systems of the
vehicle.
If you are obliged to drive on a flooded road:
► Check that the depth of water does not
exceed 15 cm, taking account of waves that
might be generated by other users.
►
Deactivate the Stop & Start function.
►
For hybrid engines, place the mode selector
in
4WD position (depending on version).
►
Drive as slowly as possible without stalling. In
all cases, do not exceed 6 mph (10
km/h).
►
Do not stop and do not switch off the engine.
On leaving the flooded road, as soon as safety
conditions allow
, make several light brake
applications to dry the brake discs and pads.
If in doubt about the state of your vehicle,
contact a PEUGEOT dealer or a qualified
workshop.
In case of towing
Driving with a trailer places greater
demands on the towing vehicle and
requires extra care from the driver.
Respect the maximum towable weights.
At altitude: reduce the maximum load by
10% per 1,000 metres of altitude; the density
of the air decreases with altitude and the
performance of the engine reduces.
New vehicle: do not pull a trailer before
having driven at least 620 miles (1,000
kilometres).
Page 116 of 308
11 4
Driving
Once the state of charge of the battery drops to
the reserve level, the system switches to energy
economy mode : the power supply is cut off
automatically to preserve the remaining battery
charge.
Starting the engine
With the parking brake applied:
► With a manual gearbox, place the gear lever
in neutral then fully depress the clutch pedal.
► With an automatic gearbox, place the gear
selector in mode N or P then fully depress the
brake pedal.
► Insert the key into the ignition switch; the
system recognises the code.
► Unlock the steering column by simultaneously
turning the steering wheel and the key.
In certain cases, you may have to apply
significant force to move the steering
wheel (wheels on full lock, for example).
► With a petrol engine , operate the starter
motor by turning the key to position 3 without
pressing the accelerator pedal, until the engine
starts. Once the engine starts, release the key.
With petrol engines , after a cold start,
preheating the catalytic converter can
cause noticeable engine vibrations for
anything up to 2 minutes while stationary with
the engine running (accelerated idle speed).
If the outside temperature is high, let the
engine idle for 1 to 2 minutes after the
vehicle comes to a stop, to help it to cool.
Before setting off
Nose weight
► Distribute the load in the trailer so that the
heaviest items are as close as possible to the
axle and the nose weight (at the point where it
joins your vehicle) approaches the maximum
permitted without exceeding it.
Tyres
► Check the tyre pressures of the towing
vehicle and of the trailer , observing the
recommended pressures.
Lighting
► Check the electrical signalling on the trailer
and the headlamp beam height of your vehicle.
If a genuine PEUGEOT towing device is
used, the rear parking sensors will be
deactivated automatically to avoid the audible
signal.
When driving
Cooling
Towing a trailer uphill causes the coolant
temperature to increase. The maximum towable
load depends on the gradient and the exterior temperature. The fan’s cooling capacity does not
increase with engine speed.
►
Reduce speed and lower the engine speed to
limit heating up.
In all cases, pay attention to the coolant
temperature.
If this warning lamp and the STOP
warning lamp come on, stop the
vehicle and switch off the engine as soon as
possible.
Brakes
Braking distances are increased when towing a
trailer. To avoid overheating the brakes, the use
of engine braking is recommended.
Side wind
Bear in mind that the vehicle will be more
susceptible to wind when towing.
Anti-theft protection
Electronic immobiliser
The keys include an electronic engine
immobiliser system, whose secret code must be
recognised in order for starting to be possible.
If the system malfunctions, indicated by the
display of a message, the engine will not start.
Contact a PEUGEOT dealer.
Starting / Switching off the
engine with the key
Key ignition switch
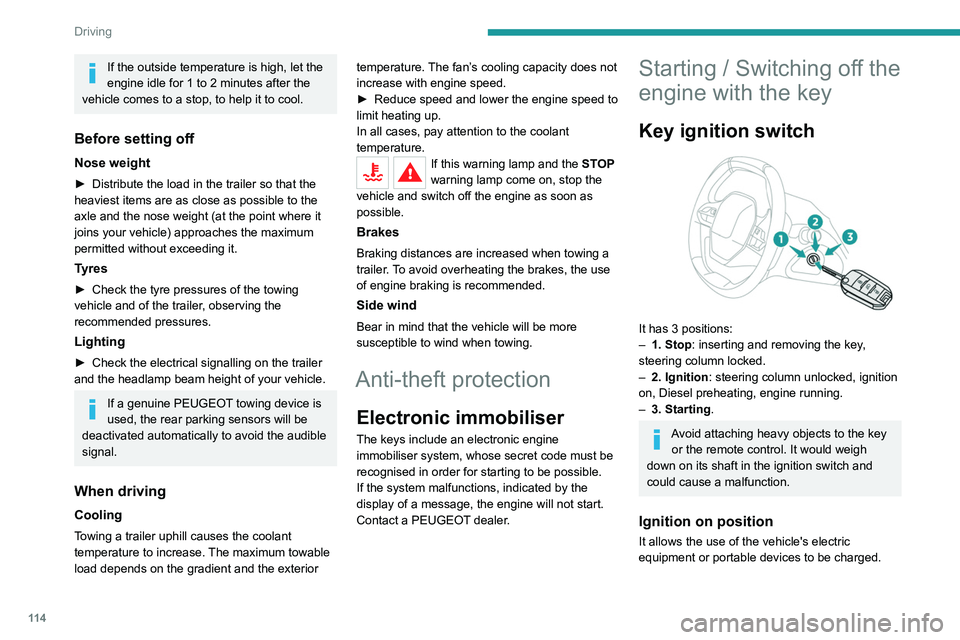
It has 3 positions:
– 1. Stop: inserting and removing the key ,
steering column locked.
–
2. Ignition : steering column unlocked, ignition
on, Diesel preheating, engine running.
–
3. Starting
.
Avoid attaching heavy objects to the key or the remote control. It would weigh
down on its shaft in the ignition switch and
could cause a malfunction.
Ignition on position
It allows the use of the vehicle's electric
equipment or portable devices to be charged.
Page 173 of 308
171
Practical information
7
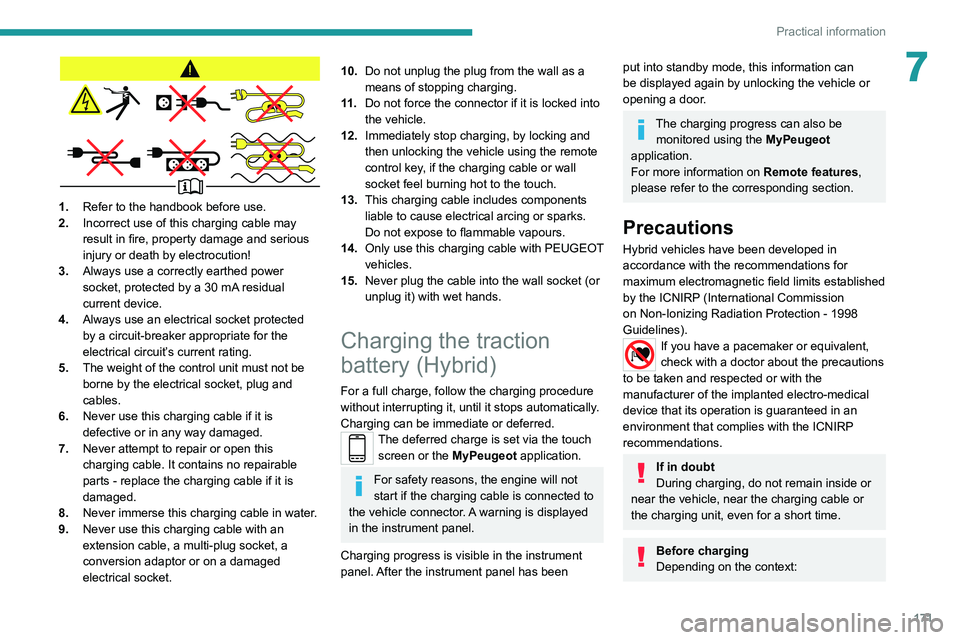
1.Refer to the handbook before use.
2. Incorrect use of this charging cable may
result in fire, property damage and serious
injury or death by electrocution!
3. Always use a correctly earthed power
socket, protected by a 30
mA residual
current device.
4. Always use an electrical socket protected
by a circuit-breaker appropriate for the
electrical circuit’s current rating.
5. The weight of the control unit must not be
borne by the electrical socket, plug and
cables.
6. Never use this charging cable if it is
defective or in any way damaged.
7. Never attempt to repair or open this
charging cable. It contains no repairable
parts - replace the charging cable if it is
damaged.
8. Never immerse this charging cable in water.
9. Never use this charging cable with an
extension cable, a multi-plug socket, a
conversion adaptor or on a damaged
electrical socket.
10.Do not unplug the plug from the wall as a
means of stopping charging.
11 . Do not force the connector if it is locked into
the vehicle.
12. Immediately stop charging, by locking and
then unlocking the vehicle using the remote
control key, if the charging cable or wall
socket feel burning hot to the touch.
13. This charging cable includes components
liable to cause electrical arcing or sparks.
Do not expose to flammable vapours.
14. Only use this charging cable with PEUGEOT
vehicles.
15. Never plug the cable into the wall socket (or
unplug it) with wet hands.
Charging the traction
battery (Hybrid)
For a full charge, follow the charging procedure
without interrupting it, until it stops automatically.
Charging can be immediate or deferred.
The deferred charge is set via the touch
screen or the MyPeugeot application.
For safety reasons, the engine will not
start if the charging cable is connected to
the vehicle connector. A warning is displayed
in the instrument panel.
Charging progress is visible in the instrument
panel. After the instrument panel has been
put into standby mode, this information can
be displayed again by unlocking the vehicle or
opening a door.
The charging progress can also be monitored using the MyPeugeot
application.
For more information on Remote features,
please refer to the corresponding section.
Precautions
Hybrid vehicles have been developed in
accordance with the recommendations for
maximum electromagnetic field limits established
by the ICNIRP (International Commission
on Non-Ionizing Radiation Protection - 1998
Guidelines).
If you have a pacemaker or equivalent,
check with a doctor about the precautions
to be taken and respected or with the
manufacturer of the implanted electro-medical
device that its operation is guaranteed in an
environment that complies with the ICNIRP
recommendations.
If in doubt
During charging, do not remain inside or
near the vehicle, near the charging cable or
the charging unit, even for a short time.
Before charging
Depending on the context:
Page 175 of 308

173
Practical information
7Before disconnecting the nozzle from the
charging connector:
►
If the vehicle is unlocked, lock it and then
unlock it .
►
If the vehicle is locked, unlock it.
The red indicator lamp in the flap goes out to
confirm that the charging nozzle is unlocked.
►
Within
30 seconds, remove the charging
nozzle.
Domestic charging (mode 2)
The end of charging is confirmed by the fixed
lighting of the green CHARGE indicator lamp on
the control unit and by the fixed lighting of the
green light guides in the flap.
►
After disconnection, remove the protective
cover from the nozzle and close the charging
flap.
►
Disconnect the control unit's charging cable
from the domestic socket.
Accelerated charging (mode 3)
The end of charging is confirmed by the
accelerated charging unit (Wallbox) and by the
fixed lighting of the green light guides in the flap.
►
After disconnection, replace the nozzle on the
charging unit and close the charging flap.
Deferred charging
By default, charging begins when the nozzle
is connected. Deferred charging can be
programmed.
Settings
► In the Hybrid touch screen menu,
select the Charge tab.
►
Set the charging start time.
►
Press
OK.
The setting is saved in the system.
You can also programme the deferred charging function using a smartphone, via
the MyPeugeot
application.
For more information on Remotely operable
features , refer to the corresponding section.
Activation
► Connect the vehicle to the desired charging
equipment.
► Press this button in the flap within one
minute to activate the system (confirmed
by the light guides coming on in blue).
Towing device
Distribution of loads
► Distribute the load in the trailer so that the
heaviest items are as close as possible to the
axle, and the nose weight approaches the
maximum permitted without exceeding it.
Air density decreases with altitude, thus reducing
engine performance.
The maximum load which
can be towed must be reduced by 10% per
1,000
metres of altitude.
Use towing devices and their genuine
wiring harnesses approved by
PEUGEOT. It is recommended that the
installation be performed by a PEUGEOT
dealer or a qualified workshop.
If not fitted by a PEUGEOT dealer, it must
still be fitted in accordance with the vehicle
manufacturer's instructions.
Important: with a motorised tailgate and its
"Hands-Free Tailgate Access" function, if a
towing device is fitted outside the PEUGEOT
dealer network, it is essential to visit a
PEUGEOT dealer or a qualified workshop
to recalibrate the detection system - risk of
"Hands-Free Tailgate Access" function failure.
Certain driving or manoeuvring aid functions
are automatically deactivated if an approved
towing system is used.
Observe the maximum authorised
towable weight, indicated on the vehicle's
registration certificate, the manufacturer's
label as well as in the Technical data section
of this guide.
Complying with the maximum authorised
nose weight (towball) also includes the
use of accessories (bicycle carriers, tow
boxes, etc.).
Observe the legislation in force in the
country in which you are driving.
Page 176 of 308
174
Practical information
After use
When travelling without a trailer or
load carrier, remove the towball and fit the
protective plug into the carrier, to provide
clear visibility of the number plate and/or its
lighting.
Fitting the towball
► Below the rear bumper, remove the protective
plug 2 from the carrier 1.
► Insert the end of the towball 5 into the carrier
1 and push it upwards; it will lock into position
automatically.
Vehicle equipped with motorised
tailgate with "Hands-Free Tailgate
Access" function
To avoid unwanted opening of the tailgate
when using the towing device:
–
deactivate this function in advance in your
vehicle's configuration menu,
–
or move the electronic key away from the
recognition zone, with the tailgate closed.
Towing device with quickly detachable towball
Presentation
This genuine towing device can be fitted and
removed with no need for tools.
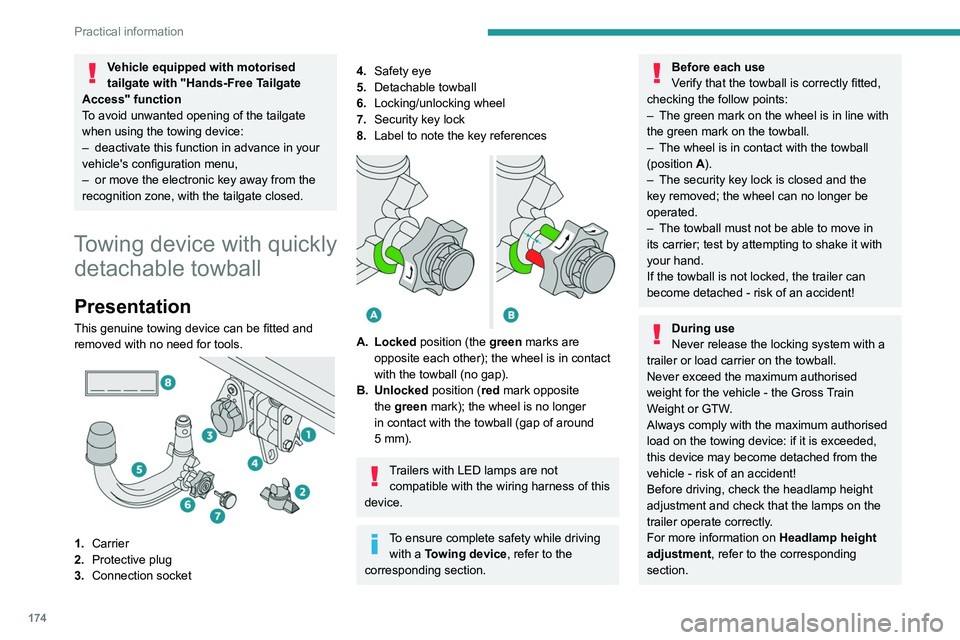
1. Carrier
2. Protective plug
3. Connection socket
4.Safety eye
5. Detachable towball
6. Locking/unlocking wheel
7. Security key lock
8. Label to note the key references
A. Locked position (the green marks are
opposite each other); the wheel is in contact
with the towball (no gap).
B. Unlocked position (red mark opposite the green mark); the wheel is no longer
in contact with the towball (gap of around
5
mm).
Trailers with LED lamps are not compatible with the wiring harness of this
device.
To ensure complete safety while driving with a Towing device , refer to the
corresponding section.
Before each use
Verify that the towball is correctly fitted,
checking the follow points:
–
The green mark on the wheel is in line with
the green mark on the towball.
–
The wheel is in contact with the towball
(position A
).
–
The security key lock is closed and the
key removed; the wheel can no longer be
operated.
–
The towball must not be able to move in
its carrier; test by attempting to shake it with
your hand.
If the towball is not locked, the trailer can
become detached - risk of an accident!
During use
Never release the locking system with a
trailer or load carrier on the towball.
Never exceed the maximum authorised
weight for the vehicle - the Gross Train
Weight or GTW.
Always comply with the maximum authorised
load on the towing device: if it is exceeded,
this device may become detached from the
vehicle - risk of an accident!
Before driving, check the headlamp height
adjustment and check that the lamps on the
trailer operate correctly.
For more information on Headlamp height
adjustment, refer to the corresponding
section.
Page 217 of 308
215
In the event of a breakdown
8
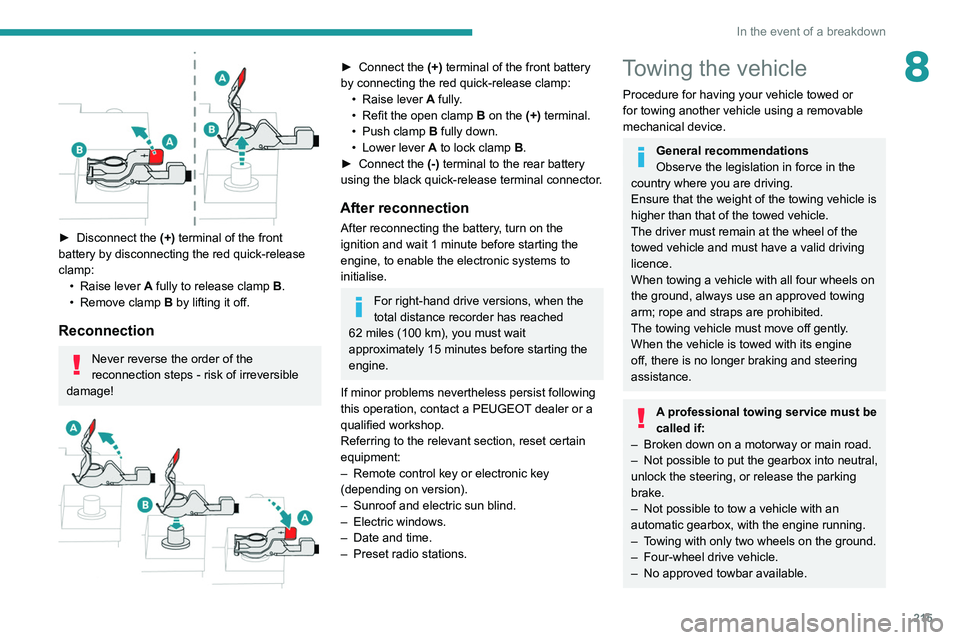
► Disconnect the (+) terminal of the front
battery by disconnecting the red quick-release
clamp: •
Raise lever
A
fully to release clamp
B
.
•
Remove clamp
B
by lifting it off.
Reconnection
Never reverse the order of the
reconnection steps - risk of irreversible
damage!
► Connect the (+) terminal of the front battery
by connecting the red quick-release clamp: •
Raise lever
A
fully.
•
Refit the open clamp
B
on the (+) terminal.
•
Push clamp
B fully down.
•
Lower lever
A
to lock clamp B.
►
Connect the
(-) terminal to the rear battery
using the black quick-release terminal connector.
After reconnection
After reconnecting the battery, turn on the
ignition and wait 1 minute before starting the
engine, to enable the electronic systems to
initialise.
For right-hand drive versions, when the
total distance recorder has reached
62
miles (100 km), you must wait
approximately 15
minutes before starting the
engine.
If minor problems nevertheless persist following
this operation, contact a PEUGEOT dealer or a
qualified workshop.
Referring to the relevant section, reset certain
equipment:
–
Remote control key or electronic key
(depending on version).
–
Sunroof and electric sun blind.
–
Electric windows.
–
Date and time.
–
Preset radio stations.
Towing the vehicle
Procedure for having your vehicle towed or
for towing another vehicle using a removable
mechanical device.
General recommendations
Observe the legislation in force in the
country where you are driving.
Ensure that the weight of the towing vehicle is
higher than that of the towed vehicle.
The driver must remain at the wheel of the
towed vehicle and must have a valid driving
licence.
When towing a vehicle with all four wheels on
the ground, always use an approved towing
arm; rope and straps are prohibited.
The towing vehicle must move off gently.
When the vehicle is towed with its engine
off, there is no longer braking and steering
assistance.
A professional towing service must be
called if:
–
Broken down on a motorway or main road.
–
Not possible to put
the gearbox into neutral,
unlock the steering, or release the parking
brake.
–
Not possible to tow a vehicle with an
automatic gearbox, with the engine running.
–
T
owing with only two wheels on the ground.
–
Four-wheel drive vehicle.
–
No approved towbar available.