2020 MERCEDES-BENZ GLS SUV warning light
[x] Cancel search: warning lightPage 322 of 549
&
WARNING Risk of becoming trapped
du ring adjustment of the driver's seat
af te r calling up a driver profile
Selecting a user profile may trigger an
adju stment of the driver's seat tothe posi‐
tion sa ved under the user profile. You or
ot her vehicle occupants could be injured in
th e process. #
Make sure that when the position of
driver's seat is being adjus ted using the
multimedia sy stem, no people or body
parts are in the seat's range of mo ve‐
ment.
If th ere is a risk of someone becoming trap‐
ped, stop the adjustment process immedi‐
ately: #
a)Tapth ewa rning message on the
media displa y.
or #
b) Press a memory position button or a
seat adjustment switch on the driver's
door.
The adjustment process will be stop‐
ped. The driver's seat is equipped with an access pre‐
ve nter.
If th e driver's door is open, the driver's seat will
not be set af ter calling up the driver's profile.
Profiles store your vehicle settings and settings
fo rth e multimedia sy stem. If theve hicle is used
by several drivers, the driver can select their
ow n profile wi thout changing thestored profile
settings of other drivers.
% Information on profiles from Mercedes me
connect can be found in the Digital Opera‐
to r's Manual.
Ve hicle settings are, forex ample, driver's seat,
st eering wheel and mir ror settings, clima tecon‐
trol and ambient lighting. Forth e settings of the
multimedia sy stem, you can select, forex ample,
ra dio stations, pr evious destinations as well as
th emes, suggestions and favo urites. Fo
rre cur ring driving situations, su chas long
drives on the mo torw ay,yo u can sa veyour pre‐
fe rred settings in a theme in theve hicle. In a
th eme you can sa vethe display of the digital
map, your prefer redra dio station and prefer red
drive prog ram, forex ample.
The vehicle can learn the habits of the driver. It
th en of fers suggestions forth e most probable
navigation destinations, media sources, radio
st ations or con tacts. The pre-requirements for
th at are the selection of a profile, your consent
to there cording of da taand suf ficient collected
da ta.
Fa vourites pr ovide quick access toapplications
th at are used of ten. You can select favo urites
from categories or add them directly toan appli‐
cation. MBUX multimedia sy
stem 319
Page 339 of 549
Making an emer
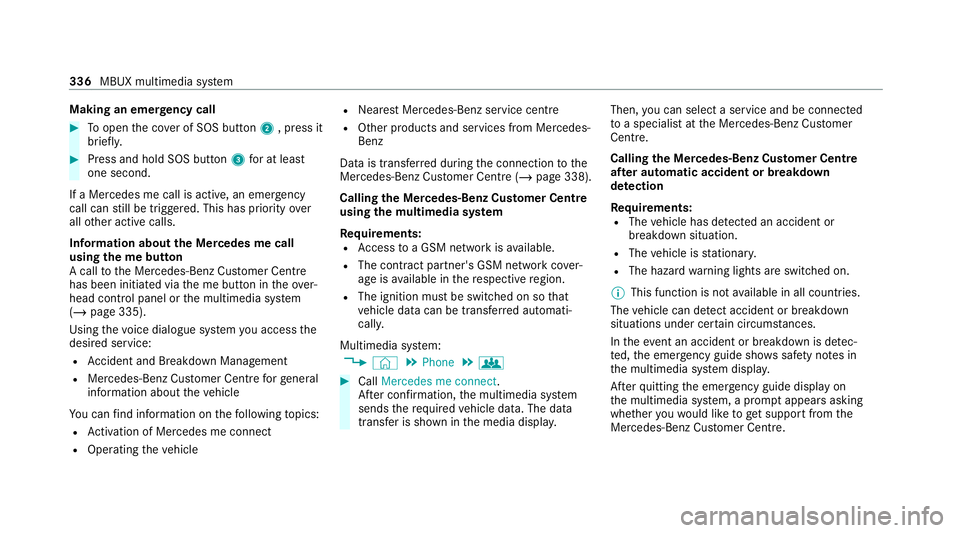
gency call #
Toopen the co ver of SOS button 2, press it
brief ly. #
Press and hold SOS button 3for at least
one second.
If a Mercedes me call is active, an emer gency
call can still be triggered. This has priority over
all other active calls.
Information about the Mercedes me call
using the me but ton
A call tothe Mercedes-Benz Cus tomer Centre
has been initia ted via the me button in theove r‐
head control panel or the multimedia sy stem
(/ page 335).
Using thevo ice dialogue sy stem you access the
desired service:
R Accident and Breakdown Management
R Mercedes-Benz Cu stomer Centre forge neral
information about theve hicle
Yo u can find information on thefo llowing topics:
R Activation of Me rcedes me connect
R Operating theve hicle R
Nearest Mercedes-Benz service centre
R Other products and services from Mercedes-
Benz
Data is transfer red during the connection tothe
Mercedes-Benz Cus tomer Centre (/ page 338).
Calling the Mercedes-Benz Cus tomer Centre
using the multimedia sy stem
Requ irements:
R Access toa GSM network is available.
R The contract partner's GSM network co ver‐
age is available in there spective region.
R The ignition must be switched on so that
ve hicle data can be transfer red automati‐
call y.
Multimedia sy stem:
4 © 5
Phone 5
g #
Call Mercedes me connect.
Af ter confirmation, the multimedia sy stem
sends there qu ired vehicle data. The data
transfer is shown in the media displa y.Then,
you can select a service and be connected
to a specialist at the Mercedes-Benz Cus tomer
Centre.
Calling the Mercedes-Benz Cus tomer Centre
af te r automatic accident or breakdown
de tection
Re quirements:
R The vehicle has de tected an accident or
breakdown situation.
R The vehicle is stationar y.
R The hazard warning lights are switched on.
% This function is not available in all countries.
The vehicle can de tect accident or breakdown
situations under cer tain circums tances.
In theeve nt an accident or breakdown is de tec‐
te d, the emer gency guide sho wssafety no tes in
th e multimedia sy stem displa y.
Af terqu itting the emer gency guide displ ayon
th e multimedia sy stem, a prom ptappears asking
whe ther youwo uld like toget support from the
Mercedes-Benz Cus tomer Centre. 336
MBUX multimedia sy stem
Page 372 of 549
Note
s on care of car parts &
WARNING Risk of entrapment if the
windscreen wipers are swit ched on while
th e windscreen is being cleaned
If th e windscreen wipers are set in motion
while you are cleaning the windscreen or
wiper blades, you can be trapped bythe
wiper arm. #
Alw ays switch off the windscreen wip‐
ers and the ignition before cleaning the
windscreen or wiper blades. &
WARNING Risk of bu rns from theta il‐
pipe and tailpipe trims
The exhaust tailpipe and tailpipe trims can
become very hot. If you come into contact
with these parts of theve hicle, you could
burn yourself. #
Alw ays be particular lycareful around
th eta ilpipe and theta ilpipe trims and
supervise children especially closely in
th is area. #
Allow vehicle parts tocool down before
to uching them. To
avo id damage totheve hicle, obser vethe
no tes on cleaning and care of thefo llowing vehi‐
cle parts:
Wheels and rims
R use wate r and acid-free alloy wheel cleaners.
R do not use acidic alloy wheel cleaners to
re mo vebrake dust. This could damage wheel
bolts and brake components.
R to av oid cor rosion of the brake discs and
brakepads, drive theve hicle for a few
minutes af ter cleaning before parking it. The
brake discs and brakepads warm up and dry
out.
Wi ndo ws
R clean the windo wsinside and outside with a
damp clo thand with a cleaning agent recom‐
mended for Mercedes-Benz.
R do not use dry clo ths or abrasive or solvent-
based cleaning agents toclean the inside of
windo ws. Wi
per blades
R movethe wiper arms into there placement
position (/ page166).
R with the wiper arms folded out, clean the
wiper blades with a damp clo th.
R do not clean the wiper blades too of ten.
Ex terior lighting
R clean the lenses with a wet sponge and mild
cleaning agent, e.g. car sha mpoo.
R only use cleaning agents or cleaning clo ths
th at are suitable for plast ic lenses.
Sensors
R clean the sensors in the front and rear bump‐
ers with a soft clo thand car shampoo
(/ page 224).
R when using a high-pressure cleaner, main tain
a minimum dis tance of 30 cm.
Ru nning boards
R use wate r and acid-free cleaning agents.
R do not clean the aluminium trim insert of the
ru nning board wi thalkaline or acidic cleaning
agents such as wheel cleaners. Do not use Main
tenance and care 369
Page 373 of 549
acidic alloy wheel cleaners
toremo vebrake
dust. The aluminium trim inserts could other‐
wise be damaged.
Re versing camera and 360° Camera
R open the camera co ver with the multimedia
sy stem (/ page 283).
R use clean water and a soft clo thtoclean the
came ralens.
R do not use a high-pressure cleaner.
Ta ilpipes
R clean with a cleaning agent recommended
fo r Mercedes-Benz, especial lyin the winter
and af terwa shing theve hicle.
R do not use acidic cleaning agents.
Tr ailer hitch
R obse rveth e no tes on care in the trailer hitch
manufacturer's operating instructions.
R do not clean the ball neck with a high-pres‐
sure cleaner or solvent.
R remo vetraces of rust on the ball, e.g. with a
wire brush.
R remo vedirt with a lint-free clo th.R
afte r cleaning, lightly oil or grease the ball
head.
% Before using trailers with anti- torsional cou‐
pling, obser vethe manufacturer's operating
instructions. Note
s on care of the interior &
WARNING Risk of inju ryfrom pla stic
parts breaking off af terth e use of sol‐
ve nt-based care products
Ca reand cleaning products con taining sol‐
ve nts can cause su rfaces in the cockpit to
become porous. When the airbags are
deplo yed, plastic parts may break away. #
Do not use any care or cleaning prod‐
ucts containing sol vents toclean the
cockpit. &
WARNING Risk of inju ryor death from
bleached seat belts
Bleaching or dyeing seat belts can se verely
we aken them. This can,
forex ample, cause seat belts to
te ar or fail in an accident. #
Never blea chor dye seat belts. To
avo id damage totheve hicle, obser vethefo l‐
lowing no tes on cleaning and care:
Seat belts R clean with luk ewarmand soapy water.
R do not use chemical cleaning agents.
R do not dry byheating them toove r 80°C or
ex posing them todirect sunlight.
Display
R switch off the display and let it cool down.
R clean the sur face carefully wi tha mic rofibre
clo thand a suitable display care product
(TF T-LC D).
R do not use any other agents.
Plastic trim R clean with a damp microfibre clo th.
R for heavy soiling: use a cleaner recommen‐
ded for Mercedes-Benz. 37 0
Maintenance and care
Page 386 of 549
&
WARNING Risk ofexplosion during
ch arging process and starting assis tance
During thech arging process and starting
assis tance, the battery may release an explo‐
sive gas mixture. #
Avoid fire , naked flames, creating
spar ksand smoking. #
Make sure there is suf ficient ventila‐
tion. #
Do not lean over a batter y. &
WARNING Risk ofexplosion from a fro‐
zen battery
A dischar ged battery may freeze at temp era‐
tures slightly abo veor below freezing point.
During starting assis tance or battery charg‐
ing, bat tery gas can be released. #
Alw ays allow a battery tothaw before
ch arging it or per form ing starting assis‐
ta nce. If
th e indicator/warning lamps in the instrument
clus ter do not light up at low temp eratures, it is
ve ry likely that the dischar ged battery has fro‐
zen. In this case you may neither jump-s tart the
ve hicle nor charge the batter y.
The service life of a battery that has been
th awe d may be dramatically shor tened. The
st arting characteristics may be impaired, espe‐
cially at low temp eratures.
It is recommended that you ha veathaw ed bat‐
te ry checked at a qualified specialist workshop.
All vehicles
* NO
TEDama gecaused bynumerous or
ex tended attem ptsto start the engine Nume
rous or extended attem ptsto start the
engine may damage the catalytic con verter
due tonon-combu sted fuel. #
Avoid numerous and extended attem pts
to start the engine. Obser
vethefo llowing points during starting
assis tance and when charging the battery:
R Only use undamaged jump lead/charging
cables with a suf ficient cross-section and
insula tedte rm inal clamps.
R Non- insulated parts of thete rm inal clamps
must not come into con tact wi thother me tal
parts while the jump lead/charging cable is
connected tothe battery/jump-s tart connec‐
tion point.
R The jump lead/charging cable must not
come into contact wi thany parts which may
mo vewhen the engine is running.
R Alw ays make sure that nei ther you nor the
battery is elect rostatically charge d.
R Keep away from fire and naked flames.
R Do not lean overth e batter y.
Obser vethe additional following points when
ch arging the battery:
R Only use battery charge rs tested and
appr oved for Mercedes-Benz.
R Read the battery charge r's operating instruc‐
tions before charging the batter y. Breakdown assis
tance 383
Page 398 of 549
#
Adjust the tyre pressure where neces‐
sar y. Ty
re pressure which is too high or too low can:
R Shor tenth e service life of the tyres.
R Cause increased tyre damage.
R Adversely af fect driving characteristics and
th us driving saf ety, e.g. due toaquaplaning. &
WARNING Risk of accident due torepea‐
te d pressure drop in the tyres
The wheels, valves or tyres could be dam‐
aged.
To o low a tyre pressure can lead tothe tyres
bur sting. #
Examine the tyres forfo re ign objects. #
Check whe ther the tyre has a puncture
or theva lve has a leak. #
Ifyo u are unable torectify the damage,
conta ct aqualified specialist workshop. Information on
there commended tyre pressure
fo rth eve hicle's factor y-fitted tyres can be found on
the tyre pressure table on the inside of the
fuel filler flap (/ page 395).
Use a suitable pressure gauge tocheck the tyre
pressure. The outer appearance of a tyre does
not permit any reliable conclusion about the tyre
pressure.
Only cor rect tyre pressures when the tyres are
cold. Conditions for cold tyres:
R The vehicle has been par ked with the tyres
out of direct sunlight for at least thre e hours.
R The vehicle has tr avelled less than 1.6 km.
The vehicle's tyres heat up when driving. As the
te mp erature of the tyres increases, so too does
th e tyre pressure.
Ve hicles with tyre pressure monitoring sys‐
te ms: you can also see the tyre pressure in the
driver's displa y.
Note s on trailer operation
Alw ays inflate there ar axle tyres tothere com‐
mended tyre pressures on the tyre pressure
ta ble for increased load. Ty
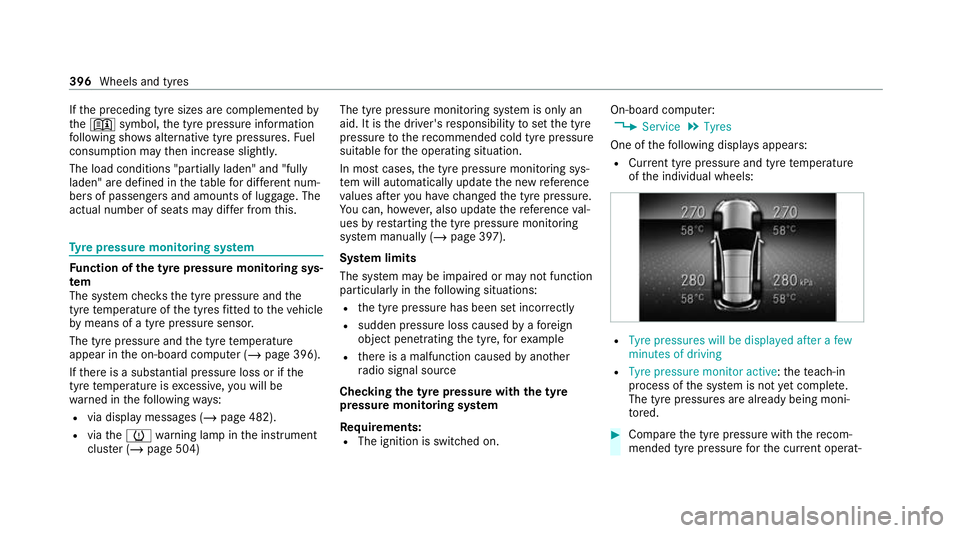
re pressure table The tyre pressure
table is on the inside of the
fuel filler flap. If one or more tyre sizes precede a tyre pres‐
sure, thefo llowing tyre pressure information is
only valid forth ose tyre sizes and their respec‐
tive load condition. Wheels and tyres
395
Page 399 of 549
If
th e preceding tyre sizes are complemented by
th e+ symbol, the tyre pressure information
fo llowing sho wsalternative tyre pressures. Fuel
consum ption may then increase slightl y.
The load conditions "partially laden" and "fully
laden" are defined in theta ble for dif fere nt num‐
be rs of passengers and amounts of luggage. The
actual number of seats may dif fer from this. Ty
re pressure moni toring sy stem Fu
nction of the ty repressure moni toring sys‐
tem
The sy stem checks the tyre pressure and the
tyre temp erature of the tyres fitted totheve hicle
by means of a tyre pressu resensor.
The tyre pressure and the tyre temp erature
appear in the on-board computer (/ page 396).
If th ere is a subs tantial pressure loss or if the
tyre temp erature is excessive, you will be
wa rned in thefo llowing ways:
R via display messa ges (/ page 482).
R viatheh warning lamp in the instrument
clus ter (/ page 504) The tyre pressu
remonitoring sy stem is only an
aid. It is the driver's responsibility toset the tyre
pressure tothere commended cold tyre pressure
suitable forth e operating situation.
In most cases, the tyre pressure monitoring sys‐
te m will auto maticallyupdate the new refere nce
va lues af teryo u ha vechanged the tyre pressure.
Yo u can, ho wever,also update there fere nce val‐
ues byrestarting the tyre pressure monitoring
sy stem manually (/ page 397).
Sy stem limits
The sy stem may be impaired or may not function
particular lyin thefo llowing situations:
R the tyre pressure has been set incor rectly
R sudden pressure loss caused byafo re ign
object penetrating the tyre, forex ample
R there is a malfunction caused byano ther
ra dio signal source
Checking the ty repressure with the tyre
pressure moni toring sy stem
Re quirements:
R The ignition is switched on. On-board computer:
4 Service 5
Tyres
One of thefo llowing displa ysappears:
R Cur rent tyre pressure and tyre temp erature
of the individual wheels: R
Tyre pressures will be displayed after a few
minutes of driving
R Tyre pressure monitor active: thete ach-in
process of the sy stem is not yet compl ete.
The tyre pressures are already being moni‐
to re d. #
Compare the tyre pressure with there com‐
mended tyre pressure forth e cur rent operat‐ 396
Wheels and tyres
Page 412 of 549
#
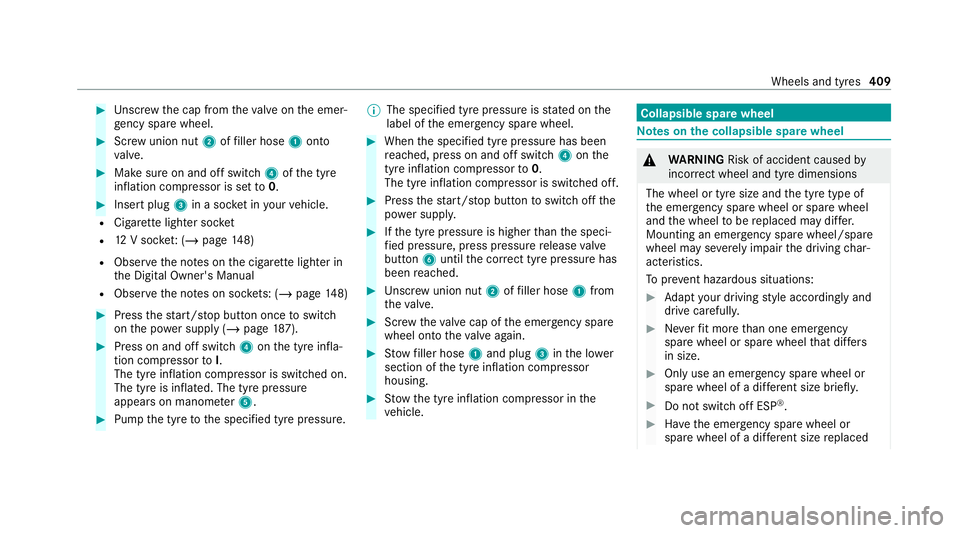
Unscr ew the cap from theva lve on the emer‐
ge ncy spa rewheel. #
Screw union nut 2offiller hose 1onto
va lve. #
Make sure on and off switch 4ofthe tyre
inflation compressor is set to0. #
Insert plug 3in a soc ket in your vehicle.
R Cigar ette lighter soc ket
R 12V soc ket: ( / page 148)
R Obse rveth e no tes on the cigar ette lighter in
th e Digital Owner's Manual
R Obser vethe no tes on soc kets: (/ page 148) #
Press thest art/ stop button once toswitch
on the po wer supp ly (/ page187). #
Press on and off switch 4onthe tyre infla‐
tion compressor toI.
The tyre inflation compressor is switched on.
The tyre is inflated. The tyre pressure
appears on manome ter5. #
Pump the tyre tothe specified tyre pressure. %
The specified tyre pressure is stated on the
label of the emer gency spa rewheel. #
When the specified tyre pressure has been
re ached, press on and off swit ch4 onthe
tyre inflation compressor to0.
The tyre inflation compressor is switched off. #
Press thest art/ stop button toswitch off the
po we r supp ly. #
Ifth e tyre pressure is higher than the speci‐
fi ed pressure, press pressure release valve
bu tton 6until the cor rect tyre pressure has
been reached. #
Unscr ew union nut 2offiller hose 1from
th eva lve. #
Screw theva lve cap of the emer gency spa re
wheel onto theva lve again. #
Stow filler hose 1and plug 3inthe lo wer
section of the tyre inflation compressor
housing. #
Stow th e tyre inflation compressor in the
ve hicle. Collapsible spare wheel
Note
s onthe collapsible spa rewheel &
WARNING Risk of accident caused by
incor rect wheel and tyre dimensions
The wheel or tyre size and the tyre type of
th e emer gency spa rewheel or spare wheel
and the wheel tobe replaced may dif fer.
Mounting an emer gency spa rewheel/spare
wheel may se verely impair the driving char‐
acteristics.
To preve nt hazardous situations: #
Adapt your driving style according lyand
drive carefull y. #
Neverfit more than one emer gency
spa rewheel or spare wheel that dif fers
in size. #
Only use an emer gency spa rewheel or
spare wheel of a dif fere nt size brie fly. #
Do not switch off ESP ®
. #
Have the emer gency spa rewheel or
spare wheel of a dif fere nt size replaced Wheels and tyres
409