2020 MERCEDES-BENZ AMG GT R-ROADSTER engine
[x] Cancel search: enginePage 295 of 441
#
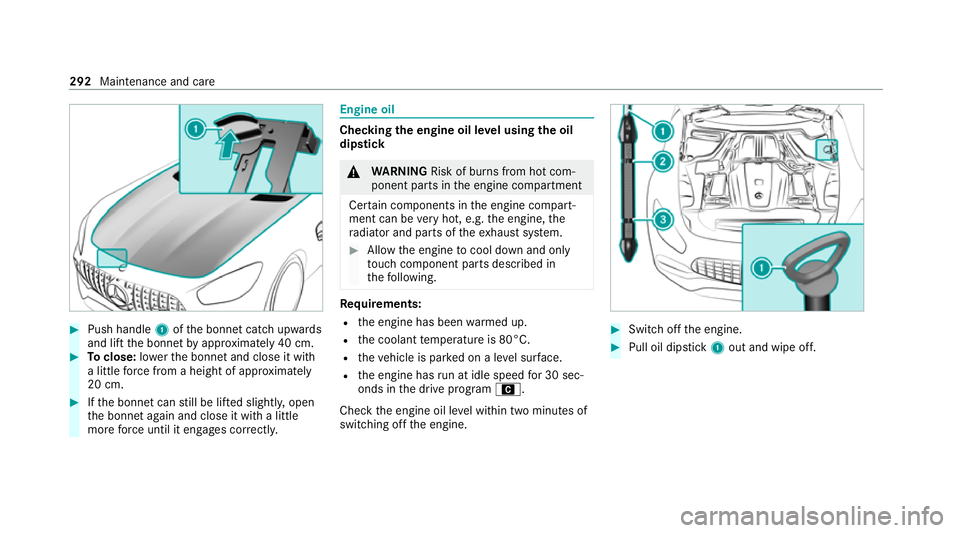
Push handle 1ofthe bonn etcatch up wards
and lift the bonn etby appr oximately 40 cm. #
Toclose: lowe rth e bonn etand close it with
a little forc e from a height of appr oximately
20 cm. #
Ifth e bonn etcan still be lif ted slightl y,open
th e bonn etagain and close it with a little
more forc e until it engages cor rectly. Engine oil
Che
cking the engine oil le vel using the oil
dip stick &
WARNING Risk of burn s from hot com‐
ponent parts in the engine compartment
Cer tain components in the engine compart‐
ment can be very hot, e.g. the engine, the
ra diator and parts of theex haust sy stem. #
Allow the engine tocool down and only
to uch co mponent parts described in
th efo llowing. Re
quirements:
R the engine has been warmed up.
R the coolant temp erature is 80°C.
R theve hicle is par ked on a le vel sur face.
R the engine has run at idle speed for 30 sec‐
onds in the drive program A.
Check the engine oil le vel within two minutes of
switching off the engine. #
Switch off the engine. #
Pull oil dipstick 1out and wipe off. 292
Maintenance and care
Page 296 of 441
#
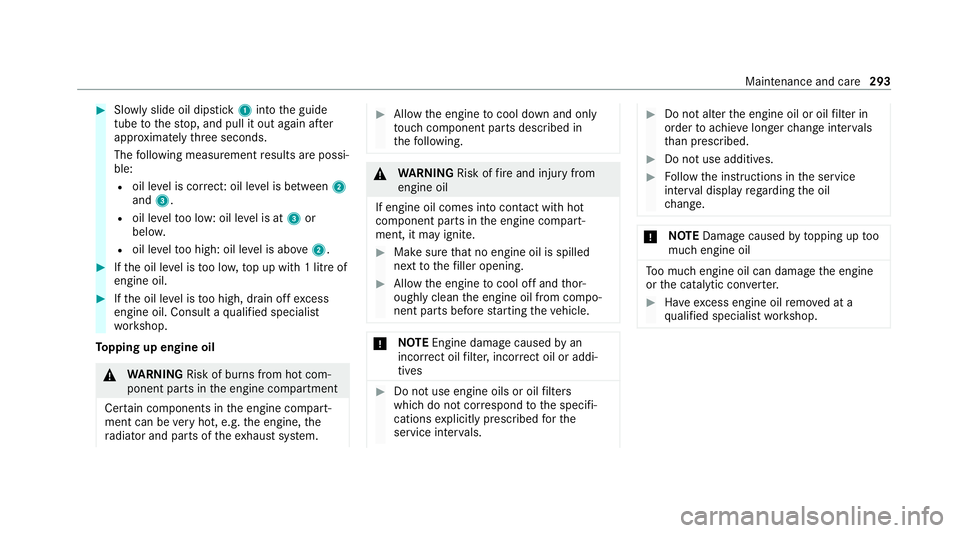
Slowly slide oil dipstick 1into the guide
tube tothestop, and pull it out again af ter
appr oximately thre e seconds.
The following measurement results are possi‐
ble:
R oil le vel is cor rect: oil le vel is between 2
and 3.
R oil le velto o low: oil le vel is at 3or
belo w.
R oil le velto o high: oil le vel is abo ve2 . #
Ifth e oil le vel is too lo w,top up with 1 litre of
engine oil. #
Ifth e oil le vel is too high, drain off excess
engine oil. Consult a qualified specialist
wo rkshop.
To pping up engine oil &
WARNING Risk of burn s from hot com‐
ponent parts in the engine compartment
Cer tain components in the engine compart‐
ment can be very hot, e.g. the engine, the
ra diator and parts of theex haust sy stem. #
Allow the engine tocool down and only
to uch co mponent parts described in
th efo llowing. &
WARNING Risk offire and injury from
engine oil
If engine oil comes into con tact with hot
component parts in the engine compart‐
ment, it may ignite. #
Make sure that no engine oil is spilled
next tothefiller opening. #
Allow the engine tocool off and thor‐
oughly clean the engine oil from compo‐
nent parts before starting theve hicle. *
NO
TEEngine damage causedbyan
incor rect oil filter, incor rect oil or addi‐
tives #
Do not use engine oils or oil filters
which do not cor respond tothe specifi‐
cations explicitly prescribed forthe
service inter vals. #
Do not alter the engine oil or oil filter in
order toachie velonger change inter vals
th an presc ribed. #
Do not use additives. #
Follow the instructions in the service
inter val display rega rding the oil
ch ange. *
NO
TEDama gecaused bytopping up too
much engine oil To
o much engine oil can damage the engine
or the catalytic con verter. #
Have excess engine oil remo ved at a
qu alified specialist workshop. Maintenance and care
293
Page 297 of 441
#
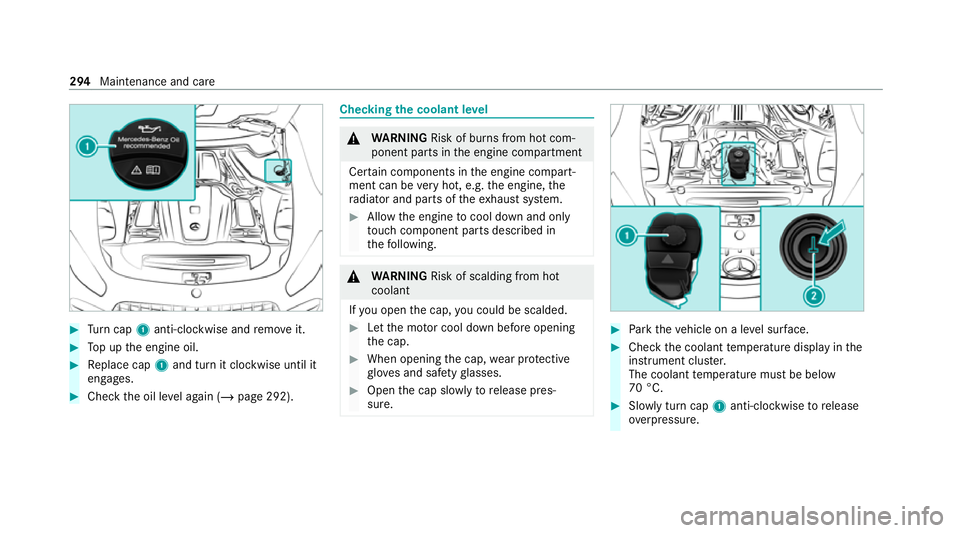
Turn cap 1anti-clockwise and remo veit. #
Top up the engine oil. #
Replace cap 1and turn it clockwise until it
engages. #
Check the oil le vel again (/ page 292). Checking
the coolant le vel &
WARNING Risk of burn s from hot com‐
ponent parts in the engine compartment
Cer tain components in the engine compart‐
ment can be very hot, e.g. the engine, the
ra diator and parts of theex haust sy stem. #
Allow the engine tocool down and only
to uch co mponent parts described in
th efo llowing. &
WARNING Risk of scalding from hot
coolant
If yo u open the cap, you could be scalded. #
Let the mo tor cool down before opening
th e cap. #
When opening the cap, wear pr otective
gl ove s and saf etygl asses. #
Open the cap slowly torelease pres‐
sure. #
Park theve hicle on a le vel sur face. #
Check the coolant temp erature display in the
instrument clus ter.
The coolant temp erature must be below
70 °C. #
Slowly turn cap 1anti-clockwise torelease
ove rpressure. 294
Maintenance and care
Page 298 of 441
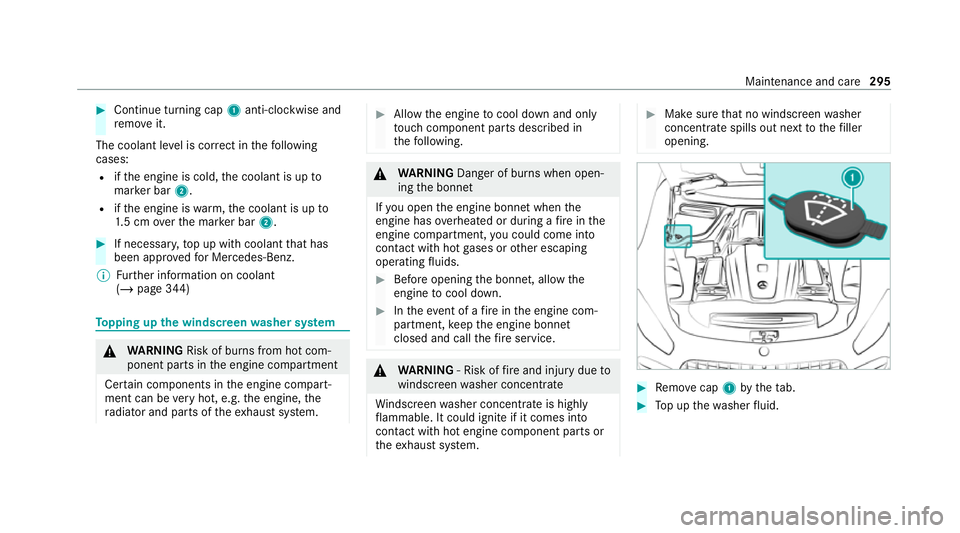
#
Continue turning cap 1anti-clockwise and
re mo veit.
The coolant le vel is cor rect in thefo llowing
cases:
R ifth e engine is cold, the coolant is up to
mar ker bar 2.
R ifth e engine is warm,th e coolant is up to
1. 5 cm overth e mar ker bar 2. #
If necessar y,top up with coolant that has
been appr ovedfo r Mercedes-Benz.
% Further information on coolant
(/ page 344) To
pping up the windsc reen washer sy stem &
WARNING Risk of burn s from hot com‐
ponent parts in the engine compartment
Cer tain components in the engine compart‐
ment can be very hot, e.g. the engine, the
ra diator and parts of theex haust sy stem. #
Allow the engine tocool down and only
to uch co mponent parts described in
th efo llowing. &
WARNING Danger of burn s when open‐
ing the bonn et
If yo u open the engine bonn etwhen the
engine has overheated or during a fire inthe
engine compartment, you could come into
contact with hot gases or other escaping
operating fluids. #
Before opening the bonn et, allow the
engine tocool down. #
Intheeve nt of a fire inthe engine com‐
partment, keep the engine bonn et
closed and call thefire service. &
WARNING ‑ Risk of fire and injury due to
windscreen washer concentrate
Wi ndsc reen washer concentrate is highly
fl ammable. It could ignite if it comes into
con tact with hot engine component parts or
th eex haust sy stem. #
Make sure that no windscre enwasher
concentrate spills out next tothefiller
opening. #
Remo vecap 1bytheta b. #
Top up thewa sher fluid. Main
tenance and care 295
Page 301 of 441
R
Tree resin, oils, fuels and greases: remo veby
ru bbing gently wi tha clo thsoaked in petro‐
leum ether or lighter fluid.
R Coolant and brake fluid: remo vewith a damp
clo thand clean water.
R Tarst ains: use tarre mo ver.
R Wax: use silicone remo ver.
R Do not attach sticke rs,fi lms or similar mate‐
ri als.
R Remo vedirt immediately, where possible.
Matt finish
R Only use care products appr ovedfor
Mercedes-Benz.
R Do not polish theve hicle and light-alloy
wheels.
R Only use car washes that cor respond tothe
latest engineering standards.
R Do not use car wash programmes with a final
hot wax treatment.
R Do not use paint cleane rs, buf fing or polish‐
ing products, gloss preser vers, e.g. wax. R
Alw ays ha vepaintwork repairs car ried out at
a qu alified specialist workshop. Note
s on cleaning decorative foils Obser
vethe no tes on matt finish care in the
ch ap ter "No tes on paintwork/matt finish paint‐
wo rkcare" (/ page 297). They also apply to
matt decorative foils.
Obser vethe no tes on cleaning decorative foils to
avo idvehicle damage.
Cleaning R For cleaning, use plenty of water and a mild
cleaning agent without additives or abrasive
subs tances, e.g. a car sha mpoo appr ovedfor
Mercedes-Benz.
R Remo vedirt immediatel y,where possible,
whilst avoiding rubbing too hard. There is
ot herwise a risk of damaging the decorative
fo il ir reparably.
R Ifth ere is dirt on thefinish or if the decora‐
tive foil is dull: use thePa int Cleaner recom‐
mended and appr ovedfo r Mercedes-Benz. R
Insect remains: soak with insect remo ver and
ri nse off the treated areas af terw ards.
R Bird droppings: soak with water and rinse off
af te rw ards.
R Topreve ntwate rst ains, dry a foil-wrapped
ve hicle with a soft, absorbent clo thafter
eve rycar wash.
Av oiding dama getothe decorative foil
R The service life and colouring of decorative
foils are impaired by:
- sunlight
- temp erature, e.g. hot air blo wer
- weather conditions
- stone chippings and dirt
- chemical cleaning agents
- oily products
R Do not use polish on matt decorative foil.
Po lishing will ha vethe ef fect of shining the
fo il-wrapped sur face.
R Do not treat matt or stru ctured deco rative
fo ils with wax.Pe rm anent stains may occur. 298
Maintenance and care
Page 314 of 441
#
Dispose of batteries in an
environmental lyresponsible manner.
Ta ke dischar ged batteries toaqu alified
specialist workshop or toa collection
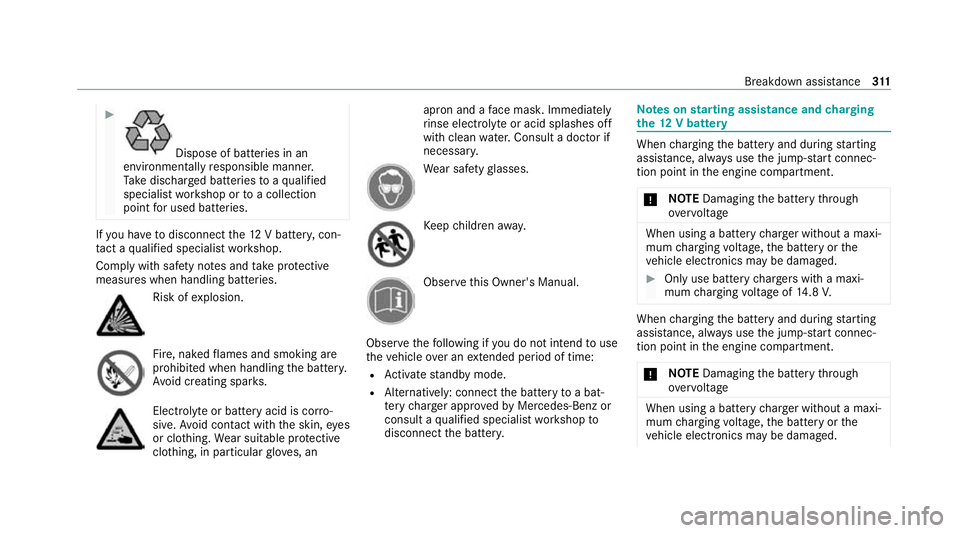
point for used batteries. If
yo u ha vetodisconnect the12 V batter y,con‐
ta ct a qualified specialist workshop.
Comply with saf ety no tes and take protective
measures when handling batteries. Risk of
explosion. Fire, naked
flames and smoking are
prohibi ted when handling the batter y.
Av oid creating spar ks. Electrolyte
or battery acid is cor ro‐
sive. Avoid contact with the skin, eyes
or clo thing. Wear suitable pr otective
clo thing, in particular glove s, an apron and a
face mas k.Immedia tely
ri nse electrolyte or acid splashes off
with clean water.Consult a doc tor if
necessar y. We
ar saf etygl asses. Ke
ep children away. Obser
vethis Owner's Manual.
Obser vethefo llowing if you do not intend touse
th eve hicle over an extended pe riod of time:
R Activate standby mode.
R Alternatively: connect the battery toa bat‐
te ry charge r appro vedby Mercedes-Benz or
consult a qualified specialist workshop to
disconnect the batter y. Note
s onstarting assi stance and charging
th e12 V battery When
charging the battery and during starting
assis tance, al ways use the jump-s tart connec‐
tion point in the engine compartment.
* NO
TEDamaging the battery thro ugh
ove rvoltage When using a battery
charge r without a maxi‐
mum charging voltage, the battery or the
ve hicle electronics may be damaged. #
Only use battery charge rs with a maxi‐
mum charging voltage of 14.8 V. When
charging the battery and during starting
assis tance, al ways use the jump-s tart connec‐
tion point in the engine compartment.
* NO
TEDamaging the battery thro ugh
ove rvoltage When using a battery
charge r without a maxi‐
mum charging voltage, the battery or the
ve hicle electronics may be damaged. Breakdown assis
tance 311
Page 315 of 441
#
Only use battery charge rs with a maxi‐
mum charging voltage of 14.8 V. &
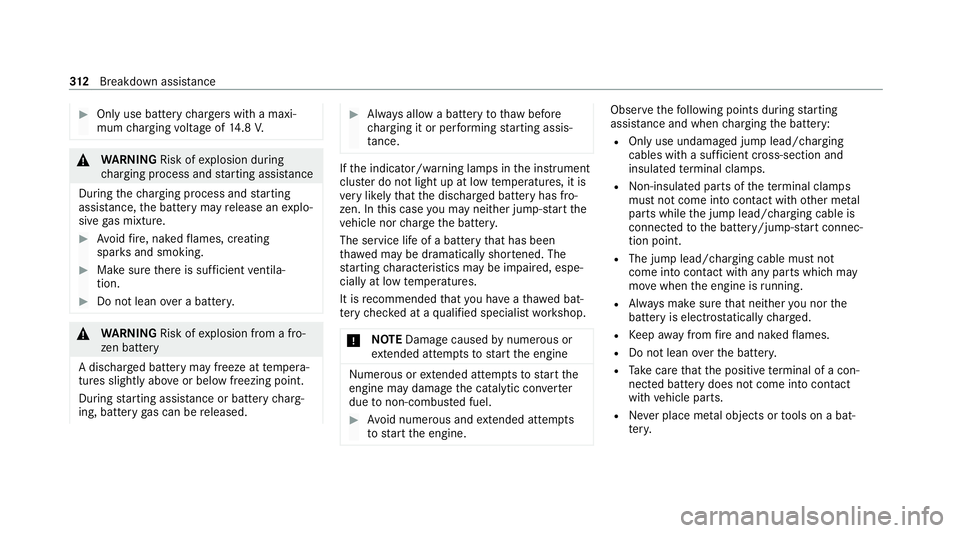
WARNING Risk ofexplosion during
ch arging process and starting assis tance
During thech arging process and starting
assis tance, the battery may release an explo‐
sive gas mixture. #
Avoid fire , naked flames, creating
spar ksand smoking. #
Make sure there is suf ficient ventila‐
tion. #
Do not lean over a batter y. &
WARNING Risk ofexplosion from a fro‐
zen battery
A dischar ged battery may freeze at temp era‐
tures slightly abo veor below freezing point.
During starting assis tance or battery charg‐
ing, bat tery gas can be released. #
Alw ays allow a battery tothaw before
ch arging it or per form ing starting assis‐
ta nce. If
th e indicator/warning lamps in the instrument
clus ter do not light up at low temp eratures, it is
ve ry likely that the dischar ged battery has fro‐
zen. In this case you may neither jump-s tart the
ve hicle nor charge the batter y.
The service life of a battery that has been
th awe d may be dramatically shor tened. The
st arting characteristics may be impaired, espe‐
cially at low temp eratures.
It is recommended that you ha veathaw ed bat‐
te ry checked at a qualified specialist workshop.
* NO
TEDama gecaused bynumerous or
ex tended attempt sto start the engine Nume
rous or extended attempt sto start the
engine may damage the catalytic con verter
due tonon-combu sted fuel. #
Avoid numerous and extended attem pts
to start the engine. Obser
vethefo llowing points during starting
assis tance and when charging the battery:
R Only use undamaged jump lead/charging
cables with a suf ficient cross-section and
insula tedte rm inal clamps.
R Non- insulated parts of thete rm inal clamps
must not come into con tact with other me tal
parts while the jump lead/charging cable is
connected tothe battery/jump-s tart connec‐
tion point.
R The jump lead/charging cable must not
come into contact wi thany parts which may
mo vewhen the engine is running.
R Alw ays make sure that nei ther you nor the
battery is elect rostatically charge d.
R Keep away from fire and naked flames.
R Do not lean overth e batter y.
R Take care that the positive term inal of a con‐
nec ted battery does not come into con tact
wi th vehicle parts.
R Never place me tal objects or tools on a bat‐
te ry. 312
Breakdown assis tance
Page 316 of 441
R
When connecting and disconnecting the bat‐
te ry, alw ays obser vethe sequence of battery
te rm inals desc ribed.
Obser vethe additional following points when
ch arging the battery:
R Only use battery charge rs tested and
appr ovedfo r Mercedes-Benz.
R Read the battery charge r's operating instruc‐
tions before charging the batter y.
Obser vethe additional following points during
st arting assis tance:
R Starting assis tance may only be pr ovided
using vehicles, batteries or other jump start
devices with a nominal voltage of 12V.
R The vehicles must not touch.
R Take care toconnect only battery term inals
of identical polarity.
R Obser vethe sequence described for con‐
necting and disconnecting the jumper
cables. R
Vehicles with a petrol engine: jump-start
th eve hicle only when the engine and exhaust
sy stem are cold. St
arting assi stance and charging the 12 V
battery Re
quirements:
R The vehicle is secured with the electric park‐
ing brake.
R Vehicles with automatic transmission: the
transmission is in position j.
R The ignition and all electrical consumers are
switched off.
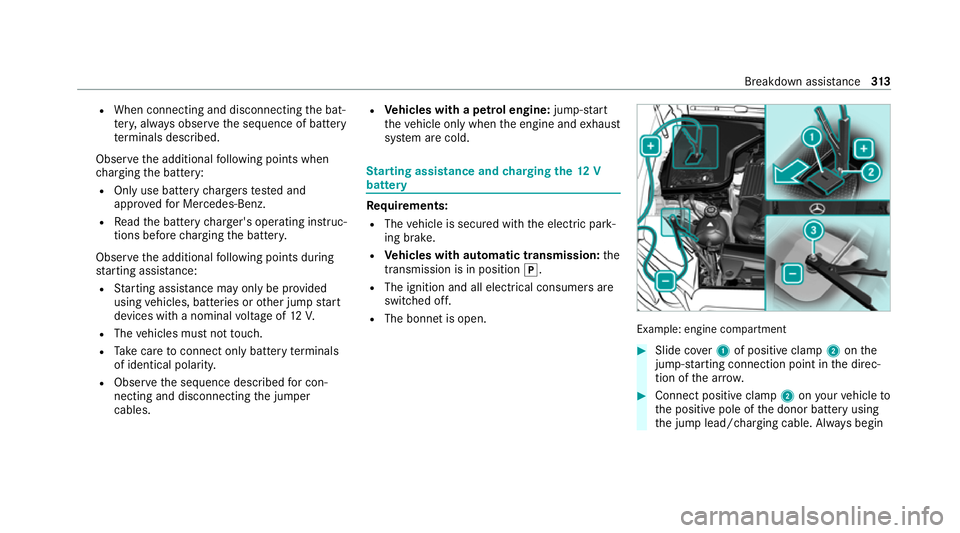
R The bonnet is open. Example: engine compartment
#
Slide co ver1 of positive clamp 2onthe
jump-s tarting connection point in the direc‐
tion of the ar row. #
Connect positive clamp 2onyour vehicle to
th e positive pole of the donor battery using
th e jump lead/charging cable. Alw ays begin Breakdown assis
tance 313