2020 MASERATI GRANTURISMO stop start
[x] Cancel search: stop startPage 210 of 286

(Continued)
slope or an uneven surface, place
chocks or other suitable items in
front of or behind the wheels to
stop the vehicle from moving.
•Never start or run the engine with
the vehicle on a jack.
•No person should place any portion
of their body under a vehicle that is
supported by a jack.
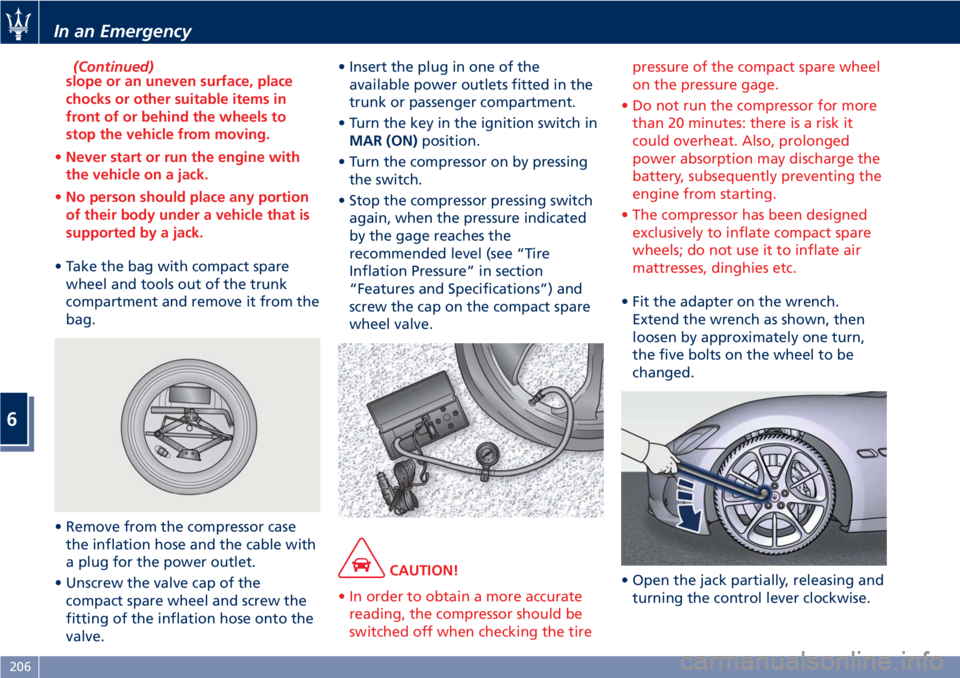
• Take the bag with compact spare
wheel and tools out of the trunk
compartment and remove it from the
bag.
• Remove from the compressor case
the inflation hose and the cable with
a plug for the power outlet.
• Unscrew the valve cap of the
compact spare wheel and screw the
fitting of the inflation hose onto the
valve.• Insert the plug in one of the
available power outlets fitted in the
trunk or passenger compartment.
• Turn the key in the ignition switch in
MAR (ON)position.
• Turn the compressor on by pressing
the switch.
• Stop the compressor pressing switch
again, when the pressure indicated
by the gage reaches the
recommended level (see “Tire
Inflation Pressure” in section
“Features and Specifications”) and
screw the cap on the compact spare
wheel valve.
CAUTION!
• In order to obtain a more accurate
reading, the compressor should be
switched off when checking the tirepressure of the compact spare wheel
on the pressure gage.
• Do not run the compressor for more
than 20 minutes: there is a risk it
could overheat. Also, prolonged
power absorption may discharge the
battery, subsequently preventing the
engine from starting.
• The compressor has been designed
exclusively to inflate compact spare
wheels; do not use it to inflate air
mattresses, dinghies etc.
• Fit the adapter on the wrench.
Extend the wrench as shown, then
loosen by approximately one turn,
the five bolts on the wheel to be
changed.
• Open the jack partially, releasing and
turning the control lever clockwise.
In an Emergency
6
206
Page 216 of 286

Freeing the Stuck Vehicle
If your vehicle is stuck in mud, sand, or
snow, it can probably be moved
backward and forward by a simple
rocking motion.
Steer the wheel right and left to clear
the area around the front wheels.
Shift then between D (Drive) or
MANUAL mode and R (Reverse) (see
chapter “Automatic Transmission” and
“Drive Mode” in section “Driving”).
Shifting to MANUAL mode, try to free
the car starting in second gear.
At low speed motion of the vehicle,
you can switch quickly from D (Drive)
to R (Reverse), and vice versa, just by
pressing the release button on the
shift lever.
For more effectiveness press lightly on
the accelerator pedal in order to avoid
wheel slippage.
If unable to release the vehicle in one
of the previously described ways, enter
the low-grip driving mode, by pressing
the “ICE” button, and completely
exclude the yaw and slip control
system, by pressing the
(ESC Off)
button for at least 2 seconds. Moving
the shift lever between D (Drive) and R
(Reverse) to start.
CAUTION!
Racing the engine or spinning the
drive wheels may lead to transmission
overheating and failure. Allow the
engine to idle with the shift lever in N
(Neutral) for at least one minute after
every five rocking-motion cycles. This
will minimize overheating and reduce
the risk of transmission failure during
prolonged efforts to free a stuck
vehicle.
WARNING!
Fast spinning tires can be dangerous.
Forces generated by excessive drive
wheel speeds may cause damage, or
even failure, of the drivetrain and
tires.
Emergency Starting with
Maserati Code
If the Maserati CODE fails to
deactivate the engine immobilizer, the
CODE warning light will illuminate
permanently, while the
MIL
warning light will go off after four
seconds and will turn on again
immediately afterward: the engine will
not start.
To start the engine, follow the
emergency starting procedure.
Emergency Starting Procedure
NOTE:
We recommend that you carefully read
the entire procedure before
performing it. If you make a mistake,
turn the key in the ignition switch to
STOP (OFF)position and repeat the
operations from the first step.
WARNING!
California Proposition 65
Operating, servicing and maintaining
a passenger vehicle or off-road vehicle
can expose you to chemicals including
such as, engine exhaust, carbon
monoxide, phthalates and lead, that
In an Emergency
6
212
Page 217 of 286

which are know to the State of
California to cause cancer and birth
defects or other reproductive harm. To
minimize exposure, avoid breathing
exhaust, do not idle the engine except
as necessary, service your vehicle in a
well-ventilated area and wear gloves
or wash your hands frequently when
servicing your vehicle. For more
information go to:
www.P65Warnings.ca.gov/passenger-
vehicle
• Read the 5-digit electronic code
found on the CODE card.
• Turn the key in the ignition switch to
MAR (ON)position: at this moment
the
CODE andMIL warning
lights are on.
• Push and hold down the accelerator
pedal. Approximately 8 seconds
later, the
MIL warning light will
go off. Release the accelerator and
get ready to count the number of
times the
MIL warning light
flashes.
• Wait until the number of flashes is
equal to the first digit of your CODE
card, then push and hold down the
accelerator pedal until the
MIL
warning light goes off, after about 4seconds, then release the accelerator
pedal.
• The
MIL warning light starts
flashing again. As soon as the
displayed number of flashing is
equal to the second digit of your
CODE card, press down the
accelerator pedal and hold it.
• Proceed in the same manner for the
remaining digits in the code on the
CODE card.
• When the last digit has been
entered, hold the accelerator pedal
pushed down. The
MIL warning
light comes on for 4 seconds and
then goes off; you can now release
the accelerator pedal.
• When the
MIL warning light
flashes fast (for about 4 seconds) it
confirms that the procedure has
been performed correctly.
• Start the engine by turning the key
in the ignition switch fromMAR
(ON)position toAVVposition.
If the
MIL warning light remains
on, turn the key toSTOP (OFF)
position and repeat the procedure
from the first step. This procedure can
be repeated an unlimited number of
times.NOTE:
After an emergency staring, you
should contact anAuthorized
Maserati Dealeras the emergency
starting procedure will have to be
carried out every time you want to
start the engine.
In an Emergency
6
213
Page 219 of 286

open flames or cigarettes that could
generate sparks.
NOTE:
If you need to disconnect the battery
from the vehicle electrical system, see
“Maintenance - Free Battery” in
section “Maintenance and Care”).
Access the Battery
The battery is stored in the trunk.
• Open the trunk lid (see “Open and
Close the Trunk Lid” in section
“Before Starting”).
• Remove any luggage from the trunk
compartment.
• Remove the floor panel from the
trunk compartment.
• Remove the inside covering panel
from the battery compartment.Remove the cover from the right side
of the battery which protects the
positive pole.
Jump-Start Procedure
WARNING!
•The battery is secured to the vehicle
with a metal clamp (indicated in the
picture), so be extremely careful not
to let the clips on the end of the
cables come into contact with it.
•Remove any metal jewelry such as
watch bands or bracelets that might
make an inadvertent electrical
contact. You could be seriously
injured.
•Do not allow the vehicles involved
in the jump-starting operation to
touch each other as this could
establish a ground connection and
cause personal injury.
• Turn off the heater, radio, and all
unnecessary electrical accessories.
• Set the parking brake, shift the
automatic transmission into P (Park)
and turn the key in the ignition
switch toSTOP (OFF)position.
• If using another vehicle to jump start
the battery, park the vehicle withinthe jumper cables reach and set the
parking brake and make sure the
ignition is off.
• Connect one terminal clamp of the
positive jumper cable to the positive
(+) pole of the discharged battery.
• Connect the opposite terminal clamp
of the positive (+) jumper cable to
the positive (+) pole of the booster
battery.
• Connect one terminal clamp of the
negative jumper cable to the
negative (–) pole of the booster
battery.
• Connect the opposite terminal clamp
of the negative (–) jumper cable to
the negative (–) pole of the
discharged battery.
• Start the engine in the vehicle that
has the booster battery, let the
engine idle a few minutes, and then
start the engine in the vehicle with
In an Emergency
6
215
Page 264 of 286

Restarting the Vehicle
Before restarting the vehicle after a
long period of inactivity, we
recommend that you carry out the
following operations.
• Check the tires for pressure and for
any damages, cuts or cracks. If this is
the case, have them replaced.
• Do not dry-rub the external surface
of the vehicle.
• Visually inspect if there are any fluid
leaks (oil, brake and clutch fluid,
engine coolant etc.).
• Have the engine oil and filter
replaced.
• Check the fluid levels in the brake
system, as well as the engine coolant
level.
• Check the air filter and have them
replaced if necessary.
• Reconnect the battery after checking
the charge status (refer to
“Maintenance-Free Battery” in this
section) and perform the initializing
procedure if applicable.
• With the transmission in N (Neutral),
let the engine idle for several
minutes.WARNING!
The engine idle must be performed
outdoors. Exhaust gases contain
carbon monoxide which is strongly
toxic and potentially lethal.
WARNING!
California Proposition 65
Operating, servicing and maintaining
a passenger vehicle or off-road vehicle
can expose you to chemicals including
such as, engine exhaust, carbon
monoxide, phthalates and lead, that
which are know to the State of
California to cause cancer and birth
defects or other reproductive harm. To
minimize exposure, avoid breathing
exhaust, do not idle the engine except
as necessary, service your vehicle in a
well-ventilated area and wear gloves
or wash your hands frequently when
servicing your vehicle. For more
information go to:
www.P65Warnings.ca.gov/passenger-
vehicle
Battery Statement
Battery Statement Status of
Charge
To avoid problems with ignition and/or
the electrical system in general when
you are driving, the battery charge
status is constantly maintained and
guaranteed by the vehicle's recharge
circuit; the main component of which
is the alternator. This circuit is only
able to supply voltage to the battery
when the vehicle is traveling.
The
warning light on the
instrument cluster (see “Instrument
Cluster” in section “Dashboard
Instruments and Controls”), will
indicate any malfunctions in the
recharge circuit or an insufficient
battery charge status (flashing).
The vehicle is fitted with advanced
electronic systems, such as, for
example, the alarm system and various
electronic control modules, which
consume power even when the key in
the ignition switch is in theSTOP (OFF)
position and the vehicle is not being
used.
Therefore, it is fundamental that the
battery is properly charged to ensure
that the engine starts properly and
Maintenance and Care
7
260