2020 MASERATI GRANTURISMO door lock
[x] Cancel search: door lockPage 92 of 286

CAUTION!
The high beams can only be switched
on manually by pushing the left-hand
multifunction lever forward.
WARNING!
If the high beams are activated, they
will turn on automatically every time
the low beams are switched on either
manually or automatically. We
recommend therefore that you switch
them off when they are no longer
necessary and every time the twilight
sensor deactivates the external lights.
“Follow me Home” Function
This function allows you to set a
timing for activation of the position
lights and low beams, so that they may
remain on for a set time after turning
off the vehicle.
This function is activated by pushing
the left-hand multifunction lever on
the steering column, used to flash the
headlights.
The position lights and low beams turn
on for 30 seconds, the message
“Follow me” appears on the
instrument cluster display for 20seconds, and the light activation time
is displayed.
When this function is active, every
time the left-hand multifunction lever
for flashing the headlights is operated,
the time the lights remain on is
increased by 30 seconds, with a
maximum total time of 210 seconds.
The display will show the time set.
If the left-hand multifunction lever for
flashing the headlights is operated for
more than 2 seconds, the function is
deactivated, and the indicator on the
instrument cluster display goes off.
When the function is active, turning
the key in the ignition switch back to
MAR (ON)position deactivates the
system.Front Domelights
The front domelight includes a central
and two reading lights.
The central light automatically turns
on when one of the doors is opened
and turns off when the door is closed
(timed switching off). The light may be
switched on manually by pressing the
central button.
The reading lights are controlled by
the respective side buttons.
If they are turned on by pressing the
button, both central and reading lights
will stay on for about 15 minutes afterturning the engine off, and will then
turn off gradually.
When the exterior lights are switched
on, the two night LEDs fitted on the
side of the lateral buttons will light up
to facilitate use of the transmission
shift lever and the central console
controls.
In the event of a collision causing the
inertia switch activation, the
domelights turn on automatically for
approx. 15 minutes.
If one or more doors are opened, the
front and rear domelights will turn on
for approx. 3 minutes. If the door is
closed before this time, the lights will
dim and subsequently switch off after
about 10 seconds.
Upon removing the key from the
ignition switch and activating the
centralized door locking system with
the remote control buttons, the
Understanding the Vehicle
3
88
Page 136 of 286

NOTE:
•For further details refer to the
“Maserati Touch Control Plus
(MTC+)” guide.
•All settings must be edited with key
in the ignition switch inMAR (ON)
position.
To display the programmable features
menu on MTC+ touch the “Settings”
softkey on “Controls” screen.
In this mode the MTC+ System allows
you to access the following
programmable features (some of them
are optional and may not be available
on your vehicle): Display, Units, Voice
Commands, Clock, Safety & Driving
Assistant, Lights, Doors & Locks, Audio,
Phone/Bluetooth, SiriusXM Setup,
Restore Settings, Clear Personal Data
and System Information.NOTE:
•Only one touchscreen area/softkey
may be selected at a time.
•Menu navigation indications refer to
the use of softkeys on MTC+ display:
the same operations can be
performed using the manual controls
on central console.
To make a selection, and enter the
desired feature, touch the
corresponding softkey on the menu
(the picture shown is “Clock”).
To scroll through the features, move
the cursor up or down, or touch the
arrow▼or▲. Once the desired mode
is entered, press and release the
touchscreen area of the setting that
you wish to modify. The new setting
will be highlighted with one or more
boxes to indicate status or possible
variants of the feature status. A checkmark in a box indicates the current
status of the feature. Touch the check
mark to cancel, or the empty box to
insert the check mark, and change the
status of the feature.
Once the procedure is completed (for
example, Display mode) touch the
back arrow softkey to return to the
previous menu or touch the upper
right “X” softkey, to close the settings
screen. Touching the▲or▼softkeys
and the cursor on the right side of the
screen will allow you to scroll up or
down through the available settings.
Dashboard Instruments and Controls
4
132
Page 140 of 286
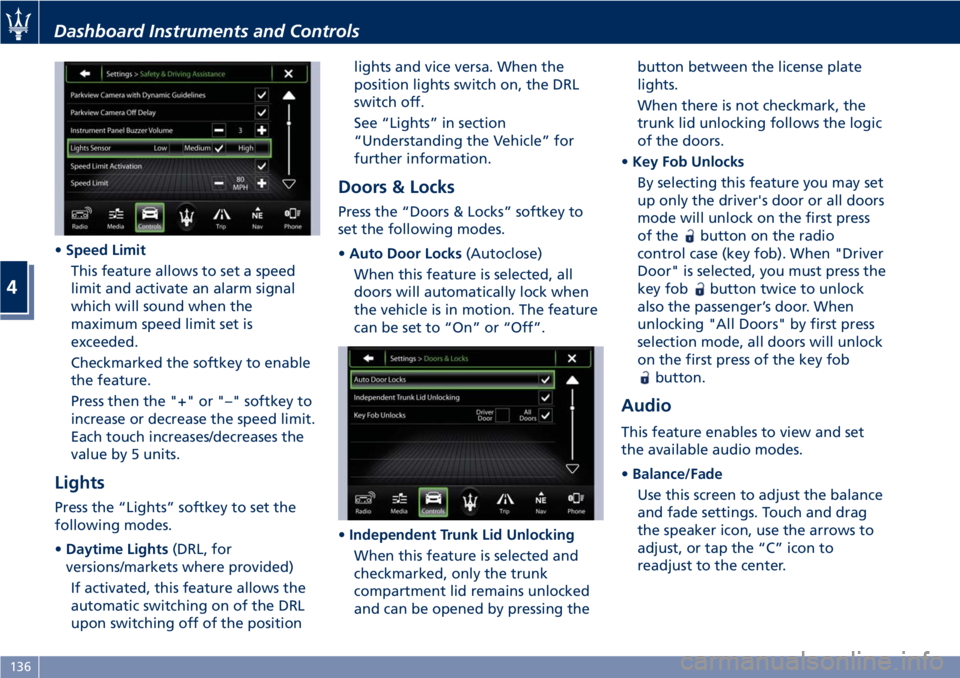
•Speed Limit
This feature allows to set a speed
limit and activate an alarm signal
which will sound when the
maximum speed limit set is
exceeded.
Checkmarked the softkey to enable
the feature.
Press then the "+" or "–" softkey to
increase or decrease the speed limit.
Each touch increases/decreases the
value by 5 units.
Lights
Press the “Lights” softkey to set the
following modes.
•Daytime Lights(DRL, for
versions/markets where provided)
If activated, this feature allows the
automatic switching on of the DRL
upon switching off of the positionlights and vice versa. When the
position lights switch on, the DRL
switch off.
See “Lights” in section
“Understanding the Vehicle” for
further information.
Doors & Locks
Press the “Doors & Locks” softkey to
set the following modes.
•Auto Door Locks(Autoclose)
When this feature is selected, all
doors will automatically lock when
the vehicle is in motion. The feature
can be set to “On” or “Off”.
•Independent Trunk Lid Unlocking
When this feature is selected and
checkmarked, only the trunk
compartment lid remains unlocked
and can be opened by pressing thebutton between the license plate
lights.
When there is not checkmark, the
trunk lid unlocking follows the logic
of the doors.
•Key Fob Unlocks
By selecting this feature you may set
up only the driver's door or all doors
mode will unlock on the first press
of the
button on the radio
control case (key fob). When "Driver
Door" is selected, you must press the
key fob
button twice to unlock
also the passenger’s door. When
unlocking "All Doors" by first press
selection mode, all doors will unlock
on the first press of the key fob
button.
Audio
This feature enables to view and set
the available audio modes.
•Balance/Fade
Use this screen to adjust the balance
and fade settings. Touch and drag
the speaker icon, use the arrows to
adjust, or tap the “C” icon to
readjust to the center.
Dashboard Instruments and Controls
4
136
Page 156 of 286
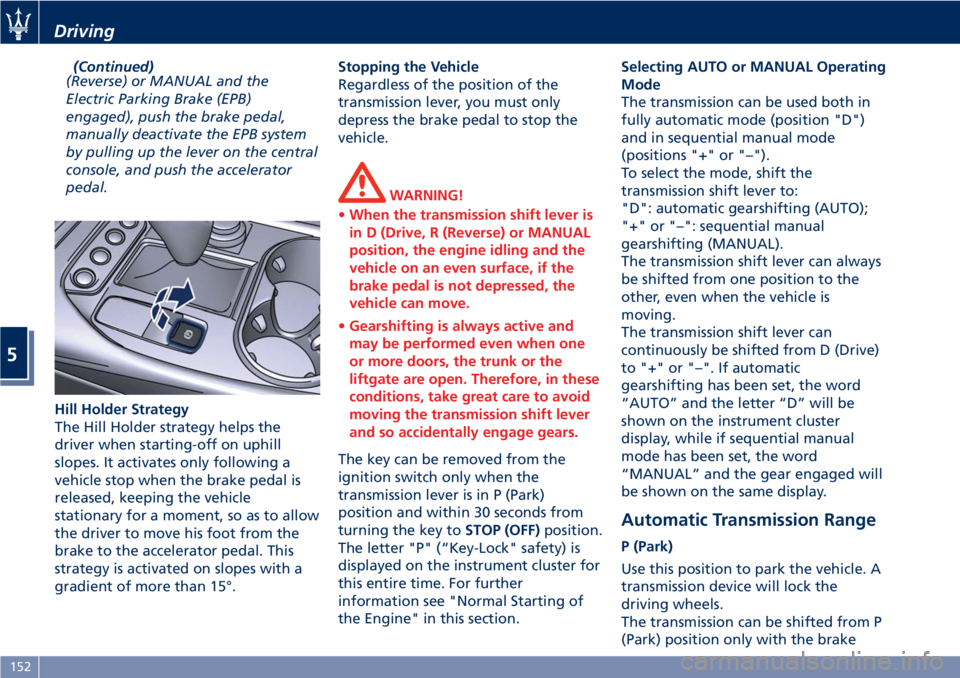
(Continued)
(Reverse) or MANUAL and the
Electric Parking Brake (EPB)
engaged), push the brake pedal,
manually deactivate the EPB system
by pulling up the lever on the central
console, and push the accelerator
pedal.
Hill Holder Strategy
The Hill Holder strategy helps the
driver when starting-off on uphill
slopes. It activates only following a
vehicle stop when the brake pedal is
released, keeping the vehicle
stationary for a moment, so as to allow
the driver to move his foot from the
brake to the accelerator pedal. This
strategy is activated on slopes with a
gradient of more than 15°.Stopping the Vehicle
Regardless of the position of the
transmission lever, you must only
depress the brake pedal to stop the
vehicle.
WARNING!
•When the transmission shift lever is
in D (Drive, R (Reverse) or MANUAL
position, the engine idling and the
vehicle on an even surface, if the
brake pedal is not depressed, the
vehicle can move.
•Gearshifting is always active and
may be performed even when one
or more doors, the trunk or the
liftgate are open. Therefore, in these
conditions, take great care to avoid
moving the transmission shift lever
and so accidentally engage gears.
The key can be removed from the
ignition switch only when the
transmission lever is in P (Park)
position and within 30 seconds from
turning the key toSTOP (OFF)position.
The letter "P" (“Key-Lock" safety) is
displayed on the instrument cluster for
this entire time. For further
information see "Normal Starting of
the Engine" in this section.Selecting AUTO or MANUAL Operating
Mode
The transmission can be used both in
fully automatic mode (position "D")
and in sequential manual mode
(positions "+" or "–").
To select the mode, shift the
transmission shift lever to:
"D": automatic gearshifting (AUTO);
"+" or "–": sequential manual
gearshifting (MANUAL).
The transmission shift lever can always
be shifted from one position to the
other, even when the vehicle is
moving.
The transmission shift lever can
continuously be shifted from D (Drive)
to "+" or "–". If automatic
gearshifting has been set, the word
“AUTO” and the letter “D” will be
shown on the instrument cluster
display, while if sequential manual
mode has been set, the word
“MANUAL” and the gear engaged will
be shown on the same display.
Automatic Transmission Range
P (Park)
Use this position to park the vehicle. A
transmission device will lock the
driving wheels.
The transmission can be shifted from P
(Park) position only with the brake
Driving
5
152
Page 157 of 286
pedal pressed. To move the shift lever
from P (Park) position to any other
position, the engine must be switched
on. The engine can be regularly
started in P (Park) range. Never
attempt to use P (Park) while the
vehicle is in motion.
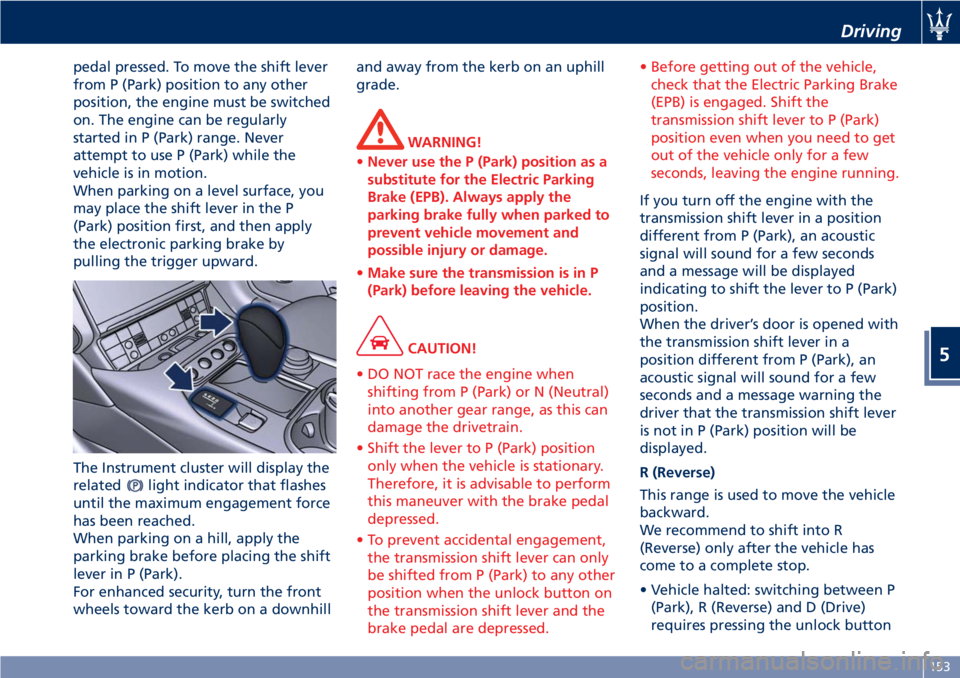
When parking on a level surface, you
may place the shift lever in the P
(Park) position first, and then apply
the electronic parking brake by
pulling the trigger upward.
The Instrument cluster will display the
related
light indicator that flashes
until the maximum engagement force
has been reached.
When parking on a hill, apply the
parking brake before placing the shift
lever in P (Park).
For enhanced security, turn the front
wheels toward the kerb on a downhilland away from the kerb on an uphill
grade.
WARNING!
•Never use the P (Park) position as a
substitute for the Electric Parking
Brake (EPB). Always apply the
parking brake fully when parked to
prevent vehicle movement and
possible injury or damage.
•Make sure the transmission is in P
(Park) before leaving the vehicle.
CAUTION!
• DO NOT race the engine when
shifting from P (Park) or N (Neutral)
into another gear range, as this can
damage the drivetrain.
• Shift the lever to P (Park) position
only when the vehicle is stationary.
Therefore, it is advisable to perform
this maneuver with the brake pedal
depressed.
• To prevent accidental engagement,
the transmission shift lever can only
be shifted from P (Park) to any other
position when the unlock button on
the transmission shift lever and the
brake pedal are depressed.• Before getting out of the vehicle,
check that the Electric Parking Brake
(EPB) is engaged. Shift the
transmission shift lever to P (Park)
position even when you need to get
out of the vehicle only for a few
seconds, leaving the engine running.
If you turn off the engine with the
transmission shift lever in a position
different from P (Park), an acoustic
signal will sound for a few seconds
and a message will be displayed
indicating to shift the lever to P (Park)
position.
When the driver’s door is opened with
the transmission shift lever in a
position different from P (Park), an
acoustic signal will sound for a few
seconds and a message warning the
driver that the transmission shift lever
is not in P (Park) position will be
displayed.
R (Reverse)
This range is used to move the vehicle
backward.
We recommend to shift into R
(Reverse) only after the vehicle has
come to a complete stop.
• Vehicle halted: switching between P
(Park), R (Reverse) and D (Drive)
requires pressing the unlock button
Driving
5
153
Page 196 of 286
Refueling
Fuel Filler Neck Access
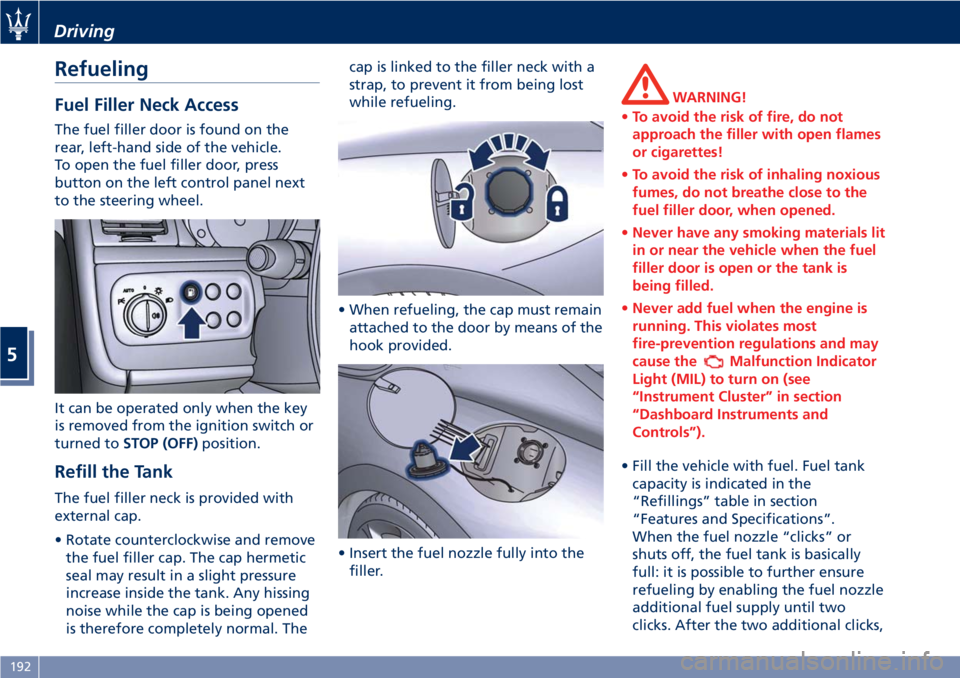
The fuel filler door is found on the
rear, left-hand side of the vehicle.
To open the fuel filler door, press
button on the left control panel next
to the steering wheel.
It can be operated only when the key
is removed from the ignition switch or
turned toSTOP (OFF)position.
Refill the Tank
The fuel filler neck is provided with
external cap.
• Rotate counterclockwise and remove
the fuel filler cap. The cap hermetic
seal may result in a slight pressure
increase inside the tank. Any hissing
noise while the cap is being opened
is therefore completely normal. Thecap is linked to the filler neck with a
strap, to prevent it from being lost
while refueling.
• When refueling, the cap must remain
attached to the door by means of the
hook provided.
• Insert the fuel nozzle fully into the
filler.
WARNING!
•To avoid the risk of fire, do not
approach the filler with open flames
or cigarettes!
•To avoid the risk of inhaling noxious
fumes, do not breathe close to the
fuel filler door, when opened.
•Never have any smoking materials lit
in or near the vehicle when the fuel
filler door is open or the tank is
being filled.
•Never add fuel when the engine is
running. This violates most
fire-prevention regulations and may
cause the
Malfunction Indicator
Light (MIL) to turn on (see
“Instrument Cluster” in section
“Dashboard Instruments and
Controls”).
• Fill the vehicle with fuel. Fuel tank
capacity is indicated in the
“Refillings” table in section
“Features and Specifications”.
When the fuel nozzle “clicks” or
shuts off, the fuel tank is basically
full: it is possible to further ensure
refueling by enabling the fuel nozzle
additional fuel supply until two
clicks. After the two additional clicks,
Driving
5
192
Page 197 of 286
the amount of fuel allowed by the
system is very low, we recommend
therefore not to persist further.
• Wait approximately 10 seconds
before removing the fuel nozzle in
order to ensure completed supply of
residual fuel and restrict the risk of
fouling the fuel filler door area.
• Remove the fuel nozzle.
• Insert the cap on the fuel filler neck.
• Tighten the cap, turning it clockwise
until it stops.
• Close the fuel tank door.
CAUTION!
To avoid fuel spillage and overfilling,
do not “top off” the fuel tank after
filling.
Emergency Fuel Filler Door
Release
If you are unable to unlock the fuel
filler door using the dedicated button,
use the fuel filler door emergency
release located in the trunk.
• Open the trunk lid (see “Open and
Close the Trunk Lid” in section
“Before Starting”).
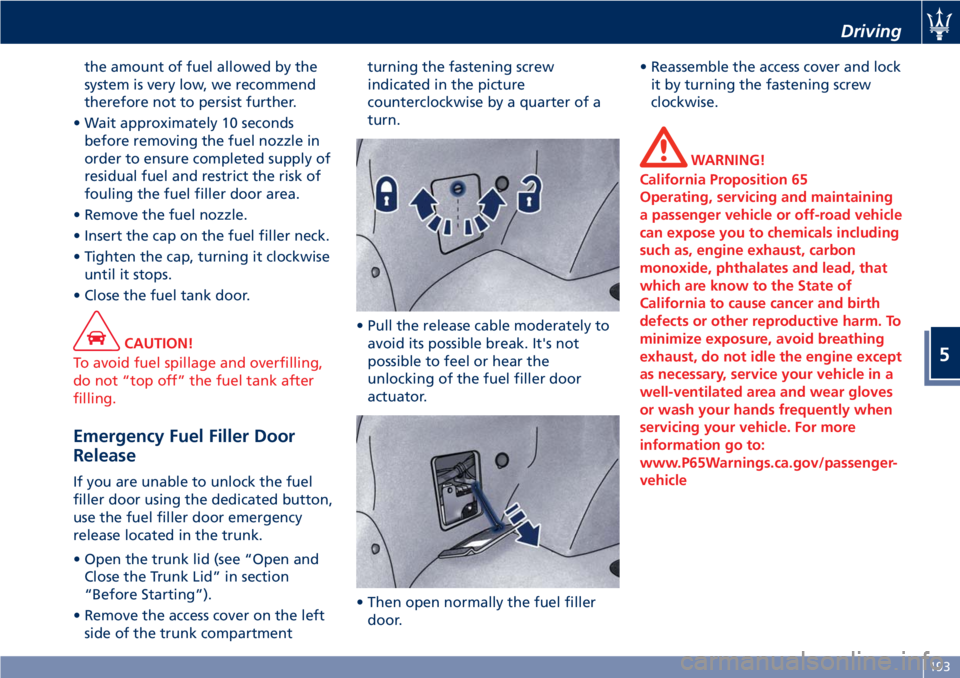
• Remove the access cover on the left
side of the trunk compartmentturning the fastening screw
indicated in the picture
counterclockwise by a quarter of a
turn.
• Pull the release cable moderately to
avoid its possible break. It's not
possible to feel or hear the
unlocking of the fuel filler door
actuator.
• Then open normally the fuel filler
door.• Reassemble the access cover and lock
it by turning the fastening screw
clockwise.
WARNING!
California Proposition 65
Operating, servicing and maintaining
a passenger vehicle or off-road vehicle
can expose you to chemicals including
such as, engine exhaust, carbon
monoxide, phthalates and lead, that
which are know to the State of
California to cause cancer and birth
defects or other reproductive harm. To
minimize exposure, avoid breathing
exhaust, do not idle the engine except
as necessary, service your vehicle in a
well-ventilated area and wear gloves
or wash your hands frequently when
servicing your vehicle. For more
information go to:
www.P65Warnings.ca.gov/passenger-
vehicle
Driving
5
193
Page 222 of 286
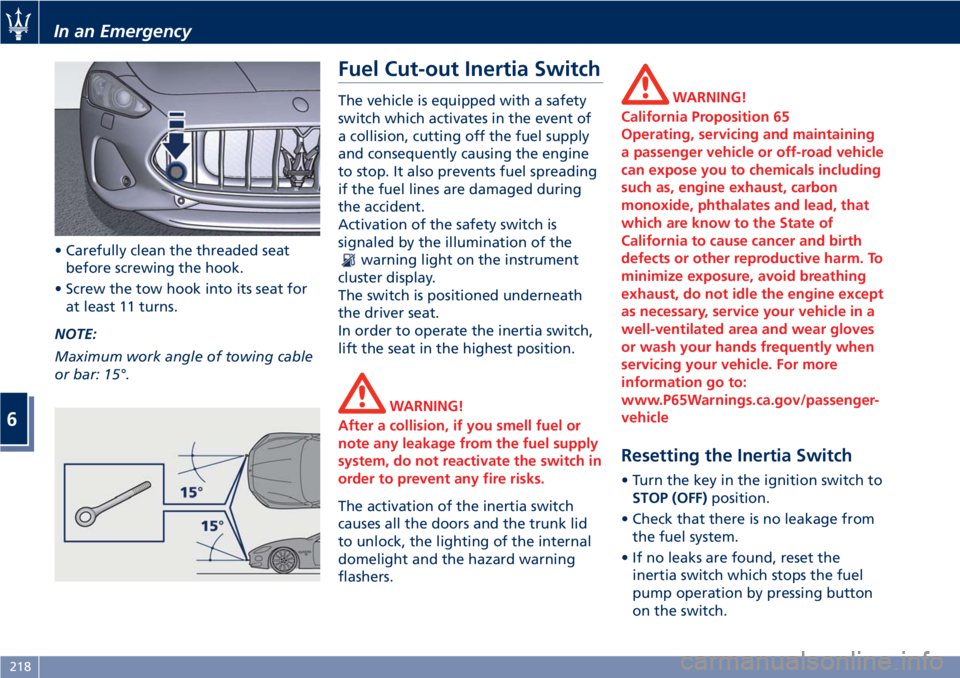
• Carefully clean the threaded seat
before screwing the hook.
• Screw the tow hook into its seat for
at least 11 turns.
NOTE:
Maximum work angle of towing cable
or bar: 15°.
Fuel Cut-out Inertia Switch
The vehicle is equipped with a safety
switch which activates in the event of
a collision, cutting off the fuel supply
and consequently causing the engine
to stop. It also prevents fuel spreading
if the fuel lines are damaged during
the accident.
Activation of the safety switch is
signaled by the illumination of the
warning light on the instrument
cluster display.
The switch is positioned underneath
the driver seat.
In order to operate the inertia switch,
lift the seat in the highest position.
WARNING!
After a collision, if you smell fuel or
note any leakage from the fuel supply
system, do not reactivate the switch in
order to prevent any fire risks.
The activation of the inertia switch
causes all the doors and the trunk lid
to unlock, the lighting of the internal
domelight and the hazard warning
flashers.
WARNING!
California Proposition 65
Operating, servicing and maintaining
a passenger vehicle or off-road vehicle
can expose you to chemicals including
such as, engine exhaust, carbon
monoxide, phthalates and lead, that
which are know to the State of
California to cause cancer and birth
defects or other reproductive harm. To
minimize exposure, avoid breathing
exhaust, do not idle the engine except
as necessary, service your vehicle in a
well-ventilated area and wear gloves
or wash your hands frequently when
servicing your vehicle. For more
information go to:
www.P65Warnings.ca.gov/passenger-
vehicle
Resetting the Inertia Switch
• Turn the key in the ignition switch to
STOP (OFF)position.
• Check that there is no leakage from
the fuel system.
• If no leaks are found, reset the
inertia switch which stops the fuel
pump operation by pressing button
on the switch.
In an Emergency
6
218