2020 MASERATI GRANTURISMO seat adjustment
[x] Cancel search: seat adjustmentPage 46 of 286

(Continued)
corresponding buckle.
•A belt that is too loose will not
protect you properly. In a sudden
stop, you could move too far
forward, increasing the possibility of
injury. Wear your seat belt
comfortably.
•A belt that is worn under your arm is
dangerous. Your body could strike
the inside surfaces of the vehicle in
an accident, increasing head and
neck injury. A belt worn under the
arm can also cause internal injuries.
• The lower part must adhere to the
pelvis rather than the abdomen of
the occupant. To fasten the lap belt
pull slightly up the diagonal portion
of the shoulder belt. To loosen the
lap belt if too tight, tilt the latch
plate and pull on the lap belt. A snug
belt reduces the risk of sliding under
the belt in an accident.
WARNING!
•A lap belt worn too high can
increase the risk of internal injury in
an accident. The belt forces won't
impact on the strong hip and pelvic
bones, but across your abdomen.Always wear the lap belt as low as
possible and keep it comfortable.
•A twisted belt will not protect you
properly. In a collision, it could even
cut into you. Be sure the belt is
straight. If you can't straighten a
belt in your vehicle, take it to a
Service Center immediately.
•Do not use devices (clips, fastenings
etc.) that prevent the seat belts from
laying close to the occupants bodies.
•Never carry children on a passengers
lap.
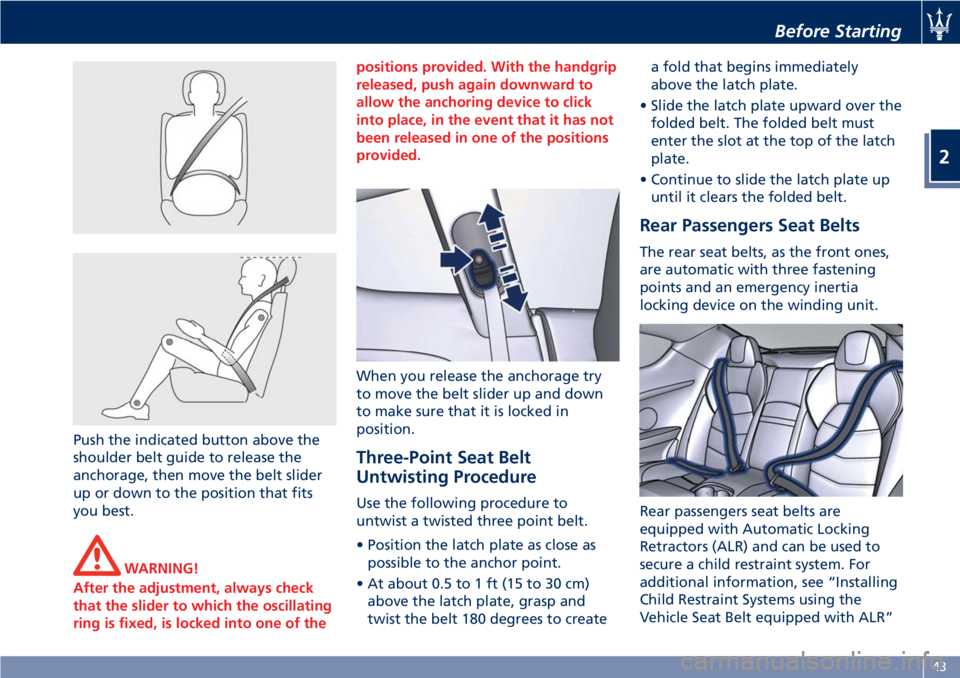
• Position the shoulder belt on your
chest so that it is comfortable and
not resting on your neck. The
retractor will withdraw any slack in
the belt.
• To release the belt, push the red
button on the buckle. The belt will
automatically retract to its stowed
position. If necessary, guide the seat
belt with your hand while it is
rewinding, to prevent it from
twisting.
WARNING!
A frayed or torn belt could break in an
accident and leave you with no
protection. Inspect the belt systemperiodically, checking for cuts, frays, or
loose parts. Damaged parts must be
replaced immediately.
Do not disassemble or modify the
system. Seat belt/retractor assemblies
must be replaced by an Authorized
Maserati Dealer after an accident if
they have been damaged (bent
retractor, torn belt, etc.).
Three-Point Seat Belt Height
Adjustment (front seats only)
WARNING!
The seat belts height must only be
adjusted when the vehicle is
stationary.
The vehicle has a shoulder belt height
adjuster for the driver and front
passenger seating positions.
Adjust the guide so the shoulder
portion of the belt is on the shoulder
and not falling off of it. The belt
should be close to, but not contacting,
the neck.
Before Starting
2
42
Page 47 of 286

Push the indicated button above the
shoulder belt guide to release the
anchorage, then move the belt slider
up or down to the position that fits
you best.
WARNING!
After the adjustment, always check
that the slider to which the oscillating
ring is fixed, is locked into one of thepositions provided. With the handgrip
released, push again downward to
allow the anchoring device to click
into place, in the event that it has not
been released in one of the positions
provided.
When you release the anchorage try
to move the belt slider up and down
to make sure that it is locked in
position.
Three-Point Seat Belt
Untwisting Procedure
Use the following procedure to
untwist a twisted three point belt.
• Position the latch plate as close as
possible to the anchor point.
• At about 0.5 to 1 ft (15 to 30 cm)
above the latch plate, grasp and
twist the belt 180 degrees to createa fold that begins immediately
above the latch plate.
• Slide the latch plate upward over the
folded belt. The folded belt must
enter the slot at the top of the latch
plate.
• Continue to slide the latch plate up
until it clears the folded belt.
Rear Passengers Seat Belts
The rear seat belts, as the front ones,
are automatic with three fastening
points and an emergency inertia
locking device on the winding unit.
Rear passengers seat belts are
equipped with Automatic Locking
Retractors (ALR) and can be used to
secure a child restraint system. For
additional information, see “Installing
Child Restraint Systems using the
Vehicle Seat Belt equipped with ALR”
Before Starting
2
43
Page 73 of 286

3 – Understanding the Vehicle
Interior Components..................................... 70
Front Seats............................................ 74
Comfort Pack Front Seats.................................. 76
Rear Seats............................................. 78
Steering Wheel Adjustment................................ 79
Rearview Mirrors........................................ 80
Lights................................................ 83
Windshield Wipers and Washers............................ 90
Interior Features........................................ 93
Cargo Area............................................ 97
HomeLink (for versions/markets, where provided)............... 98
Air Conditioning Distribution............................. 101
Sport Skyhook Suspension
(for versions/markets, where provided)..................... 103
69
Page 78 of 286

Front Seats
Seats and seat belts are part of the
Occupant Restraint System of the
vehicle. For further information, see
chapter “Occupant Restraint System”
in Section “Before Starting”.
WARNING!
Be sure everyone in your vehicle is in a
seat and using a seat belt properly.
Seat Adjustments
The seats can only be adjusted with
the key in the ignition switch inMAR
(ON)position.
It is however possible, when the door
is closed, to operate the seat for
approx. 15 seconds after turning the
key toSTOP (OFF)position and then
for other 15 seconds after the last
operation.
The power seats switches are located
on the outboard side of the seat
cushion.
Use the front switch1to move the
seat up or down, forward or rearward
or to recline the seat cushion.
Use the switch2to adjust the lumbar
support and recline the seatback.Seat Forward/Rearward Adjustment
The seat can be adjusted both forward
and rearward.
Push the seat switch1forward or
rearward, the seat will move in the
direction of the switch.
Release the switch1when the desired
position is reached.
Seat Up/Down Adjustment
The height of the seat can be adjusted
up- or downward.
Grip switch1from the center and push
it down or up.
Release the switch1when the desired
position is reached.
CAUTION!
If the seat's movement does not work,
make sure that the corresponding fuse
is not tripped (see chapter “FuseReplacement” in section “Maintenance
and Care”).
Seat Tilt Control (Up/Down)
The angle of the seat cushion can be
adjusted in four directions.
Pull upward or push the front of the
switch1, to move the front cushion
seat in the direction of the switch.
Release the switch1when the desired
position is reached.
Perform the same maneuver by acting
on the back of the switch1.
Seatback Inclination Control
The angle of the seatback can be
adjusted forward or rearward.
Push the seatback switch2forward or
rearward, the upper seatback will
move in the direction of the switch.
Release the switch2when the desired
position is reached.
WARNING!
Sitting in a reclined position while the
vehicle is in motion could be
dangerous. The seatback should not
be tilted back too far.
The 3-point shoulder/lap belt must be
firmly secured against the occupant’s
body in order to function properly.
Therefore, both the driver’s and
Understanding the Vehicle
3
74
Page 81 of 286

will be felt within 2 to 5 minutes.
Comfort Screen Page
If the vehicle is equipped with
“Comfort Pack Front Seats” option,
press the “MODE” button to display
the screen page showing the
operating status of the heating system
for each seat.
The user can view the following
information:
• Seat indication.
• Heating level.
This screen page remains displayed for
10 seconds, as shown in figure.Once you have chosen the seat to be
heated, press "+" or "–" buttons to
change the heating level.
Driver Memory Seat
This feature allows the driver to store
up to three different memory profiles
for easy recall through the buttons on
the outer side of the seat cushion.
Each memory profile contains desired
position settings for the driver seat,
outside side mirrors and power tilt
and telescopic steering column.The memory procedure is only possible
with the key in the ignition switch
turned inMAR (ON)position.
Adjust the position of the seat, the
outside rearview mirrors and the
steering wheel.
Engage R (Reverse) gear and position
the passenger’s outside mirror again
to ensure the best possible visibility
for reversing, then disengage R
(Reverse) gear.
Next press one of the three buttons
“1”, “2” or “3”, each corresponding to
a memorizable position, for more than
3 seconds until you hear a
confirmation tone.
Lumbar support adjustment is not
included in the seat position storage
procedure.
The memorization of a new seat
position cancels the one previously
stored with that particular button.
Understanding the Vehicle
3
77
Page 82 of 286

To recall one of the stored positions
with the door open, press the relative
button “1”, “2” or “3” briefly.
To recall a stored position with the
door closed, press the corresponding
button until hearing a tone that
confirms the seat has stopped.
NOTE:
•To stop the seat, press one of the
buttons - “1”, “2” or “3” -, or one of
the adjustment controls.
•Malfunctioning of the seat control
unit is indicated by a sequence of 5
tones emitted when the key in the
ignition switch is turned toSTOP
(OFF)position. Contact an
Authorized Maserati Dealerto have
the malfunction corrected.
Each system is independent of the
others and can be operated separately
using specific buttons for each seat.
System Initialization Procedure
Following any power cut-out (e.g.
after using the battery master switch
or dead battery), check the seats to
ensure that they are operating
properly when the power supply is
available.
Perform the following procedures on
both seats in the event of a
malfunction.The key in the ignition switch must be
inSTOP (OFF)position and the door on
the side of the seat concerned closed.
Open the door and begin the
following procedure within 5 seconds,
then complete it within 10 seconds:
• forward - STOP;
• backward - STOP;
• forward - STOP;
• backward - STOP;
• tilt the seatback fully forward and
wait until the seat performs two
complete travels (forward and
backward);
• move the seatback to its normal
upright position.
NOTE:
If you need to disconnect the battery,
wait at least 30 seconds from the last
seat movement. If you disconnect the
battery before, you will have to run
the initialization procedure.
Seatback Facilitated Tilt
This function only active when the
door is open, moves the seat forward
automatically when the seatback is
reclined forward to facilitate access to
the rear seat or exiting the vehicle. The
seat returns to their original position
when the seatback is tilted back again.Rear Seats
Rear seats can fit two passengers.
Seats and seat belts are parts of the
occupant restraint system of the
vehicle.
WARNING!
Be sure everyone in your vehicle is in a
seat and using a seat belt properly.
NOTE:
See chapter “Occupants Restraint
Systems” in section “Before Starting”
for seat belt positioning.
Rear Head Restraints
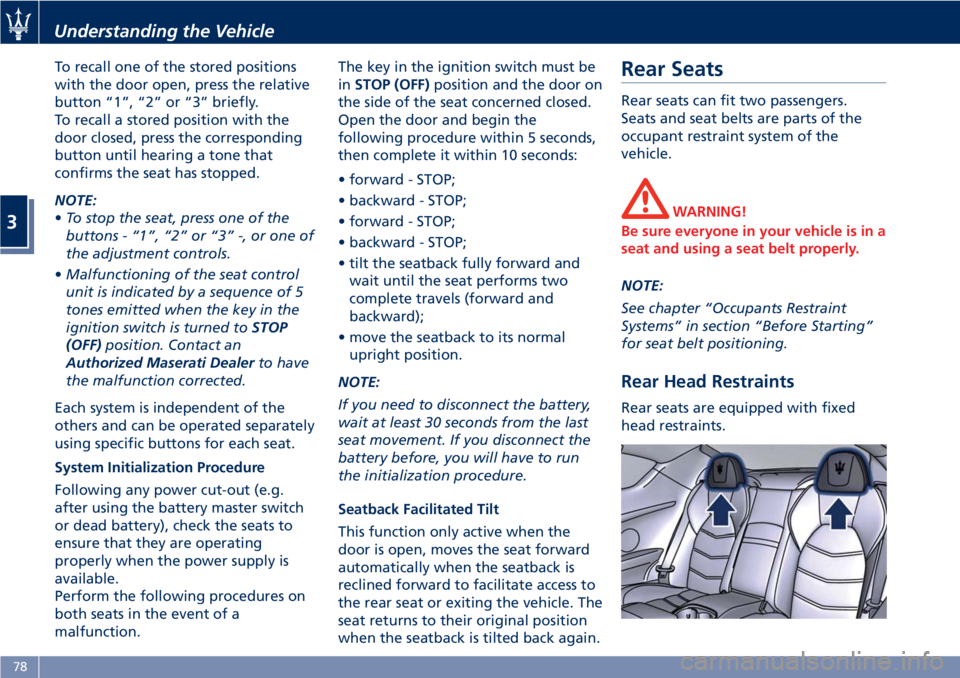
Rear seats are equipped with fixed
head restraints.
Understanding the Vehicle
3
78
Page 83 of 286

Rear Armrest
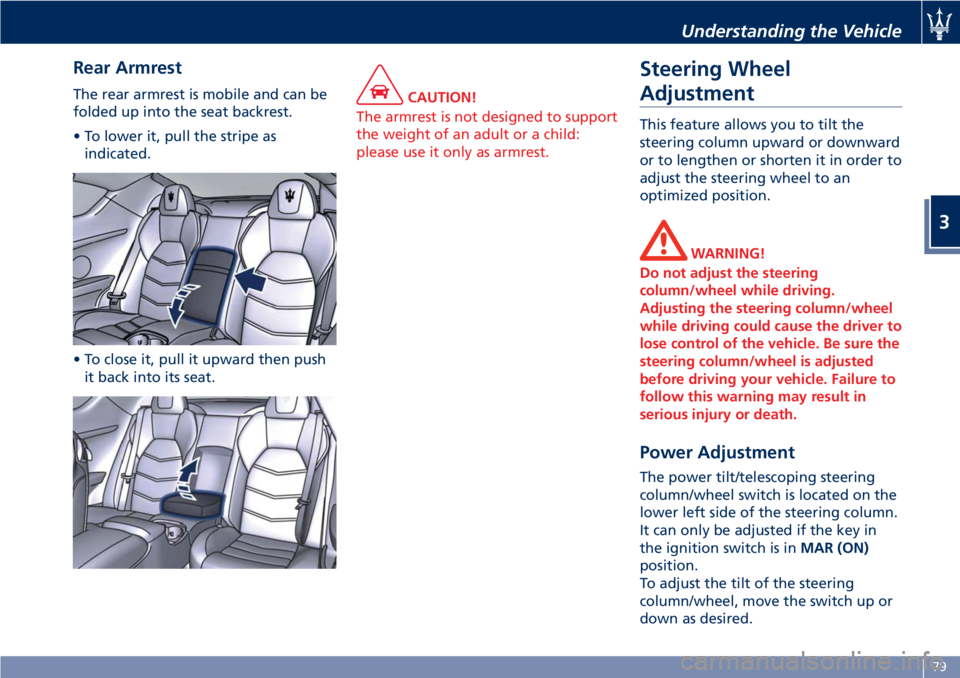
The rear armrest is mobile and can be
folded up into the seat backrest.
• To lower it, pull the stripe as
indicated.
• To close it, pull it upward then push
it back into its seat.CAUTION!
The armrest is not designed to support
the weight of an adult or a child:
please use it only as armrest.
Steering Wheel
Adjustment
This feature allows you to tilt the
steering column upward or downward
or to lengthen or shorten it in order to
adjust the steering wheel to an
optimized position.
WARNING!
Do not adjust the steering
column/wheel while driving.
Adjusting the steering column/wheel
while driving could cause the driver to
lose control of the vehicle. Be sure the
steering column/wheel is adjusted
before driving your vehicle. Failure to
follow this warning may result in
serious injury or death.
Power Adjustment
The power tilt/telescoping steering
column/wheel switch is located on the
lower left side of the steering column.
It can only be adjusted if the key in
the ignition switch is inMAR (ON)
position.
To adjust the tilt of the steering
column/wheel, move the switch up or
down as desired.
Understanding the Vehicle
3
79
Page 230 of 286

Service coupons 1° 2° 3° 4° 5° 6° 7° 8° 9° 10° 11° 12°
Main operations Maintenance schedules: every 12500 mi (20000 km) or 2 years
Tightening of screws, nuts and bolts
(including those for the exhaust system),
connections, retaining clips and clampsIIIIIIIIIIII
Pollen filterRRRRRRRRRRRR
Replace every 2 years. In the event that the vehicle is frequently used in
dusty or strongly polluted environments, a more frequent replacement is
recommended
Starter motor and alternator: power
absorption and chargeIII II
Vehicle geometry checkIIIIIIIIIIII
Controls and adjustment systems in
general, hinges, doors, front and rear lidIIIIIIIIIIII
Correct operation and reliability of the
seats and seat beltsIIIIIIIIIIII
Fastening screws and nuts on the
bodyworkIIIIIIII
Headlight aimingIIIIIIIIIIII
Chassis and protected area intactnessIIIIIIIIIIII
Check every 2 years
Vehicle road test (any time this may be
necessary)IIIIIIIIIIII
Check with diagnostics systemIIIIIIIIIIII
Maintenance and Care
7
226