Page 177 of 200
 Fast forward/rewind through tracks
Press and hold down the
button
to fast forward the selected track or
keep the
button pressed to fast
rewind the track.
Track selection (browse)
Use this function to")
Fast forward/rewind through tracks
Press and hold down the
button
to fast forward the selected track or
keep the
button pressed to fast
rewind the track.
Track selection (browse)
Use this function to scroll through and
select the tracks on the active device.
The choices available depend on the
device connected.
For example, on a USB/iPod or
Bluetooth® device you can also scroll
through the list of artists, genres and
albums available depending on the
information present on the same tracks.
NOTE A fewBluetooth® devices do
not offer the possibility of scrolling
tracks through all categories.
Within each list, the "ABC" button
allows the user to skip to the desired
letter in the list.
NOTE This button might be disabled for
someApple®devices.
NOTE The "Browse" button does not
allow any operation on the AUX device.
Press the "Browse" button to activate
this function on the source being
played.
Turn the BROWSE ENTER button/knob
to select the desired category and
then press the button/knob to confirm
the selection.Press the "X" button to cancel the
function.
Track information display
Press the "Info" button to display the
information on the track being listened
to for devices that support the function.
Press the "X" button to exit the screen.
Shuffle
Press the ">" button then the "Shuffle"
button to activate the function.
Press the "Shuffle" button again to
deactivate the function.
Repeat
Press the ">" button then the "Repeat"
button to activate the function.
Press the "Repeat" button again to
deactivate the function.
Bluetooth® SOURCE
PAIRING A Bluetooth®
AUDIO DEVICE
To pair aBluetooth® audio device,
proceed as follows:
activate theBluetooth® function on
the device;
press the MEDIA button on the front
panel;
if the "Media" source is active, press
the "Source" button;
select theBluetooth® Media
source;
press the "Add Device" button;
search forUconnect™on
theBluetooth® audio device (during
the pairing stage a screen is displayed
showing the progress of the operation);
when requested by the audio
device, enter the PIN code shown on
the system display or confirm on the
device the PIN displayed;
if the pairing procedure is completed
successfully, a screen is displayed.
Answer "Yes" to the question to pair the
Bluetooth® audio device as favourite
(the device will have priority over all
other devices to be paired
subsequently). If "No" is selected, the
priority is determined according to
the order of connection. The last device
connected will have the highest
priority;
an audio device can also be paired
by pressing the PHONE button on
the front panel and by selecting
"Settings" or, from the "Settings" menu,
selecting "Phone/Bluetooth".
IMPORTANT If theBluetooth®
connection between mobile phone and
system is lost, consult the mobile
phone Owner's handbook.
175
Page 178 of 200
 NOTE After updating the phone
software, for proper operation, it is
recommended to remove the phone
from the list of devices linked to the
radio, delete the previous system
pairing also from the list")
NOTE After updating the phone
software, for proper operation, it is
recommended to remove the phone
from the list of devices linked to the
radio, delete the previous system
pairing also from the list ofBluetooth®
devices on the phone and make a
new pairing.
AUX SOURCE
To activate AUX mode, insert an
appropriate device in the AUX socket
on the vehicle.
When a device WITH AUX output is
inserted the system starts reproducing
the AUX source connected, if it is
already being played.
Adjust the volume using the
button/
knob on the front panel or using the
volume adjustment control on the
connected device.
For the "Audio source selection"
function, see the "Media mode"
chapter.
IMPORTANT NOTES
The functions of the device connected
with the AUX socket are directly
managed by the device itself: it is not
possible to change track/folder/playlist
or control playing start/end/pause
with the controls on the front panel or
on the steering wheel.Do not leave the cable of your portable
player connected to the AUX socket
after disconnection, to avoid possible
hiss from the speakers.
USB/iPod SOURCE
To activate the USB/iPod mode insert
the corresponding device (USB or iPod)
in the USB port located on the central
tunnel fig. 127.
If a USB/iPod device is inserted with
the system on, this starts playing the
tracks present on the device.
IMPORTANT After using a USB
recharging socket, we recommend
disconnecting the device (smartphone),
always removing the cable from the
vehicle socket first, never from the
device. See fig. 127. Cables left flying
or connected incorrectly could
compromise correct recharging and/or
the USB socket condition.PHONE MODE
Phone mode activation
Press the PHONE button on the front
panel to activate the Phone mode.
NOTE To consult the list of mobile
phones and supported functions, visit
the www.driveuconnect.eu website
Use the buttons on the display to:
dial the phone number (using the
graphic keypad on the display);
display and call the contacts in the
mobile phone phonebook;
display and call contacts from the
registers of previous calls;
pair up to 10 phones/audio device
to make access and connection easier
and quicker;
transfer calls from the system to the
mobile phone and vice versa and
deactivate the microphone audio for
private conversations.
Pairing a mobile phone
To pair the mobile phone, proceed as
follows:
activate theBluetooth® function on
the mobile phone;
press the PHONE button on the
front panel;
if no phone is paired with the system
yet, the display shows a dedicated
screen;
127L0F0438C
176
MULTIMEDIA
Page 179 of 200
 select \"Yes\" to start the pairing
procedure, then search for the
Uconnect™ device on the mobile
phone (if \"No\" is selected, the Phone
main screen is displayed);
when prompted by the")
select "Yes" to start the pairing
procedure, then search for the
Uconnect™ device on the mobile
phone (if "No" is selected, the Phone
main screen is displayed);
when prompted by the mobile
phone, use its keypad to enter the PIN
code shown on the system display
or confirm on the mobile phone the PIN
displayed;
from the "Phone" screen you can
always pair a mobile phone by pressing
the "Settings" button: press the "Add
Device" button and proceed as
described above;
during the pairing stage a screen is
displayed showing the progress of
the operation;
when the pairing procedure is
completed successfully, a screen is
displayed: answer "Yes" to the question
to pair the mobile phone as favourite
(the mobile phone will have priority over
all other mobile phones to be paired
subsequently). If no other devices are
paired, the system will consider the first
associated device as favourite.
Making a phone call
The operations described below can
only be accessed if supported by
the mobile phone in use.A call can be made by:
selecting theicon (mobile
phonebook);
selecting "Recent Calls";
selecting theicon;
pressing the "Redial" button.
Text message reader
The system can read the messages
received by the mobile phone.
To use this function the mobile phone
must support the SMS exchange
function throughBluetooth®.
If this function is not supported by the
phone, the corresponding graphic
button
is deactivated (greyed out).
When a text message is received,
the display will show a screen where
the options "Listen", "Call" or "Ignore"
can be selected.
You can access the SMS message list
received by the cell by pressing the
graphic
button (the list shows
a maximum of 60 received messages).
SMS message options
Default SMS messages are stored in
the system memory and can be sent to
answer a received message or as a
new message.
Yes.
No.
Okay.
I can't talk right now.
Call me.
I'll call you later.
I'm on my way.
Thanks.
I will be late.
Stuck in traffic.
Start without me.
Where are you?
Are you there yet?
I need directions.
I'm lost.
See you later.
I will be 5 (or 10, 15, 20, 25, 30, 45,
60)* minutes late.
See you in 5 (or 10, 15, 20, 25, 30,
45, 60)* minutes.
* Only use the numbers listed,
otherwise the system will not take the
message.
NOTE See the dedicated section for
details on how to send a text message
using the voice commands.
177
phone
Page 180 of 200
 Uconnect™ LIVE
SERVICES
Press the APPS button to access a
radio menu which shows all the
application functions of the system,
such as: Trip computer, Settings,
Compass (for versions/markets where
pr")
Uconnect™ LIVE
SERVICES
Press the APPS button to access a
radio menu which shows all the
application functions of the system,
such as: Trip computer, Settings,
Compass (for versions/markets where
provided),Uconnect™LIVE
applications.
If theUconnect™LIVEicon is
present, the system is set up for the
connected services and allows the
applications to be used directly from
the radio, for a more efficient and
advanced use of the vehicle. The
application functions are present
according to the vehicle configuration
and to the market.
To use theUconnect™LIVEservices
it is necessary to:
Download theUconnect™LIVE
App from: "App Store" or "Google play"
on your compatible smartphone,
making sure that the data connection is
enabled.
Register onUconnect™LIVE App,
www.driveuconnect.eu or in the site
www.fiat.it.
Start theUconnect™LIVE Appon
the smartphone and enter your
credentials.For further information about the
services available in your market, visit
the www.driveuconnect.eu website.
First access to the car
Once you have launched the
Uconnect™LIVE Appand entered
your details, you have to pair the
Bluetooth® with your smartphone and
the radio, as described in the "Pairing
a mobile phone" chapter, to access the
Uconnect™LIVEservices in your
vehicle. The list of supported mobile
phones is available on
www.DriveUconnect.eu.
When pairing is complete, the
connected services can be accessed
by pressing theUconnect™ icon
on the radio.
When the activation process is
complete, a message will inform the
user. If a personal profile is necessary
for the services, your accounts can
be connected through theUconnect™
LIVE App, or in your personal area on
www.driveuconnect.eu.
User not connected
If the user does not carry out the
Bluetooth® pairing of the phone,
when theUconnect™ button is
pressed, the radio menu shows
disabled icons, excepteco:Drive™.Further information about the
eco:Drive™ functions is available in
the dedicated chapter.
Settings of the Uconnect™ services
that can be managed through the
radio
In theUconnect™LIVEradio menu
the "Settings" section can be accessed
by pressing the
icon. In this section
the user can check the system options
and change them according to their
preferences.
Systems updating
If an update for theUconnect™LIVE
system is available while the
Uconnect™ services are being used,
the user will be informed with a
message on the radio screen.
The update includes the download of
the new software version for managing
theUconnect™LIVEservices. The
update is made using the data
connection of the paired smartphone.
The amount of traffic generated will
be communicated to the user.
The Uconnect™ LIVE App
Uconnect™LIVE Appmust be
installed on your smartphone to access
the connected services on the vehicle;
this can be used to access your profile
and customise yourUconnect™
LIVEexperience.
178
MULTIMEDIA
Page 181 of 200
 The App can by downloaded from \"App
Store\" or \"Google play\".
For safety reasons, the App cannot be
accessed when the phone is paired
with the radio.
Personal details (e-mail and passwo")
The App can by downloaded from "App
Store" or "Google play".
For safety reasons, the App cannot be
accessed when the phone is paired
with the radio.
Personal details (e-mail and password)
are required to access theUconnect™
LIVEradio services, therefore the
content of your personal accounts is
protected and can only be accessed by
the real user.
Connected services that can be
accessed on the vehicle
TheUconnect™LIVEservices
available in the radio menu can change
according to the market.
Theeco:Drive™ application is
developed to improve the customer's
driving experience and is available in all
countries where theUconnect™
LIVEservices can be accessed.
For further information visit the
www.driveuconnect.eu website.
If the navigation system is installed in
the radio, accessing theUconnect™
LIVEservices enables use of the
TomTom LIVE services. Further
information about the LIVE functions is
available in the dedicated chapter.eco:Drive™
Theeco:Drive™ application allows you
to display your driving behaviour in
real time, in order to help you reach a
more efficient driving style as far as
consumption and emissions are
concerned.
In addition, the data can be saved on
an USB stick, and the data analysis can
be made on your personal computer
with theeco:Drive™ desktop
application, available on www.fiat.it or
www.driveuconnect.eu.
Driving style is evaluated by means of
four indices which monitor the following
parameters:
Acceleration
Deceleration
Transmission
Speed
eco:Drive™ display
Press theeco:Drive™ button to
interact with the function.
A screen will be displayed on the radio,
showing the 4 indices described above.
These indices are grey until the system
has enough data to evaluate the driving
style.Once sufficient data are available, the
indices will have 5 colours depending
on the evaluation: dark green (very
good), light green, yellow, orange and
red (very bad).
"Current trip index" refers to the entire
value calculated in real time based
on the average of the described
indices. It represents eco-friendliness of
the driving style: from 0 (low) to 100
(high).
In the event of extended inactivity the
display will show the average of the
indexes until that moment (the "Average
index"), then the indexes will be
coloured again in real time as soon as
the vehicle is restarted.
To check the data average of previous
route (the "route" starts when the
ignition key is turned to MAR and stops
when it is turned to STOP), select the
"Previous route" button.
The details of the previous trip can also
be displayed by pressing the "Details"
button, in which journey duration (time
and mileage) and average speed will be
reported.
179
Page 182 of 200
 Trip data storage and transfer
The trip data can be stored in
the system memory and transferred
using a suitably configured USB flash
drive orUconnect™LIVE App. This
allows you to display the histor")
Trip data storage and transfer
The trip data can be stored in
the system memory and transferred
using a suitably configured USB flash
drive orUconnect™LIVE App. This
allows you to display the history of
the collected data, showing the
complete analysis of the trip data and
of your driving style.
Further information is available at
www.driveuconnect.eu.
IMPORTANT Do not remove the USB
memory stick nor unpair the
smartphone and theUconnect™LIVE
Appbefore the system has
downloaded the data, since these
could be lost. During the transfer of
data to the devices, messages may
appear on the radio display to guide the
user correctly through the operation;
follow these instructions. These
messages are only displayed with the
ignition key at STOP and when a delay
in the system switching off is set. The
data are automatically transferred to the
devices when the engine is switched
off. Transferred data will be deleted
from the system memory in this
manner. You can choose to store the
trip data or not, by pressing the
"Settings" button and by setting the
storage activation and the USB or
Cloud transfer mode.When the USB memory stick is full, the
warning messages are shown on the
radio display.
When theeco:Drive™ data are not
transferred to USB memory stick for a
long time, the internal memory of the
Uconnect™LIVEsystem may be
exhausted. Follow the instructions given
by the messages on the radio display.
SETTINGS
Press SETTINGS button
on the
front panel (versions withUconnect™
5” Radio LIVE) or the APPS button
on the front panel and then the
“Settings” graphic button (versions with
Uconnect™ 5” Radio Nav LIVE) on
the display to view the “Settings” main
menu.
NOTE The menu items displayed vary
according to the versions.
The menu includes the following items:
Display;
Units;
Voice controls;
Clock & Date;
Safety (for versions/markets where
provided)
Lights (for versions/markets where
provided);
Doors & Locks;
Vehicle Off Options;
Audio;
Phone / Bluetooth;
Configurat. SiriusXM (for versions/
markets where provided);
Radio Setup;
Restore settings;
Clear Personal Data.
Safety
(for versions/markets, where provided)
This function can be used to carry
out the following adjustments:
"Rain sensor"(for versions/markets,
where provided): this function can be
used to activate/deactivate the
automatic operation of the wipers in the
event of rain.
NAVIGATION
(Uconnect™ 5" Radio Nav LIVE only)
IMPORTANT In the interest of safety
and to reduce distractions while you are
driving, you should always plan a route
before you start driving.
To plan a route, do the following:
tap the screen to open the Main
menu;
Tap "Navigate to" or "Drive to".
Tap "Address". You can change the
country or state setting by tapping
the flag before you select a city.
180
MULTIMEDIA
Page 183 of 200
 Enter the town or city name, or the
postcode. Towns with similar names
are shown in the list while you type.
When the correct city or town appears
in the list, tap the name to select the
destination.")
Enter the town or city name, or the
postcode. Towns with similar names
are shown in the list while you type.
When the correct city or town appears
in the list, tap the name to select the
destination.
Enter the street name. Streets with
similar names are shown in the list while
you type. When the correct street
name appears in the list, tap the name
to select the destination.
Enter the house number, then tap
"Done".
If in the Advanced settings menu the
"Show location preview" option is
active, your position is shown on the
map. Tap "Select" to continue or tap
"Back" to enter another address.
When the new route is shown, tap
"Done". For more information about the
route, tap on "Details". To change
your route, for example, to travel via a
particular location or to select a new
destination, tap "Change route".
You are guided to your destination,
using spoken instructions and
on-screen directions.Updating the map
Two modes for downloading a map
update are available:
Most recent maps guarantee: if a
new map is available for your system
within 90 days of initial use, you can
download it once free of charge.
Map update: you can purchase a
new version of the map installed on
your system.
Preparing a USB device
To update the map, use a USB device
that meets the following requirements.
Ideally, the USB device should be
empty.
The USB device must have at least
8 GB of memory free.
The USB device must use a FAT-32
file system.
The USB device must not be
blocked and must allow files to be
saved.
NOTE: the use of a memory stick is
recommended, while the use of mass
storage devices, such as mobile
phones or multimedia players, is not
recommended.
To prepare a USB device, proceed as
follows:
SelectNavigation updatesin the
settingsmenu.You are asked whether you wish to
prepare a USB device for downloading
updates.
SelectYes.
Insert the USB device.
NOTE If the system continues to ask
you to insert the USB device, check
that the device meets the requirements
indicated previously, then retry.
The system starts to prepare the USB
device.
When the USB device is ready, a
dedicated message is displayed.
Remove the USB device and
connect it to the computer. The new
map can now be downloaded to the
USB device.
TomTom home installation
To install TomTom HOME and create a
MyTomTom account, proceed as
follows:
Download and install the TomTom
HOME application on the computer. On
the computer, access tomtom.com/
getstarted. Select "Download TomTom
HOME", then follow the instructions
provided.
Connect the USB device prepared
with the computer. TomTom HOME
is started automatically.
Select "Enter" in the top right corner
of TomTom HOME.
181
Page 184 of 200
 Select \"Create account\" and enter
the required details to create a
MyTomTom account. A MyTomTom
account is required to receive map
updates.
After the account is created, you are
asked whether")
Select "Create account" and enter
the required details to create a
MyTomTom account. A MyTomTom
account is required to receive map
updates.
After the account is created, you are
asked whether you wish to connect the
Uconnect™ system to your account.
The USB device prepared represents
yourUconnect™ system.
Select "Connect device", then select
"close".
A map can now be downloaded to the
USB device.
Download a map
The map can be updated in two ways:
Most recent maps guarantee: if a
new map is available for your system
within 90 days of initial use, it can
be downloaded once free of charge.
Map update: it is possible to
purchase a new version of the map
installed on the system.
To check availability or purchase a map,
make sure that you have prepared a
USB device and installed TomTom
HOME on your computer.
Connect the USB device to the
computer.Downloading a map
If a map update is available for the
system, this update is included in the
list of updates available.
NOTE If the most recent map is already
installed on the system, the update is
not proposed.
Select the map that you wish to
download, then select "Update and
install".
The map is downloaded and copied to
your USB device.
Select "Done" when the process is
complete.
NOTE Don’t disconnect the USB device
from the computer while map
downloading and copying is in
progress.
The map can now be installed on the
system.
Installing the map
The map update MUST be made
with the vehicle engine running and
may require more than 30 minutes.
Do not disconnect the USB device
during the map installation process,
otherwise installation will be
interrupted.
After downloading a map to your USB
device, it can be installed on your
system.
Insert the USB device containing the
new map in theUconnect™ system.
The system detects a new map on
the USB device.
Select "Start".
Keep the device inserted. Before
updating the map, the system indicates
that this process may take several
minutes. Select "OK".
NOTE Do not remove the USB device
and do not disconnect the system’s
power supply before the update is
complete. The system cannot be used
until the update is completed correctly.
If the update is interrupted, the system
update is started again.
Once the map has been updated, a
dedicated message is displayed.
Click on "Close".
The new map is now available on the
system.
Troubleshooting
The following problems may occur
during the update:
The map on the USB device is not
valid. In this case, download the map to
the USB device again, using TomTom
HOME. It may be necessary to prepare
the USB device again.
182
MULTIMEDIA
 1
1 2
2 3
3 4
4 5
5 6
6 7
7 8
8 9
9 10
10 11
11 12
12 13
13 14
14 15
15 16
16 17
17 18
18 19
19 20
20 21
21 22
22 23
23 24
24 25
25 26
26 27
27 28
28 29
29 30
30 31
31 32
32 33
33 34
34 35
35 36
36 37
37 38
38 39
39 40
40 41
41 42
42 43
43 44
44 45
45 46
46 47
47 48
48 49
49 50
50 51
51 52
52 53
53 54
54 55
55 56
56 57
57 58
58 59
59 60
60 61
61 62
62 63
63 64
64 65
65 66
66 67
67 68
68 69
69 70
70 71
71 72
72 73
73 74
74 75
75 76
76 77
77 78
78 79
79 80
80 81
81 82
82 83
83 84
84 85
85 86
86 87
87 88
88 89
89 90
90 91
91 92
92 93
93 94
94 95
95 96
96 97
97 98
98 99
99 100
100 101
101 102
102 103
103 104
104 105
105 106
106 107
107 108
108 109
109 110
110 111
111 112
112 113
113 114
114 115
115 116
116 117
117 118
118 119
119 120
120 121
121 122
122 123
123 124
124 125
125 126
126 127
127 128
128 129
129 130
130 131
131 132
132 133
133 134
134 135
135 136
136 137
137 138
138 139
139 140
140 141
141 142
142 143
143 144
144 145
145 146
146 147
147 148
148 149
149 150
150 151
151 152
152 153
153 154
154 155
155 156
156 157
157 158
158 159
159 160
160 161
161 162
162 163
163 164
164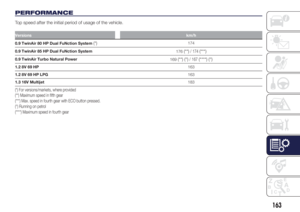 165
165 166
166 167
167 168
168 169
169 170
170 171
171 172
172 173
173 174
174 175
175 176
176 177
177 178
178 179
179 180
180 181
181 182
182 183
183 184
184 185
185 186
186 187
187 188
188 189
189 190
190 191
191 192
192 193
193 194
194 195
195 196
196 197
197 198
198 199
199