2020 HYUNDAI VELOSTER tow
[x] Cancel search: towPage 148 of 480
3-14
If the engine stalls while driving in
the "limp home" mode, you can
start your engine within 3 seconds
without re-entering the password.
If the immobilizer indicator blinks for
five seconds, you must re-enter the
password (steps 1~4).
After performing the limp home acti-
vation procedure, consult with your
authorized HYUNDAI dealer as soon
as possible.
NOTICE
Convenient features of your vehicle
If the password is entered
incorrectly three consecutive
times, wait for about one hour
to perform the limp home acti-
vation procedure again.
If you cannot start your
engine using the limp home
activation procedure, have
your vehicle towed by an
authorized HYUNDAI dealer.
CAUTION
Page 156 of 480
3-22
Convenient features of your vehicle
Tilt Steering / Telescope
Steering
When adjusting the steering wheel to
a comfortable position, adjust the
steering wheel so that it points
toward your chest, not toward your
face. Make sure you can see the
instrument cluster warning lights and
gauges. After adjusting, push the
steering wheel both up and down to
be certain it is locked in position.
Always adjust the position of the
steering wheel before driving.
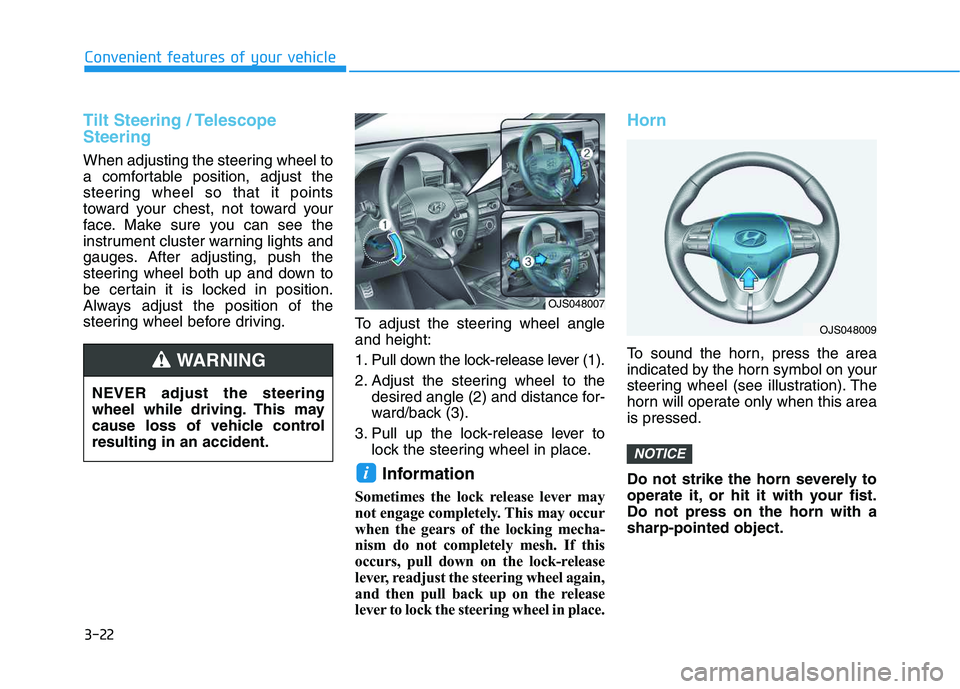
To adjust the steering wheel angle
and height:
1. Pull down the lock-release lever (1).
2. Adjust the steering wheel to the
desired angle (2) and distance for-
ward/back (3).
3. Pull up the lock-release lever to
lock the steering wheel in place.
Information
Sometimes the lock release lever may
not engage completely. This may occur
when the gears of the locking mecha-
nism do not completely mesh. If this
occurs, pull down on the lock-release
lever, readjust the steering wheel again,
and then pull back up on the release
lever to lock the steering wheel in place.
Horn
To sound the horn, press the area
indicated by the horn symbol on your
steering wheel (see illustration). The
horn will operate only when this area
is pressed.
Do not strike the horn severely to
operate it, or hit it with your fist.
Do not press on the horn with a
sharp-pointed object.
NOTICE
i
NEVER adjust the steering
wheel while driving. This may
cause loss of vehicle control
resulting in an accident.
WARNING
OJS048007
OJS048009
Page 158 of 480
3-24
Convenient features of your vehicle
When cleaning the mirror, use a
paper towel or similar material
dampened with glass cleaner. Do
not spray glass cleaner directly on
the mirror as this may cause the
liquid cleaner to enter the mirror
housing.
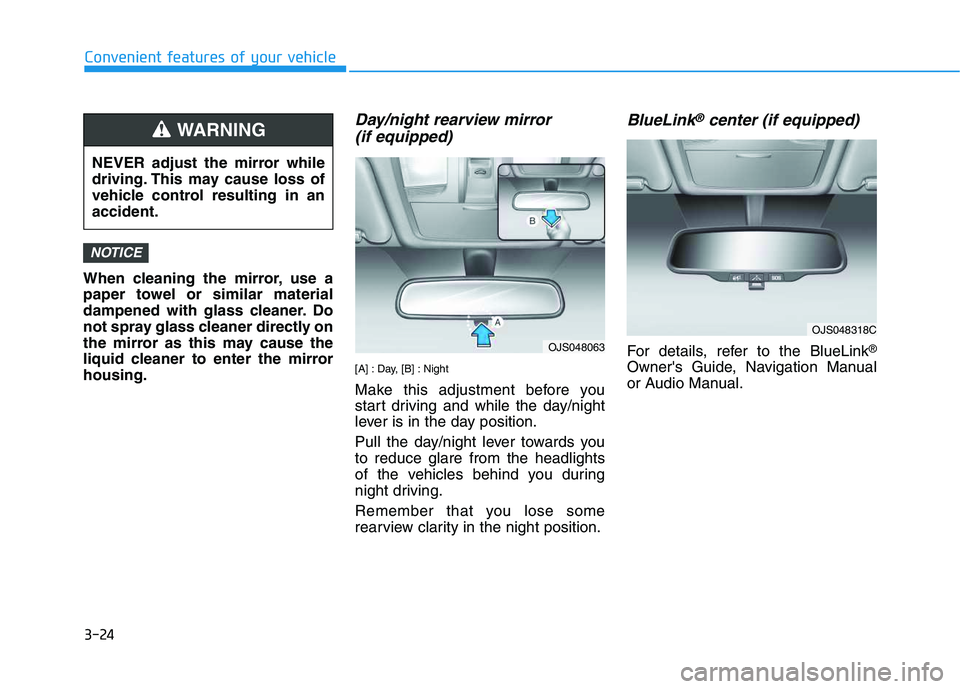
Day/night rearview mirror
(if equipped)
[A] : Day, [B] : Night
Make this adjustment before you
start driving and while the day/night
lever is in the day position.
Pull the day/night lever towards you
to reduce glare from the headlights
of the vehicles behind you during
night driving.
Remember that you lose some
rearview clarity in the night position.
BlueLink®center (if equipped)
For details, refer to the BlueLink®
Owner's Guide, Navigation Manual
or Audio Manual.
NOTICE
NEVER adjust the mirror while
driving. This may cause loss of
vehicle control resulting in an
accident.
WARNING
OJS048063
OJS048318C
Page 177 of 480
3-43
Convenient features of your vehicle
3
Gauges and Meters
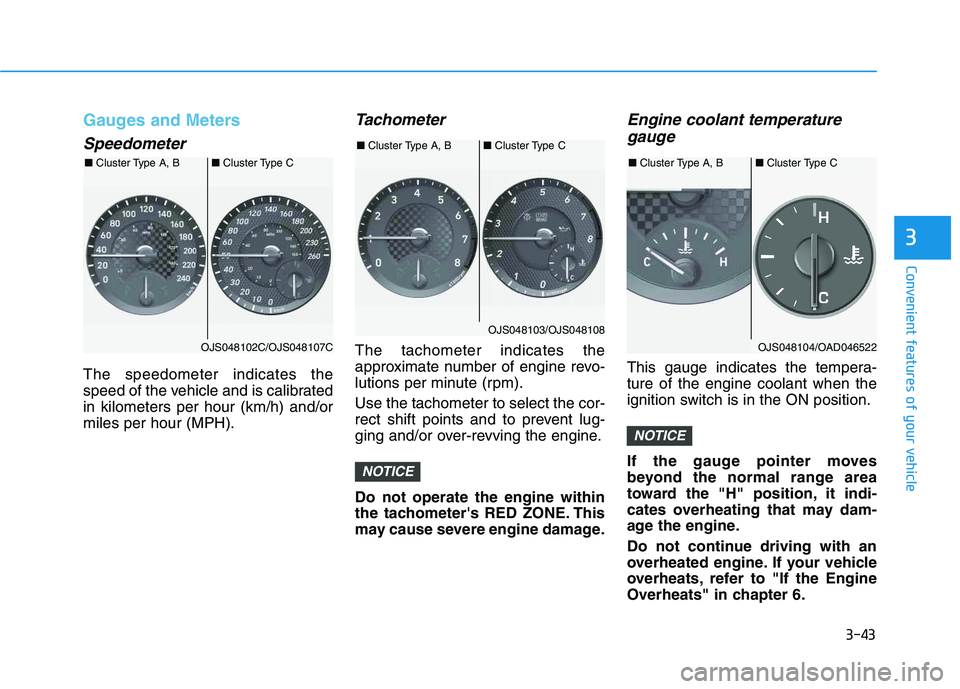
Speedometer
The speedometer indicates the
speed of the vehicle and is calibrated
in kilometers per hour (km/h) and/or
miles per hour (MPH).
Tachometer
The tachometer indicates the
approximate number of engine revo-
lutions per minute (rpm).
Use the tachometer to select the cor-
rect shift points and to prevent lug-
ging and/or over-revving the engine.
Do not operate the engine within
the tachometer's RED ZONE. This
may cause severe engine damage.
Engine coolant temperature
gauge
This gauge indicates the tempera-
ture of the engine coolant when the
ignition switch is in the ON position.
If the gauge pointer moves
beyond the normal range area
toward the "H" position, it indi-
cates overheating that may dam-
age the engine.
Do not continue driving with an
overheated engine. If your vehicle
overheats, refer to "If the Engine
Overheats" in chapter 6.
NOTICE
NOTICE
OJS048102C/OJS048107C ■Cluster Type A, B■Cluster Type C
OJS048103/OJS048108 ■Cluster Type A, B■Cluster Type C
OJS048104/OAD046522 ■Cluster Type A, B■Cluster Type C
Page 220 of 480
5
Lane Keeping Assist (LKA) System ...................5-88
LKA System Operation...................................................5-89
Warning Light and Message.........................................5-93
Limitations of the System .............................................5-94
LKA system Function Change ......................................5-95
Driver Attention Warning (DAW) System .........5-96
System Setting and Activation.....................................5-96
Resetting the System .....................................................5-97
System Standby ...............................................................5-98
System Malfunction .......................................................5-98
Cruise Control .....................................................5-100
Cruise Control operation .............................................5-100
Smart Cruise Control System ...........................5-105
Smart Cruise Control Switch ......................................5-106
Smart Cruise Control Speed .......................................5-107
Smart Cruise Control Vehicle-to-Vehicle
Distance ...........................................................................5-111
Sensor to Detect Distance to the
Vehicle Ahead ................................................................5-113
To Adjust the Sensitivity of
Smart Cruise Control ....................................................5-115
To Convert to Cruise Control Mode .........................5-116
Limitations of the System...........................................5-116
Special Driving Conditions ................................5-121
Hazardous Driving Conditions....................................5-121
Rocking the Vehicle ......................................................5-121
Smooth Cornering .........................................................5-122
Driving at Night .............................................................5-122
Driving in the Rain ........................................................5-122
Driving in Flooded Areas.............................................5-123
Highway Driving ............................................................5-123
Winter Driving ....................................................5-124
Snow or Icy Conditions................................................5-124
Winter Precautions .......................................................5-124
Vehicle Load Limit..............................................5-127
Tire Loading Information Label .................................5-128
Trailer Towing .....................................................5-132
Page 225 of 480
5-7
Driving your vehicle
5
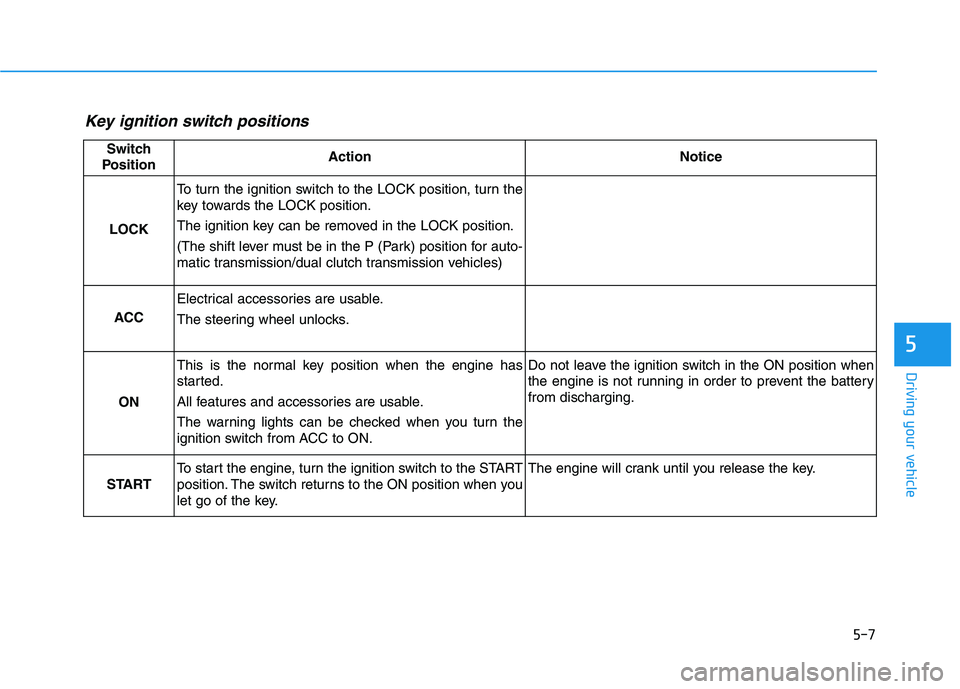
Key ignition switch positions
Switch
PositionActionNotice
LOCK
To turn the ignition switch to the LOCK position, turn the
key towards the LOCK position.
The ignition key can be removed in the LOCK position.
(The shift lever must be in the P (Park) position for auto-
matic transmission/dual clutch transmission vehicles)
ACC
Electrical accessories are usable.
The steering wheel unlocks.
ON
This is the normal key position when the engine has
started.
All features and accessories are usable.
The warning lights can be checked when you turn the
ignition switch from ACC to ON.Do not leave the ignition switch in the ON position when
the engine is not running in order to prevent the battery
from discharging.
START
To start the engine, turn the ignition switch to the START
position. The switch returns to the ON position when you
let go of the key.The engine will crank until you release the key.
Page 226 of 480
5-8
Starting the engine Vehicle with manual transmission:
1. Make sure the parking brake is
applied.
2. Make sure the shift lever is in neu-
tral.
3. Depress the clutch and brake ped-
als.
4. Turn the ignition switch to the
START position. Hold the key
(maximum of 10 seconds) until the
engine starts and release it.
Information
Depress the brake pedal and clutch
pedal until the engine starts.
Vehicle with automatic transmission/
dual clutch transmission:
1. Make sure the parking brake is
applied.
2. Make sure the shift lever is in P
(Park).
3. Depress the brake pedal.
4. Turn the ignition switch to the
START position. Hold the key
(maximum of 10 seconds) until the
engine starts and release it.
Information
• It is best to maintain a moderate
engine speed until the vehicle engine
comes up to normal operating tem-
perature. Avoid harsh or abrupt
acceleration or deceleration while
the engine is still cold.
• Whether the engine is cold or warm,
always start the vehicle with your
foot on the brake pedal. Do not
depress the accelerator while start-
ing the vehicle. Do not rev the
engine while warming it up.
To prevent damage to the vehicle:
Do not hold the ignition key in
the START position for more
than 10 seconds. Wait 5 to 10
seconds before trying again.
Do not push or tow your vehicle
to start the engine.
NOTICE
i
i
Driving your vehicle
Always wear appropriate shoes
when operating your vehicle.
Unsuitable shoes, such as high
heels, ski boots, sandals, flip-
flops, etc., may interfere with
your ability to use the brake and
accelerator pedals.
WARNING
Page 234 of 480
5-16
Driving your vehicle
Information
• Do not wait for the engine to warm
up while the vehicle remains station-
ary. Start driving at moderate
engine speeds. (Aggressive accelerat-
ing and decelerating should be
avoided.)
• Always start the vehicle with your
foot on the brake pedal. Do not
depress the accelerator while start-
ing the vehicle. Do not rev the
engine while warming it up.
To prevent damage to the vehicle:
If the engine stalls while you are
in motion, do not attempt to
move the shift lever to the P
(Park) position.
If traffic and road conditions
permit, you may put the shift
lever in the N (Neutral) position
while the vehicle is still moving
and press the Engine Start/Stop
button in an attempt to restart
the engine.
Do not push or tow your vehicle
to start the engine.To prevent damage to the vehicle:
When the stop lamp switch fuse is
blown, you can't start the engine
normally. Replace the fuse with a
new one. If you are not able to
replace the fuse, you can start the
engine by pressing and holding
the Engine Start/Stop button for
10 seconds with the Engine Start/
Stop button in the ACC position.
Do not press the Engine Start/Stop
button for more than 10 seconds
except when the stop lamp switch
fuse is blown.
For your safety always depress
the brake pedal before starting the
engine.
Starting and stopping the engine
for turbocharger intercooler
1. Do not race or accelerate the
engine immediately after starting
the engine.
If the engine is cold, idle for sever-
al seconds before sufficient lubri-
cation is ensured in the tur-
bocharger.
2. After high speed or extended driv-
ing that requires heavy engine
load, idle the engine about 1
minute before turning the engine
off. This idle time will allow the tur-
bocharger to cool prior to shutting
the engine off.
Do not turn off the engine immedi-
ately after it has been subjected to
a heavy load. Doing so may cause
severe damage to the engine or
turbocharger.
NOTICE
NOTICE
NOTICE
i