Page 15 of 637
1-2
E EX
XT
TE
ER
RI
IO
OR
R
O
OV
VE
ER
RV
VI
IE
EW
W
(
(I
I)
)
Your vehicle at a glance
1. Panorama sunroof ..................................3-37
2. Front windscreen wiper blades ...............7-48
3. Outside rearview mirrors ........................3-29
4. Door locks...............................................3-14
5. Headlamps .............................................7-84
6. DRL (Daytime Running Light) ................7-84
7. Front fog light ..........................................7-87
8. Bonnet ....................................................3-42
9. Tyres and wheels ....................................7-53
10. Parking Distance Warning system
(Reverse/Forward) ..............................3-134
OTLE018001
■Front view
The actual shape may differ from the illustration.
Page 17 of 637

1-4
Your vehicle at a glance
I IN
NT
TE
ER
RI
IO
OR
R
O
OV
VE
ER
RV
VI
IE
EW
W
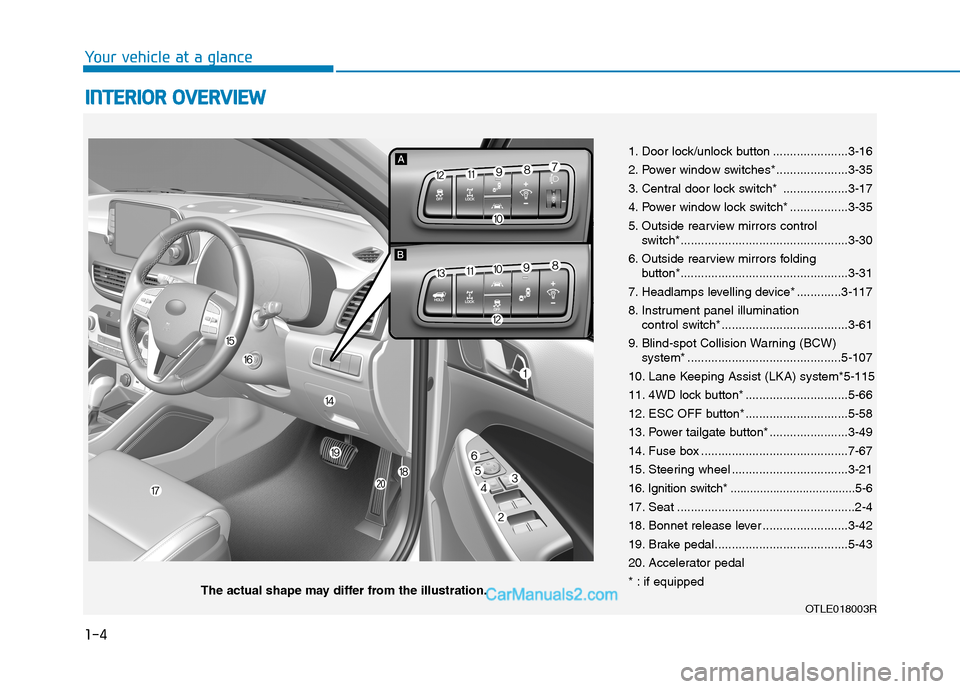
1. Door lock/unlock button ......................3-16
2. Power window switches*.....................3-35
3. Central door lock switch* ...................3-17
4. Power window lock switch* .................3-35
5. Outside rearview mirrors control
switch*.................................................3-30
6. Outside rearview mirrors folding
button*.................................................3-31
7. Headlamps levelling device* .............3-117
8. Instrument panel illumination
control switch*.....................................3-61
9. Blind-spot Collision Warning (BCW)
system* .............................................5-107
10. Lane Keeping Assist (LKA) system*5-115
11. 4WD lock button* ..............................5-66
12. ESC OFF button* ..............................5-58
13. Power tailgate button* .......................3-49
14. Fuse box ...........................................7-67
15. Steering wheel ..................................3-21
16. Ignition switch* ......................................5-6
17. Seat ....................................................2-4
18. Bonnet release lever .........................3-42
19. Brake pedal.......................................5-43
20. Accelerator pedal
* : if equipped
OTLE018003R
The actual shape may differ from the illustration.
Page 111 of 637

3-25
Convenient features of your vehicle
3
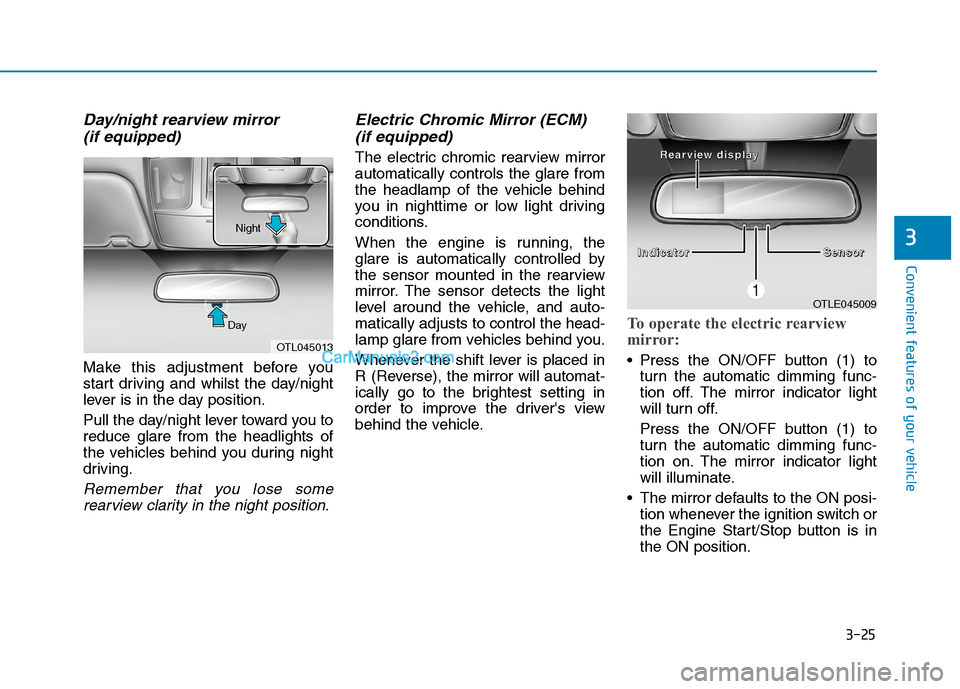
Day/night rearview mirror
(if equipped)
Make this adjustment before you
start driving and whilst the day/night
lever is in the day position.
Pull the day/night lever toward you to
reduce glare from the headlights of
the vehicles behind you during night
driving.
Remember that you lose some
rearview clarity in the night position.
Electric Chromic Mirror (ECM)
(if equipped)
The electric chromic rearview mirror
automatically controls the glare from
the headlamp of the vehicle behind
you in nighttime or low light driving
conditions.
When the engine is running, the
glare is automatically controlled by
the sensor mounted in the rearview
mirror. The sensor detects the light
level around the vehicle, and auto-
matically adjusts to control the head-
lamp glare from vehicles behind you.
Whenever the shift lever is placed in
R (Reverse), the mirror will automat-
ically go to the brightest setting in
order to improve the driver's view
behind the vehicle.
To operate the electric rearview
mirror:
Press the ON/OFF button (1) to
turn the automatic dimming func-
tion off. The mirror indicator light
will turn off.
Press the ON/OFF button (1) to
turn the automatic dimming func-
tion on. The mirror indicator light
will illuminate.
The mirror defaults to the ON posi-
tion whenever the ignition switch or
the Engine Start/Stop button is in
the ON position.
OTLE045009
I I I I
n n n n
d d d d
i i i i
c c c c
a a a a
t t t t
o o o o
r r r r
S S S S
e e e e
n n n n
s s s s
o o o o
r r r r R R R R
e e e e
a a a a
r r r r
v v v v
i i i i
e e e e
w w w w
d d d d
i
i i i
s s s s
p p p p
l l l l
a a a a
y y y y
OTL045013 DayNight
Page 162 of 637
3-76
Convenient features of your vehicle
ItemsExplanation
One Touch Turn Signal
The one touch turn signal function will be deactivated.
The turn signal indicator will blink 3, 5, or 7 times when the turn signal lever is moved
slightly.
For more details, refer to "Lighting" in this chapter.
Head lamp delayTo activate or deactivate the headlamp delay function.
For more details, refer to "Lighting" in this chapter.
3. Lights
ItemsExplanation
Volume for PDW
(Parking Distance Warning)To adjust the volume of the Parking Distance Warning (PDW) system. (Level 1~3)
For more details, refer to the "Parking Distance Warning (PDW)" in chapter 5.
Welcome soundTo activate or deactivate the welcome sound.
4. Sound
Page 170 of 637

3-84
Convenient features of your vehicle
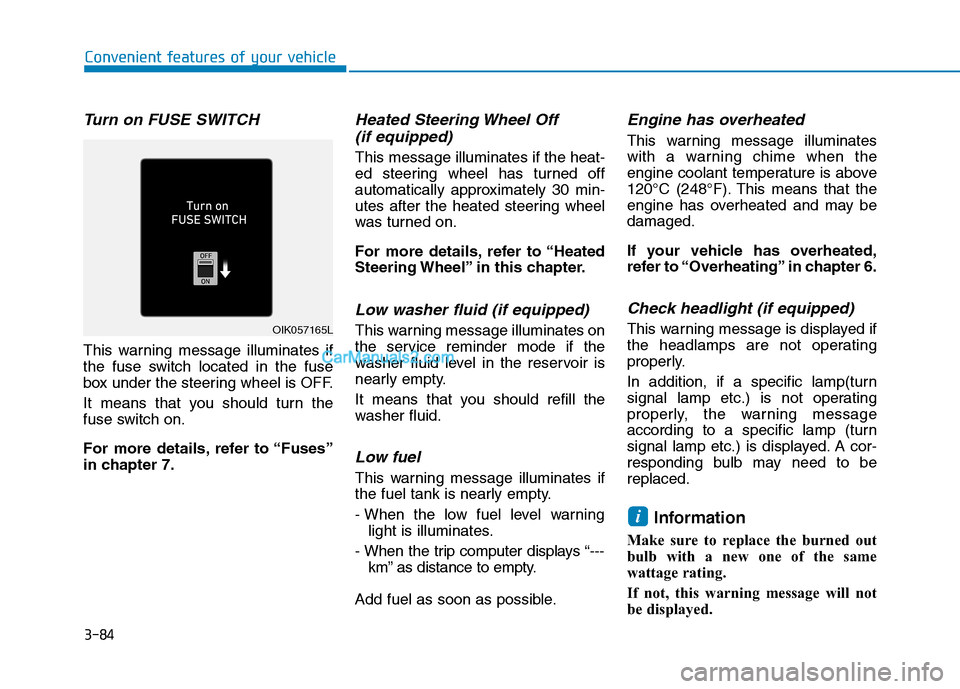
Turn on FUSE SWITCH
This warning message illuminates if
the fuse switch located in the fuse
box under the steering wheel is OFF.
It means that you should turn the
fuse switch on.
For more details, refer to “Fuses”
in chapter 7.
Heated Steering Wheel Off
(if equipped)
This message illuminates if the heat-
ed steering wheel has turned off
automatically approximately 30 min-
utes after the heated steering wheel
was turned on.
For more details, refer to “Heated
Steering Wheel” in this chapter.
Low washer fluid (if equipped)
This warning message illuminates on
the service reminder mode if the
washer fluid level in the reservoir is
nearly empty.
It means that you should refill the
washer fluid.
Low fuel
This warning message illuminates if
the fuel tank is nearly empty.
- When the low fuel level warning
light is illuminates.
- When the trip computer displays “---
km” as distance to empty.
Add fuel as soon as possible.
Engine has overheated
This warning message illuminates
with a warning chime when the
engine coolant temperature is above
120°C (248°F). This means that the
engine has overheated and may be
damaged.
If your vehicle has overheated,
refer to “Overheating” in chapter 6.
Check headlight (if equipped)
This warning message is displayed if
the headlamps are not operating
properly.
In addition, if a specific lamp(turn
signal lamp etc.) is not operating
properly, the warning message
according to a specific lamp (turn
signal lamp etc.) is displayed. A cor-
responding bulb may need to be
replaced.
Information
Make sure to replace the burned out
bulb with a new one of the same
wattage rating.
If not, this warning message will not
be displayed.
i
OIK057165L
Page 194 of 637

3-108
Exterior lights
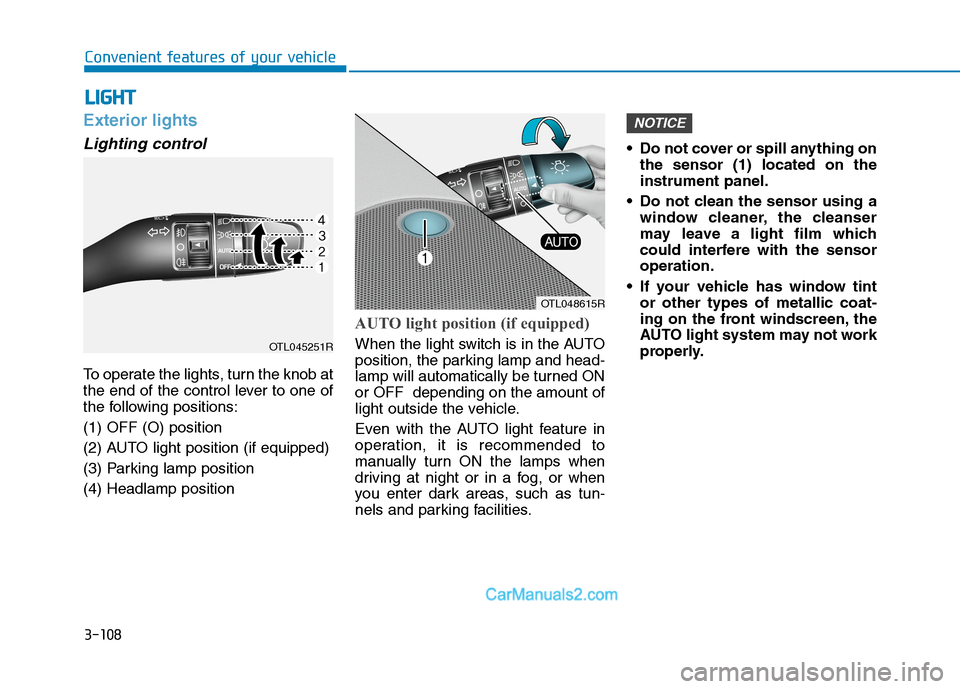
Lighting control
To operate the lights, turn the knob at
the end of the control lever to one of
the following positions:
(1) OFF (O) position
(2) AUTO light position (if equipped)
(3) Parking lamp position
(4) Headlamp position
AUTO light position (if equipped)
When the light switch is in the AUTO
position, the parking lamp and head-
lamp will automatically be turned ON
or OFF depending on the amount of
light outside the vehicle.
Even with the AUTO light feature in
operation, it is recommended to
manually turn ON the lamps when
driving at night or in a fog, or when
you enter dark areas, such as tun-
nels and parking facilities. Do not cover or spill anything on
the sensor (1) located on the
instrument panel.
Do not clean the sensor using a
window cleaner, the cleanser
may leave a light film which
could interfere with the sensor
operation.
If your vehicle has window tint
or other types of metallic coat-
ing on the front windscreen, the
AUTO light system may not work
properly.
NOTICE
L LI
IG
GH
HT
T
Convenient features of your vehicle
OTL045251R
OTL048615R
Page 195 of 637
3-109
Convenient features of your vehicle
3
Parking lamps position ( )
The parking lamps, licence plate
lamps and instrument panel lamps
are turned ON.
Headlamps position ( )
The headlamps, parking lamps,
licence plate lamps and instrument
panel lamps are turned ON.
Information
The ignition switch button must be in
the ON position to turn on the head-
lamps.
High beam operation
To turn on the high beam head-
lamps, push the lever away from you.
The lever will return to its original
position.
The high beam indicator will light
when the headlamp high beams are
switched on.
To turn off the high beam head-
lamps, pull the lever towards you.
The low beams will turn on.
i
OTL045253ROTL045252R
OTL045255R
Page 196 of 637
3-110
Convenient features of your vehicle
To flash the high beam headlamps,
pull the lever towards you, then
release the lever. The high beams
will remain ON as long as you hold
the lever towards you.
High Beam Assist (HBA) system
(if equipped)
High Beam Assist (HBA) is a system
that automatically adjusts the head-
lamp range (switches between high
beam and low beam) according to
the brightness of other vehicles and
road conditions.
Operating condition
1. Place the light switch in the AUTO
position.
2. Turn on the high beam by pushing
the lever away from you.
3. The High Beam Assist (HBA) ( )
indicator will illuminate.
Do not use high beam when
there are other vehicles
approaching you. Using high
beam could obstruct the other
driver's vision.
WARNING
OTL045254R
OTL048625R