2020 Hyundai Tucson brake
[x] Cancel search: brakePage 546 of 637
7-30
Maintenance
Brake pads, calipers and
rotors
Check the pads for excessive wear,
discs for run out and wear, and
calipers for fluid leakage.
Suspension mounting bolts
Check the suspension connections
for looseness or damage. Retighten
to the specified torque.
Steering gear box, linkage &
boots/lower arm ball joint
With the vehicle stopped and the
engine off, check for excessive free-
play in the steering wheel.
Check the linkage for bends or dam-
age. Check the dust boots and ball
joints for deterioration, cracks, or
damage. Replace any damaged
parts.
Drive shafts and boots
Check the drive shafts, boots and
clamps for cracks, deterioration, or
damage. Replace any damaged
parts and, if necessary, repack the
grease.
Air conditioning refrigerant/
compressor
Check the air conditioning lines and
connections for leakage and dam-
age.
Page 555 of 637
7-39
7
Maintenance
B BR
RA
AK
KE
E/
/C
CL
LU
UT
TC
CH
H
F
FL
LU
UI
ID
D
(
(I
IF
F
E
EQ
QU
UI
IP
PP
PE
ED
D)
)
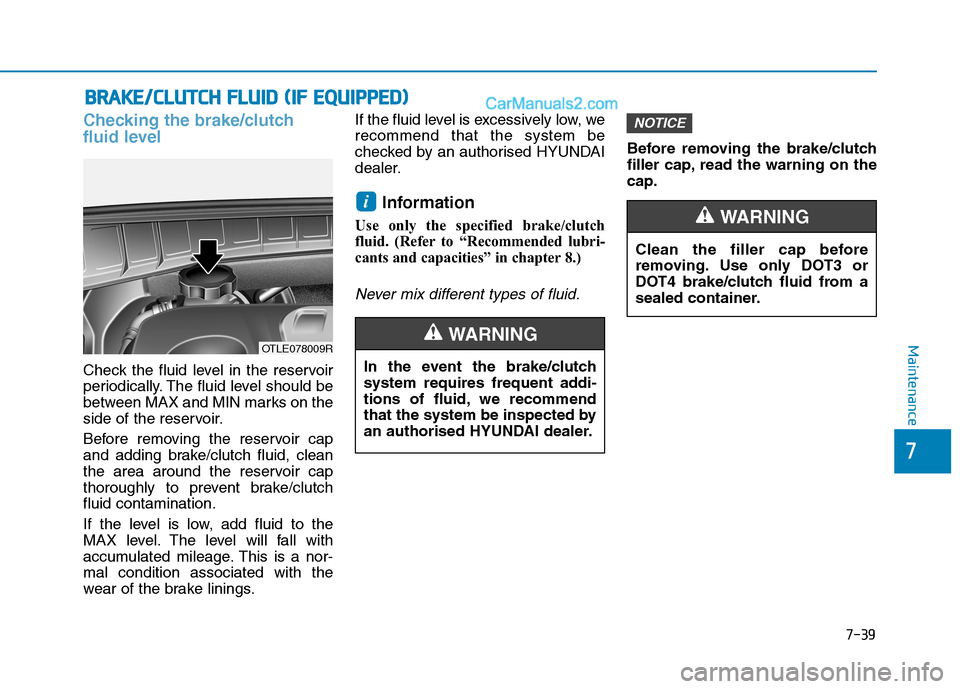
Checking the brake/clutch
fluid level
Check the fluid level in the reservoir
periodically. The fluid level should be
between MAX and MIN marks on the
side of the reservoir.
Before removing the reservoir cap
and adding brake/clutch fluid, clean
the area around the reservoir cap
thoroughly to prevent brake/clutch
fluid contamination.
If the level is low, add fluid to the
MAX level. The level will fall with
accumulated mileage. This is a nor-
mal condition associated with the
wear of the brake linings.If the fluid level is excessively low, we
recommend that the system be
checked by an authorised HYUNDAI
dealer.
Information
Use only the specified brake/clutch
fluid. (Refer to “Recommended lubri-
cants and capacities” in chapter 8.)
Never mix different types of fluid.
Before removing the brake/clutch
filler cap, read the warning on the
cap.
NOTICE
i
OTLE078009R
In the event the brake/clutch
system requires frequent addi-
tions of fluid, we recommend
that the system be inspected by
an authorised HYUNDAI dealer.
WARNING
Clean the filler cap before
removing. Use only DOT3 or
DOT4 brake/clutch fluid from a
sealed container.
WARNING
Page 556 of 637
7-40
Maintenance
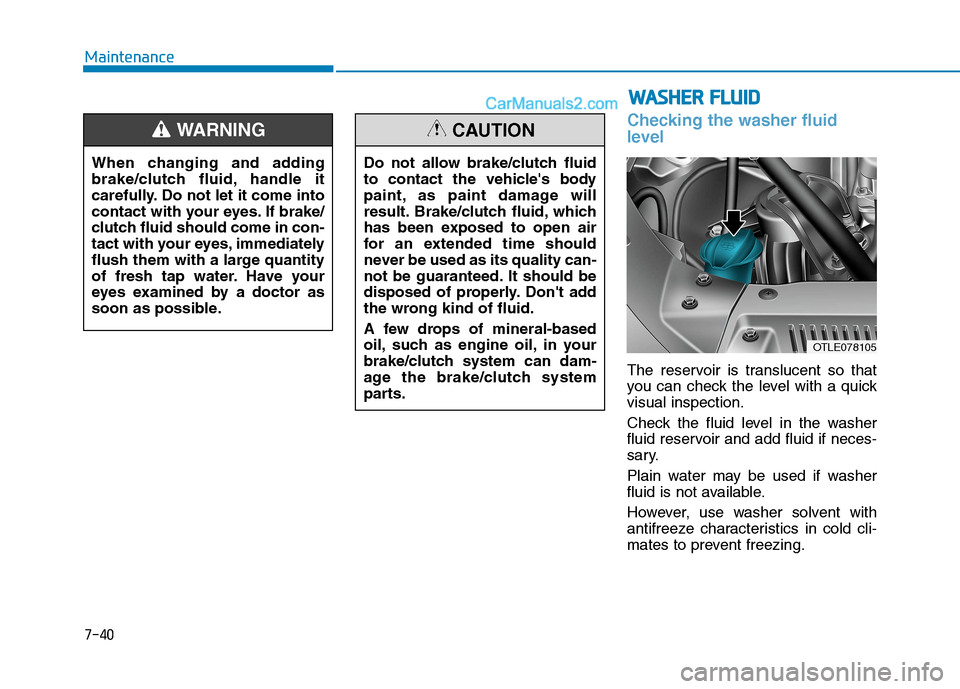
Checking the washer fluid
level
The reservoir is translucent so that
you can check the level with a quick
visual inspection.
Check the fluid level in the washer
fluid reservoir and add fluid if neces-
sary.
Plain water may be used if washer
fluid is not available.
However, use washer solvent with
antifreeze characteristics in cold cli-
mates to prevent freezing. When changing and adding
brake/clutch fluid, handle it
carefully. Do not let it come into
contact with your eyes. If brake/
clutch fluid should come in con-
tact with your eyes, immediately
flush them with a large quantity
of fresh tap water. Have your
eyes examined by a doctor as
soon as possible.
WARNING
Do not allow brake/clutch fluid
to contact the vehicle's body
paint, as paint damage will
result. Brake/clutch fluid, which
has been exposed to open air
for an extended time should
never be used as its quality can-
not be guaranteed. It should be
disposed of properly. Don't add
the wrong kind of fluid.
A few drops of mineral-based
oil, such as engine oil, in your
brake/clutch system can dam-
age the brake/clutch system
parts.
CAUTION
W WA
AS
SH
HE
ER
R
F
FL
LU
UI
ID
D
OTLE078105
Page 557 of 637
7-41
7
Maintenance
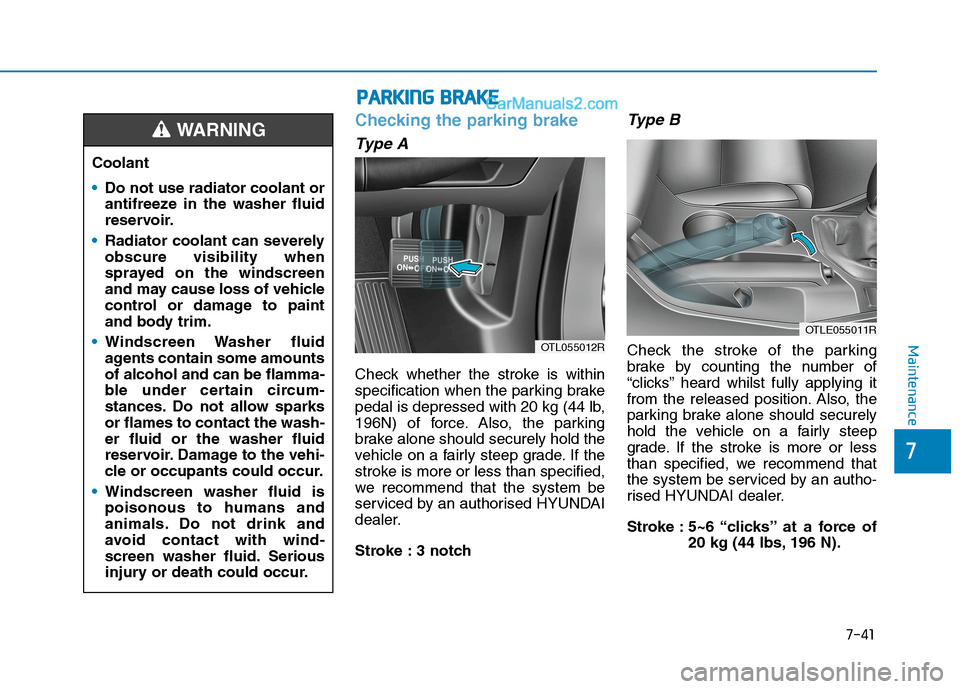
Checking the parking brake
Type A
Check whether the stroke is within
specification when the parking brake
pedal is depressed with 20 kg (44 lb,
196N) of force. Also, the parking
brake alone should securely hold the
vehicle on a fairly steep grade. If the
stroke is more or less than specified,
we recommend that the system be
serviced by an authorised HYUNDAI
dealer.
Stroke : 3 notch
Type B
Check the stroke of the parking
brake by counting the number of
“clicks’’ heard whilst fully applying it
from the released position. Also, the
parking brake alone should securely
hold the vehicle on a fairly steep
grade. If the stroke is more or less
than specified, we recommend that
the system be serviced by an autho-
rised HYUNDAI dealer.
Stroke : 5~6 “clicks’’ at a force of
20 kg (44 lbs, 196 N).
P PA
AR
RK
KI
IN
NG
G
B
BR
RA
AK
KE
E
OTL055012R
OTLE055011R
Coolant
Do not use radiator coolant or
antifreeze in the washer fluid
reservoir.
Radiator coolant can severely
obscure visibility when
sprayed on the windscreen
and may cause loss of vehicle
control or damage to paint
and body trim.
Windscreen Washer fluid
agents contain some amounts
of alcohol and can be flamma-
ble under certain circum-
stances. Do not allow sparks
or flames to contact the wash-
er fluid or the washer fluid
reservoir. Damage to the vehi-
cle or occupants could occur.
Windscreen washer fluid is
poisonous to humans and
animals. Do not drink and
avoid contact with wind-
screen washer fluid. Serious
injury or death could occur.
WARNING
Page 572 of 637
7-56
Maintenance
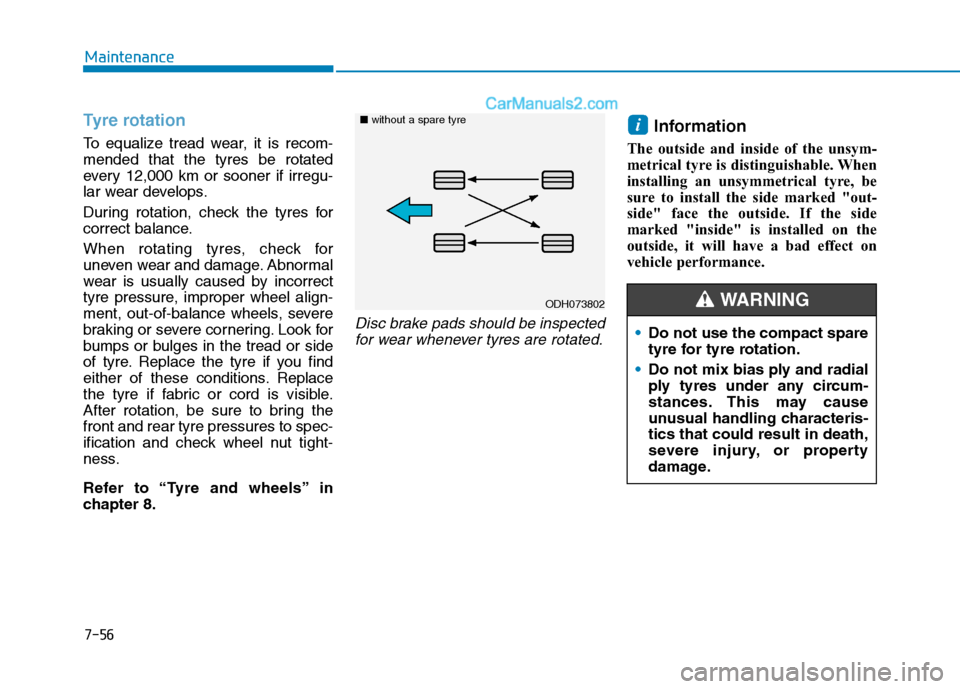
Tyre rotation
To equalize tread wear, it is recom-
mended that the tyres be rotated
every 12,000 km or sooner if irregu-
lar wear develops.
During rotation, check the tyres for
correct balance.
When rotating tyres, check for
uneven wear and damage. Abnormal
wear is usually caused by incorrect
tyre pressure, improper wheel align-
ment, out-of-balance wheels, severe
braking or severe cornering. Look for
bumps or bulges in the tread or side
of tyre. Replace the tyre if you find
either of these conditions. Replace
the tyre if fabric or cord is visible.
After rotation, be sure to bring the
front and rear tyre pressures to spec-
ification and check wheel nut tight-
ness.
Refer to “Tyre and wheels” in
chapter 8.
Disc brake pads should be inspected
for wear whenever tyres are rotated.
Information
The outside and inside of the unsym-
metrical tyre is distinguishable. When
installing an unsymmetrical tyre, be
sure to install the side marked "out-
side" face the outside. If the side
marked "inside" is installed on the
outside, it will have a bad effect on
vehicle performance.
i
Do not use the compact spare
tyre for tyre rotation.
Do not mix bias ply and radial
ply tyres under any circum-
stances. This may cause
unusual handling characteris-
tics that could result in death,
severe injury, or property
damage.
WARNING ODH073802 ■without a spare tyre
Page 574 of 637
7-58
Maintenance
Compact spare tyre replace-
ment (if equipped)
A compact spare tyre has a shorter
tread life than a regular size tyre.
Replace it when you can see the
tread wear indicator bars on the tyre.
The replacement compact spare tyre
should be the same size and design
tyre as the one provided with your
new vehicle and should be mounted
on the same compact spare tyre
wheel. The compact spare tyre is not
designed to be mounted on a regular
size wheel, and the compact spare
tyre wheel is not designed for mount-
ing a regular size tyre. The use of any other tyre size
or type may seriously affect
ride, handling, ground clear-
ance, stopping distance, body
to tyre clearance, snow tyre
clearance, and speedometer
reliability.
When replacing tyres (or
unwheels), it is recommended
to replace the two front or two
rear tyres (or wheels) as a
pair.
Replacing just one tyre can
seriously affect your vehicle's
handling.
The ABS works by comparing
the speed of the wheels. Tyre
size can affect wheel speed.
When replacing tyres, all 4
tyres must use the same size
originally supplied with the
vehicle. Using tyres of a dif-
ferent size can cause the ABS
(Anti-lock Brake System) and
ESC (Electronic Stability
Control) (if equipped) to work
irregularly.Driving on worn-out tyres is
very hazardous and will
reduce braking effectiveness,
steering accuracy, and trac-
tion.
Your vehicle is equipped with
tyres designed to provide for
safe ride and handling capa-
bility. Do not use a size and
type of tyre and wheel that is
different from the one that is
originally installed on your
vehicle. It can affect the safety
and performance of your vehi-
cle, which could lead to han-
dling failure or rollover and
serious injury. When replacing
the tyres, be sure to equip all
four tyres with the tyre and
wheel of the same size, type,
tread, brand and load-carrying
capacity.
WARNING
Page 590 of 637
7-74
Maintenance
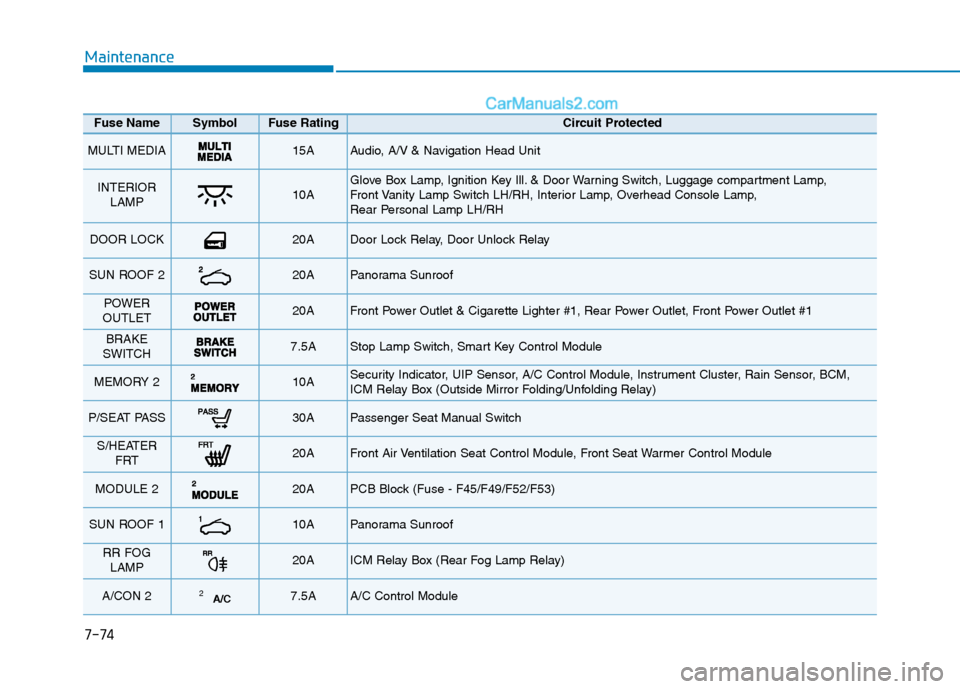
Fuse Name SymbolFuse RatingCircuit Protected
MULTI MEDIA 15A Audio, A/V & Navigation Head Unit
INTERIOR
LAMP 10A Glove Box Lamp, Ignition Key Ill. & Door Warning Switch, Luggage compartment Lamp,
Front Vanity Lamp Switch LH/RH, Interior Lamp, Overhead Console Lamp,
Rear Personal Lamp LH/RH
DOOR LOCK 20A Door Lock Relay, Door Unlock Relay
SUN ROOF 2 20A Panorama Sunroof
POWER
OUTLET 20A Front Power Outlet & Cigarette Lighter #1, Rear Power Outlet, Front Power Outlet #1
BRAKE
SWITCH 7.5A Stop Lamp Switch, Smart Key Control Module
MEMORY 2 10A Security Indicator, UIP Sensor, A/C Control Module, Instrument Cluster, Rain Sensor, BCM,
ICM Relay Box (Outside Mirror Folding/Unfolding Relay)
P/SEAT PASS 30A Passenger Seat Manual Switch
S/HEATER
FRT 20A Front Air Ventilation Seat Control Module, Front Seat Warmer Control Module
MODULE 2 20A PCB Block (Fuse - F45/F49/F52/F53)
SUN ROOF 1 10A Panorama Sunroof
RR FOG
LAMP 20A ICM Relay Box (Rear Fog Lamp Relay)
A/CON 2 2A/C7.5A A/C Control Module
Page 599 of 637
7-83
7
Maintenance
L LI
IG
GH
HT
T
B
BU
UL
LB
BS
S
Use only the bulbs of the specified
wattage.
The headlamp and tail lamp lens-
es could appear frosty if the vehi-
cle is washed after driving or the
vehicle is driven at night in wet
weather. This condition is caused
by temperature difference
between the lamp inside and out-
side and, it does not indicate a
problem with your vehicle.When moisture condenses in the
lamp, it will be removed after driv-
ing with the headlamp on. The
removable level may differ
depending on lamp size, lamp
position and environmental condi-
tion. However, if moisture is not
removed, we recommend that
your vehicle is inspected by an
authorised HYUNDAI dealer.
Information - Headlamp des-
iccant
(if equipped)
This vehicle is equipped with desic-
cant to reduce fogging inside the head-
lamp due to moisture.
The desiccant is consumable and its
performance may change based on the
used period or environment. If fog-
ging inside the headlamp due to mois-
ture continues for a long time, we rec-
ommend that you consult an autho-
rised HYUNDAI dealer.i
NOTICEBe sure to replace the burned-
out bulb with one of the same
wattage rating. Otherwise, it
may cause damage to the fuse
or electric wiring system.
CAUTION
If you don’t have necessary
tools, the correct bulbs and the
expertise, consult an autho-
rised HYUNDAI dealer. In many
cases, it is difficult to replace
vehicle light bulbs because
other parts of the vehicle must
be removed before you can get
to the bulb. This is especially
true if you have to remove the
headlamp assembly to get to
the bulb(s).
Removing/installing the head-
lamp assembly can result in
damage to the vehicle.
CAUTION
Working on the lights
Prior to working on the light,
firmly apply the parking brake,
ensure that the Engine
Start/Stop button is turned to
the OFF position and turn off
the lights to avoid sudden
movement of the vehicle and
burning your fingers or receiv-
ing an electric shock.
WARNING