2020 Hyundai Sonata display
[x] Cancel search: displayPage 239 of 537

05
5-109
ODN8A059248ODN8A059248
(2) Park the vehicle in front of the space where you desire to use
the Remote Moving Forward/
Backward. Press Remote Smart
Parking Assist system button
and select the Remote Moving
Forward/Backward. Exit the
vehicle possessing the smart key
and check whether all the doors
are closed. The hazard warning
light blinks and Remote Moving
Forward/Backward displays
whether the vehicle is movable or
not.
You will hear frequent beep sounds if
the driver gets off the vehicle after the
Remote Moving Forward/Backward is
ready.
ODN8059095ODN8059095
2. Remote Moving Forward/Backward
Assist
With the vehicle stopped, press and hold one of the moving forward/
backward button on the smart key
and then steering wheel, gear shift
and vehicle speed are controlled
automatically If the driver releases
the moving forward/backward button
while the Remote Moving Forward/
Backward button is in activation, the
control will stop temporarily. Press the
button again to resume the control.
For your safety, the assist is activated only when the smart key is within
about 10-16 ft. (3-5 m) from the
vehicle.
The vehicle can travel up to 23 ft. (7 m) per move. Press the moving forward/
backward button to make additional
movement.
Press the moving forward/backward
button again after checking the
distance from the vehicles if the
vehicle didn’t move after pressing
and holding the smart key button for
about 5 seconds.
Under cold weather, take enough time
before pressing the moving forward/
backward button of the smart key
after turning on the vehicle remotely.
It may take more time until the vehicle
moves.
Page 243 of 537

05
5-113
Additional Instructions
When the Remote Smart Parking Assist
system is in operation, the system may
be cancelled regardless of the instruction
order.
The appeared messages could be
differed according to the circumstances.
Follow the instructions provided while
driving your vehicle with the Remote
Smart Parking Assist system in activation.
When the function works, please follow
the displayed messages and the driver
should be cautious for safety.
Malfunction warning
ODN8A059262ODN8A059262
If there is a problem with Remote
Smart Parking Assist system, the above
message will appear when the system is
turned on.
In addition, the indicator on Remote
Smart Parking Assist system button
will blink and the warning sound will
beep three times. (The Parking Distance
Warning system can be operable
depending on the failure type.)
If you recognize any problem, have
the vehicle checked by an authorized
HYUNDAI dealer.
Parking assist conditions not met
ODN8A059261ODN8A059261
When Remote Smart Parking Assist
system is not getting ready for activation,
the above message will appear when
Remote Smart Parking Assist system
button is pressed.
Press the button again after a while and
check whether the function operates
properly.
Remote Smart Parking Assist system is
on standby for a while, you should not
use the Remote Smart Parking Assist
system and have your vehicle checked
by an authorized HYUNDAI dealer.
Page 244 of 537

Convenient Features5-114
Display Operation Status
While Remote Smart Parking Assist system is on, Smart key / Hazard lamp
status is displayed
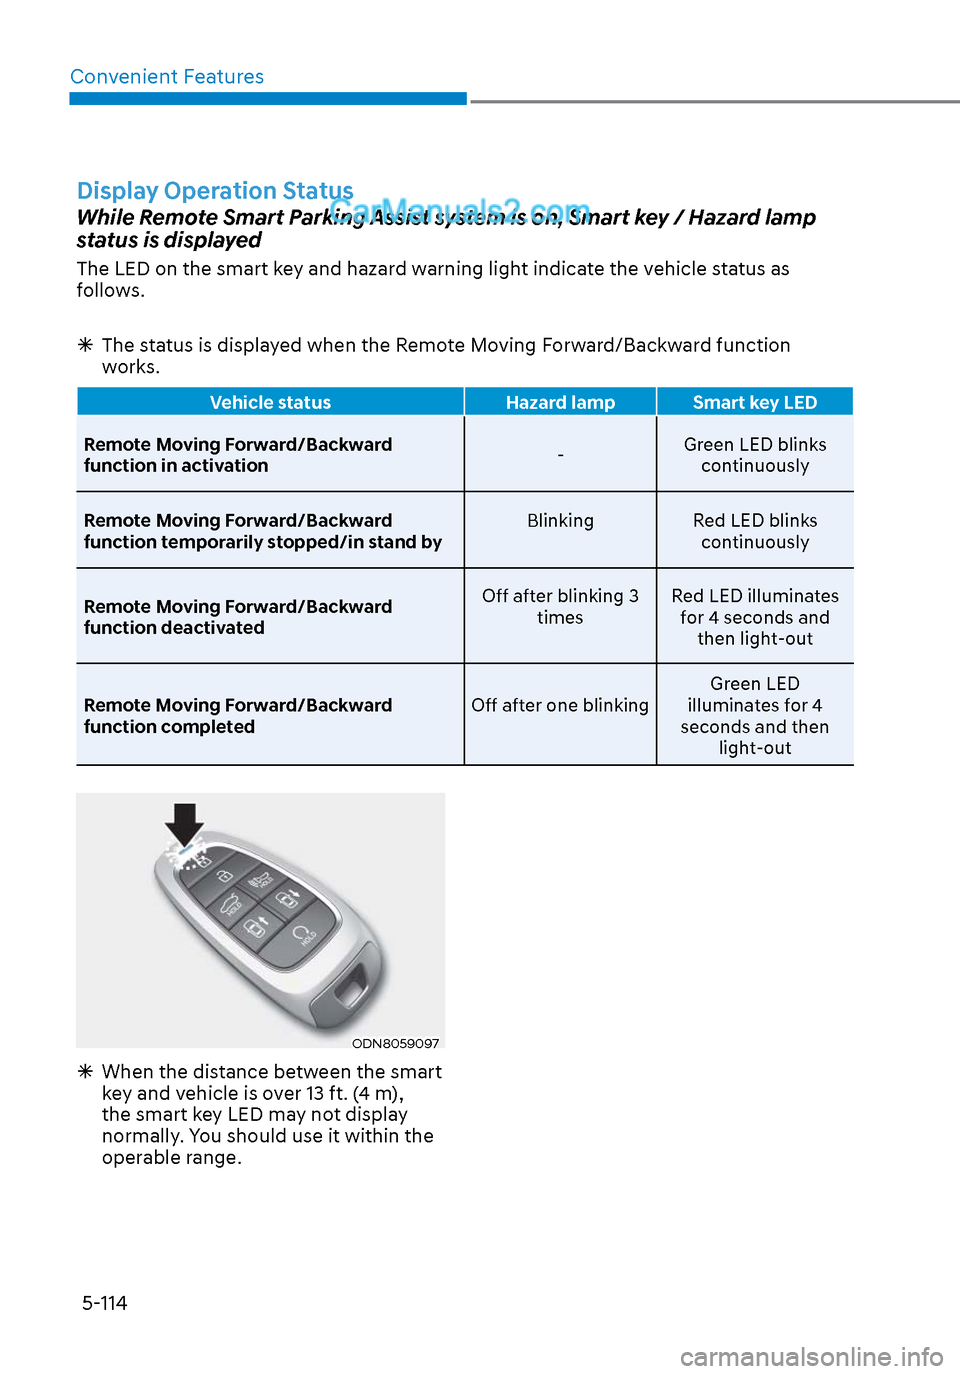
The LED on the smart key and hazard warning light indicate the vehicle status as
follows.
The status is displayed when the Remote Moving Forward/Backward function
works.
Vehicle status Hazard lamp Smart key LED
Remote Moving Forward/Backward
function in activ
ation -Green LED blinks
continuously
Remote Moving Forward/Backward
function temporarily stopped/in stand by Blinking
Red LED blinks
continuously
Remote Moving Forward/Backward
function deactivated Off after blinking 3
times Red LED illuminates
for 4 seconds and then light-out
Remote Moving Forward/Backward
function completed Off after one blinkingGreen LED
illuminates for 4
seconds and then light-out
ODN8059097ODN8059097
When the distance between the smart
key and vehicle is over 13 ft. (4 m),
the smart key LED may not display
normally. You should use it within the
operable range.
Page 263 of 537

05
5-133
Temperature conversion
If the battery has been discharged or
disconnect
ed, the temperature mode
display will reset to Centigrade.
To change the temperature unit from °C
to °F or °F to °C :
- Automatic climate control system
Press the AUTO button for 3 seconds while pressing the OFF button.
- Instrument cluster
Go to User Settings → Other → Temperature Unit.
The temperature unit on both the cluster
LCD display and the climate control
screen will change.
Air intake control
This is used to select the outside (fresh)
air position or recirculated air position.
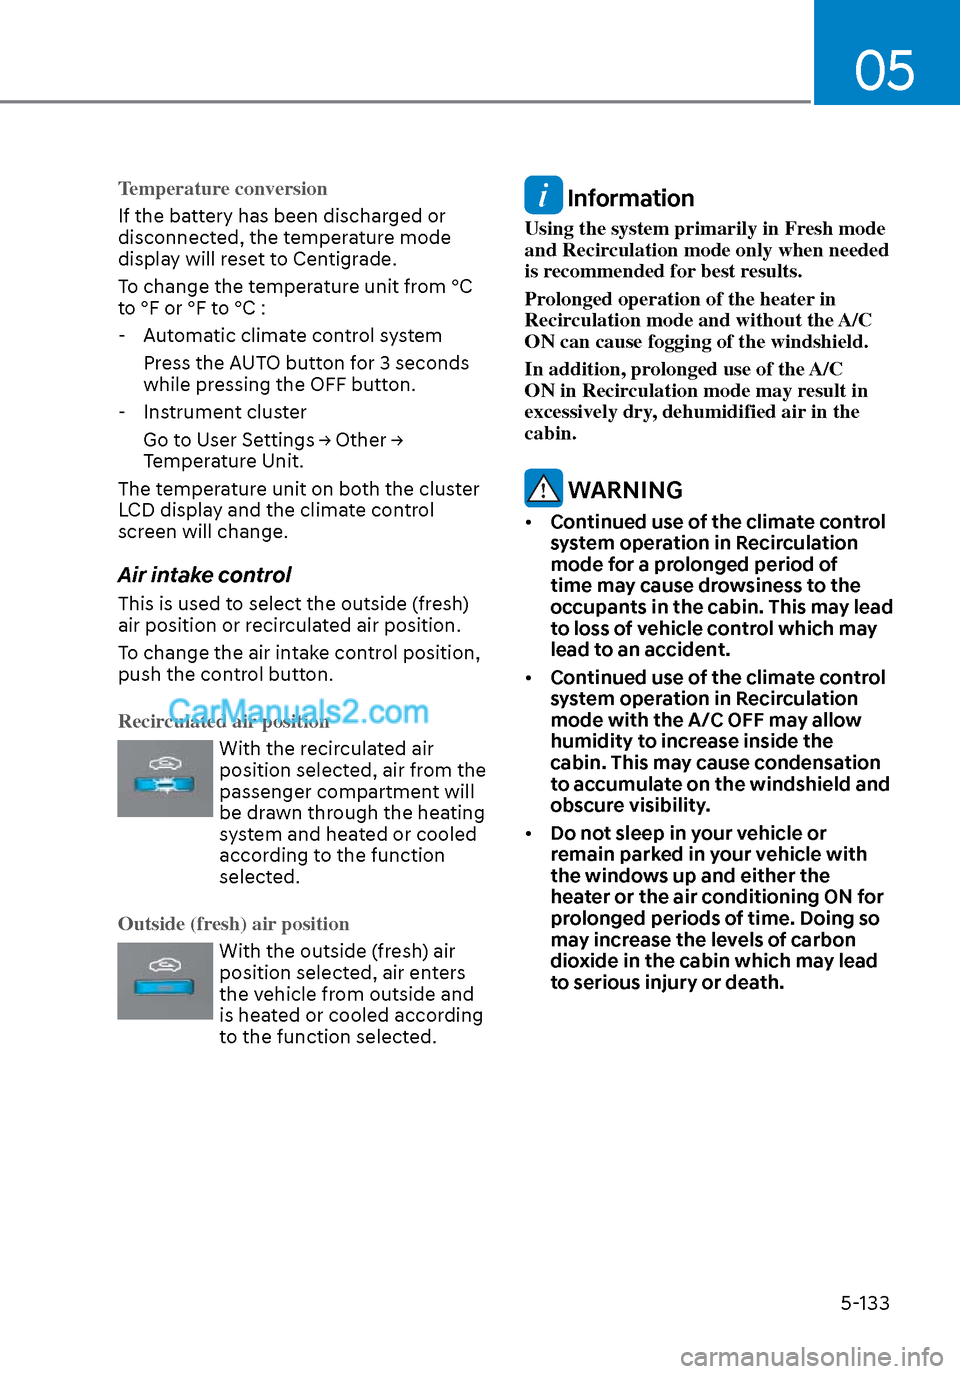
To change the air intake control position,
push the control button.
Recirculated air position
With the recirculated air
position selected, air from the
passenger compartment will
be drawn through the heating
system and heated or cooled
according to the function
selected.
Outside (fresh) air position
With the outside (fresh) air
position selected, air enters
the vehicle from outside and
is heated or cooled according
to the function selected.
Information
Using the system primarily in Fresh mode
and Recirculation mode only when needed
is recommended for best results.
Prolonged operation of the heater in
Recirculation mode and without the A/C
ON can cause fogging of the windshield.
In addition, prolonged use of the A/C
ON in Recirculation mode may result in
excessively dry, dehumidified air in the
cabin.
WARNING
• Continued use of the climate control
system operation in Recirculation
mode for a prolonged period of
time may cause drowsiness to the
occupants in the cabin. This may lead
to loss of vehicle control which may
lead to an accident.
• Continued use of the climate control
system operation in Recirculation
mode with the A/C OFF may allow
humidity to increase inside the
cabin. This may cause condensation
to accumulate on the windshield and
obscure visibility.
• Do not sleep in your vehicle or
remain parked in your vehicle with
the windows up and either the
heater or the air conditioning ON for
prolonged periods of time. Doing so
may increase the levels of carbon
dioxide in the cabin which may lead
to serious injury or death.
Page 278 of 537
![Hyundai Sonata 2020 Owners Manual Convenient Features5-148
Wireless Cellular Phone
Charging System (if equipped)
ODN8059223ODN8059223
[A]: Indicator light, [B]: Charging pad
On certain models, the vehicle comes
equipped with a wirel Hyundai Sonata 2020 Owners Manual Convenient Features5-148
Wireless Cellular Phone
Charging System (if equipped)
ODN8059223ODN8059223
[A]: Indicator light, [B]: Charging pad
On certain models, the vehicle comes
equipped with a wirel](/manual-img/35/16773/w960_16773-277.png)
Convenient Features5-148
Wireless Cellular Phone
Charging System (if equipped)
ODN8059223ODN8059223
[A]: Indicator light, [B]: Charging pad
On certain models, the vehicle comes
equipped with a wireless cellular phone
charger.
The system is available when all doors
are closed, and when the ignition switch
is ON.
To charge a cellular phone
The wireless cellular phone charging
system charges only the Qi-enabled
cellular phones. Read the label on the
cellular phone accessory cover or visit
your cellular phone manufacturer’s
website to check whether your cellular
phone supports the Qi technology.
The wireless charging process starts
when you put a Qi-enabled cellular
phone on the wireless charging unit.
1. Remove other items, including the smart key, from the wireless charging
unit. If not, the wireless charging
process may be interrupted. Place
the cellular phone on the center of
the charging pad (
).
2. The indicator light is orange when the cellular phone is charging. The
indicator light turns green when
phone charging is complete.
3. You can turn ON or OFF the wireless charging function in the user settings
mode on the instrument cluster. For
further information, refer to the “LCD
Display Modes” in this chapter.
If your cellular phone is not charging:
- Slightly change the position of the cellular phone on the charging pad.
- Make sure the indicator light is orange.
The indicator light will blink orange for 10
seconds if there is a malfunction in the
wireless charging system.
In this case, temporarily stop the
charging process, and re-attempt to
charge your cellular phone again.
The system warns you with a message
on the LCD display if the cellular phone
is still on the wireless charging unit after
the engine is turned OFF and the front
door is opened.
Information
For some manufacturers’ cellular phones,
the system may not warn you even though
the cellular phone is left on the wireless
charging unit. This is due to the particular
characteristic of the cellular phone and
not a malfunction of the wireless charging.
NOTICE
• The wireless cellular phone charging system may not support certain
cellular phones, which are not
verified for the Qi specification (
).
• When placing your cellular phone on the charging mat, position the
phone in the middle of the mat for
optimal charging performance. If
your cellular phone is off to the side,
the charging rate may be less and in
some cases the cellular phone may
experience higher heat conduction.
• In some cases, the wireless charging may stop temporarily when the
Remote Key or Smart Key is used,
either when starting the vehicle or
locking/unlocking the doors, etc.
• When charging certain cellular phones, the charging indicator
may not change to green when the
cellular phone is fully charged.
Page 284 of 537

Convenient Features5-154
Bluetooth® Wireless Technology
Hands-Free
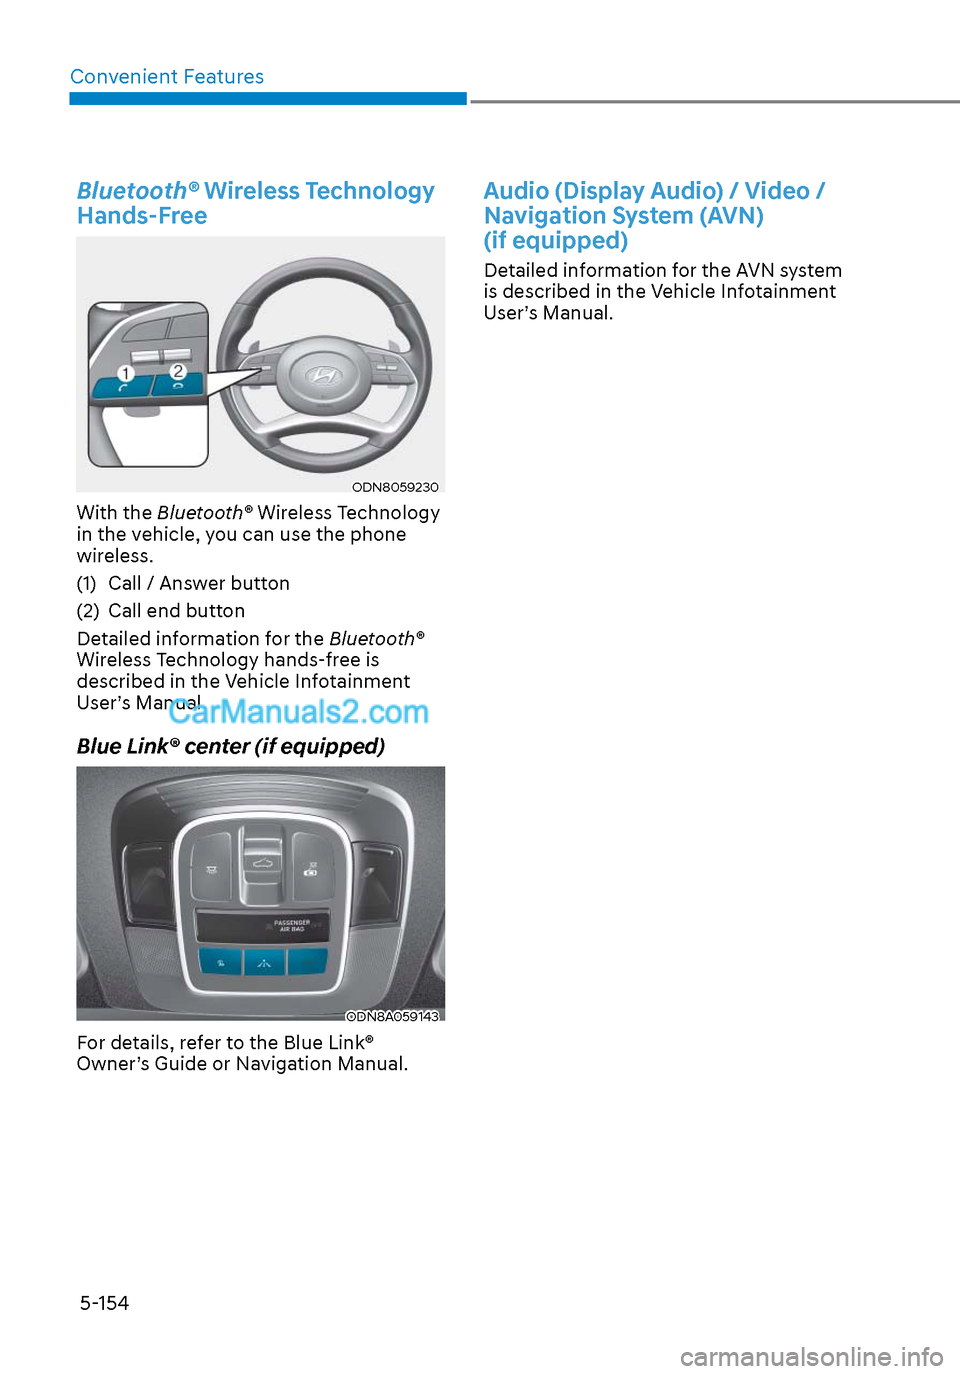
ODN8059230ODN8059230
With the Bluetooth® Wireless Technology
in the vehicle, you can use the phone
wireless.
(1) Call / Answer button
(2) Call end button
Detailed information for the Bluetooth®
Wireless Technology hands-free is
described in the Vehicle Infotainment
User’s Manual.
Blue Link® center (if equipped)
ODN8A059143ODN8A059143
For details, refer to the Blue Link®
Owner’s Guide or Navigation Manual.
Audio (Display Audio) / Video /
Navigation System (AVN)
(if equipped)
Detailed information for the AVN system
is described in the Vehicle Infotainment
User’s Manual.
Page 285 of 537

6
6. While Driving
Before Driving ........................................................................\
........................ 6-5Before Entering the Vehicle ........................................................................\
............. 6-5
Before Starting ........................................................................\
................................. 6-5
Ignition Switch ........................................................................\
.......................6-6Key Ignition Switch ........................................................................\
........................... 6-6
Engine Start/Stop Button ........................................................................\
................ 6-9
Remote Start ........................................................................\
.................................... 6-12
Automatic Transmission ........................................................................\
.......6-13Automatic Transmission Operation ........................................................................\
6-13
Parking .................................................................\
....................................................6-16
LCD Display Message ........................................................................\
...................... 6-17
Good Driving Practices ........................................................................\
..................6-18
Paddle Shifter (Manual Shift Mode) ......................................................................6-\
19
Brake System ........................................................................\
........................ 6-20Power Brakes ........................................................................\
.................................. 6-20
Disc Brakes Wear Indicator......................................................................\
.............. 6-20
Electronic Parking Brake (EPB) ........................................................................\
....... 6-21
Auto Hold ........................................................................\
........................................ 6-24
Anti-lock Brake System (ABS) ..................................................................... 6-27Electronic Stability Control (ESC) ........................................................................\
. 6-29
Vehicle Stability Management (VSM) ....................................................................6-31
Hill-Start Assist Control (HAC) ........................................................................\
....... 6-32
Good Braking Practices ................................................................\
......................... 6-32
ISG (Idle Stop and Go) system..................................................................... 6-33To Activate the ISG System ........................................................................\
............ 6-33
To Deactivate the ISG System ........................................................................\
....... 6-35
ISG System Malfunction ........................................................................\
................ 6-35
Battery Sensor Deactivation ........................................................................\
.......... 6-36
Drive Mode Integrated Control System ...................................................... 6-37Drive Mode ........................................................................\
..................................... 6-37
Page 289 of 537

06
6-5
Before Entering the Vehicle
• Be sure all windows, outside mirror(s), and outside lights are clean and
unobstructed.
• Remove frost, snow, or ice.
• Visually check the tires for uneven wear and damage.
• Check under the vehicle for any sign of leaks.
• Be sure there are no obstacles behind you if you intend to back up.
Before Starting
• Make sure the hood, the trunk, and the doors are securely closed and
locked.
• Adjust the position of the seat and steering wheel.
• Adjust the inside and side view mirrors.
• Verify all the lights work.
• Fasten your seatbelt. Check that all passengers have fastened their
seatbelts.
• Check the gauges and indicators in the instrument panel and the
messages on the instrument display
when the ignition switch is in the ON
position.
• Check that any items you are carrying are stored properly or fastened down
securely.
WARNING
To reduce the risk of SERIOUS INJURY or
DEATH, take the following precautions:
• ALWAYS wear your seat belt. All
passengers must be properly belted
whenever the vehicle is moving.
For more information, refer to "Seat
Belts" in chapter 3.
• Always drive defensively. Assume
other drivers or pedestrians may be
careless and make mistakes.
• Stay focused on the task of driving.
Driver distraction can cause
accidents.
• Leave plenty of space between you
and the vehicle in front of you.
WARNING
NEVER drink alcohol or take drugs and
drive.
Drinking alcohol or taking drugs and
driving is dangerous and may result in
an accident and SERIOUS INJURY or
DEATH.
Drunk driving is the number one
contributor to the highway death
toll each year. Even a small amount
of alcohol will affect your reflexes,
perceptions and judgment. Just
one drink can reduce your ability to
respond to changing conditions and
emergencies and your reaction time
gets worse with each additional drink.
Driving while under the influence
of drugs is as dangerous or more
dangerous than driving under the
influence of alcohol.
You are much more likely to have a
serious accident if you drink or take
drugs and drive. If you are drinking or
taking drugs, don't drive. Do not ride
with a driver who has been drinking
or taking drugs. Choose a designated
driver or call a taxi.
BEFORE DRIVING