2020 Hyundai Ioniq Hybrid display
[x] Cancel search: displayPage 399 of 635

5-133
Driving your vehicle
5
The system responds to curves
located on the destination set in
the navigation. If the destination is
not set, the system will respond to
road information of the expected
route.
Information
• Navigation-based Smart Cruise
Control is limited in other countries.
• The system may not operate due to
the existence of leading vehicles and
the driving situations of the vehicle.
• The driver can active the system in
User Settings mode on the cluster.
• The system operates regardless of
whether the sharp curve warning
appears on the navigation, but the
time gap could occur between the
warning and system operation.
• The navigation only provides curve
information within permitted speed
ranges so that the system may not
decrease its speed during extreme
over-speed driving.
• The system is not designed to work
on highways other than mentioned
as a controlled access road.
(Continued)(Continued)
• The system automatically cancels
when you leave the highway.
• Highway Driving Assist and
Navigation-based Smart Cruise
Control uses the same symbol
that indicates the status of the sys-
tem. Therefore, even if the
Navigation-based Cruise Control is
off, the symbol may be dis-
played.
• If there is a problem with
Navigation-based Smart Cruise
Control, the system cannot be acti-
vated in the infotainment system
screen, and the symbol will
turn off. However, if Highway
Driving Assist is activated, the
symbol will be displayed.
• After you pass through a tollgate on
a highway, the system operates
based on the first lane. If you enter
one of the other lanes, the system
might not properly decelerate.
• If you over speed, the system may
not decelerate the vehicle in a curve.
(Continued)(Continued)
• Deceleration by the system may not
be sufficient if the driver accelerates
while the system is operating,
• If the driver releases the accelerator
after stepping on it while the system
is operating, sudden deceleration
might occur for safety.
• Deceleration by the system may not
be sufficient due to road conditions
such as uneven road surfaces, nar-
row lanes, etc.
• If the road is controlled, due to con-
struction or holiday events, the sys-
tem might not work properly.
i
Navigation-based Cruise
Control system may not func-
tion properly in the following
situations:
The navigation is not working
properly.
The navigation is not updated.
The real-time GPS or map
information provided has
errors.
(Continued)
CAUTION
Page 402 of 635
5-136
Driving your vehicle
LFA operation
System setting
With the ignition switch is in the ON
position, Lane Following Assist can
be activated by selecting 'User set-
tings →Driver assistance →
Driving assist →Lane following
assist' in the cluster LCD display.
Deselect the setting to turn off the
system.
If the vehicle is turned off then on
again, the system maintains the
last setting. (Continued)
Please refer to "Limitations of
the System".
Do not remove or damage the
related parts of LFA system.
You may not hear a warning
sound of LFA system if the
audio volume is high.
Do not place objects on the
dashboard that reflects light
such as mirrors, white paper,
etc. This may prevent LFA sys-
tem from functioning proper-
ly.
Always have your hands on
the steering wheel while LFA
system is activated. If you
continue to drive with your
hands off the steering wheel
after the "Keep hands on
steering wheel" warning mes-
sage appears, the system will
turn off automatically.
However, if the driver has their
hands on the steering wheel
again, the system will start
controlling the steering wheel.
(Continued)
(Continued)
The steering wheel is not con-
tinuously controlled so if the
vehicle speed is at a higher
rate when leaving a lane the
vehicle may not be controlled
by the system. The driver
must always follow the speed
limit when using the system.
If you attach objects to the
steering wheel, the system
may not assist steering or the
hands off alarm may not work
properly.
When you tow a trailer, make
sure that you turn off LFA sys-
tem.
Page 403 of 635
5-137
Driving your vehicle
5
Operating conditions
Select 'Lane following assist' from
the User settings mode in the cluster
LCD display and meet the following
conditions for the system to operate.
- Smart Cruise Control is operating
- Vehicle speed is below 110 mph
(180 km/h)
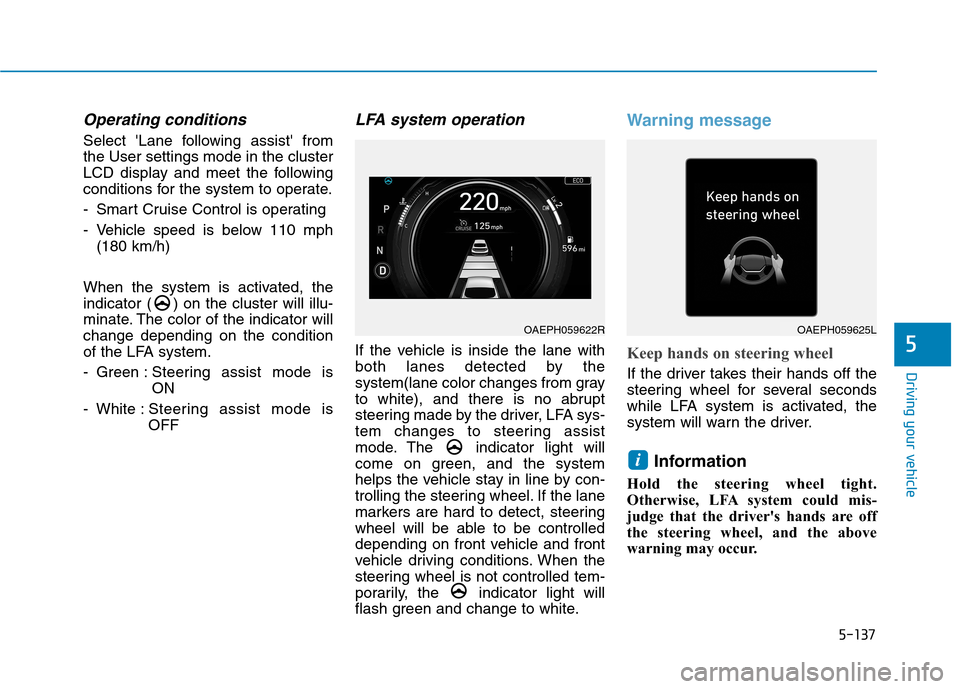
When the system is activated, the
indicator ( ) on the cluster will illu-
minate. The color of the indicator will
change depending on the condition
of the LFA system.
- Green : Steering assist mode is
ON
- White :Steering assist mode is
OFF
LFA system operation
If the vehicle is inside the lane with
both lanes detected by the
system(lane color changes from gray
to white), and there is no abrupt
steering made by the driver, LFA sys-
tem changes to steering assist
mode. The indicator light will
come on green, and the system
helps the vehicle stay in line by con-
trolling the steering wheel. If the lane
markers are hard to detect, steering
wheel will be able to be controlled
depending on front vehicle and front
vehicle driving conditions. When the
steering wheel is not controlled tem-
porarily, the indicator light will
flash green and change to white.
Warning message
Keep hands on steering wheel
If the driver takes their hands off the
steering wheel for several seconds
while LFA system is activated, the
system will warn the driver.
Information
Hold the steering wheel tight.
Otherwise, LFA system could mis-
judge that the driver's hands are off
the steering wheel, and the above
warning may occur.
i
OAEPH059622ROAEPH059625L
Page 415 of 635
5-149
Driving your vehicle
5
When the system is initially turned
on and when the vehicle is turned
off then on again, the warning light
will illuminate for 3 seconds on the
outside rearview mirror.
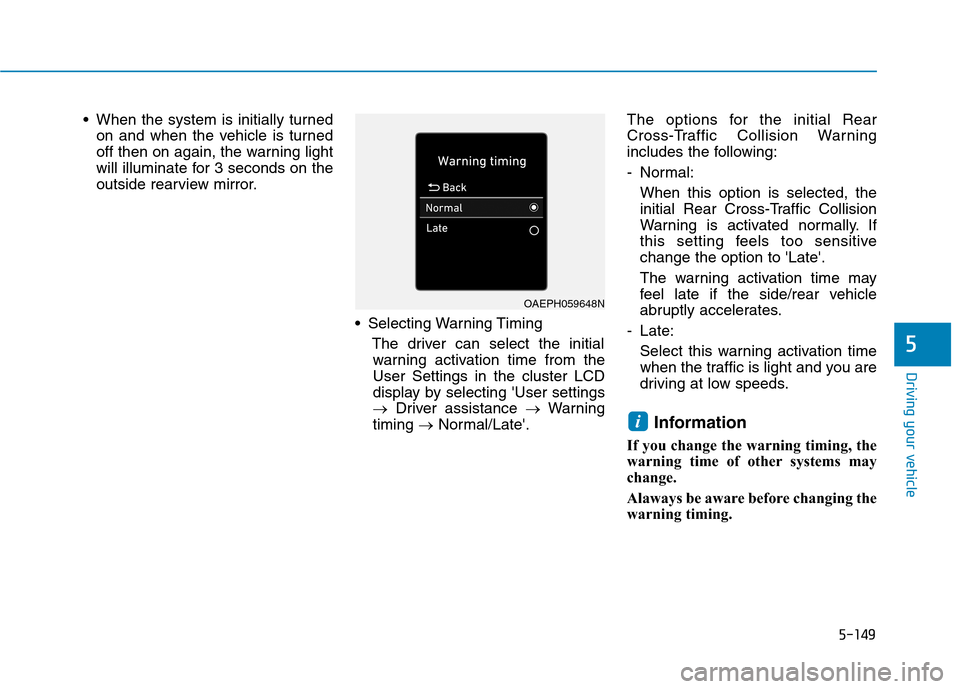
Selecting Warning Timing
The driver can select the initial
warning activation time from the
User Settings in the cluster LCD
display by selecting 'User settings
→Driver assistance →Warning
timing →Normal/Late'.The options for the initial Rear
Cross-Traffic Collision Warning
includes the following:
- Normal:
When this option is selected, the
initial Rear Cross-Traffic Collision
Warning is activated normally. If
this setting feels too sensitive
change the option to 'Late'.
The warning activation time may
feel late if the side/rear vehicle
abruptly accelerates.
- Late:
Select this warning activation time
when the traffic is light and you are
driving at low speeds.
Information
If you change the warning timing, the
warning time of other systems may
change.
Alaways be aware before changing the
warning timing.
i
OAEPH059648N
Page 416 of 635

5-150
Driving your vehicle
Setting Warning Volume
The driver can select the warning
volume from the User Settings in
the LCD display by selecting 'User
settings →Driver assistance →
Warning volume →High/Medium/
Low'.
Information
If you change the warning volume, the
warning volume of other systems may
change.
Alaways be aware before changing the
warning volume.
For more information refer to
"LCD Display Modes" in chapter 3.
Operating conditions
To operate:
1. Go to the 'User settings →Driver
assistance →Parking safety →
Rear Cross-Traffic Safety' on the
LCD display. The system will turn
on and standby to operate.
2. The system will operate when
vehicle speed is below 7 mph (10
km/h) and with the shift lever in R
(Reverse).
* The system will not operate when
the vehicle speed exceeds 7 mph
(10 km/h). The system will activate
again when the speed is below 7
mph (10 km/h).
The system's detecting range is
approximately 1 ft ~ 65 ft (0.5 m ~ 20
m). An approaching vehicle will be
detected if their vehicle speed is
within 5 ~ 22.5 mph (8 km/h ~ 36
km/h).
Note that the detecting range and
operating speed may vary under cer-
tain conditions. As always, use cau-
tion and pay close attention to your
surroundings when backing up your
vehicle.
Warning message and system
control
Rear Cross-Traffic Collision
Warning System
If the vehicle detected by the sensors
approaches from the rear left/right
side of your vehicle, the warning
chime will sound, the warning light
on the outside rearview mirror will
blink and a message will appear on
the LCD display. If the rear view mon-
itor system is in activation, a mes-
sage will also appear on the audio or
infotainment system screen.
i
OAEPH059652L
■Left■Right
OAEE059046/OAEE059047
Page 419 of 635

5-153
Driving your vehicle
5
Blind-Spot Collision Warning
(BCW) system disabled.
Radar blocked
This warning message may appear
when:
- One or both of the sensors on the
rear bumper is blocked by dirt or
snow or a foreign object.
- Driving in rural areas where the
sensor does not detect another
vehicle for an extended period of
time.
- When there is inclement weather
such as heavy snow or rain.
- When a trailer or carrier is
installed.If any of these conditions occur, the
light on the BCW switch and the sys-
tem will turn off automatically.
Information
Turn off BCW and RCCW system (if
equipped) when a trailer or carrier is
installed.
- Press the BCW button (the indica-
tor on the button will turn off)
- Deactivate RCCW system by dese-
lecting
'User settings →Driver assistance
→Parking safety →Rear cross-
traffic safety'When the BCW canceled warning
message is displayed in the cluster,
check to make sure that the rear
bumper is free from any dirt or snow
in the areas where the sensor is
located. Remove any dirt, snow, or
foreign material that could interfere
with the radar sensors.
After any dirt or debris is removed,
the RCCW system should operate
normally after about 10 minutes of
driving the vehicle.
If the system still does not operate
normally, we recommend that the
vehicle be inspected by an author-
ized HYUNDAI dealer.
i
OIK057092L
Page 437 of 635
What to do in an emergency
6
Hazard Warning Flasher .......................................6-2
In Case of an Emergency While Driving.............6-2
If the Engine Stalls While Driving .................................6-2
If the Vehicle Stalls at a Crossroad or Crossing .......6-2
If You Have a Flat Tire While Driving ..........................6-3
If the Vehicle will not Start ..................................6-3
If the 12 Volt Battery is Discharged
(Hybrid Vehicle) .....................................................6-5
Before Jump Starting .......................................................6-5
Jump Starting......................................................................6-6
If the 12 Volt Battery is Discharged
(Plug-In Hybrid Vehicle) .......................................6-9
Jump Starting......................................................................6-9
If the Engine Overheats......................................6-12
Tire Pressure Monitoring System (TPMS).......6-14
Check Tire Pressure .......................................................6-14
Tire Pressure Monitoring System ...............................6-15
Low Tire Pressure Telltale ............................................6-16
Low Tire Pressure LCD Display with
Position Indicator ............................................................6-16
TPMS Malfunction Indicator ........................................6-17
Changing a Tire with TPMS..........................................6-18
If You Have a Flat Tire........................................6-20
With Spare Tire................................................................6-20
With Tire Mobility Kit (TMK) - Type A ......................6-25
With Tire Mobility Kit (TMK) - Type B ......................6-33
Towing ...................................................................6-40
Towing Service .................................................................6-40
Removable Towing Hook ...............................................6-41
Emergency Towing..........................................................6-42
If an Accident Occurs..........................................6-44
Page 450 of 635
6-14
What to do in an emergency
T TI
IR
RE
E
P
PR
RE
ES
SS
SU
UR
RE
E
M
MO
ON
NI
IT
TO
OR
RI
IN
NG
G
S
SY
YS
ST
TE
EM
M
(
(T
TP
PM
MS
S)
)
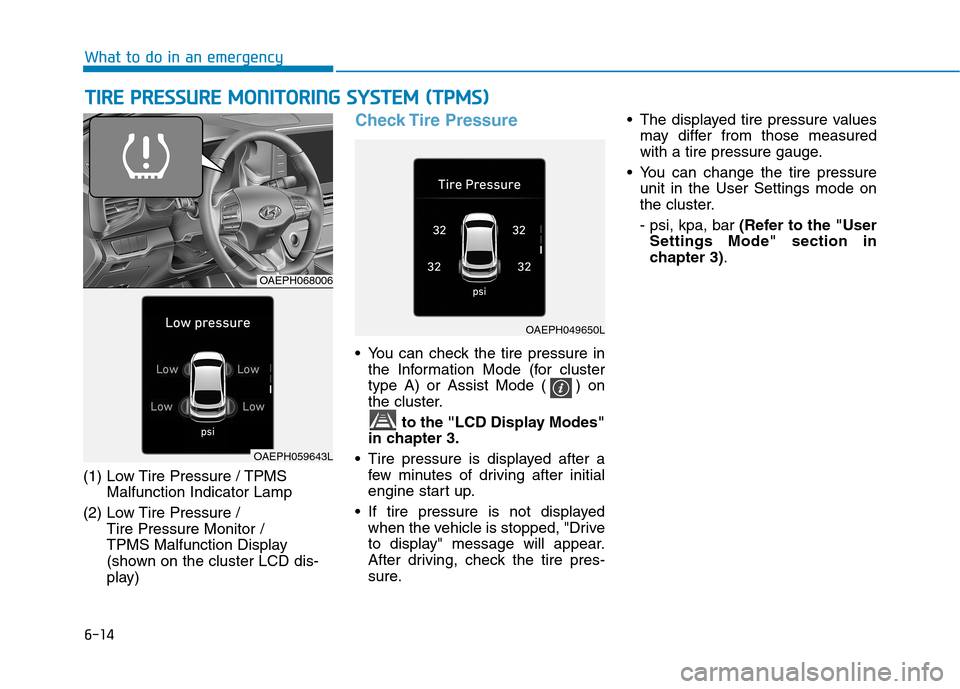
(1) Low Tire Pressure / TPMS
Malfunction Indicator Lamp
(2) Low Tire Pressure /
Tire Pressure Monitor /
TPMS Malfunction Display
(shown on the cluster LCD dis-
play)
Check Tire Pressure
You can check the tire pressure in
the Information Mode (for cluster
type A) or Assist Mode ( ) on
the cluster.
to the "LCD Display Modes"
in chapter 3.
Tire pressure is displayed after a
few minutes of driving after initial
engine start up.
If tire pressure is not displayed
when the vehicle is stopped, "Drive
to display" message will appear.
After driving, check the tire pres-
sure. The displayed tire pressure values
may differ from those measured
with a tire pressure gauge.
You can change the tire pressure
unit in the User Settings mode on
the cluster.
- psi, kpa, bar (Refer to the "User
Settings Mode" section in
chapter 3).
OAEPH068006
OAEPH049650L
OAEPH059643L