2020 Hyundai Ioniq Hybrid tyre pressure
[x] Cancel search: tyre pressurePage 513 of 613
6-40
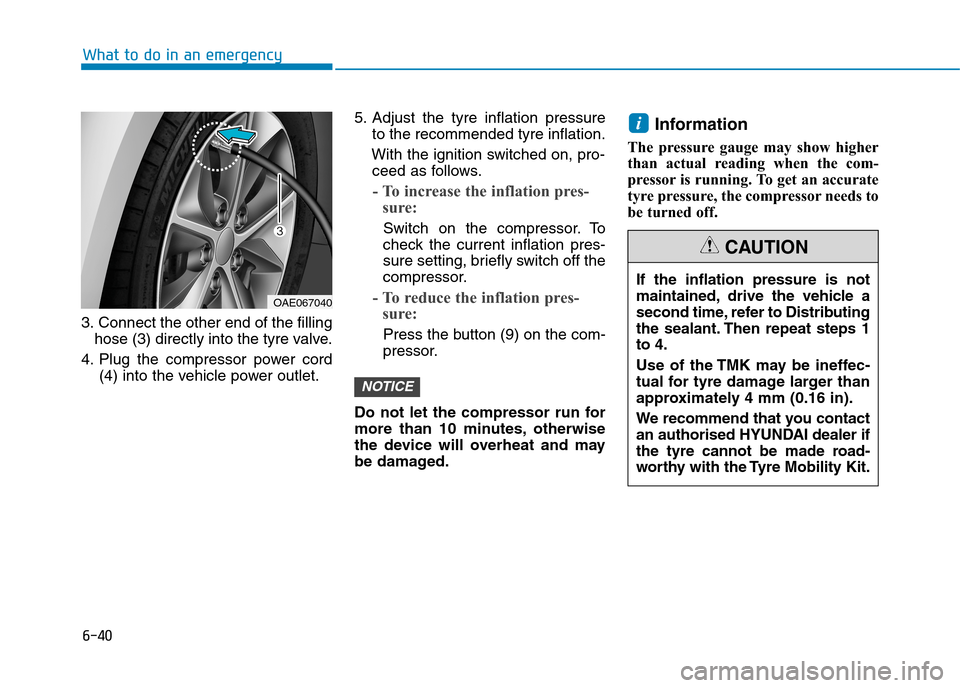
3. Connect the other end of the filling
hose (3) directly into the tyre valve.
4. Plug the compressor power cord
(4) into the vehicle power outlet.5. Adjust the tyre inflation pressure
to the recommended tyre inflation.
With the ignition switched on, pro-
ceed as follows.
- To increase the inflation pres-
sure:
Switch on the compressor. To
check the current inflation pres-
sure setting, briefly switch off the
compressor.
- To reduce the inflation pres-
sure:
Press the button (9) on the com-
pressor.
Do not let the compressor run for
more than 10 minutes, otherwise
the device will overheat and may
be damaged.
Information
The pressure gauge may show higher
than actual reading when the com-
pressor is running. To get an accurate
tyre pressure, the compressor needs to
be turned off.
i
NOTICE
What to do in an emergency
If the inflation pressure is not
maintained, drive the vehicle a
second time, refer to Distributing
the sealant. Then repeat steps 1
to 4.
Use of the TMK may be ineffec-
tual for tyre damage larger than
approximately 4 mm (0.16 in).
We recommend that you contact
an authorised HYUNDAI dealer if
the tyre cannot be made road-
worthy with the Tyre Mobility Kit.
CAUTION
OAE067040
Page 514 of 613
6-41
What to do in an emergency
Information
When reinstalling the repaired or
replaced tyre and wheel on the vehi-
cle, tighten the wheel brace to 11~13
kgf·m (79~94 lbf·ft).
i
6
Tyre pressure sensor
(if equipped with TPMS)
The sealant on the tyre pres-
sure sensor and wheel should
be removed when you replace
the tyre with a new one and
inspect the tyre pressure sen-
sors at an authorised dealer.
CAUTION
The tyre inflation pressure must
be at least 220 kPa (32 psi). If it
is not, do not continue driving.
Call for road side service or tow-
ing.
WARNING
Page 520 of 613
Tyres and wheels .................................................7-36
Tyre care ...........................................................................7-36
Recommended cold tyre inflation pressures ...........7-37
Check tyre inflation pressure ......................................7-38
Tyre rotation ....................................................................7-39
Wheel alignment and tyre balance.............................7-40
Tyre replacement ............................................................7-40
Wheel replacement .........................................................7-41
Tyre traction .....................................................................7-41
Tyre maintenance ...........................................................7-42
Tyre sidewall labelling ....................................................7-42
Low aspect ratio tyres...................................................7-46
Fuses ......................................................................7-47
Instrument panel fuse replacement ...........................7-48
Engine compartment panel fuse replacement.........7-49
Fuse/relay panel description .......................................7-51
Light bulbs.............................................................7-61
Headlamp, position lamp, turn signal lamp bulb
replacement ......................................................................7-62
Daytime running lamp ....................................................7-66
Side repeater lamp replacement .................................7-66
Rear combination lamp bulb replacement ................7-66
Rear fog lamp ..................................................................7-69
High mounted stop lamp ...............................................7-70
Licence plate light bulb replacement .........................7-70
Interior light bulb replacement ....................................7-70
Appearance care ..................................................7-72
Exterior care ....................................................................7-72
Interior care......................................................................7-78
Emission control system .....................................7-81
Crankcase emission control system ...........................7-81
Evaporative emission control system.........................7-81
Exhaust emission control system ...............................7-82
Procedure for entering forced engine activation
mode ......................................................................7-85
Page 525 of 613
7-7
7
Maintenance
Owner maintenance schedule
When you stop for fuel:
Check the engine oil level.
Check the coolant level in the
engine coolant reservoir.
Check the windscreen washer fluid
level.
Check for low or under-inflated
tyres.
Whilst operating your vehicle:
Note any changes in the sound of
the exhaust or any smell of
exhaust fumes in the vehicle.
Check for vibrations in the steering
wheel. Notice if there is any
increased steering effort or loose-
ness in the steering wheel, or
change in its straight-ahead posi-
tion.
Notice if your vehicle constantly
turns slightly or “pulls” to one side
when travelling on smooth, level
road.
When stopping, listen and check
for unusual sounds, pulling to one
side, increased brake pedal travel
or “hard-to-push” brake pedal.
If any slipping or changes in the
operation of your transmission
occurs, check the transmission
fluid level.
Check the dual clutch transmission
P (Park) function.
Check the parking brake.
Check for fluid leaks under your
vehicle (water dripping from the air
conditioning system during or after
use is normal).
At least monthly:
Check coolant level in the engine
coolant reservoir.
Check the operation of all exterior
lights, including the stoplights, turn
signals and hazard warning flashers.
Check the inflation pressures of all
tyres including the spare for tyres
that are worn, show uneven wear,
or are damaged.
Check for loose wheel lug nuts.
At least twice a year:
(i.e., every Spring and Autumn)
Check radiator, heater and air condi-
tioning hoses for leaks or damage.
Check windscreen washer spray
and wiper operation. Clean wiper
blades with a clean cloth damp-
ened with washer fluid.
Check headlamp alignment.
Check muffler, exhaust pipes,
shields and clamps.
Check the seat belts for wear and
function. Be careful when checking your
engine coolant/inverter coolant
level when the engine is hot.
This may result in coolant being
blown out of the opening and
cause serious burns and other
injuries.
WARNING
Page 530 of 613
7-12
Maintenance
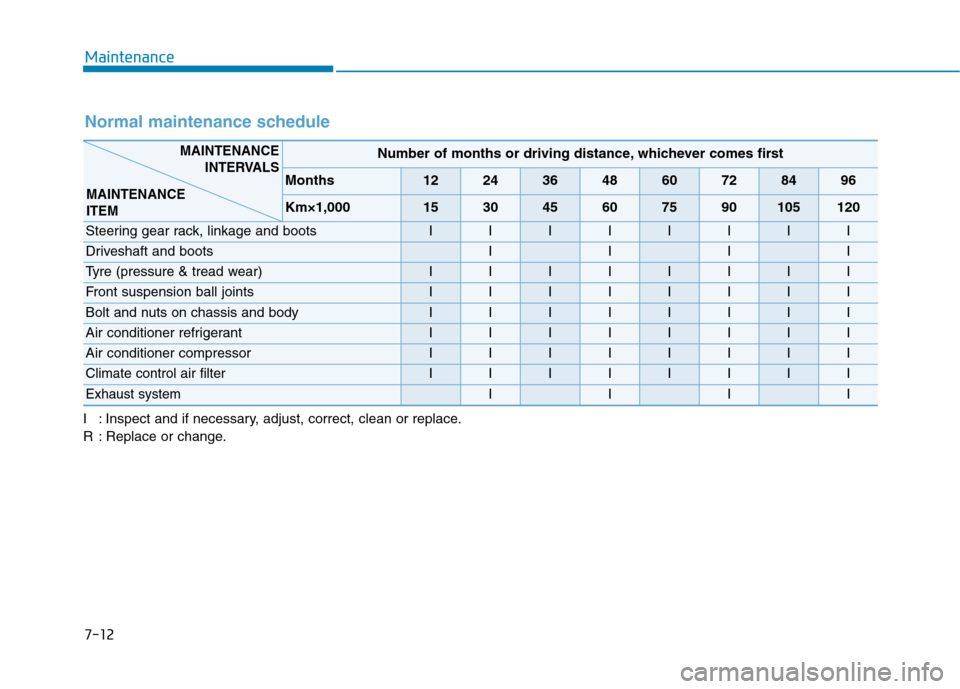
Normal maintenance schedule
Number of months or driving distance, whichever comes first
Months1224364860728496
Km×1,000153045607590105120
Steering gear rack, linkage and bootsIIIIIIII
Driveshaft and bootsIIII
Tyre (pressure & tread wear) IIIIIIII
Front suspension ball jointsIIIIIIII
Bolt and nuts on chassis and bodyIIIIIIII
Air conditioner refrigerant IIIIIIII
Air conditioner compressorIIIIIIII
Climate control air filterIIIIIIII
Exhaust systemIIII
MAINTENANCE
INTERVALS
MAINTENANCE
ITEM
I : Inspect and if necessary, adjust, correct, clean or replace.
R : Replace or change.
Page 554 of 613
7-36
Maintenance
T TY
YR
RE
ES
S
A
AN
ND
D
W
WH
HE
EE
EL
LS
S
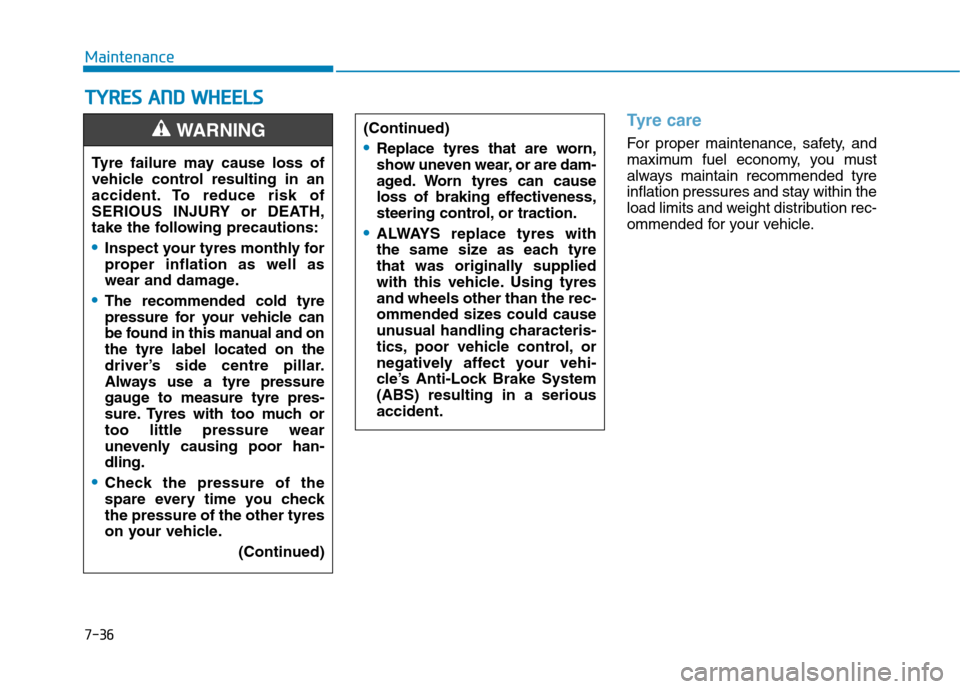
Tyre care
For proper maintenance, safety, and
maximum fuel economy, you must
always maintain recommended tyre
inflation pressures and stay within the
load limits and weight distribution rec-
ommended for your vehicle. (Continued)Replace tyres that are worn,
show uneven wear, or are dam-
aged. Worn tyres can cause
loss of braking effectiveness,
steering control, or traction.
ALWAYS replace tyres with
the same size as each tyre
that was originally supplied
with this vehicle. Using tyres
and wheels other than the rec-
ommended sizes could cause
unusual handling characteris-
tics, poor vehicle control, or
negatively affect your vehi-
cle’s Anti-Lock Brake System
(ABS) resulting in a serious
accident.
Tyre failure may cause loss of
vehicle control resulting in an
accident. To reduce risk of
SERIOUS INJURY or DEATH,
take the following precautions:
Inspect your tyres monthly for
proper inflation as well as
wear and damage.
The recommended cold tyre
pressure for your vehicle can
be found in this manual and on
the tyre label located on the
driver’s side centre pillar.
Always use a tyre pressure
gauge to measure tyre pres-
sure. Tyres with too much or
too little pressure wear
unevenly causing poor han-
dling.
Check the pressure of the
spare every time you check
the pressure of the other tyres
on your vehicle.
(Continued)
WARNING
Page 555 of 613
7-37
7
Maintenance
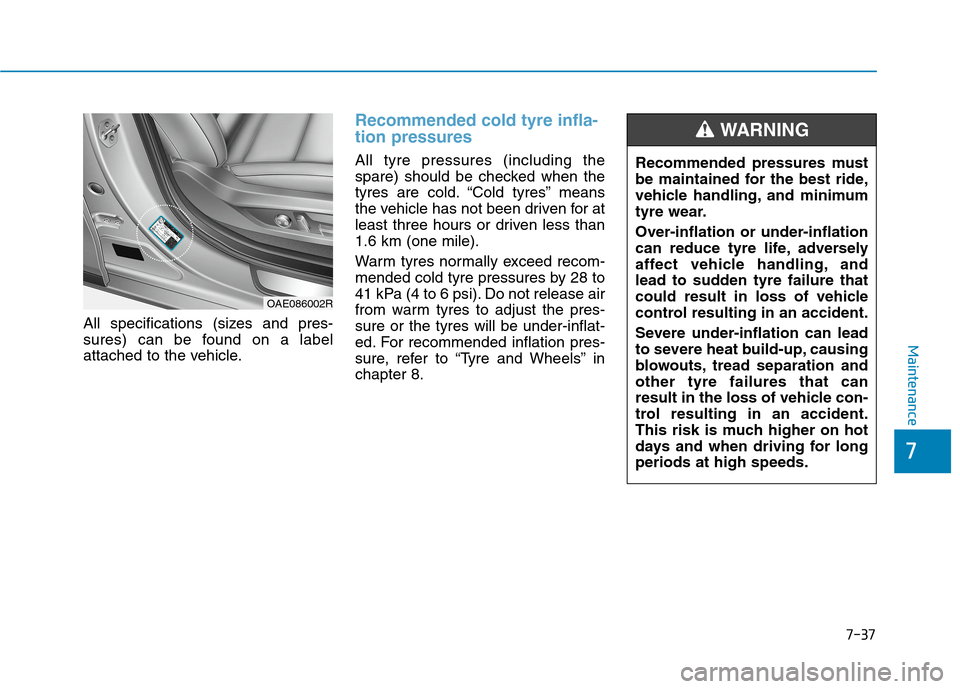
All specifications (sizes and pres-
sures) can be found on a label
attached to the vehicle.
Recommended cold tyre infla-
tion pressures
All tyre pressures (including the
spare) should be checked when the
tyres are cold. “Cold tyres” means
the vehicle has not been driven for at
least three hours or driven less than
1.6 km (one mile).
Warm tyres normally exceed recom-
mended cold tyre pressures by 28 to
41 kPa (4 to 6 psi). Do not release air
from warm tyres to adjust the pres-
sure or the tyres will be under-inflat-
ed. For recommended inflation pres-
sure, refer to “Tyre and Wheels” in
chapter 8.Recommended pressures must
be maintained for the best ride,
vehicle handling, and minimum
tyre wear.
Over-inflation or under-inflation
can reduce tyre life, adversely
affect vehicle handling, and
lead to sudden tyre failure that
could result in loss of vehicle
control resulting in an accident.
Severe under-inflation can lead
to severe heat build-up, causing
blowouts, tread separation and
other tyre failures that can
result in the loss of vehicle con-
trol resulting in an accident.
This risk is much higher on hot
days and when driving for long
periods at high speeds.
WARNING
OAE086002R
Page 556 of 613
7-38
Maintenance
Check tyre inflation pressure
Check your tyres, including the spare
tyre, once a month or more.
How to check
Use a good quality tyre pressure
gauge to check tyre pressure. You
can not tell if your tyres are properly
inflated simply by looking at them.
Radial tyres may look properly inflat-
ed when they are under-inflated.
Remove the valve cap from the tyre
valve stem. Press the tyre gauge
firmly onto the valve to get a pres-
sure measurement. If the cold tyre
inflation pressure matches the rec-
ommended pressure on the tyre and
loading information label, no further
adjustment is necessary. If the pres-
sure is low, add air until you reach
the recommended pressure. Make
sure to put the valve caps back on
the valve stems. Without the valve
cap, dirt or moisture could get into
the valve core and cause air leakage.
If a valve cap is missing, install a new
one as soon as possible.If you overfill the tyre, release air by
pushing on the metal stem in the
centre of the tyre valve. Recheck the
tyre pressure with the tyre gauge. Be
sure to put the valve caps back on
the valve stems. Without the valve
cap, dirt or moisture could get into
the valve core and cause air leakage.
If a valve cap is missing, install a new
one as soon as possible.
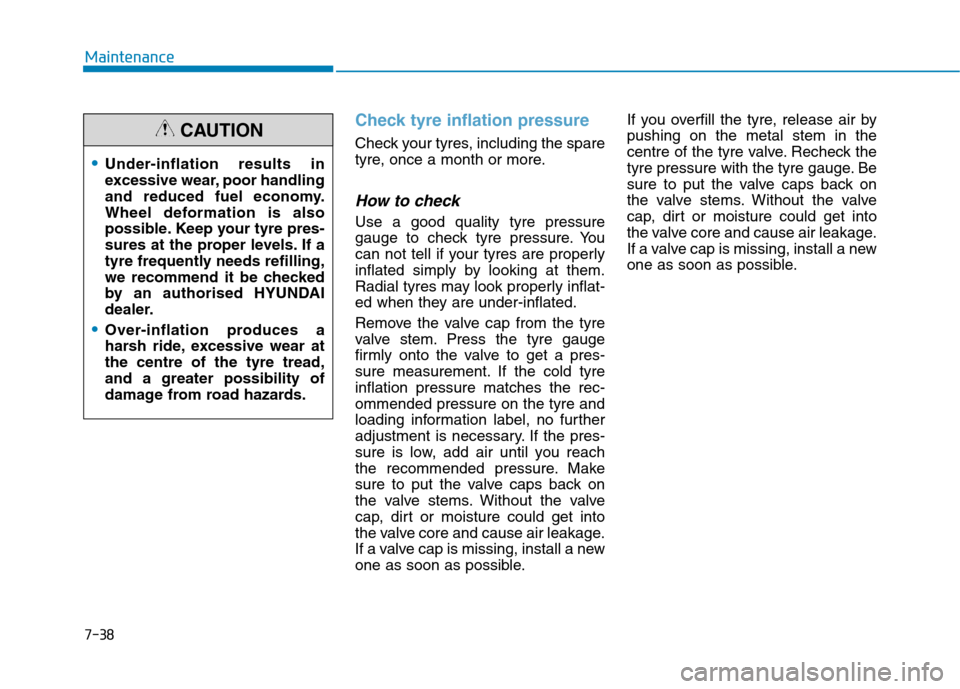
Under-inflation results in
excessive wear, poor handling
and reduced fuel economy.
Wheel deformation is also
possible. Keep your tyre pres-
sures at the proper levels. If a
tyre frequently needs refilling,
we recommend it be checked
by an authorised HYUNDAI
dealer.
Over-inflation produces a
harsh ride, excessive wear at
the centre of the tyre tread,
and a greater possibility of
damage from road hazards.
CAUTION