2020 FORD EXPLORER buttons
[x] Cancel search: buttonsPage 72 of 555
LOCKING AND UNLOCKING
You can use the power door lock control
or the remote control to lock and unlock
your vehicle.
Power Door Locks
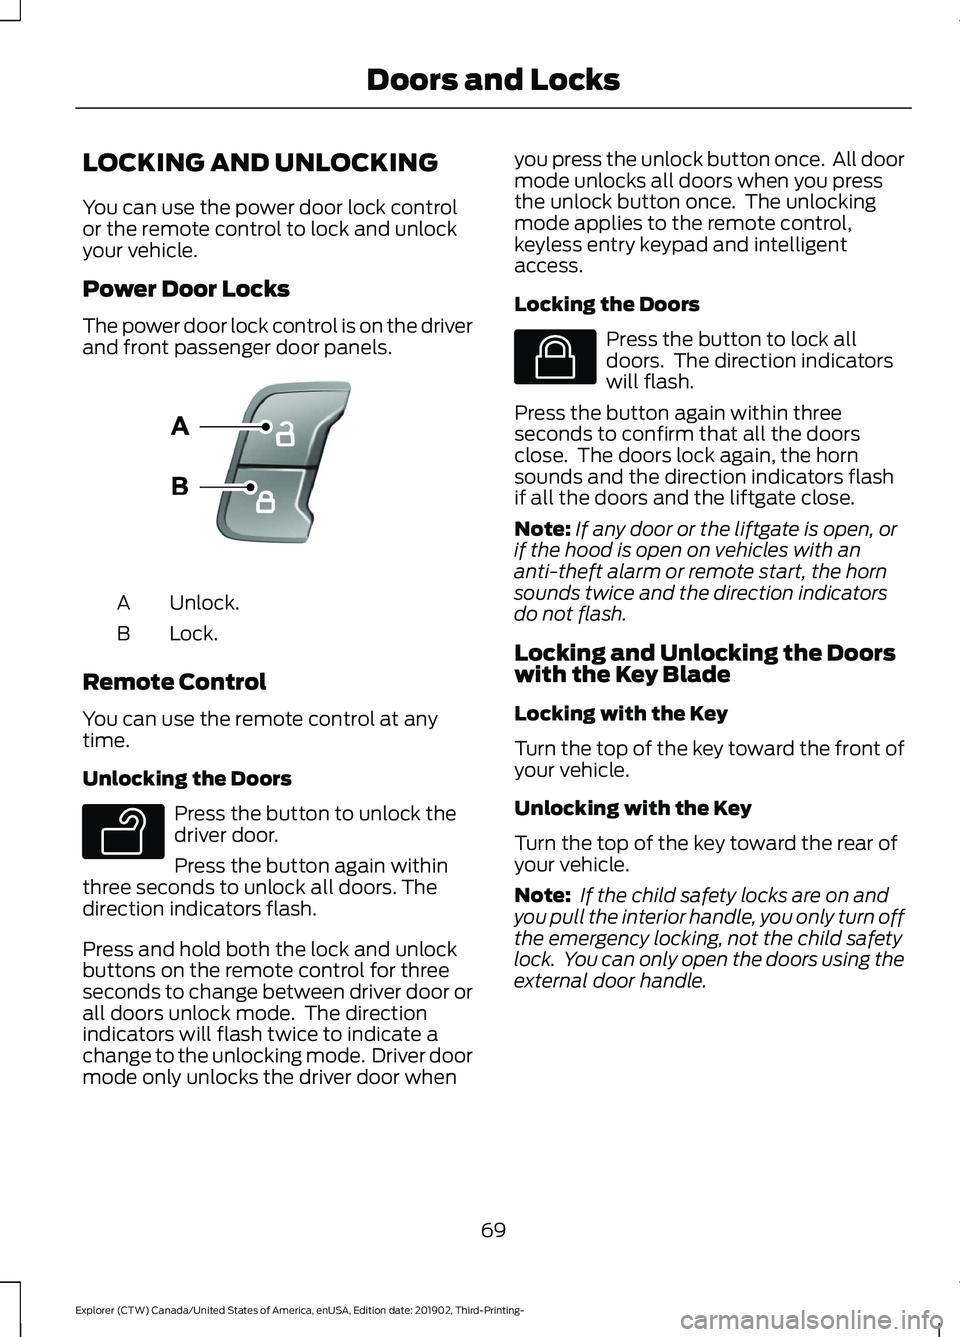
The power door lock control is on the driver
and front passenger door panels.
Unlock.
A
Lock.
B
Remote Control
You can use the remote control at any
time.
Unlocking the Doors Press the button to unlock the
driver door.
Press the button again within
three seconds to unlock all doors. The
direction indicators flash.
Press and hold both the lock and unlock
buttons on the remote control for three
seconds to change between driver door or
all doors unlock mode. The direction
indicators will flash twice to indicate a
change to the unlocking mode. Driver door
mode only unlocks the driver door when you press the unlock button once. All door
mode unlocks all doors when you press
the unlock button once. The unlocking
mode applies to the remote control,
keyless entry keypad and intelligent
access.
Locking the Doors Press the button to lock all
doors. The direction indicators
will flash.
Press the button again within three
seconds to confirm that all the doors
close. The doors lock again, the horn
sounds and the direction indicators flash
if all the doors and the liftgate close.
Note: If any door or the liftgate is open, or
if the hood is open on vehicles with an
anti-theft alarm or remote start, the horn
sounds twice and the direction indicators
do not flash.
Locking and Unlocking the Doors
with the Key Blade
Locking with the Key
Turn the top of the key toward the front of
your vehicle.
Unlocking with the Key
Turn the top of the key toward the rear of
your vehicle.
Note: If the child safety locks are on and
you pull the interior handle, you only turn off
the emergency locking, not the child safety
lock. You can only open the doors using the
external door handle.
69
Explorer (CTW) Canada/United States of America, enUSA, Edition date: 201902, Third-Printing- Doors and LocksE138628 E138629 E138623
Page 92 of 555

Flashing High Beam Headlamps
Pull the lever toward you and release it to
flash the high beam headlamps.
AUTOLAMPS
WARNING: The system does not
relieve you of your responsibility to drive
with due care and attention. You may
need to override the system if it does not
turn the headlamps on in low visibility
conditions, for example daytime fog.
Autolamps turn the headlamps on in low
light situations or when the wipers operate. Switch the lighting control to the
autolamps position.
Note: The lighting control defaults to
autolamps each time you switch your
vehicle on.
The headlamps remain on for a period of
time after you switch the ignition off. Use
the touchscreen to adjust the period of
time that the headlamps remain on.
Note: If you switch the autolamps on, you
cannot switch the high beams on until the
system turns the low beams on. Windshield Wiper Activated
Headlamps
When you switch the autolamps on, the
headlamps turn on within 10 seconds of
switching the wipers on. They turn off
approximately 60 seconds after you switch
the windshield wipers off.
The headlamps do not turn on with the
wipers:
•
During a single wipe.
• When using the windshield washers.
• If the wipers are in intermittent mode.
Note: If you switch the autolamps and the
autowipers on, the headlamps turn on when
the windshield wipers continuously operate.
INSTRUMENT LIGHTING
DIMMER
The instrument lighting dimmer buttons
are on the lighting control. Repeatedly press one of the
buttons to adjust the brightness.
HEADLAMP EXIT DELAY
After you switch the ignition off, you can
switch the headlamps on by pulling the
direction indicator lever toward you. You
will hear a short tone. The headlamps will
switch off automatically after three
minutes with any door open or 30 seconds
after the last door has been closed. You
can cancel this feature by pulling the
direction indicator toward you again or
switching the ignition on.
89
Explorer (CTW) Canada/United States of America, enUSA, Edition date: 201902, Third-Printing- LightingE248604 E281240 E291299 E296433
Page 115 of 555
GENERAL INFORMATION
WARNING: Driving while distracted
can result in loss of vehicle control, crash
and injury. We strongly recommend that
you use extreme caution when using any
device that may take your focus off the
road. Your primary responsibility is the
safe operation of your vehicle. We
recommend against the use of any
hand-held device while driving and
encourage the use of voice-operated
systems when possible. Make sure you
are aware of all applicable local laws
that may affect the use of electronic
devices while driving.
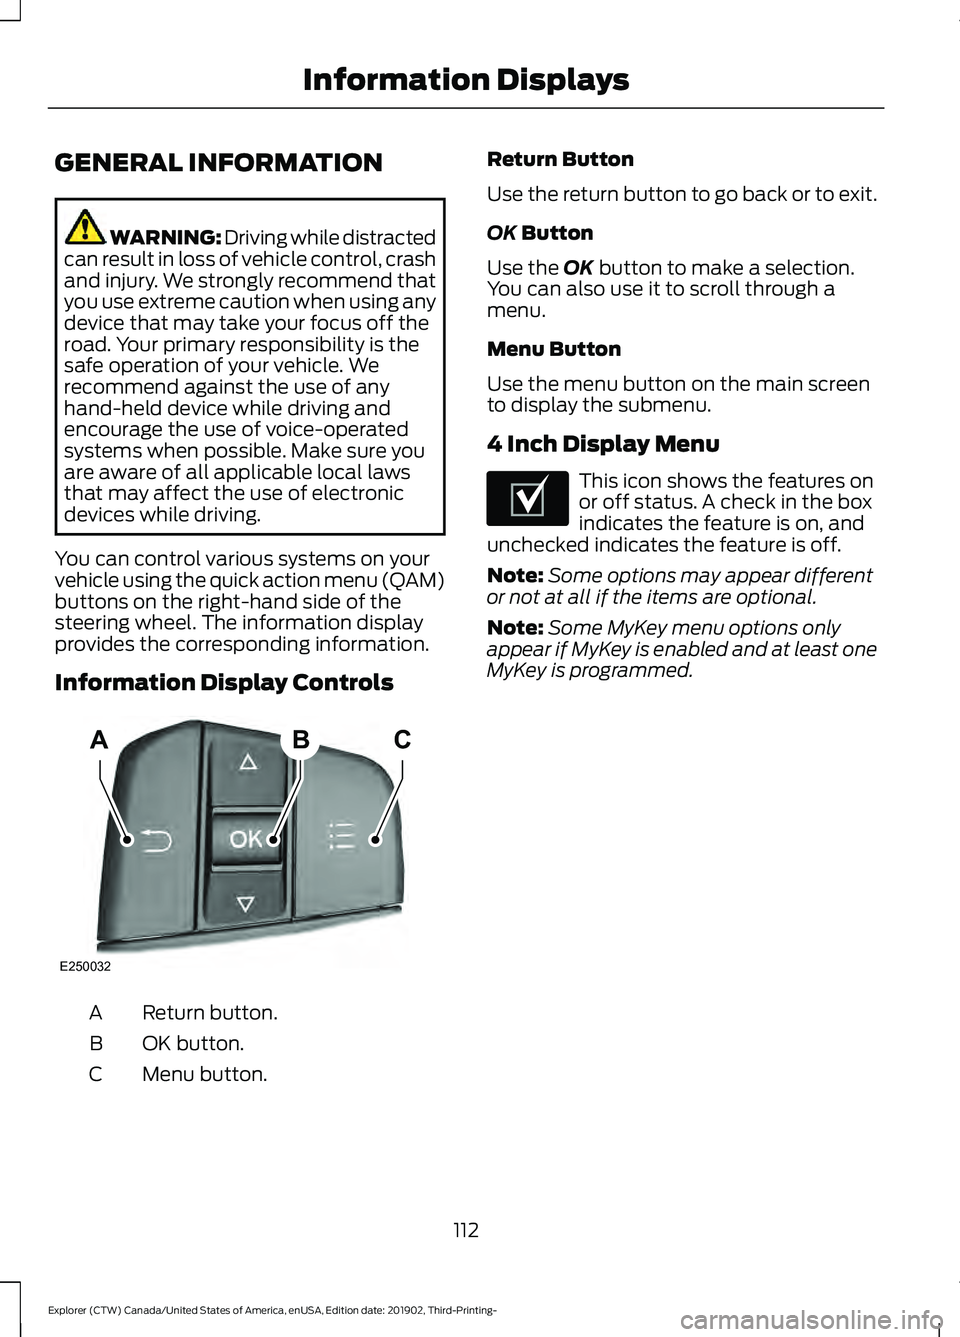
You can control various systems on your
vehicle using the quick action menu (QAM)
buttons on the right-hand side of the
steering wheel. The information display
provides the corresponding information.
Information Display Controls Return button.
A
OK button.
B
Menu button.
C Return Button
Use the return button to go back or to exit.
OK Button
Use the
OK button to make a selection.
You can also use it to scroll through a
menu.
Menu Button
Use the menu button on the main screen
to display the submenu.
4 Inch Display Menu This icon shows the features on
or off status. A check in the box
indicates the feature is on, and
unchecked indicates the feature is off.
Note: Some options may appear different
or not at all if the items are optional.
Note: Some MyKey menu options only
appear if MyKey is enabled and at least one
MyKey is programmed.
112
Explorer (CTW) Canada/United States of America, enUSA, Edition date: 201902, Third-Printing- Information DisplaysABC
E250032 E204495
Page 148 of 555
WARNING: The head restraint is a
safety device. Whenever possible it
should be installed and properly
adjusted when the seat is occupied.
Failure to adjust the head restraint
properly could reduce its effectiveness
during certain impacts.
Note: Adjust the seat backrest to an upright
driving position before adjusting the head
restraint. Adjust the head restraint so that
the top of it is level with the top of your head
and as far forward as possible. Make sure
that you remain comfortable. If you are
extremely tall, adjust the head restraint to
its highest position.
Adjusting the Head Restraints
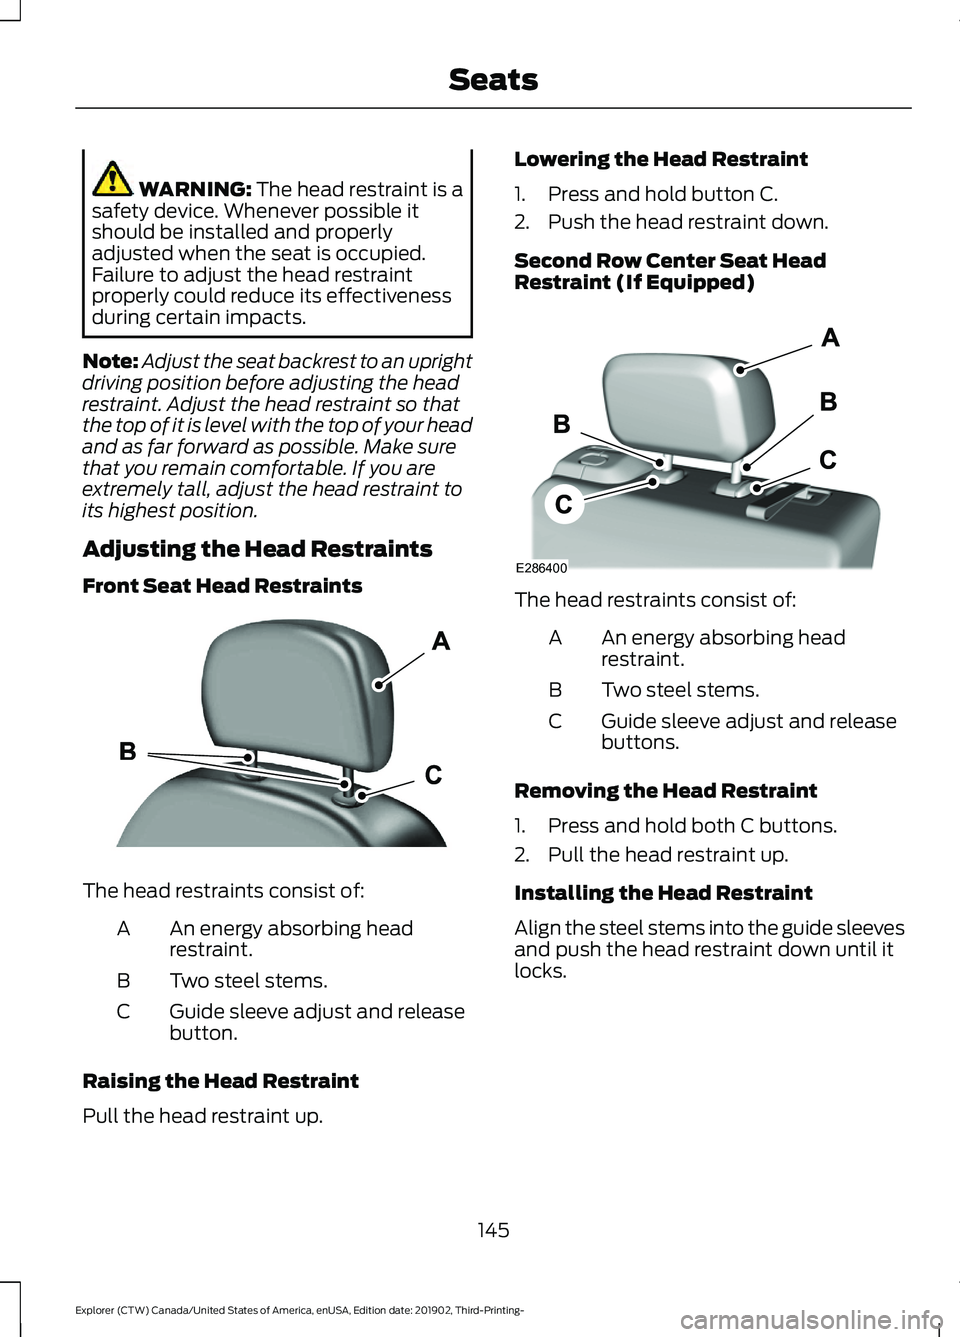
Front Seat Head Restraints The head restraints consist of:
An energy absorbing head
restraint.
A
Two steel stems.
B
Guide sleeve adjust and release
button.
C
Raising the Head Restraint
Pull the head restraint up. Lowering the Head Restraint
1. Press and hold button C.
2. Push the head restraint down.
Second Row Center Seat Head
Restraint (If Equipped)
The head restraints consist of:
An energy absorbing head
restraint.
A
Two steel stems.
B
Guide sleeve adjust and release
buttons.
C
Removing the Head Restraint
1. Press and hold both C buttons.
2. Pull the head restraint up.
Installing the Head Restraint
Align the steel stems into the guide sleeves
and push the head restraint down until it
locks.
145
Explorer (CTW) Canada/United States of America, enUSA, Edition date: 201902, Third-Printing- SeatsE291139 E286400
Page 149 of 555
Second Row Outermost Seat Head
Restraints
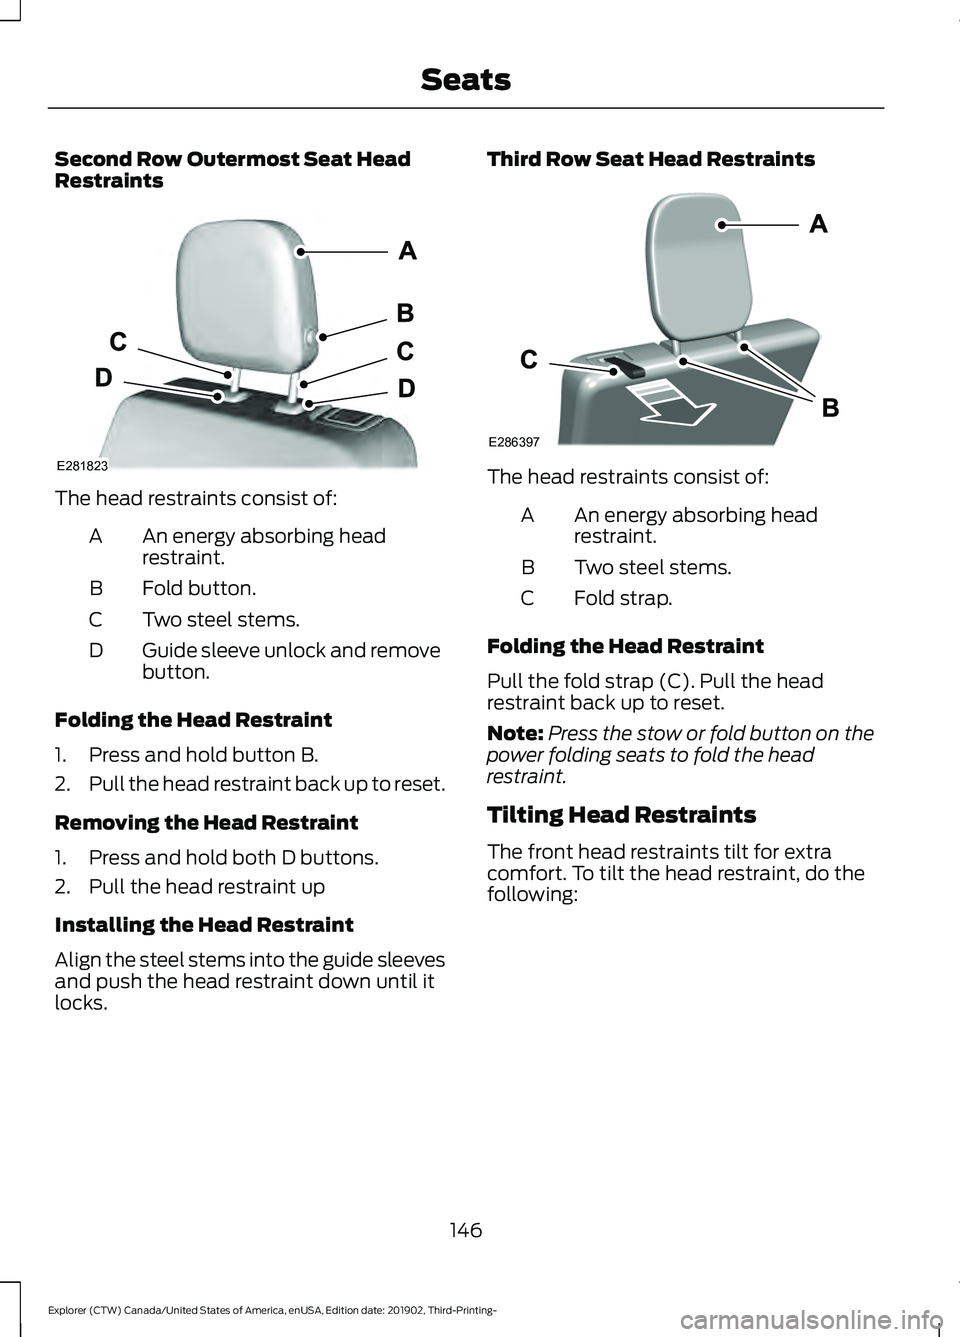
The head restraints consist of:
An energy absorbing head
restraint.
A
Fold button.
B
Two steel stems.
C
Guide sleeve unlock and remove
button.
D
Folding the Head Restraint
1. Press and hold button B.
2. Pull the head restraint back up to reset.
Removing the Head Restraint
1. Press and hold both D buttons.
2. Pull the head restraint up
Installing the Head Restraint
Align the steel stems into the guide sleeves
and push the head restraint down until it
locks. Third Row Seat Head Restraints
The head restraints consist of:
An energy absorbing head
restraint.
A
Two steel stems.
B
Fold strap.
C
Folding the Head Restraint
Pull the fold strap (C). Pull the head
restraint back up to reset.
Note: Press the stow or fold button on the
power folding seats to fold the head
restraint.
Tilting Head Restraints
The front head restraints tilt for extra
comfort. To tilt the head restraint, do the
following:
146
Explorer (CTW) Canada/United States of America, enUSA, Edition date: 201902, Third-Printing- SeatsE281823 E286397
Page 159 of 555
1. To return the seat backrest to the
upright position, pull the long strap
until the seat backrest locks.
2. Pull the head restraints up to their normal positions.
Adjusting the Third Row Power
Seats
Note: The power rear seat functions disable
10 minutes after you switch the ignition off.
The transmission must be in park (P) and
the liftgate must be open to operate the
seats.
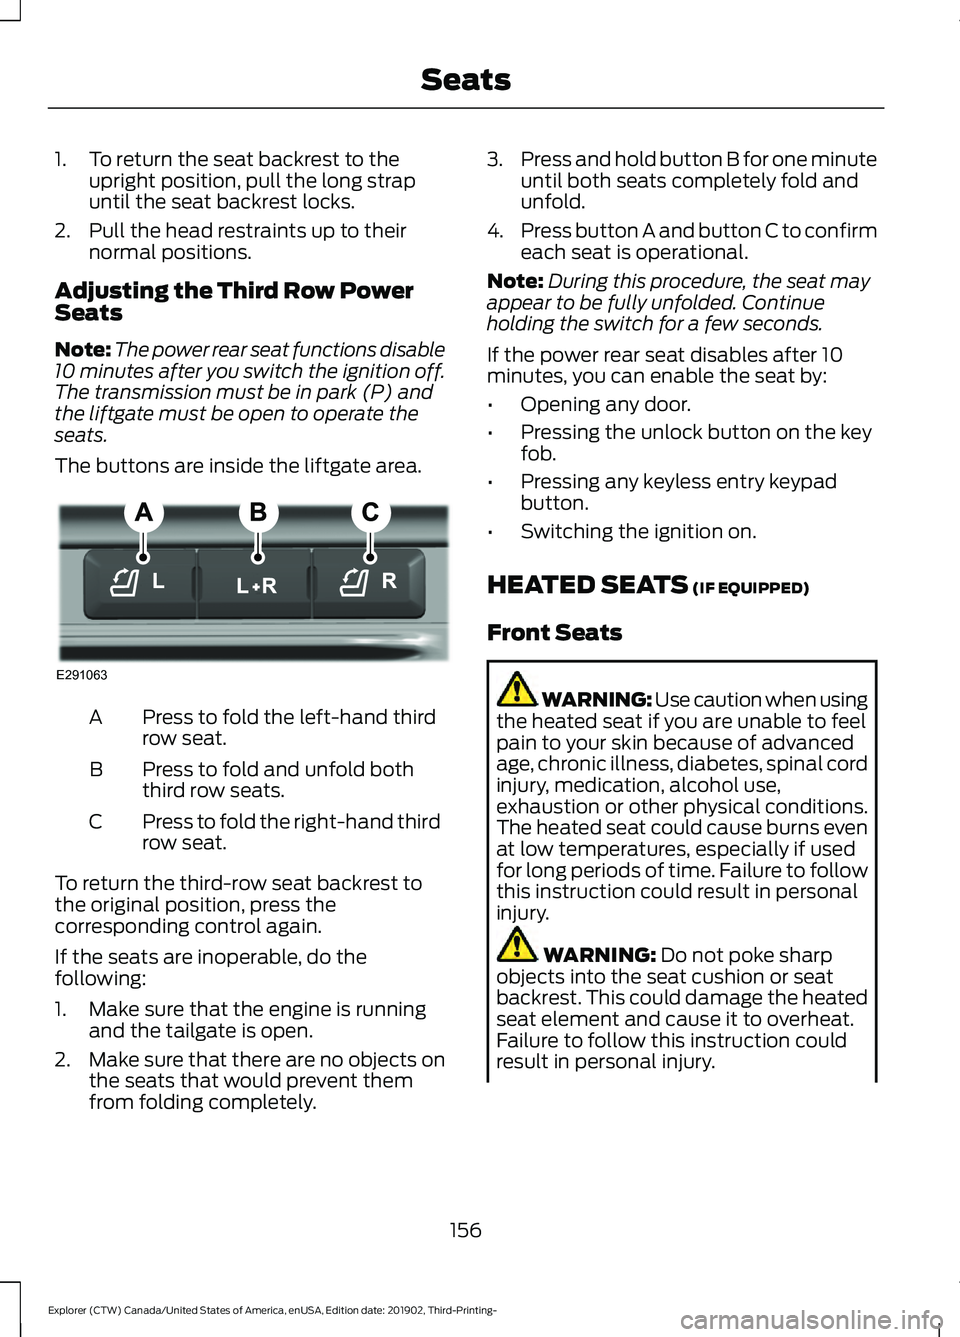
The buttons are inside the liftgate area. Press to fold the left-hand third
row seat.
A
Press to fold and unfold both
third row seats.
B
Press to fold the right-hand third
row seat.
C
To return the third-row seat backrest to
the original position, press the
corresponding control again.
If the seats are inoperable, do the
following:
1. Make sure that the engine is running and the tailgate is open.
2. Make sure that there are no objects on
the seats that would prevent them
from folding completely. 3.
Press and hold button B for one minute
until both seats completely fold and
unfold.
4. Press button A and button C to confirm
each seat is operational.
Note: During this procedure, the seat may
appear to be fully unfolded. Continue
holding the switch for a few seconds.
If the power rear seat disables after 10
minutes, you can enable the seat by:
• Opening any door.
• Pressing the unlock button on the key
fob.
• Pressing any keyless entry keypad
button.
• Switching the ignition on.
HEATED SEATS (IF EQUIPPED)
Front Seats WARNING: Use caution when using
the heated seat if you are unable to feel
pain to your skin because of advanced
age, chronic illness, diabetes, spinal cord
injury, medication, alcohol use,
exhaustion or other physical conditions.
The heated seat could cause burns even
at low temperatures, especially if used
for long periods of time. Failure to follow
this instruction could result in personal
injury. WARNING:
Do not poke sharp
objects into the seat cushion or seat
backrest. This could damage the heated
seat element and cause it to overheat.
Failure to follow this instruction could
result in personal injury.
156
Explorer (CTW) Canada/United States of America, enUSA, Edition date: 201902, Third-Printing- SeatsE291063
Page 165 of 555
UNIVERSAL GARAGE DOOR
OPENER
HomeLink Wireless Control
System
WARNING: Do not use the system
with any garage door opener that does
not have the safety stop and reverse
feature as required by U.S. Federal
Safety Standards (this includes any
garage door opener manufactured
before April 1, 1982). A garage door
opener which cannot detect an object,
signaling the door to stop and reverse,
does not meet current federal safety
standards. Using a garage door opener
without these features increases the risk
of serious injury or death.
Note: Make sure that the garage door and
security device are free from obstruction
when you are programming. Do not program
the system with the vehicle in the garage.
Note: Make sure you keep the original
remote control transmitter for use in other
vehicles as well as for future system
programming.
Note: We recommend that upon the sale
or lease termination of your vehicle, you
erase the programmed function buttons for
security reasons. See Erasing the Function
Button Codes
.
Note: You can program a maximum of
three devices. To change or replace any of
the three devices after it has been initially
programmed, you must first erase the
current settings. See Erasing the Function
Button Codes
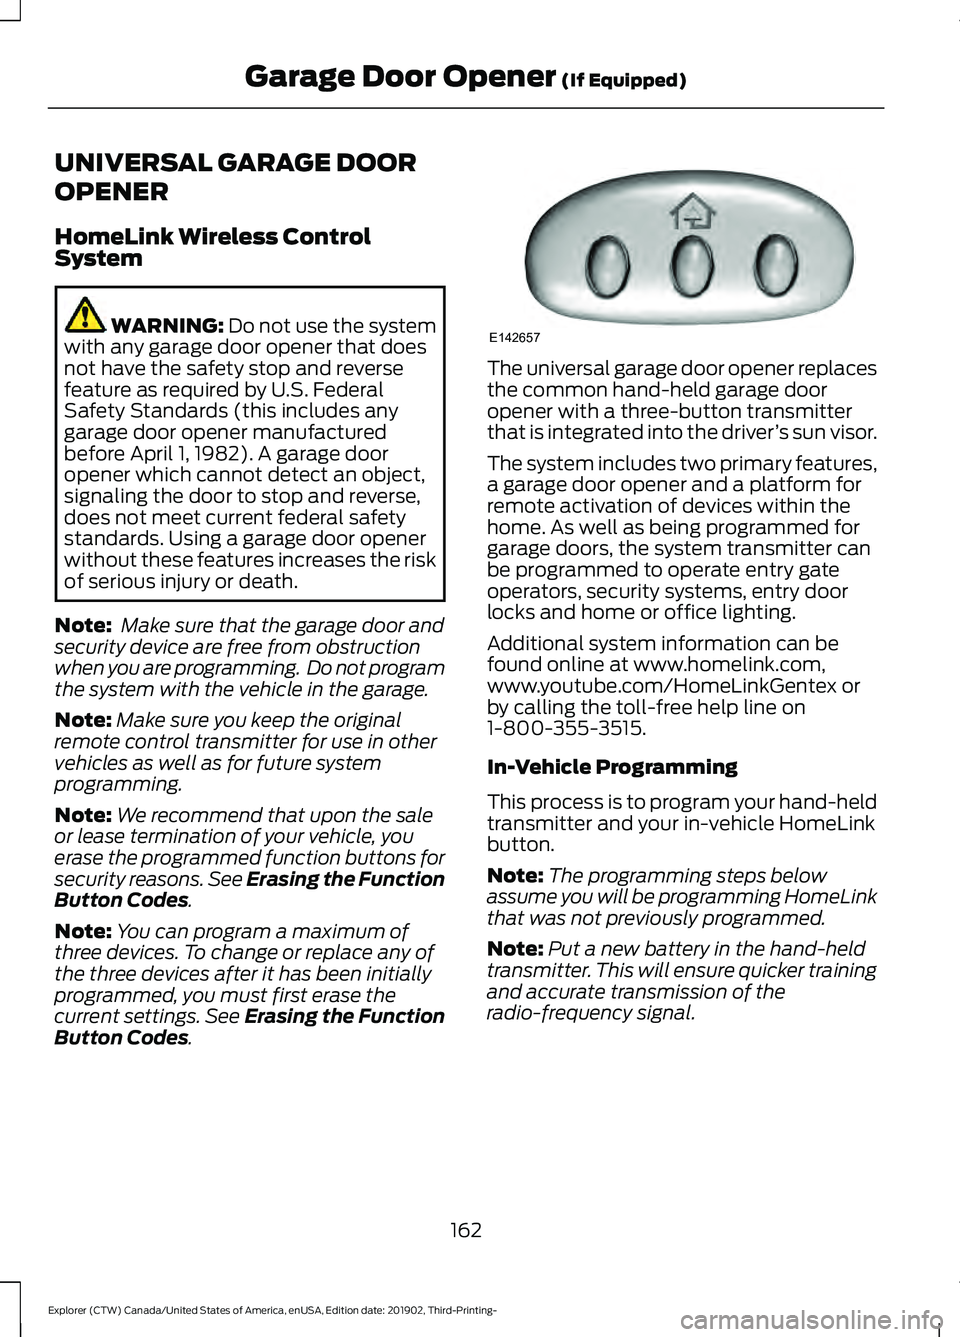
. The universal garage door opener replaces
the common hand-held garage door
opener with a three-button transmitter
that is integrated into the driver
’s sun visor.
The system includes two primary features,
a garage door opener and a platform for
remote activation of devices within the
home. As well as being programmed for
garage doors, the system transmitter can
be programmed to operate entry gate
operators, security systems, entry door
locks and home or office lighting.
Additional system information can be
found online at www.homelink.com,
www.youtube.com/HomeLinkGentex or
by calling the toll-free help line on
1-800-355-3515.
In-Vehicle Programming
This process is to program your hand-held
transmitter and your in-vehicle HomeLink
button.
Note: The programming steps below
assume you will be programming HomeLink
that was not previously programmed.
Note: Put a new battery in the hand-held
transmitter. This will ensure quicker training
and accurate transmission of the
radio-frequency signal.
162
Explorer (CTW) Canada/United States of America, enUSA, Edition date: 201902, Third-Printing- Garage Door Opener
(If Equipped)E142657
Page 166 of 555
1.
With your vehicle parked outside of the
garage, turn your ignition to the on
position, but do not start your vehicle.
2. Hold your hand-held garage door transmitter
2–6 in (5– 14 cm) away
from the HomeLink button you want
to program.
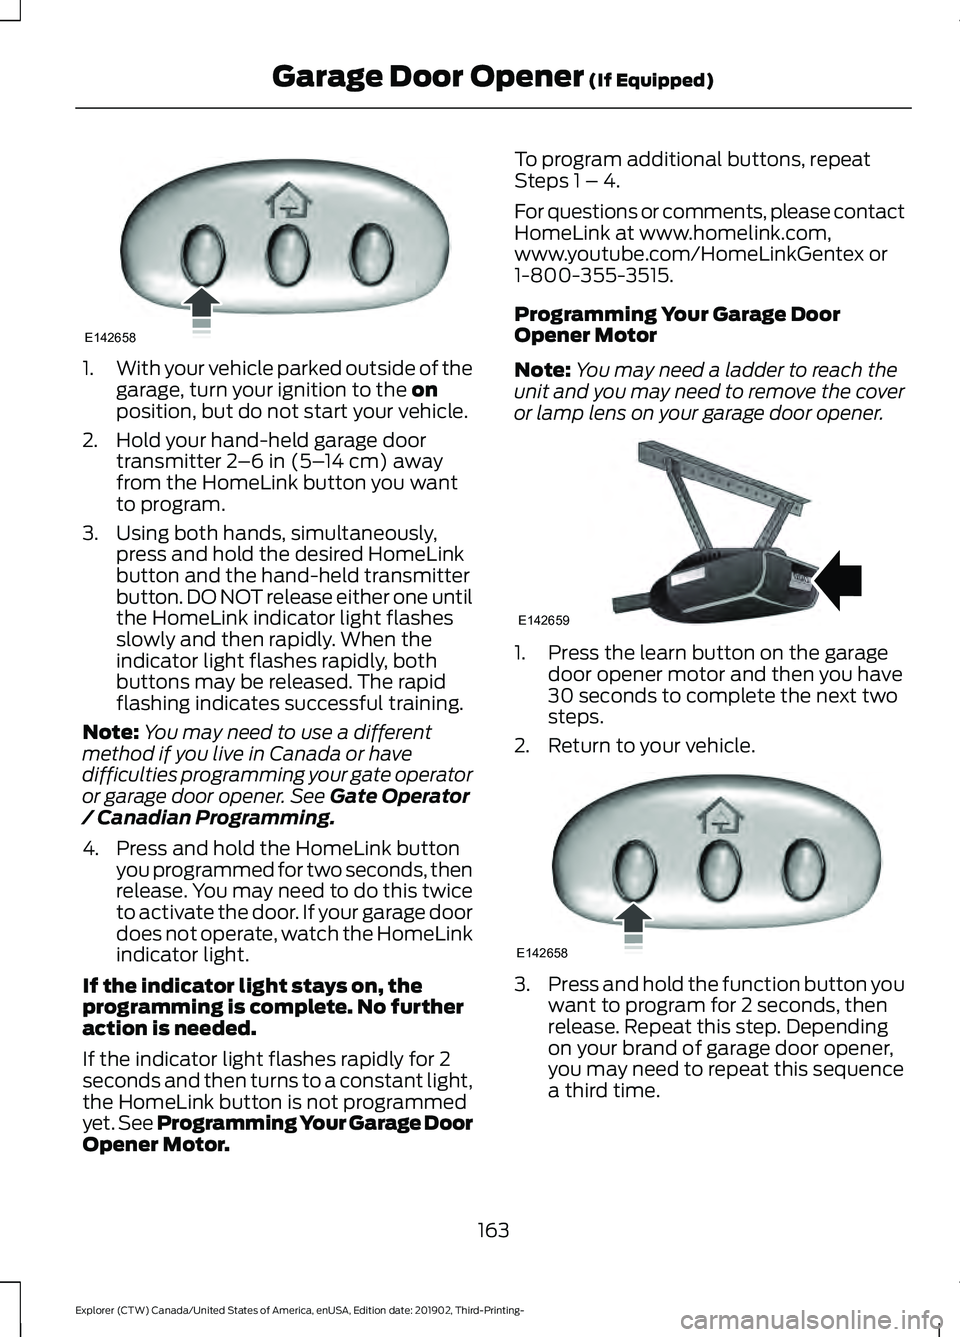
3. Using both hands, simultaneously, press and hold the desired HomeLink
button and the hand-held transmitter
button. DO NOT release either one until
the HomeLink indicator light flashes
slowly and then rapidly. When the
indicator light flashes rapidly, both
buttons may be released. The rapid
flashing indicates successful training.
Note: You may need to use a different
method if you live in Canada or have
difficulties programming your gate operator
or garage door opener. See
Gate Operator
/ Canadian Programming.
4. Press and hold the HomeLink button you programmed for two seconds, then
release. You may need to do this twice
to activate the door. If your garage door
does not operate, watch the HomeLink
indicator light.
If the indicator light stays on, the
programming is complete. No further
action is needed.
If the indicator light flashes rapidly for 2
seconds and then turns to a constant light,
the HomeLink button is not programmed
yet. See Programming Your Garage Door
Opener Motor. To program additional buttons, repeat
Steps 1 – 4.
For questions or comments, please contact
HomeLink at www.homelink.com,
www.youtube.com/HomeLinkGentex or
1-800-355-3515.
Programming Your Garage Door
Opener Motor
Note:
You may need a ladder to reach the
unit and you may need to remove the cover
or lamp lens on your garage door opener. 1. Press the learn button on the garage
door opener motor and then you have
30 seconds to complete the next two
steps.
2. Return to your vehicle. 3.
Press and hold the function button you
want to program for 2 seconds, then
release. Repeat this step. Depending
on your brand of garage door opener,
you may need to repeat this sequence
a third time.
163
Explorer (CTW) Canada/United States of America, enUSA, Edition date: 201902, Third-Printing- Garage Door Opener
(If Equipped)E142658 E142659 E142658