2020 FORD EXPLORER change wheel
[x] Cancel search: change wheelPage 361 of 555

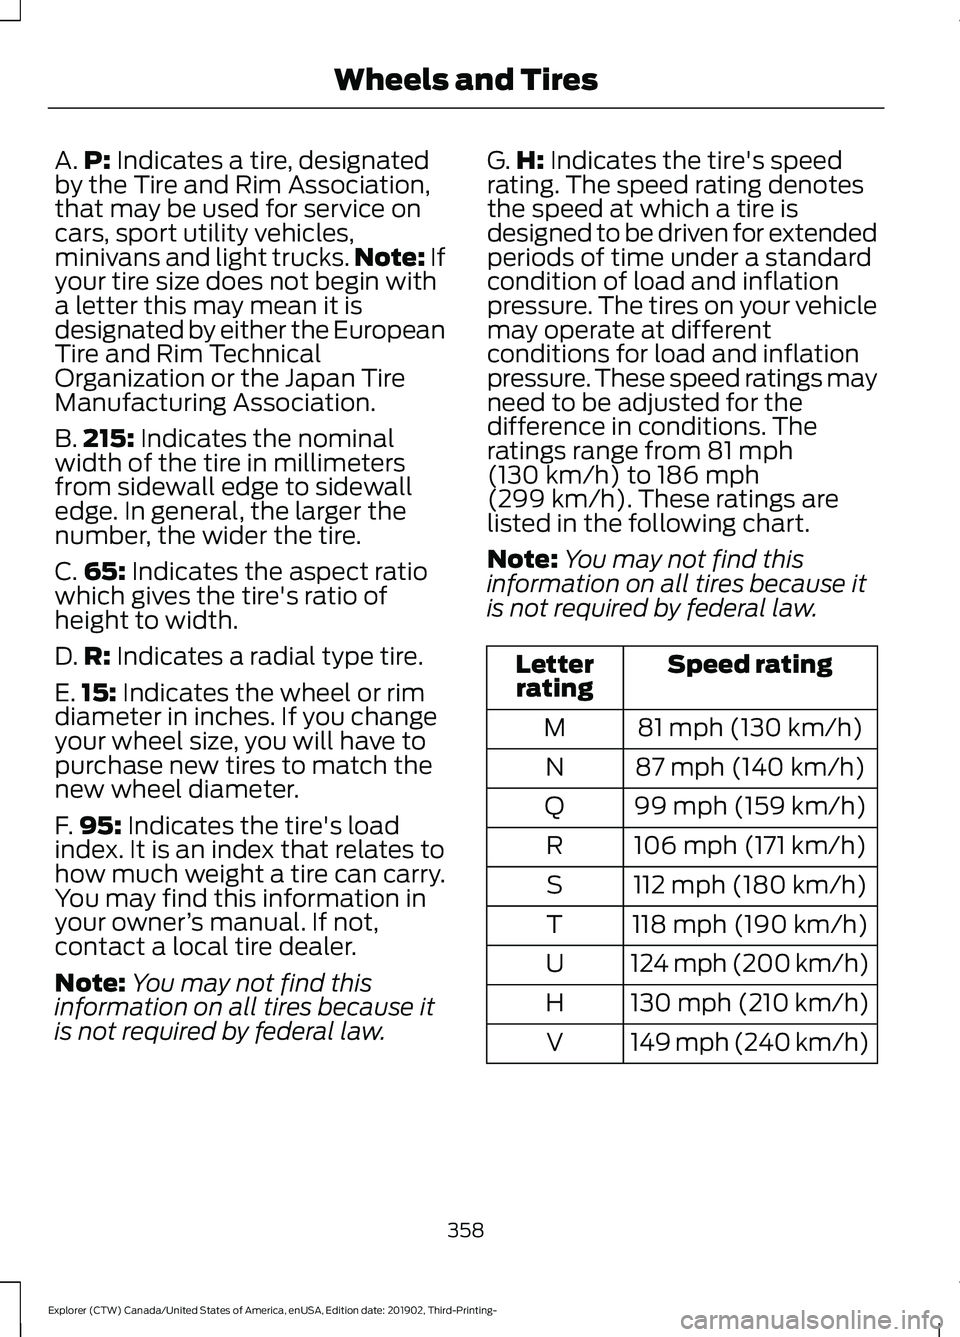
A.
P: Indicates a tire, designated
by the Tire and Rim Association,
that may be used for service on
cars, sport utility vehicles,
minivans and light trucks. Note:
If
your tire size does not begin with
a letter this may mean it is
designated by either the European
Tire and Rim Technical
Organization or the Japan Tire
Manufacturing Association.
B. 215:
Indicates the nominal
width of the tire in millimeters
from sidewall edge to sidewall
edge. In general, the larger the
number, the wider the tire.
C. 65:
Indicates the aspect ratio
which gives the tire's ratio of
height to width.
D. R:
Indicates a radial type tire.
E. 15:
Indicates the wheel or rim
diameter in inches. If you change
your wheel size, you will have to
purchase new tires to match the
new wheel diameter.
F. 95:
Indicates the tire's load
index. It is an index that relates to
how much weight a tire can carry.
You may find this information in
your owner ’s manual. If not,
contact a local tire dealer.
Note: You may not find this
information on all tires because it
is not required by federal law. G.
H:
Indicates the tire's speed
rating. The speed rating denotes
the speed at which a tire is
designed to be driven for extended
periods of time under a standard
condition of load and inflation
pressure. The tires on your vehicle
may operate at different
conditions for load and inflation
pressure. These speed ratings may
need to be adjusted for the
difference in conditions. The
ratings range from
81 mph
(130 km/h) to 186 mph
(299 km/h). These ratings are
listed in the following chart.
Note: You may not find this
information on all tires because it
is not required by federal law. Speed rating
Letter
rating
81 mph (130 km/h)
M
87 mph (140 km/h)
N
99 mph (159 km/h)
Q
106 mph (171 km/h)
R
112 mph (180 km/h)
S
118 mph (190 km/h)
T
124 mph (200 km/h)
U
130 mph (210 km/h)
H
149 mph (240 km/h)
V
358
Explorer (CTW) Canada/United States of America, enUSA, Edition date: 201902, Third-Printing- Wheels and Tires
Page 365 of 555

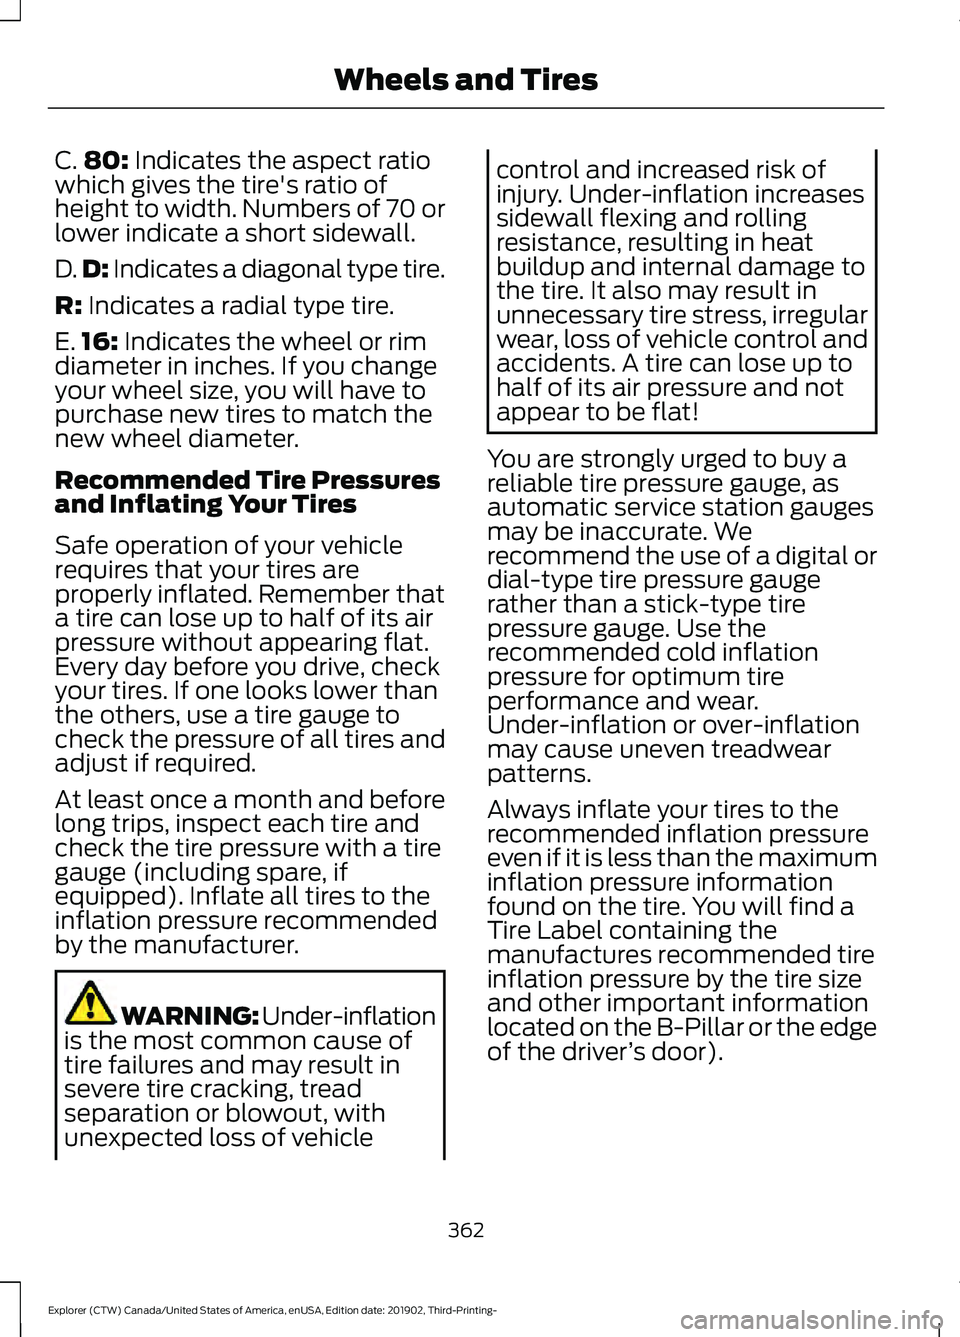
C.
80: Indicates the aspect ratio
which gives the tire's ratio of
height to width. Numbers of 70 or
lower indicate a short sidewall.
D. D:
Indicates a diagonal type tire.
R:
Indicates a radial type tire.
E. 16:
Indicates the wheel or rim
diameter in inches. If you change
your wheel size, you will have to
purchase new tires to match the
new wheel diameter.
Recommended Tire Pressures
and Inflating Your Tires
Safe operation of your vehicle
requires that your tires are
properly inflated. Remember that
a tire can lose up to half of its air
pressure without appearing flat.
Every day before you drive, check
your tires. If one looks lower than
the others, use a tire gauge to
check the pressure of all tires and
adjust if required.
At least once a month and before
long trips, inspect each tire and
check the tire pressure with a tire
gauge (including spare, if
equipped). Inflate all tires to the
inflation pressure recommended
by the manufacturer. WARNING: Under-inflation
is the most common cause of
tire failures and may result in
severe tire cracking, tread
separation or blowout, with
unexpected loss of vehicle control and increased risk of
injury. Under-inflation increases
sidewall flexing and rolling
resistance, resulting in heat
buildup and internal damage to
the tire. It also may result in
unnecessary tire stress, irregular
wear, loss of vehicle control and
accidents. A tire can lose up to
half of its air pressure and not
appear to be flat!
You are strongly urged to buy a
reliable tire pressure gauge, as
automatic service station gauges
may be inaccurate. We
recommend the use of a digital or
dial-type tire pressure gauge
rather than a stick-type tire
pressure gauge. Use the
recommended cold inflation
pressure for optimum tire
performance and wear.
Under-inflation or over-inflation
may cause uneven treadwear
patterns.
Always inflate your tires to the
recommended inflation pressure
even if it is less than the maximum
inflation pressure information
found on the tire. You will find a
Tire Label containing the
manufactures recommended tire
inflation pressure by the tire size
and other important information
located on the B-Pillar or the edge
of the driver ’s door).
362
Explorer (CTW) Canada/United States of America, enUSA, Edition date: 201902, Third-Printing- Wheels and Tires
Page 374 of 555

Please note that the TPMS is not a
substitute for proper tire maintenance, and
it is the driver
’s responsibility to maintain
correct tire pressure, even if under-inflation
has not reached the level to trigger
illumination of the TPMS low tire pressure
telltale.
Your vehicle has also been equipped with
a TPMS malfunction indicator to indicate
when the system is not operating properly.
The TPMS malfunction indicator is
combined with the low tire pressure
telltale. When the system detects a
malfunction, the telltale will flash for
approximately one minute and then remain
continuously illuminated. This sequence
will continue upon subsequent vehicle
start-ups as long as the malfunction exists.
When the malfunction indicator is
illuminated, the system may not be able
to detect or signal low tire pressure as
intended. TPMS malfunctions may occur
for a variety of reasons, including the
installation of replacement or alternate
tires or wheels on the vehicle that prevent
the TPMS from functioning properly.
Always check the TPMS malfunction
telltale after replacing one or more tires or
wheels on your vehicle to ensure that the
replacement or alternate tires and wheels
allow the TPMS to continue to function
properly.
This device complies with Part 15 of the
FCC Rules and with License exempt RSS
Standards of Industry Canada. Operation
is subject to the following two conditions:
1. This device may not cause harmful interference, and
2. This device must accept any interference received, including
interference that may cause undesired
operation. WARNING: Changes or
modifications not expressively approved
by the party responsible for compliance
could void the user's authority to operate
the equipment. The term "IC:" before the
radio certification number only signifies
that Industry Canada technical
specifications were met.
Changing Tires With a Tire
Pressure Monitoring System Note:
Each road tire is equipped with a tire
pressure sensor located inside the wheel
and tire assembly cavity. The pressure
sensor is attached to the valve stem. The
pressure sensor is covered by the tire and is
not visible unless the tire is removed. Take
care when changing the tire to avoid
damaging the sensor.
You should always have your tires serviced
by an authorized dealer.
Check the tire pressure periodically (at
least monthly) using an accurate tire
gauge. See
When Inflating Your Tires in
this chapter.
371
Explorer (CTW) Canada/United States of America, enUSA, Edition date: 201902, Third-Printing- Wheels and TiresE142549
Page 380 of 555

•
Use commercial car washing
equipment.
• Try to repair the dissimilar spare tire.
Use of one of the dissimilar spare tires
listed above at any one wheel location can
lead to impairment of the following:
• Handling, stability and braking
performance.
• Comfort and noise.
• Ground clearance and parking at curbs.
• Winter weather driving capability.
• Wet weather driving capability.
• Four-wheel driving capability.
3. Full-size dissimilar spare without
label on wheel.
When driving with the full-size dissimilar
spare wheel and tire assembly, do not:
• Exceed 70 mph (113 km/h).
• Use more than one dissimilar spare
wheel and tire assembly at a time.
• Use commercial car washing
equipment.
• Use snow chains on the end of the
vehicle with the dissimilar spare wheel
and tire assembly.
The usage of a full-size dissimilar spare
wheel and tire assembly can lead to
impairment of the following:
• Handling, stability and braking
performance.
• Comfort and noise.
• Ground clearance and parking at curbs.
• Winter weather driving capability.
• Wet weather driving capability.
• Four-wheel driving capability. When driving with the full-size dissimilar
spare wheel and tire assembly additional
caution should be given to:
•
Towing a trailer.
• Driving vehicles equipped with a
camper body.
• Driving vehicles with a load on the
cargo rack.
Drive cautiously when using a full-size
dissimilar spare wheel and tire assembly
and seek service as soon as possible.
Tire Change Procedure WARNING:
The jack supplied with
this vehicle is only intended for changing
wheels. Do not use the vehicle jack other
than when you are changing a wheel in
an emergency. WARNING: Check that the vehicle
jack is not damaged or deformed and
the thread is lubricated and clean. WARNING:
To help prevent your
vehicle from moving when changing a
wheel, shift the transmission into park
(P), set the parking brake and use an
appropriate block or wheel chock to
secure the wheel diagonally opposite to
the wheel being changed. For example,
when changing the front left wheel,
place an appropriate block or wheel
chock on the right rear wheel. WARNING:
Always use the jack
provided as original equipment with your
vehicle. If using a jack other than the one
provided, make sure the jack capacity is
adequate for the vehicle weight,
including any vehicle cargo or
modifications. If you are unsure if the jack
capacity is adequate, contact the
authorized dealer.
377
Explorer (CTW) Canada/United States of America, enUSA, Edition date: 201902, Third-Printing- Wheels and Tires
Page 381 of 555

WARNING: Do not work on your
vehicle when the jack is the only support
as your vehicle could slip off the jack.
Failure to follow this instruction could
result in personal injury or death. WARNING:
Use only the specified
jacking points. If you use other positions,
you may damage the body, steering,
suspension, engine, braking system or
the fuel lines. WARNING:
Never place anything
between the vehicle jack and your
vehicle. WARNING:
Never place anything
between the vehicle jack and the ground. WARNING:
Park your vehicle so
that you do not obstruct the flow of
traffic or place yourself in any danger and
set up a warning triangle. WARNING:
Do not attempt to
change a tire on the side of the vehicle
close to moving traffic. Pull far enough
off the road to avoid the danger of being
hit when operating the jack or changing
the wheel.
Note: Passengers should not remain in your
vehicle when the vehicle is being jacked.
Note: Jack at the specified locations to
avoid damage to the vehicle. Note:
No maintenance or additional
lubrication of your jack is required over the
service life of your vehicle.
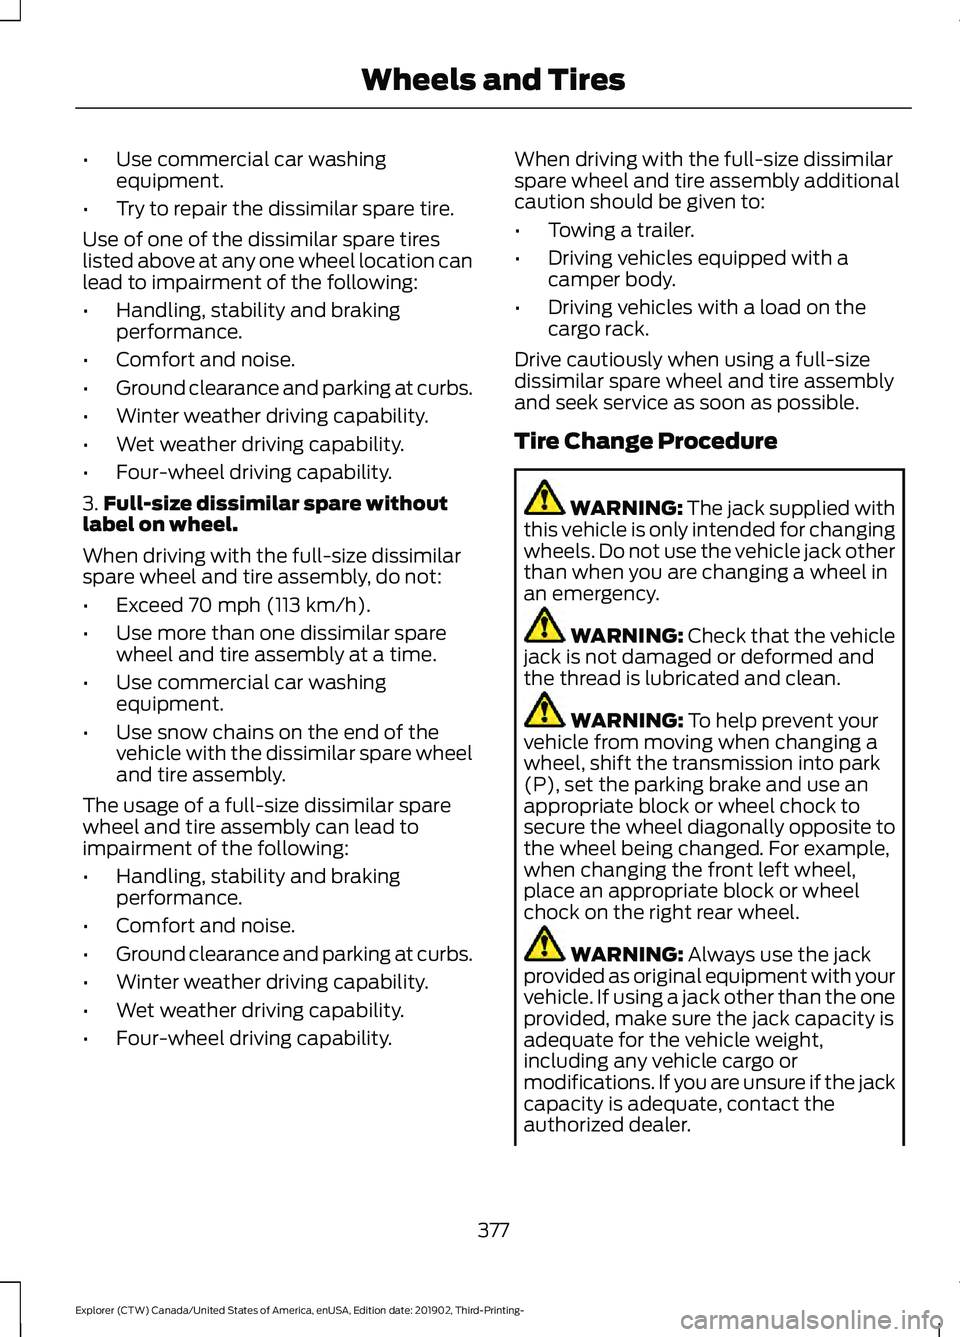
1. Park on a level surface, set the parking
brake and switch on the hazard
flashers.
2. Apply the parking brake, place the transmission in park (P) or reverse (R)
for manual transmission. Turn the
engine off.
3. If your vehicle has air suspension, use the touch screen to switch on the Air
Suspension Service Mode prior to
jacking. 4. Block the wheel diagonally opposite
the flat tire. For example, if the left
front tire is flat, block the right rear
wheel.
378
Explorer (CTW) Canada/United States of America, enUSA, Edition date: 201902, Third-Printing- Wheels and TiresE166722 E142551
Page 495 of 555

At Every Oil Change Interval as Indicated by the Information Display
1
Inspect the steering linkage, ball joints, suspension and the tire-rod ends.
Inspect the tires, tire wear and measure the tread depth.
Inspect the wheels and related components for abnormal noise, wear, looseness or
drag.
1 Do not exceed one year or 12,500 mi (20,000 km) between service intervals.
2 Reset the Intelligent Oil-Life Monitor after engine oil and filter changes. See Engine Oil
Check
(page 327). Brake Fluid Maintenance
1
Change the brake fluid. 2
Every 3 Years
1 Perform this maintenance item every 3 years. Do not exceed the designated time for
the interval.
2 Brake fluid servicing requires special equipment available at your authorized dealer. Other Maintenance Items
1
Replace the cabin air filter.
Every
20,000 mi
(32,186 km)
Replace the engine air filter.
Every
30,000 mi
(48,280 km)
Change the engine coolant and motor electronics coolant. 2
At
200,000 mi
(322,000 km)
Replace the spark plugs.
Every
100,000 mi
(160,000 km)
Inspect the accessory drive belt or belts. 3
Every
100,000 mi
(160,000 km)
492
Explorer (CTW) Canada/United States of America, enUSA, Edition date: 201902, Third-Printing- Scheduled Maintenance
Page 497 of 555

Extensive Idling or Low-speed Driving for Long Distances, as in Heavy Commercial Use
Change engine oil and filter as indicated by the information
display and perform services listed in the Normal Sched-
uled Maintenance chart.
As required
Replace cabin air filter.
Inspect frequently, service
as required
Replace engine air filter.
Replace spark plugs.
Every 60,000 mi
(96,000 km) Operating in Dusty or Sandy Conditions - Such as Unpaved or Dusty Roads
Replace cabin air filter.
Inspect frequently, service
as required
Replace engine air filter.
Inspect the wheels and related components for abnormal
noise, wear, looseness or drag.
Every
5,000 mi (8,000 km)
Rotate tires, inspect tires for wear and measure tread
depth.
Change engine oil and filter. 1
Every
5,000 mi (8,000 km)
or six months
Perform multi-point inspection.
1 Reset your Intelligent Oil-Life Monitor after engine oil and filter changes. See Oil Change
Indicator Reset
(page 328). Exclusive use of E85 - Flex Fuel Vehicles Only
If ran exclusively on E85, fill the fuel tank full with regular
unleaded fuel.
Every oil change
Exceptions
There are several exceptions to the Normal
Schedule: Axle and Transfer Case maintenance
:
The Transfer case, front and rear axles in
your vehicle do not require an any normal
scheduled maintenance. Vehicles are
electrically monitored and notify the driver
required service by displaying a message
in the information display. The transfer
case, front and rear axles are more likely
to require a fluid change if the vehicle has
494
Explorer (CTW) Canada/United States of America, enUSA, Edition date: 201902, Third-Printing- Scheduled Maintenance
Page 543 of 555

Changing a Bulb...........................................343
LED Lamps........................................................... 343
License Plate Lamp.......................................... 344
Rear Direction Indicator and Reversing Lamp................................................................. 343
Changing a Fuse............................................321
Fuses........................................................................\
321
Changing a Road Wheel
............................376
Dissimilar Spare Wheel and Tire Assembly
Information...................................................... 376
Tire Change Procedure..................................... 377
Changing the 12V Battery.........................338 Battery Management System....................... 339
Remove and Reinstall the Battery..............339
Changing the Engine Air Filter - 2.3L EcoBoost™.................................................329
Changing the Engine Air Filter - 3.0L................................................................330
Changing the Engine Air Filter - 3.3L..................................................................331
Changing the Front Wiper Blades.........342
Changing the Rear Wiper Blades...........342
Changing the Vehicle Wi-Fi Hotspot Name or Password
..................................429
Checking MyKey System Status..............66 MyKey Distance.................................................... 66
Number of Admin Keys...................................... 67
Number of MyKeys............................................... 67
Checking the Wiper Blades......................342
Child Restraint and Seatbelt Maintenance.................................................43
Child Restraint Positioning.........................35
Child Safety......................................................23 General Information............................................ 23
Child Safety Locks.........................................36 Left-Hand Side...................................................... 37
Right-Hand Side................................................... 37
Cleaning Leather Seats
.............................349
Cleaning Products.......................................345 Materials............................................................... 345
Cleaning the Engine
....................................347
Cleaning the Exterior..................................346 Cleaning the Headlamps................................ 346
Exterior Chrome Parts..................................... 346
Exterior Plastic Parts........................................ 346
Stripes or Graphics........................................... 346
Underbody............................................................ 347
Under Hood.......................................................... 347Cleaning the Instrument Panel and
Instrument Cluster Lens........................348
Cleaning the Interior...................................348 Mirrors.................................................................... 348
Cleaning the Wheels..................................350
Cleaning the Windows and Wiper Blades............................................................347
Clearing All MyKeys.......................................66
Climate............................................................456 Accessing Rear Climate Controls................458
Accessing the Climate Control Menu........456
Directing the Airflow........................................ 456
Rear Climate Control Lock Indicator..........458
Setting the Blower Motor Speed.................456
Setting the Temperature................................ 456
Switching Auto Mode On and Off...............456
Switching Dual Zone Mode On and Off....................................................................... 457
Switching Maximum Air Conditioning On and Off.............................................................. 457
Switching Maximum Defrost On and Off....................................................................... 457
Switching Rear Auto Mode On and Off...................................................................... 458
Switching Recirculated Air On and Off...................................................................... 458
Switching the Air Conditioning On and Off...................................................................... 456
Switching the Climate Controlled Seats On and Off.............................................................. 457
Switching the Climate Control On and Off....................................................................... 457
Switching the Heated Exterior Mirrors On and Off.............................................................. 457
Switching the Heated Rear Window On and Off....................................................................... 457
Switching the Heated Seats On and Off....................................................................... 457
Switching the Heated Steering Wheel On and Off.............................................................. 457
Switching the Heated Windshield On and Off....................................................................... 457
Switching the Rear Climate Controlled Seats On and Off.......................................... 458
Switching the Rear Heated Seats On and Off...................................................................... 458
Switching the Rear Ventilated Seats On and Off............................................................. 458
540
Explorer (CTW) Canada/United States of America, enUSA, Edition date: 201902, Third-Printing- Index