2020 FORD EXPLORER change wheel
[x] Cancel search: change wheelPage 264 of 555

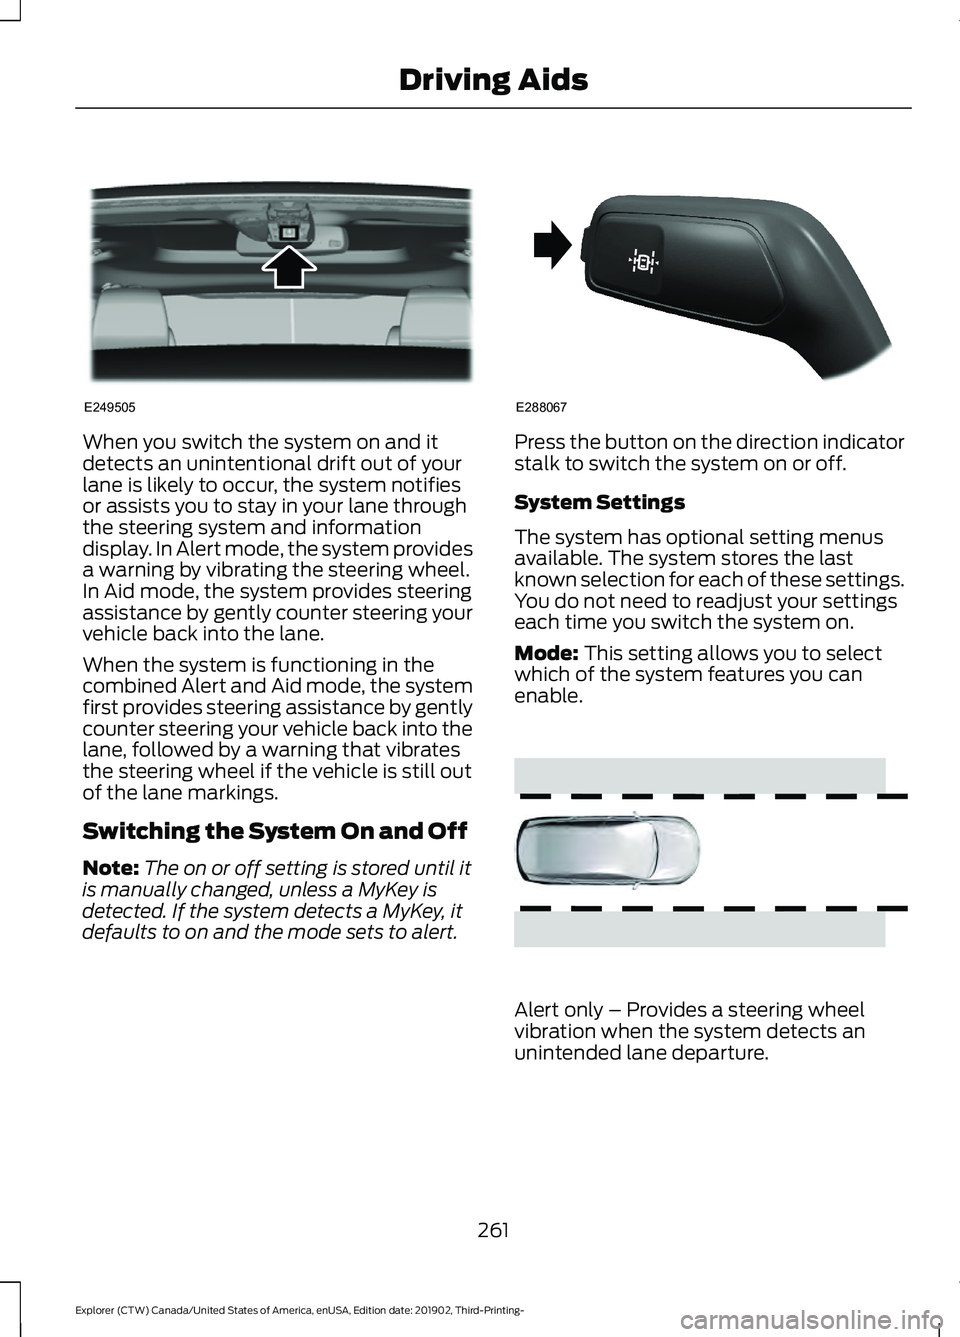
When you switch the system on and it
detects an unintentional drift out of your
lane is likely to occur, the system notifies
or assists you to stay in your lane through
the steering system and information
display. In Alert mode, the system provides
a warning by vibrating the steering wheel.
In Aid mode, the system provides steering
assistance by gently counter steering your
vehicle back into the lane.
When the system is functioning in the
combined Alert and Aid mode, the system
first provides steering assistance by gently
counter steering your vehicle back into the
lane, followed by a warning that vibrates
the steering wheel if the vehicle is still out
of the lane markings.
Switching the System On and Off
Note:
The on or off setting is stored until it
is manually changed, unless a MyKey is
detected. If the system detects a MyKey, it
defaults to on and the mode sets to alert. Press the button on the direction indicator
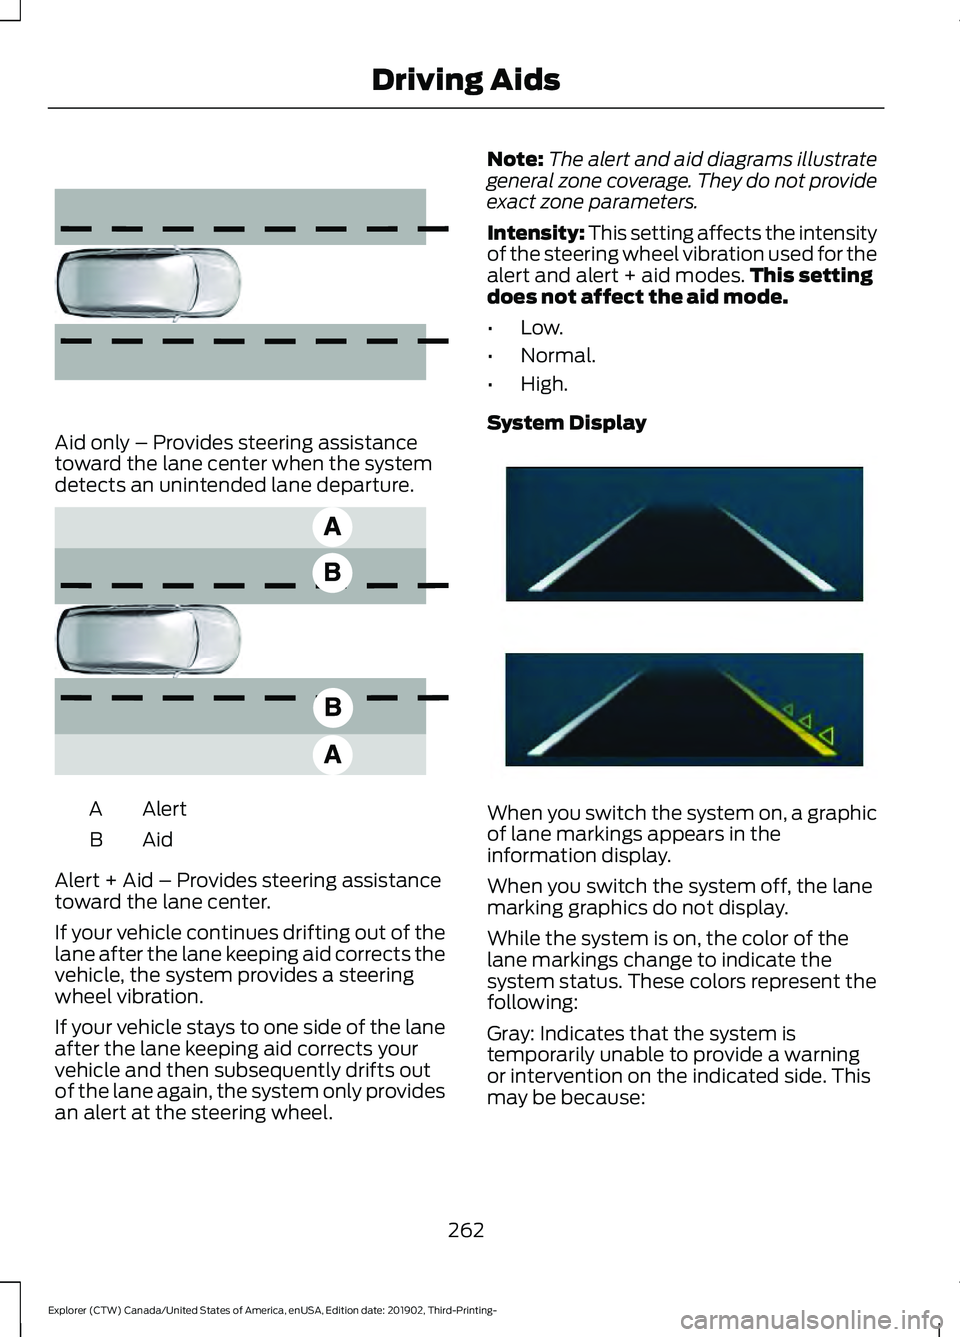
stalk to switch the system on or off.
System Settings
The system has optional setting menus
available. The system stores the last
known selection for each of these settings.
You do not need to readjust your settings
each time you switch the system on.
Mode: This setting allows you to select
which of the system features you can
enable. Alert only – Provides a steering wheel
vibration when the system detects an
unintended lane departure.
261
Explorer (CTW) Canada/United States of America, enUSA, Edition date: 201902, Third-Printing- Driving AidsE249505 E288067 E165515
Page 265 of 555

Aid only – Provides steering assistance
toward the lane center when the system
detects an unintended lane departure.
Alert
A
AidB
Alert + Aid – Provides steering assistance
toward the lane center.
If your vehicle continues drifting out of the
lane after the lane keeping aid corrects the
vehicle, the system provides a steering
wheel vibration.
If your vehicle stays to one side of the lane
after the lane keeping aid corrects your
vehicle and then subsequently drifts out
of the lane again, the system only provides
an alert at the steering wheel. Note:
The alert and aid diagrams illustrate
general zone coverage. They do not provide
exact zone parameters.
Intensity: This setting affects the intensity
of the steering wheel vibration used for the
alert and alert + aid modes. This setting
does not affect the aid mode.
• Low.
• Normal.
• High.
System Display When you switch the system on, a graphic
of lane markings appears in the
information display.
When you switch the system off, the lane
marking graphics do not display.
While the system is on, the color of the
lane markings change to indicate the
system status. These colors represent the
following:
Gray: Indicates that the system is
temporarily unable to provide a warning
or intervention on the indicated side. This
may be because:
262
Explorer (CTW) Canada/United States of America, enUSA, Edition date: 201902, Third-Printing- Driving Aids E165516 E165517 E294544
Page 279 of 555

Time Gap
Distance Gap
Graphics
Sensitivity
Speed
>0.9sec
>82 ft (25 m)
Grey
Normal
62 mph
(100 km/h)
0.6sec —0.9sec
56–82 ft
(17 –25 m)
Yellow
Normal
62 mph
(100 km/h)
<0.6sec
<
56 ft (17 m)
Red
Normal
62 mph
(100 km/h)
Evasive Steering Assist
(If Equipped)
If your vehicle is rapidly approaching a
stationary vehicle or a vehicle traveling in
the same direction as your vehicle, the
system is designed to help you steer
around the vehicle.
The system only activates when all of the
following occur:
• The Pre-Collision Assist system detects
a vehicle ahead and starts to apply
Active Braking.
• You turn the steering wheel in an
attempt to steer around the vehicle.
After you turn the steering wheel, the
system applies additional steering torque
to help you steer around the vehicle. After
you pass the vehicle, the system applies
steering torque in the opposite direction to
encourage you to steer back into the lane.
The system deactivates after you fully pass
the vehicle.
Note: The system does not automatically
steer around a vehicle. If you do not turn the
steering wheel, the system does not
activate.
Note: The system does not activate if the
distance to the vehicle ahead is too small
and the system cannot avoid a crash. Adjusting the Pre-Collision Assist
Settings
You can adjust the following settings by
using the touchscreen. See Settings (page
469
).
• You can change Alert and Distance
Alert sensitivity to one of three possible
settings.
• You can switch Distance Indication and
Alert on or off.
• If required, you can switch Active
Braking on or off.
• If required, you can switch Evasive
Steering Assist on or off.
Note: Active Braking and Evasive Steering
Assist automatically turn on every time you
switch the ignition on.
Note: If you switch Active Braking off,
Evasive Steering Assist turns off.
276
Explorer (CTW) Canada/United States of America, enUSA, Edition date: 201902, Third-Printing- Driving Aids
Page 282 of 555

WHAT IS DRIVE MODE
CONTROL
The system delivers a driving experience
through a suite of sophisticated electronic
vehicle systems. These systems optimize
steering, handling and powertrain
response. This provides a single location
to control multiple systems performance
settings.
Changing the drive mode changes the
functionality of the following systems:
•
Electric power-assisted steering
system adjusts steering effort and feel
based on the mode you select. See
Steering (page 273).
• Electronic stability control and traction
control maintain your vehicle control
in adverse conditions or high
performance driving. See
Stability
Control (page 225).
• Electronic throttle control enhances
the powertrain response to your driving
inputs.
• Transmission controls become
optimized with shift schedules tuned
to each mode.
• Four-wheel drive settings are optimized
and tuned to each mode.
• Electric vehicle mode selections may
be limited. See
Hybrid Vehicle
Operation (page 182).
The system tailors your vehicle
configuration for each mode you select.
Note: Not all settings may be available.
Note: The system has diagnostic checks
that continuously monitor the system for
proper operation. If a mode is unavailable
due to a system fault or change in gear
shifter position, the mode defaults to
Normal. SELECTING A DRIVE MODE
Note:
Drive mode changes may not be
available when the ignition is off or when
the engine is not running.
Note: Button icons shown may vary from
your vehicle. Rotate the drive mode dial on the center
console to select or change a drive mode.
To select drive modes for RWD vehicles
use the console mounted control.
DRIVE MODES
Deep Snow/Sand
(If Equipped)
For snow or soft dry sand. When
stuck in deep snow, use this
mode to help get unstuck.
279
Explorer (CTW) Canada/United States of America, enUSA, Edition date: 201902, Third-Printing- Drive Mode ControlE298238 E297643 E295420
Page 297 of 555

Before Towing a Trailer
Practice turning, stopping and backing up
to get the feel of your vehicle-trailer
combination before starting on a trip.
When turning, make wider turns so the
trailer wheels clear curbs and other
obstacles.
When Towing a Trailer
•
Do not drive faster than 70 mph
(113 km/h) during the first 500 mi
(800 km).
• Do not make full-throttle starts.
• Check your hitch, electrical connections
and trailer wheel lug nuts thoroughly
after you have traveled 50 mi (80 km).
• When stopped in congested or heavy
traffic during hot weather, place the
gearshift in park (P) to aid engine and
transmission cooling and to help A/C
performance.
• Turn off the speed control with heavy
loads or in hilly terrain. The speed
control may turn off automatically
when you are towing on long, steep
grades.
• Shift to a lower gear when driving down
a long or steep hill. Do not apply the
brakes continuously, as they may
overheat and become less effective.
• If your transmission is equipped with a
Grade Assist or Tow/Haul feature, use
this feature when towing. This provides
engine braking and helps eliminate
excessive transmission shifting for
optimum fuel economy and
transmission cooling.
• Allow more distance for stopping with
a trailer attached. Anticipate stops and
brake gradually.
• Avoid parking on a grade. However, if
you must park on a grade:
1. Turn the steering wheel to point your vehicle tires away from traffic flow. 2. Set your vehicle parking brake.
3. Place the automatic transmission in
park (P).
4. Place wheel chocks in front and back of the trailer wheels. (Chocks not
included with vehicle.)
Launching or Retrieving a Boat or
Personal Watercraft (PWC)
Note: Disconnect the wiring to the trailer
before backing the trailer into the water.
Note: Reconnect the wiring to the trailer
after
removing the trailer from the water.
When backing down a ramp during boat
launching or retrieval:
• Do not allow the static water level to
rise above the bottom edge of the rear
bumper.
• Do not allow waves to break higher
than
6 in (15 cm) above the bottom
edge of the rear bumper.
Exceeding these limits may allow water to
enter vehicle components:
• Causing internal damage to the
components.
• Affecting driveability, emissions, and
reliability.
Replace the rear axle lubricant anytime
the rear axle has been submerged in water.
Water may have contaminated the rear
axle lubricant, which is not normally
checked or changed unless a leak is
suspected or other axle repair is required.
294
Explorer (CTW) Canada/United States of America, enUSA, Edition date: 201902, Third-Printing- Towing
Page 300 of 555
![FORD EXPLORER 2020 Owners Manual •
Carry unnecessary weight
(approximately 1 mpg [0.4 km/L] is
lost for every 395 lb (180 kg) of weight
carried).
• Driving with the wheels out of
alignment.
Conditions
• Heavily loading a vehicl FORD EXPLORER 2020 Owners Manual •
Carry unnecessary weight
(approximately 1 mpg [0.4 km/L] is
lost for every 395 lb (180 kg) of weight
carried).
• Driving with the wheels out of
alignment.
Conditions
• Heavily loading a vehicl](/manual-img/11/40647/w960_40647-299.png)
•
Carry unnecessary weight
(approximately 1 mpg [0.4 km/L] is
lost for every 395 lb (180 kg) of weight
carried).
• Driving with the wheels out of
alignment.
Conditions
• Heavily loading a vehicle or towing a
trailer may reduce fuel economy at any
speed.
• Adding certain accessories to your
vehicle (for example bug deflectors,
rollbars, light bars, running boards, ski
racks or luggage racks) may reduce
fuel economy.
• To maximize the fuel economy, drive
with the tonneau cover installed (if
equipped).
• Using fuel blended with alcohol may
lower fuel economy.
• Fuel economy may decrease with lower
temperatures during the first
5–10 mi
(12 –16 km) of driving.
• Driving on flat terrain offers improved
fuel economy as compared to driving
on hilly terrain.
• Transmissions give their best fuel
economy when operated in the top
cruise gear and with steady pressure
on the gas pedal.
• Four-wheel-drive operation (if
equipped) is less fuel efficient than
two-wheel-drive operation.
• Close the windows for high-speed
driving.
COLD WEATHER
PRECAUTIONS
The functional operation of some
components and systems can be affected
at temperatures below
-13°F (-25°C). BREAKING-IN
You need to break in new tires for
approximately
300 mi (480 km). During
this time, your vehicle may exhibit some
unusual driving characteristics.
Avoid driving too fast during the first
1,000 mi (1,600 km)
. Vary your speed
frequently and change up through the
gears early. Do not labor the engine.
Do not tow during the first
1,000 mi
(1,600 km).
DRIVING THROUGH WATER WARNING:
Do not drive through
flowing or deep water as you may lose
control of your vehicle.
Note: Driving through standing water can
cause vehicle damage.
Note: Engine damage can occur if water
enters the air filter.
Before driving through standing water,
check the depth. Never drive through water
that is higher than the bottom of the front
rocker area of your vehicle. 297
Explorer (CTW) Canada/United States of America, enUSA, Edition date: 201902, Third-Printing- Driving HintsE259345
Page 331 of 555

8.
Make sure that the oil level is between
the maximum and minimum marks. If
the oil level is at the minimum mark,
add oil immediately. See Capacities
and Specifications (page 395).
9. If the oil level is correct, replace the dipstick and make sure it is fully seated.
Note: Do not remove the dipstick when the
engine is running.
Note: If the oil level is between the
maximum and minimum marks, the oil level
is acceptable. Do not add oil.
Note: The oil consumption of new engines
reaches its normal level after approximately
3,000 mi (5,000 km)
.
Adding Engine Oil WARNING: Do not remove the filler
cap when the engine is running.
Do not use supplemental engine oil
additives because they are unnecessary
and could lead to engine damage that may
not be covered by the vehicle Warranty. Only use oils certified for gasoline engines
by the American Petroleum Institute (API).
An oil with this trademark symbol
conforms to the current engine and
emission system protection standards and
fuel economy requirements of the
International Lubricants Specification
Advisory Committee (ILSAC).
To top up the engine oil level do the
following:
1. Clean the area surrounding the engine
oil filler cap before you remove it.
2. Remove the engine oil filler cap. See Under Hood Overview
(page 324).
Turn it counterclockwise and remove
it.
3. Add engine oil that meets our specifications. See
Capacities and
Specifications (page 395). You may
have to use a funnel to pour the engine
oil into the opening.
4. Recheck the oil level.
5. If the oil level is correct, replace the dipstick and make sure it is fully seated.
6. Replace the engine oil filler cap. Turn it clockwise until you feel a strong
resistance.
Note: Do not add oil further than the
maximum mark. Oil levels above the
maximum mark may cause engine damage.
Note: Make sure you install the oil filler cap
correctly.
Note: Soak up any spillage with an
absorbent cloth immediately.
OIL CHANGE INDICATOR
RESET
Use the information display controls on
the steering wheel to reset the oil change
indicator.
328
Explorer (CTW) Canada/United States of America, enUSA, Edition date: 201902, Third-Printing- MaintenanceE142732
Page 356 of 555

GENERAL INFORMATION
The recommended tire inflation pressures
are found on the Tire Label which is
located on the B-pillar or the edge of the
driver door. This information can also be
found on the Safety Compliance
Certification Label, affixed to either the
door hinge pillar, door-latch post, or the
door edge that meets the door-latch post,
next to the driver
’s seating position.
We strongly recommend maintaining these
tire pressures at all times. Failure to follow
the tire pressure recommendations can
cause uneven treadwear patterns, reduced
fuel economy, and adversely affect the
way your vehicle handles.
Note: Check and set the tire pressure at the
ambient temperature in which you are
intending to drive your vehicle and when the
tires are cold.
Note: Check your tire pressures at least
once per month.
If your vehicle has a spare tire, set the
pressure to the highest value given for your
vehicle and tire size combination.
Use only approved wheels and tire sizes;
using other sizes could damage your
vehicle.
If you change the diameter of the factory
installed tires, the speedometer could
display the incorrect speed. This could
effect the functionality of the 4WD system
(if equipped). Take your vehicle to an
authorized dealer and have the engine
management system reprogrammed.
If you intend to change the size of the
factory installed tires, check the suitability
with an authorized dealer.
Additional information related to the
functionality and maintenance of your tires
can be found in the Wheels and Tire
section. See Tire Care (page 355). Self-Sealing Tires
(If Equipped)
Self-Sealing tires are a special type of tire
that have a material on the inside of the
tire that can seal punctures up to
0.2 in
(6 mm) in diameter in the tread area. This
material does not protect from damage or
punctures in the sidewall of the tire.
Self-sealing tires can be identified by the
tire manufacturer with a special mark.
If your TPMS warning light comes on,
inspect your tires for damage and re-inflate
your tires to the pressure indicated on the
tire placard. See
Tire Pressure
Monitoring System (page 370). If your
tires are damaged or continue to lose air,
take your vehicle to the nearest authorized
dealer to have your tires inspected and
repaired/replaced as necessary.
Note: Replace self-sealing tires with
self-sealing tires to maintain the
functionality provided.
Note: Do not drive on a deflated
self-sealing tire. This damages the tire
beyond repair.
Notice to utility vehicle and truck
owners WARNING:
Vehicles with a higher
center of gravity (utility and four-wheel
drive vehicles) handle differently than
vehicles with a lower center of gravity
(passenger cars). Avoid sharp turns,
excessive speed and abrupt steering in
these vehicles. Failure to drive cautiously
increases the risk of losing control of your
vehicle, vehicle rollover, personal injury
and death. WARNING:
In a rollover crash, an
unbelted person is significantly more
likely to die than a person wearing a
seatbelt.
353
Explorer (CTW) Canada/United States of America, enUSA, Edition date: 201902, Third-Printing- Wheels and Tires