2020 FORD EXPLORER radio
[x] Cancel search: radioPage 165 of 555
UNIVERSAL GARAGE DOOR
OPENER
HomeLink Wireless Control
System
WARNING: Do not use the system
with any garage door opener that does
not have the safety stop and reverse
feature as required by U.S. Federal
Safety Standards (this includes any
garage door opener manufactured
before April 1, 1982). A garage door
opener which cannot detect an object,
signaling the door to stop and reverse,
does not meet current federal safety
standards. Using a garage door opener
without these features increases the risk
of serious injury or death.
Note: Make sure that the garage door and
security device are free from obstruction
when you are programming. Do not program
the system with the vehicle in the garage.
Note: Make sure you keep the original
remote control transmitter for use in other
vehicles as well as for future system
programming.
Note: We recommend that upon the sale
or lease termination of your vehicle, you
erase the programmed function buttons for
security reasons. See Erasing the Function
Button Codes
.
Note: You can program a maximum of
three devices. To change or replace any of
the three devices after it has been initially
programmed, you must first erase the
current settings. See Erasing the Function
Button Codes
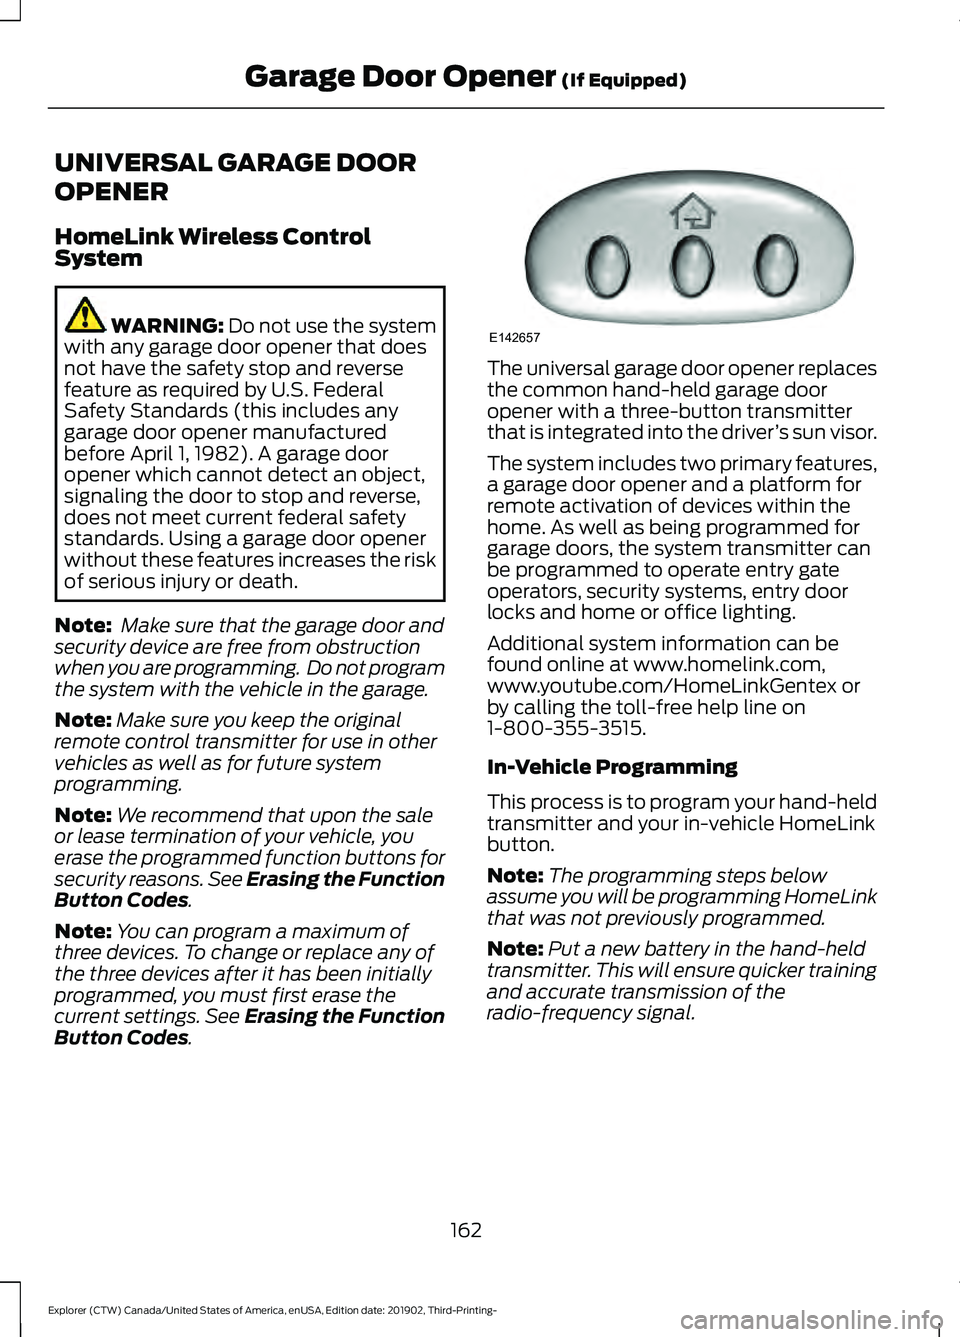
. The universal garage door opener replaces
the common hand-held garage door
opener with a three-button transmitter
that is integrated into the driver
’s sun visor.
The system includes two primary features,
a garage door opener and a platform for
remote activation of devices within the
home. As well as being programmed for
garage doors, the system transmitter can
be programmed to operate entry gate
operators, security systems, entry door
locks and home or office lighting.
Additional system information can be
found online at www.homelink.com,
www.youtube.com/HomeLinkGentex or
by calling the toll-free help line on
1-800-355-3515.
In-Vehicle Programming
This process is to program your hand-held
transmitter and your in-vehicle HomeLink
button.
Note: The programming steps below
assume you will be programming HomeLink
that was not previously programmed.
Note: Put a new battery in the hand-held
transmitter. This will ensure quicker training
and accurate transmission of the
radio-frequency signal.
162
Explorer (CTW) Canada/United States of America, enUSA, Edition date: 201902, Third-Printing- Garage Door Opener
(If Equipped)E142657
Page 167 of 555
Gate Operator / Canadian
Programming
Canadian radio-frequency laws require
transmitter signals to
“time-out” (or quit)
after several seconds of transmission –
which may not be long enough for
HomeLink to pick up the signal during
programming. Similar to this Canadian law,
some U.S. gate operators are designed to
“time-out” in the same manner.
Note: If programming a garage door opener
or gate operator, it is advised to unplug the
device during the “cycling” process to
prevent possible overheating.
1. Press and hold the HomeLink button while you press and release, every two
seconds, your hand-held transmitter
until the HomeLink indicator light
changes from a slow to a rapidly
blinking light.
2. Release both the HomeLink and hand-held transmitter buttons.
3. Continue programing HomeLink. See In-Vehicle Programming
.
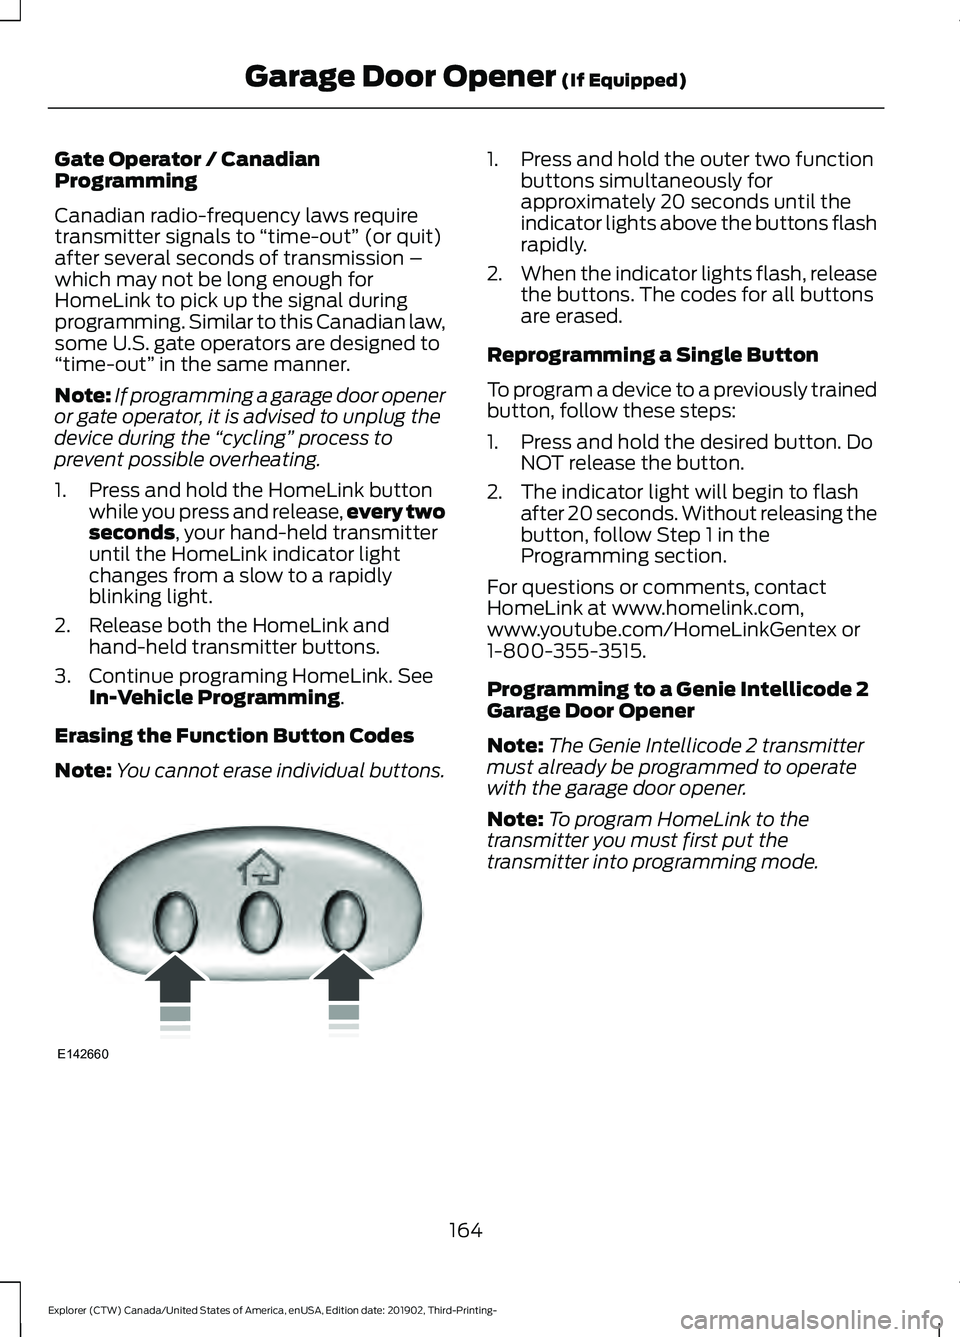
Erasing the Function Button Codes
Note: You cannot erase individual buttons. 1. Press and hold the outer two function
buttons simultaneously for
approximately 20 seconds until the
indicator lights above the buttons flash
rapidly.
2. When the indicator lights flash, release
the buttons. The codes for all buttons
are erased.
Reprogramming a Single Button
To program a device to a previously trained
button, follow these steps:
1. Press and hold the desired button. Do NOT release the button.
2. The indicator light will begin to flash after 20 seconds. Without releasing the
button, follow Step 1 in the
Programming section.
For questions or comments, contact
HomeLink at www.homelink.com,
www.youtube.com/HomeLinkGentex or
1-800-355-3515.
Programming to a Genie Intellicode 2
Garage Door Opener
Note: The Genie Intellicode 2 transmitter
must already be programmed to operate
with the garage door opener.
Note: To program HomeLink to the
transmitter you must first put the
transmitter into programming mode.
164
Explorer (CTW) Canada/United States of America, enUSA, Edition date: 201902, Third-Printing- Garage Door Opener
(If Equipped)E142660
Page 169 of 555
5. Press and hold the previously
programmed button on the visor for 2
seconds. Repeat this step up to 3 times
until the garage door moves.
Programming is now complete.
Clearing a HomeLink Device
To erase programming from the three
HomeLink buttons press and hold the two
outer HomeLink buttons until the indicator
light begins to flash. The indicator light will
begin flashing in 10 to 20 seconds, at which
time both buttons should be released.
Programming has now been erased, and
the indicator light should blink slowly to
indicate the device is in train mode when
any of the three HomeLink buttons are
pressed.
FCC and RSS-210 Industry Canada
Compliance
This device complies with Part 15 of the
FCC Rules and with RSS-210 of Industry
Canada. Operation is subject to the
following two conditions: (1) this device
may not cause harmful interference, and
(2) this device must accept any
interference received, including
interference that may cause undesired
operation. WARNING: Changes or
modifications not expressively approved
by the party responsible for compliance
could void the user's authority to operate
the equipment. The term "IC:" before the
radio certification number only signifies
that Industry Canada technical
specifications were met. This equipment complies with FCC
radiation exposure limits set forth for an
uncontrolled environment. End Users must
follow the specific operating instructions
for satisfying RF exposure compliance. This
transmitter must be at least
8 in (20 cm)
from the user and must not be co-located
or operating in conjunction with any other
antenna or transmitter.
The term “IC:” before the
certification/registration number only
signifies that Industry Canada technical
specifications were met.
166
Explorer (CTW) Canada/United States of America, enUSA, Edition date: 201902, Third-Printing- Garage Door Opener
(If Equipped)
Page 172 of 555
Note:
This device controls the rate of
charge, or charging power. During charging,
the device and the charger may heat up, this
is normal. If the battery gets hotter than
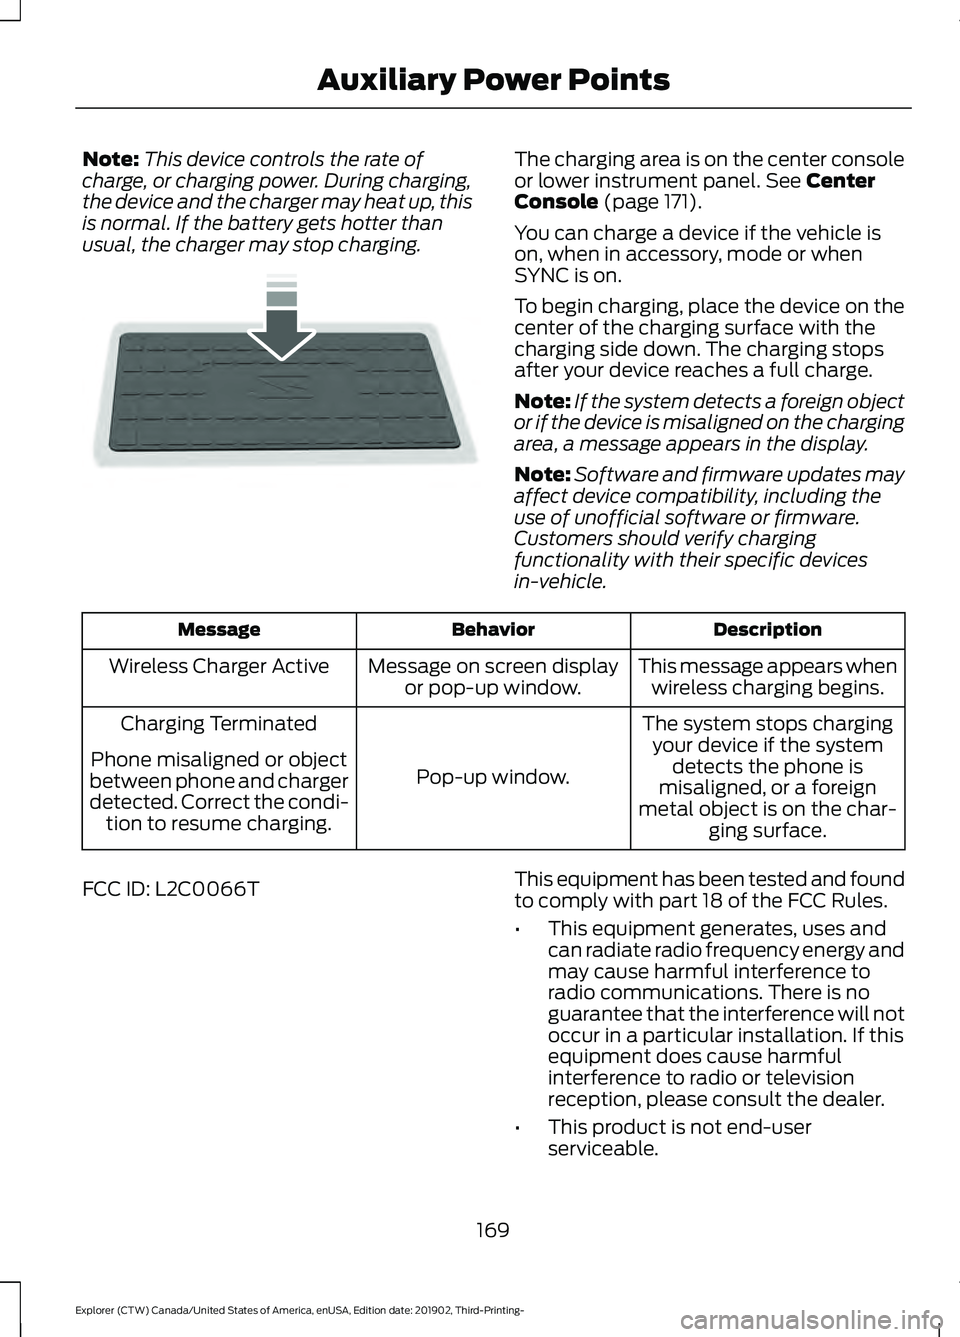
usual, the charger may stop charging. The charging area is on the center console
or lower instrument panel. See Center
Console (page 171).
You can charge a device if the vehicle is
on, when in accessory, mode or when
SYNC is on.
To begin charging, place the device on the
center of the charging surface with the
charging side down. The charging stops
after your device reaches a full charge.
Note: If the system detects a foreign object
or if the device is misaligned on the charging
area, a message appears in the display.
Note: Software and firmware updates may
affect device compatibility, including the
use of unofficial software or firmware.
Customers should verify charging
functionality with their specific devices
in-vehicle. Description
Behavior
Message
This message appears whenwireless charging begins.
Message on screen display
or pop-up window.
Wireless Charger Active
The system stops chargingyour device if the system detects the phone is
misaligned, or a foreign
metal object is on the char- ging surface.
Pop-up window.
Charging Terminated
Phone misaligned or object
between phone and charger
detected. Correct the condi- tion to resume charging.
FCC ID: L2C0066T This equipment has been tested and found
to comply with part 18 of the FCC Rules.
•
This equipment generates, uses and
can radiate radio frequency energy and
may cause harmful interference to
radio communications. There is no
guarantee that the interference will not
occur in a particular installation. If this
equipment does cause harmful
interference to radio or television
reception, please consult the dealer.
• This product is not end-user
serviceable.
169
Explorer (CTW) Canada/United States of America, enUSA, Edition date: 201902, Third-Printing- Auxiliary Power PointsE250812
Page 173 of 555
This device complies with Industry Canada
licence-exempt RSS standard(s).
Operation is subject to the following two
conditions:
•
This device may not cause interference,
and
• This device must accept any
interference, including interference that
may cause undesired operation of the
device.
Note: Changes or modifications not
expressively approved by the party
responsible for compliance could void the
user's authority to operate the equipment.
The term "IC" before the radio certification
number only signifies that Industry Canada
technical specifications were met.
170
Explorer (CTW) Canada/United States of America, enUSA, Edition date: 201902, Third-Printing- Auxiliary Power Points
Page 175 of 555

GENERAL INFORMATION
WARNING: Extended idling at high
engine speeds can produce very high
temperatures in the engine and exhaust
system, creating the risk of fire or other
damage. WARNING:
Do not park, idle or
drive your vehicle on dry grass or other
dry ground cover. The emission system
heats up the engine compartment and
exhaust system, creating the risk of fire. WARNING: Do not start the engine
in a closed garage or in other enclosed
areas. Exhaust fumes can be toxic.
Always open the garage door before you
start the engine. WARNING:
Exhaust leaks may
result in entry of harmful and potentially
lethal fumes into the passenger
compartment. If you smell exhaust
fumes inside your vehicle, have your
vehicle inspected immediately. Do not
drive if you smell exhaust fumes.
If you disconnect the battery, your vehicle
may exhibit some unusual driving
characteristics for approximately
5 mi
(8 km) after you reconnect it. This is
because the engine management system
must realign itself with the engine. You
can disregard any unusual driving
characteristics during this period.
The powertrain control system meets all
Canadian interference-causing equipment
standard requirements regulating the
impulse electrical field or radio noise.
When you start the engine, avoid pressing
the accelerator pedal before and during
operation. Only use the accelerator pedal
when you have difficulty starting the
engine. IGNITION SWITCH
(IF EQUIPPED)
0
(off) - The ignition is off.
Note: When you switch the ignition off and
leave your vehicle, do not leave your key in
the ignition. This could cause your vehicle
battery to lose charge.
I
(accessory) - Allows the electrical
accessories, such as the radio, to operate
while the engine is not running.
Note: Do not leave the ignition key in this
position for too long. This could cause your
vehicle battery to lose charge.
II
(on) - All electrical circuits are
operational and the warning lamps and
indicators illuminate.
III
(start) - cranks the engine.
KEYLESS STARTING
Note: The system may not function if the
intelligent access key is close to metal
objects or electronic devices, for example
keys or a cell phone.
Note: A valid intelligent access key must
be located inside your vehicle to switch the
ignition on and start your vehicle.
172
Explorer (CTW) Canada/United States of America, enUSA, Edition date: 201902, Third-Printing- Starting and Stopping the EngineE304650
Page 342 of 555
Note:
If you only disconnect the negative
battery cable terminal, make sure it is
isolated or placed away from the battery
terminal to avoid unintended connection or
arcing.
If you replace the battery make sure it
matches the electrical requirements of
your vehicle.
If you disconnect or replace the battery
and your vehicle has an automatic
transmission, it must relearn its adaptive
strategy. Because of this, the transmission
may shift firmly when first driven. This is
normal operation while the transmission
fully updates its operation to optimum
shift feel.
Battery Management System (If
Equipped)
The battery management system monitors
battery conditions and takes actions to
extend battery life. If excessive battery
drain is detected, the system temporarily
disables some electrical systems to
protect the battery.
Systems included are:
• Heated rear window.
• Heated seats.
• Climate control.
• Heated steering wheel.
• Audio unit.
• Navigation system.
A message may appear in the information
displays to alert you that battery
protection actions are active. These
messages are only for notification that an
action is taking place, and not intended to
indicate an electrical problem or that the
battery requires replacement. After battery replacement, or in some
cases after charging the battery with an
external charger, the battery management
system requires eight hours of vehicle sleep
time to relearn the battery state of charge.
During this time your vehicle must remain
fully locked with the ignition switched off.
Note:
Prior to relearning the battery state
of charge, the battery management system
may temporarily disable some electrical
systems.
Electrical Accessory Installation
To make sure the battery management
system works correctly, do not connect an
electrical device ground connection
directly to the battery negative post. This
can cause inaccurate measurements of
the battery condition and potential
incorrect system operation.
Note: If you add electrical accessories or
components to the vehicle, it may adversely
affect battery performance and durability.
This may also affect the performance of
other electrical systems in the vehicle.
Remove and Reinstall the Battery
To disconnect or remove the battery, do
the following:
1. Apply the parking brake and switch the
ignition off.
2. Switch all electrical equipment off, for
example lights and radio.
3. Wait a minimum of two minutes before
disconnecting the battery.
Note: The engine management system has
a power hold function and remains powered
for a period of time after you switch the
ignition off. This is to allow diagnostic and
adaptive tables to be stored. Disconnecting
the battery without waiting can cause
damage not covered by the vehicle
Warranty.
339
Explorer (CTW) Canada/United States of America, enUSA, Edition date: 201902, Third-Printing- Maintenance
Page 343 of 555

4. Disconnect the negative battery cable
terminal.
5. Disconnect the positive battery cable terminal.
6. Remove the battery securing clamp.
7. Remove the battery.
8. To install, reverse the removal procedure.
Note: Before reconnecting the battery,
make sure the ignition remains switched off.
Note: Make sure the battery cable terminals
are fully tightened.
If you disconnect or replace the vehicle
battery, you must reset the following
features:
• Window bounce-back. See Power
Windows (page 97).
• Clock Settings.
• Pre-set radio stations.
Battery Disposal Make sure that you dispose of
old batteries in an
environmentally friendly way.
Seek advice from your local authority
about recycling old batteries.
ADJUSTING THE HEADLAMPS
Vertical Aim Adjustment
If your vehicle has been involved in a crash,
have the aim of the headlamp beam
checked by an authorized dealer. 8 ft (2.4 m)
A
Ground to the center of the
headlamp high beam bulb
B
25 ft (7.6 m)
C
Horizontal reference line
D
Vertical Aim Adjustment Procedure
1. Park your vehicle on level ground approximately
25 ft (7.6 m) from a wall
or screen.
2. Measure the distance from the ground
to the center of the headlamp beam
bulb and mark an
8 ft (2.4 m) long
horizontal reference line on the wall or
screen at this height.
Note: There may be an identifying mark on
the lens to help you locate the center line
of the headlamp beam bulb.
Note: To see a clearer light pattern for
adjusting, you may want to block the light
from one headlamp while adjusting the
other.
3. Switch on the low beam headlamps and open the hood.
340
Explorer (CTW) Canada/United States of America, enUSA, Edition date: 201902, Third-Printing- MaintenanceE107998 E142592