2020 FORD EXPEDITION ignition
[x] Cancel search: ignitionPage 78 of 542
2.
With the buttons facing the rear of your
vehicle and the key ring facing upward,
place the first intelligent access key
into the backup slot inside the center
console.
3. Press the push button ignition switch once and wait for a few seconds.
4. Press the push button ignition switch again and remove the intelligent access
key from the center console.
5. Insert the second programmed key into
the backup slot in the center console,
then press the push button ignition
switch.
The factory-set code appears in the
information display for a few seconds.
Note: The code may not display until after
any other warning messages first display.
75
Expedition (TB8) Canada/United States of America, enUSA, Edition date: 201907, Third-Printing- Doors and Locks
Page 80 of 542
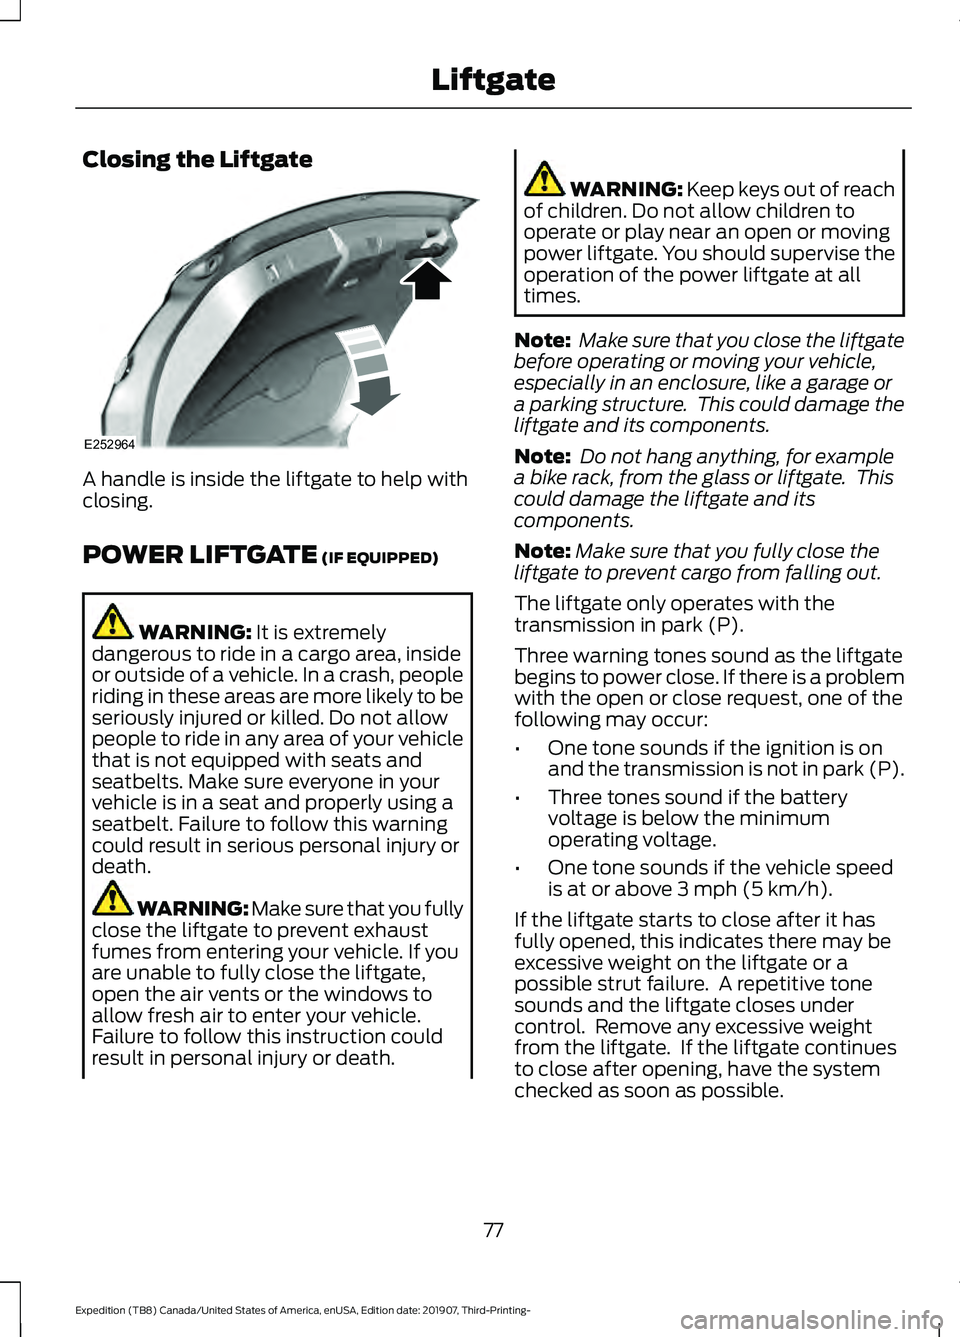
Closing the Liftgate
A handle is inside the liftgate to help with
closing.
POWER LIFTGATE (IF EQUIPPED)
WARNING:
It is extremely
dangerous to ride in a cargo area, inside
or outside of a vehicle. In a crash, people
riding in these areas are more likely to be
seriously injured or killed. Do not allow
people to ride in any area of your vehicle
that is not equipped with seats and
seatbelts. Make sure everyone in your
vehicle is in a seat and properly using a
seatbelt. Failure to follow this warning
could result in serious personal injury or
death. WARNING:
Make sure that you fully
close the liftgate to prevent exhaust
fumes from entering your vehicle. If you
are unable to fully close the liftgate,
open the air vents or the windows to
allow fresh air to enter your vehicle.
Failure to follow this instruction could
result in personal injury or death. WARNING: Keep keys out of reach
of children. Do not allow children to
operate or play near an open or moving
power liftgate. You should supervise the
operation of the power liftgate at all
times.
Note: Make sure that you close the liftgate
before operating or moving your vehicle,
especially in an enclosure, like a garage or
a parking structure. This could damage the
liftgate and its components.
Note: Do not hang anything, for example
a bike rack, from the glass or liftgate. This
could damage the liftgate and its
components.
Note: Make sure that you fully close the
liftgate to prevent cargo from falling out.
The liftgate only operates with the
transmission in park (P).
Three warning tones sound as the liftgate
begins to power close. If there is a problem
with the open or close request, one of the
following may occur:
• One tone sounds if the ignition is on
and the transmission is not in park (P).
• Three tones sound if the battery
voltage is below the minimum
operating voltage.
• One tone sounds if the vehicle speed
is at or above 3 mph (5 km/h).
If the liftgate starts to close after it has
fully opened, this indicates there may be
excessive weight on the liftgate or a
possible strut failure. A repetitive tone
sounds and the liftgate closes under
control. Remove any excessive weight
from the liftgate. If the liftgate continues
to close after opening, have the system
checked as soon as possible.
77
Expedition (TB8) Canada/United States of America, enUSA, Edition date: 201907, Third-Printing- LiftgateE252964
Page 84 of 542
PASSIVE ANTI-THEFT
SYSTEM
Note:
The system is not compatible with
non-Ford aftermarket remote start systems.
Use of these systems may result in vehicle
starting problems and a loss of security
protection.
Note: Metallic objects, electronic devices
or a second coded key on the same key
chain may cause vehicle starting problems
if they are too close to the key when starting
the engine. Prevent these objects from
touching the coded key while starting the
engine. Switch the ignition off, move all
objects on the key chain away from the
coded key and restart the engine if a
problem occurs.
Note: Do not leave a duplicate coded key
in the vehicle. Always take your keys and
lock all doors when leaving the vehicle.
SecuriLock ™
The system is an engine immobilization
system. The intended design is to help
prevent the engine from starting unless a
coded key programmed to your vehicle is
used. Using the wrong key may prevent
the engine from starting. A message may
appear in the information display.
If you are unable to start the engine with a
correctly coded key, a malfunction has
happened and a message may appear in
the information display.
Automatic Arming
The vehicle arms immediately after you
switch the ignition off.
Automatic Disarming
If you switch the ignition on with a coded
key you disarm the vehicle. If you unlock
the doors with the touch handle you disarm
the alarm. Replacement Keys
Note:
Your vehicle comes equipped with
two intelligent access keys.
The intelligent access key functions as a
programmed key that operates the driver
door lock and activates the intelligent
access with push button start system, as
well as a remote control.
If your programmed transmitters are lost
or stolen and you do not have an extra
coded key, you will need to have your
vehicle towed to an authorized dealer. You
need to erase the key codes from your
vehicle and program new coded keys.
Store an extra programmed key away from
the vehicle in a safe place to help prevent
any inconveniences. See your authorized
dealer to purchase additional spare or
replacement keys.
Programming a Spare Integrated
Keyhead Transmitter
Note: You can program a maximum of
eight coded keys to your vehicle. All eight
can be integrated keyhead transmitters.
You can program your own integrated
keyhead transmitter or standard
SecuriLock coded keys to your vehicle.
This procedure programs both the engine
immobilizer keycode and the remote entry
portion of the remote control to your
vehicle
Only use integrated keyhead transmitters
or standard SecuriLock keys.
You must have two previously
programmed coded keys and the new
unprogrammed key readily accessible. See
your authorized dealer to have the spare
key programmed if two previously
programmed coded keys are not available.
Read and understand the entire procedure
before you begin.
81
Expedition (TB8) Canada/United States of America, enUSA, Edition date: 201907, Third-Printing- Security
Page 85 of 542
1.
Insert the first previously programmed
coded key into the ignition.
2. Switch the ignition from off to on. Keep
the ignition on for at least three
seconds, but no more than 10 seconds.
3. Switch the ignition off and remove the
first coded key from the ignition.
4. After three seconds but within 10 seconds of switching the ignition off,
insert the second previously coded key
into the ignition.
5. Switch the ignition from off to on. Keep
the ignition on for at least three
seconds, but no more than 10 seconds.
6. Switch the ignition off and remove the
second previously programmed coded
key from the ignition.
7. After three seconds but within 10 seconds of switching the ignition off
and removing the previously
programmed coded key, insert the new
unprogrammed key into the ignition.
8. Switch the ignition from off to on. Keep
the ignition on for at least six seconds.
9. Remove the newly programmed coded
key from the ignition.
If the key has been successfully
programmed it will start the engine and
operate the remote entry system (if the
new key is an integrated keyhead
transmitter).
If programming was not successful, wait
10 seconds and repeat Steps 1 through 8.
If you are still unsuccessful, take your
vehicle to your authorized dealer.
Programming a Spare Intelligent
Access Key
Note: You can program a maximum of four
keys to your vehicle. You must have two previously
programmed intelligent access keys inside
your vehicle and the new unprogrammed
intelligent access key readily accessible.
You can purchase replacement keys or
remote controls from an authorized dealer.
Make sure that the ignition is switched off
before beginning this procedure. Make sure
that you close all the doors before
beginning and that they remain closed
throughout the procedure. Carry out all
steps within 30 seconds of starting the
sequence. Stop and wait for at least one
minute before starting again if you carry
out any steps out of sequence.
Read and understand the entire procedure
before you begin.
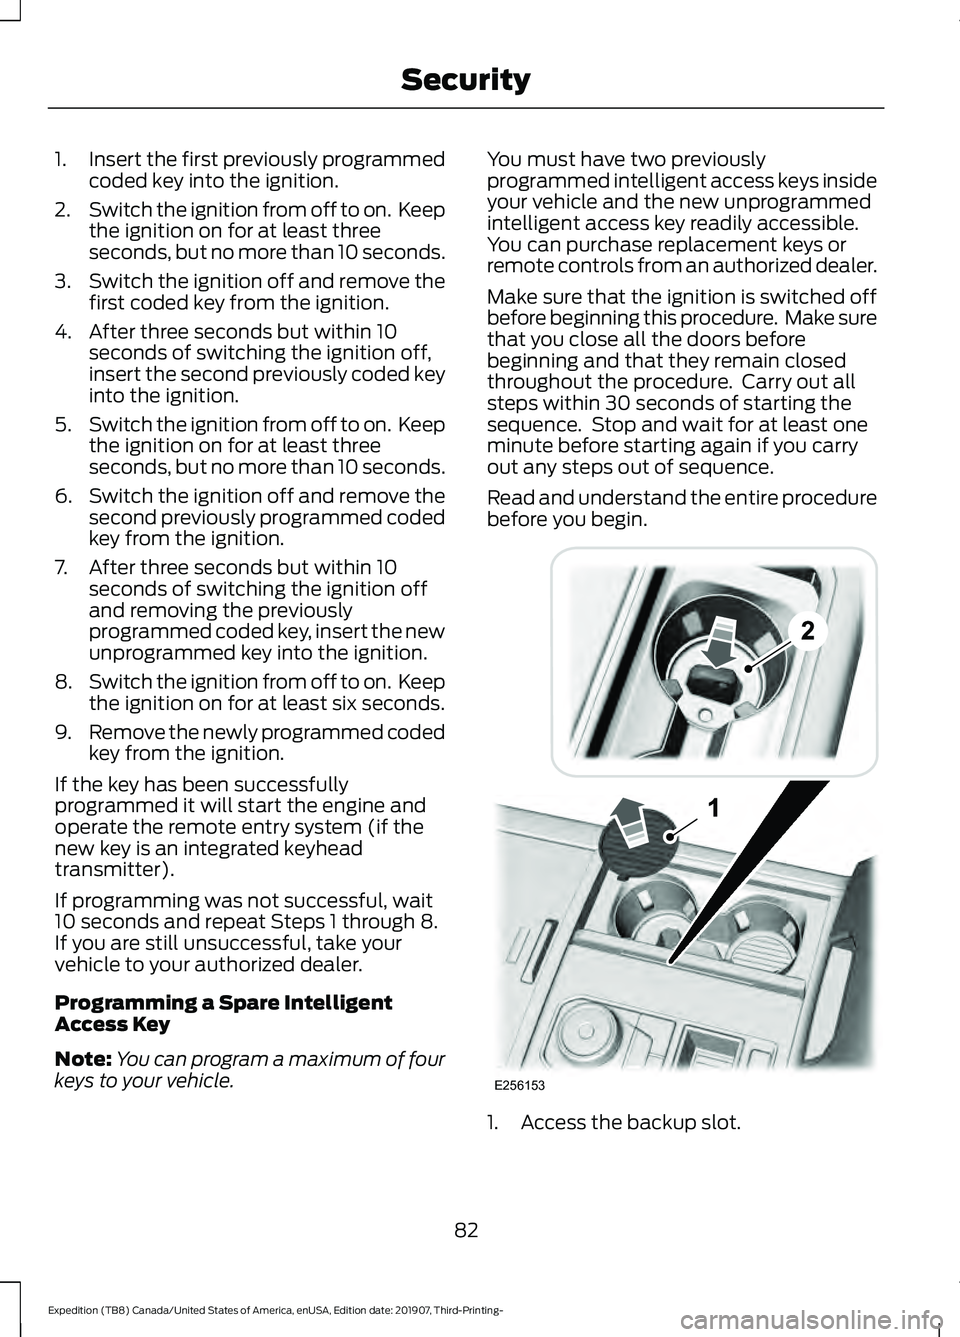
1. Access the backup slot.
82
Expedition (TB8) Canada/United States of America, enUSA, Edition date: 201907, Third-Printing- SecurityE256153
Page 86 of 542

2. Insert the first programmed key in the
backup slot.
3. Press the push button ignition switch.
4. Wait five seconds and then press the push button ignition switch again.
5. Remove the intelligent access key.
6. Within 10 seconds, place a second programmed intelligent access key in
the backup slot and press the push
button ignition switch.
7. Wait five seconds and then press the push button ignition switch again.
8. Remove the intelligent access key.
9. Wait five seconds, then place the unprogrammed intelligent access key
in the backup slot and press the push
button ignition switch.
10. Once complete, the information cluster displays a message
confirming the key has been
programmed. The direction indicators
flash and the horn sounds.
Programming is now complete. Check that
the remote control functions operate and
your vehicle starts with the new intelligent
access key.
If programming was unsuccessful, wait 10
seconds and repeat steps 1 through 7. If it
still does not work, take your vehicle to an
authorized dealer.
ANTI-THEFT ALARM
The active anti-theft system is designed
to warn you in the event of unauthorized
vehicle entry and is also designed to help
prevent unwanted towing of your vehicle.
You can choose what is monitored by
arming the system in different ways. See
Information Displays (page 114).
The direction indicators flash and the horn
sounds if the system triggers while the
alarm is armed. Take all remote controls to an authorized
dealer if there is any potential alarm
problem with your vehicle.
Using the System
You can select two levels of alarm security.
You can change the level of security when
the ignition is switched off through the
information display with the two options
below:
Perimeter Only (If Equipped)
Perimeter only monitors the following:
•
Doors.
• Hood.
• Liftgate.
All Sensors (If Equipped)
All sensors monitors the following:
• Doors.
• Hood.
• Liftgate.
• Movement inside your vehicle.
• Change in vehicle inclination, for
example, unwanted towing.
Note: Do not choose all sensors monitor
mode when the vehicle is in transport or if
movement within the vehicle is likely to
occur.
Note: For correct operation of the interior
motion detection system, make sure you
close all the windows prior to arming the
system. This helps prevent accidental alarm
activation due to external influences.
Additionally, the interior motion sensing
system does not arm if any door is ajar.
83
Expedition (TB8) Canada/United States of America, enUSA, Edition date: 201907, Third-Printing- Security
Page 87 of 542

Arming the Alarm
The alarm is ready to arm when there is
not a key in the ignition. Lock your vehicle
using the remote control or keyless entry
keypad. You can also lock your vehicle
using the lock sensor on the exterior door
handle if your vehicle is equipped with
intelligent access. See Locking and
Unlocking (page 69).
The direction indicators flash once after
you lock your vehicle. This indicates the
alarm is in the pre-armed mode. It fully
arms after 20 seconds.
Disarming the Alarm
Disarm the alarm by any of the following
actions:
• Press the power door unlock button
within the 20-second pre-armed mode.
• Unlock the doors with the remote
control or keyless entry keypad. If
equipped with intelligent access, you
can use the unlock sensor on the
exterior door handle. See
Locking and
Unlocking (page 69).
• Switch the ignition on or start your
vehicle.
• Use a key in the driver door lock
cylinder to unlock your vehicle, then
switch the ignition on within 12
seconds.
84
Expedition (TB8) Canada/United States of America, enUSA, Edition date: 201907, Third-Printing- Security
Page 91 of 542
End of Travel Position
The steering column sets a stopping
position just short of the end of the column
position to prevent damage to the steering
column. A new stopping position sets if
the steering column encounters an object
when tilting or telescoping.
To reset the steering column to its normal
stopping position:
1. Confirm there is nothing obstructing
the motion of the steering column.
2. Press and hold the steering column control until the steering column stops
moving.
3. Press the steering column control again.
Note: The steering column may begin to
move again.
4. When the steering column stops, continue holding the control for a few
seconds.
5. Repeat for each direction as necessary.
A new stopping position sets. The next
time you tilt or telescope the steering
column, it stops just short of the end of the
column position.
Memory Feature (If Equipped)
You can save and recall the steering
column position with the memory
function. See
Memory Function (page
157).
Pressing the adjustment control during a
memory recall cancels the operation.
Easy Entry and Exit Feature
The column moves up when you switch
the ignition off. Switch the ignition on to
return the system to its previous settings.
You can switch this feature on or off in the
information display. See
Information
Displays (page 114). Note:
If you press any adjustment or
memory button when in easy exit mode, the
system cancels the operation.
Note: Depending on your vehicle, the
column may move up and in.
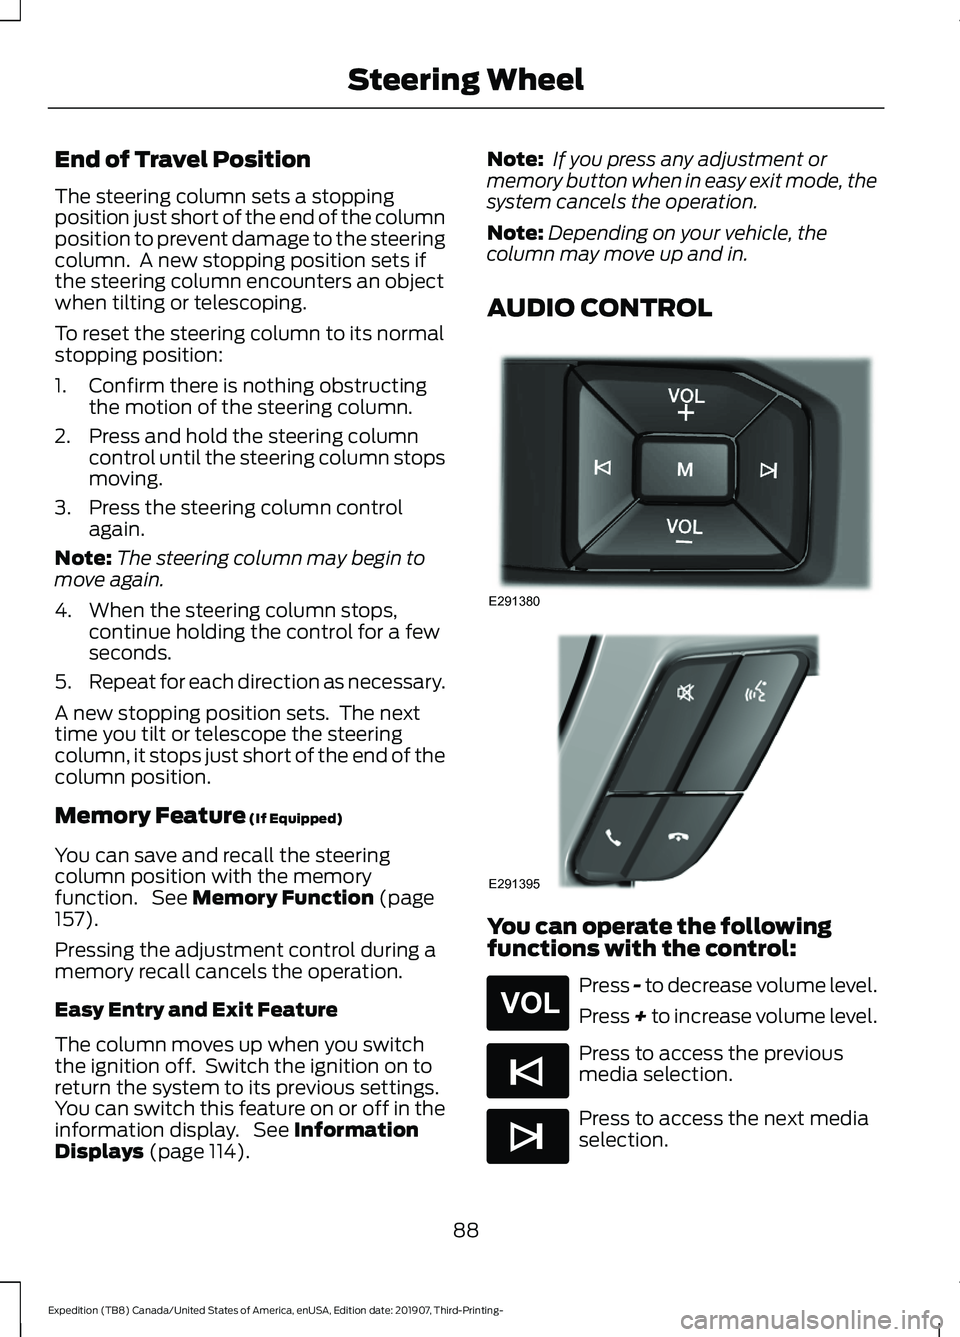
AUDIO CONTROL You can operate the following
functions with the control:
Press - to decrease volume level.
Press + to increase volume level.
Press to access the previous
media selection.
Press to access the next media
selection.
88
Expedition (TB8) Canada/United States of America, enUSA, Edition date: 201907, Third-Printing- Steering WheelE291380 E291395 E265304 E265045 E265044
Page 98 of 542

Flashing the Headlamp High Beam
Slightly pull the lever toward you and
release it to flash the headlamps.
AUTOLAMPS
WARNING: The system does not
relieve you of your responsibility to drive
with due care and attention. You may
need to override the system if it does not
turn the headlamps on in low visibility
conditions, for example daytime fog.
Autolamps turn the headlamps on in low
light situations or when the wipers operate. Switch the lighting control to the
autolamps position.
The headlamps remain on for a period of
time after you switch the ignition off. Use
the information display controls to adjust
the period of time that the headlamps
remain on.
Note: If you switch the autolamps on, you
cannot switch the high beams on until the
system turns the low beams on. Windshield Wiper Activated
Headlamps
When you switch the autolamps on, the
headlamps turn on within 10 seconds of
switching the wipers on. They turn off
approximately 60 seconds after you switch
the windshield wipers off.
The headlamps do not turn on with the
wipers:
•
During a single wipe.
• When using the windshield washers.
• If the wipers are in intermittent mode.
Note: If you switch the autolamps and the
autowipers on, the headlamps turn on when
the windshield wipers continuously operate.
INSTRUMENT LIGHTING
DIMMER
The instrument lighting dimmer buttons
are on the lighting control. Repeatedly press one of the
buttons to adjust the brightness.
HEADLAMP EXIT DELAY
After you switch the ignition off, you can
switch the headlamps on by pulling the
direction indicator lever toward you. You
will hear a short tone. The headlamps will
switch off automatically after three
minutes with any door open or 30 seconds
after the last door has been closed. You
can cancel this feature by pulling the
direction indicator lever toward you again
or switching the ignition on.
95
Expedition (TB8) Canada/United States of America, enUSA, Edition date: 201907, Third-Printing- LightingE311233 E291299 E291298