2020 FORD EXPEDITION lights
[x] Cancel search: lightsPage 216 of 542
PRINCIPLE OF OPERATION
The traction control system helps avoid
drive wheel spin and loss of traction.
If your vehicle begins to slide, the system
applies the brakes to individual wheels
and, when needed, reduces engine power
at the same time. If the wheels spin when
accelerating on slippery or loose surfaces,
the system reduces engine power in order
to increase traction.
USING TRACTION CONTROL
WARNING: The stability and
traction control light illuminates steadily
if the system detects a failure. Make sure
you did not manually disable the traction
control system using the information
display controls or the switch. If the
stability control and traction control light
is still illuminating steadily, have the
system serviced by an authorized dealer
immediately. Operating your vehicle with
the traction control disabled could lead
to an increased risk of loss of vehicle
control, vehicle rollover, personal injury
and death.
The system automatically turns on each
time you switch the ignition on.
If your vehicle is stuck in mud or snow,
switching traction control off may be
beneficial as this allows the wheels to spin.
Note: When you switch traction control off,
stability control remains fully active.
Switching the System Off When you switch the system off,
a message and an illuminated
icon appear on the instrument
cluster. Use the switch again to return the traction
control system to normal operation.
The switch for the stability and traction
control system is on the instrument panel.
Your vehicle may have MyKey restrictions
regarding this feature. See
Principle of
Operation (page 64).
System Indicator Lights and
Messages The stability and traction control
light temporarily illuminates on
engine start-up and flashes:
• When a driving condition activates
either of the systems.
• If a problem occurs in either of the
systems. The stability and traction control
off light temporarily illuminates
on engine start-up and stays on:
• When you switch the traction control
system off.
• When you select an alternative stability
control mode.
213
Expedition (TB8) Canada/United States of America, enUSA, Edition date: 201907, Third-Printing- Traction ControlE130458 E138639 E130458
Page 245 of 542

Detection issues can occur:
When driving on a different line
than the vehicle in front.
A
With vehicles that edge into your
lane. The system can only detect
these vehicles once they move
fully into your lane.
B
There may be issues with the
detection of vehicles in front
when driving into and coming out
of a bend or curve in the road.
C
In these cases, the system may brake late
or unexpectedly. You should stay alert and
take action when necessary.
If something hits the front end of your
vehicle or damage occurs, the
radar-sensing zone may change. This could
cause missed or false vehicle detection.
Optimal system performance requires a
clear view of the road by the
windshield-mounted camera.
Optimal performance may not occur if:
• The camera is blocked.
• There is poor visibility or lighting
conditions.
• There are bad weather conditions.
System Not Available
Conditions that can cause the system to
deactivate or prevent the system from
activating when requested include:
• A blocked sensor.
• High brake temperature.
• A failure in the system or a related
system. Blocked Sensor
A message displays if something obstructs
the radar signals from the sensor. The
sensor is in the lower grille. The system
cannot detect a vehicle ahead and does
not function when something blocks the
sensor.
Note:
You cannot see the sensor. It is
behind a fascia panel.
Keep the front of your vehicle free of dirt,
metal badges or objects. Vehicle front
protectors and aftermarket lights may also
block the sensor.
242
Expedition (TB8) Canada/United States of America, enUSA, Edition date: 201907, Third-Printing- Cruise ControlE257553
Page 253 of 542

The system is designed to detect vehicles
that may have entered the blind spot zone.
The detection area is on both sides of your
vehicle, extending rearward from the
exterior mirrors to approximately 13 ft
(4 m) beyond the rear bumper. The
detection area extends to approximately
59 ft (18 m)
beyond the rear bumper when
the vehicle speed is greater than 30 mph
(48 km/h) to alert you of faster
approaching vehicles.
Note: The system does not prevent contact
with other vehicles. It is not designed to
detect parked vehicles, pedestrians, animals
or other infrastructures.
Using the Blind Spot Information
System
Vehicles with Automatic Transmission
The system turns on when all of the
following occur:
• You start your vehicle.
• You shift into drive (D).
• The vehicle speed is greater than
6 mph (10 km/h)
.
Note: The system does not operate in park
(P) or reverse (R).
Vehicles with Manual Transmission
The system turns on when all of the
following occur:
• You start your vehicle.
• The vehicle speed is greater than
6 mph (10 km/h)
.
Note: The system does not operate in
reverse (R). System Lights and Messages
When the system detects a vehicle, an
alert indicator illuminates in the exterior
mirror on the side the approaching vehicle
is coming from. If you turn the direction
indicator on for that side of your vehicle,
the alert indicator flashes.
Note:
The system may not alert you if a
vehicle quickly passes through the detection
zone.
Blocked Sensors The sensors are behind the rear bumper
on both sides of your vehicle.
Note:
Keep the sensors free from snow, ice
and large accumulations of dirt.
Note: Do not cover the sensors with bumper
stickers, repair compound or other objects.
Note: Blocked sensors could affect system
performance.
250
Expedition (TB8) Canada/United States of America, enUSA, Edition date: 201907, Third-Printing- Driving AidsE142442 E205199
Page 292 of 542
ESSENTIAL TOWING CHECKS
Follow these guidelines for safe towing:
•
Do not tow a trailer until you drive your
vehicle at least 1,000 mi (1,600 km).
• Consult your local motor vehicle laws
for towing a trailer.
• See the instructions included with
towing accessories for the proper
installation and adjustment
specifications.
• Service your vehicle more frequently if
you tow a trailer. See your scheduled
maintenance information.
• If you use a rental trailer, follow the
instructions the rental agency gives
you.
For load specification terms found on the
tire label and Safety Compliance label and
instructions on calculating your vehicle's
load,
See Load Limit (page 269).
Remember to account for the trailer
tongue weight as part of your vehicle load
when calculating the total vehicle weight.
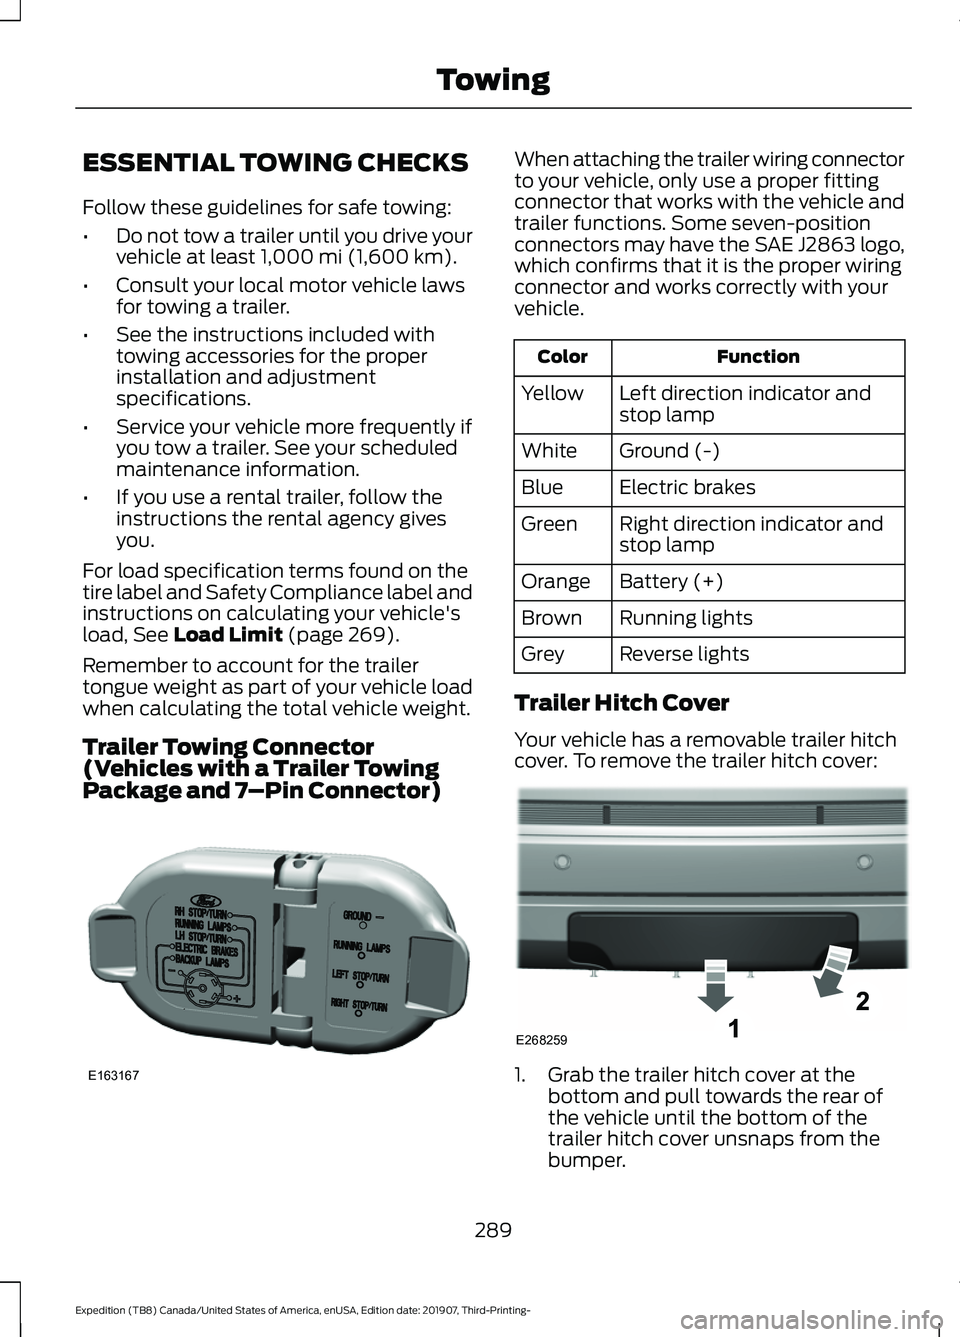
Trailer Towing Connector
(Vehicles with a Trailer Towing
Package and 7 –Pin Connector) When attaching the trailer wiring connector
to your vehicle, only use a proper fitting
connector that works with the vehicle and
trailer functions. Some seven-position
connectors may have the SAE J2863 logo,
which confirms that it is the proper wiring
connector and works correctly with your
vehicle.
Function
Color
Left direction indicator and
stop lamp
Yellow
Ground (-)
White
Electric brakes
Blue
Right direction indicator and
stop lamp
Green
Battery (+)
Orange
Running lights
Brown
Reverse lights
Grey
Trailer Hitch Cover
Your vehicle has a removable trailer hitch
cover. To remove the trailer hitch cover: 1. Grab the trailer hitch cover at the
bottom and pull towards the rear of
the vehicle until the bottom of the
trailer hitch cover unsnaps from the
bumper.
289
Expedition (TB8) Canada/United States of America, enUSA, Edition date: 201907, Third-Printing- TowingE163167 E268259
Page 297 of 542
wiring. Consult your trailer dealer for
assistance. This can be a short to ground
such as a chaffed wire, short to voltage
such as a pulled pin on trailer emergency
breakaway battery, or the trailer brakes
may be drawing too much current.
Points to Remember
Note:
Do not attempt removal of the trailer
brake controller without consulting the
Workshop Manual. Damage to the unit may
result.
• Adjust gain setting before using the
trailer brake controller for the first time.
• Adjust gain setting, using the procedure
above, whenever road, weather and
trailer or vehicle loading conditions
change from when the gain was initially
set.
• Only use the manual control lever for
proper adjustment of the gain during
trailer setup. Misuse, such as
application during trailer sway, could
cause instability of trailer or tow
vehicle.
• Avoid towing in adverse weather
conditions. The trailer brake controller
does not provide anti-lock control of
the trailer wheels. Trailer wheels can
lock up on slippery surfaces, resulting
in reduced stability of trailer and tow
vehicle.
• The trailer brake controller is equipped
with a feature that reduces output at
vehicle speeds below 11 mph (18 km/h)
so trailer and vehicle braking is not jerky
or harsh. This feature is only available
when applying the brakes using your
vehicle's brake pedal, not the
controller.
• The controller interacts with the brake
control system and powertrain control
system of your vehicle to provide the
best performance on different road
conditions. •
Your vehicle's brake system and the
trailer brake system work
independently of each other. Changing
the gain setting on the controller does
not affect the operation of your
vehicle's brakes whether you attach a
trailer or not.
• When you switch the engine off, the
controller output is disabled and the
display and module shut down. The
controller module and display turn on
when you switch the ignition on.
• The trailer brake controller is only a
factory-installed or dealer-installed
item. We are not responsible for
warranty or performance of the
controller due to misuse or customer
installation.
Trailer Lamps WARNING: Never connect any
trailer lamp wiring to the vehicle's tail
lamp wiring; this may damage the
electrical system resulting in fire. Contact
your authorized dealer as soon as
possible for assistance in proper trailer
tow wiring installation. Additional
electrical equipment may be required.
Trailer lamps are required on most towed
vehicles. Make sure all running lights, brake
lights, direction indicators and hazard lights
are working.
Before Towing a Trailer
Practice turning, stopping and backing up
to get the feel of your vehicle-trailer
combination before starting on a trip.
When turning, make wider turns so the
trailer wheels clear curbs and other
obstacles.
294
Expedition (TB8) Canada/United States of America, enUSA, Edition date: 201907, Third-Printing- Towing
Page 303 of 542
•
Avoid adding particular accessories to
your vehicle (e.g. bug deflectors,
rollbars/light bars, running boards, ski
racks).
• Avoid driving with the wheels out of
alignment.
BREAKING-IN
You need to break in new tires for
approximately 300 mi (480 km). During
this time, your vehicle may exhibit some
unusual driving characteristics.
Avoid driving too fast during the first
1,000 mi (1,600 km)
. Vary your speed
frequently and change up through the
gears early. Do not labor the engine.
Do not tow during the first
1,000 mi
(1,600 km).
DRIVING THROUGH WATER WARNING:
Do not drive through
flowing or deep water as you may lose
control of your vehicle.
Note: Driving through standing water can
cause vehicle damage.
Note: Engine damage can occur if water
enters the air filter.
Before driving through standing water,
check the depth. Never drive through water
that is higher than the bottom of the wheel
hubs. When driving through standing water, drive
very slowly and do not stop your vehicle.
Your brake performance and traction may
be limited. After driving through water and
as soon as it is safe to do so:
•
Lightly press the brake pedal to dry the
brakes and to check that they work.
• Check that the horn works.
• Check that the exterior lights work.
• Turn the steering wheel to check that
the steering power assist works.
FLOOR MATS WARNING:
Use a floor mat
designed to fit the footwell of your
vehicle that does not obstruct the pedal
area. Failure to follow this instruction
could result in the loss of control of your
vehicle, personal injury or death. WARNING:
Pedals that cannot
move freely can cause loss of vehicle
control and increase the risk of serious
personal injury.
300
Expedition (TB8) Canada/United States of America, enUSA, Edition date: 201907, Third-Printing- Driving HintsE176913
Page 479 of 542
When the oil change message appears in
the information display, it is time for an oil
change. Make sure you perform the oil
change within two weeks or 500 mi
(800 km) of the message appearing. Make
sure you reset the Intelligent Oil-Life
Monitor after each oil change. See
Oil
Change Indicator Reset (page 328).
If your information display resets
prematurely or becomes inoperative, you
should perform the oil change interval at
six months or
5,000 mi (8,000 km) from
your last oil change. Never exceed one year
or
10,000 mi (16,000 km) between oil
change intervals,
Your vehicle is very sophisticated and built
with multiple, complex, performance
systems. Every manufacturer develops
these systems using different
specifications and performance features.
That is why it is important to rely upon your
dealership to properly diagnose and repair
your vehicle.
We have recommended maintenance
intervals for various parts and component
systems based upon engineering testing.
We rely upon this testing to determine the
most appropriate mileage for replacement
of oils and fluids to protect your vehicle at
the lowest overall cost to you and
recommends against maintenance
schedules that deviate from the scheduled
maintenance information.
We strongly recommend the use of only
genuine Ford, Motorcraft or
Ford-authorized re-manufactured
replacement parts engineered for your
vehicle. Additives and Chemicals
This owner's manual and the our
Workshop Manual list the recommended
additives and chemicals for your vehicle.
We do not recommend using chemicals or
additives not approved by us as part of
your vehicle
’s normal maintenance. Please
consult your warranty information.
Oils, Fluids and Flushing
In many cases, fluid discoloration is a
normal operating characteristic and, by
itself, does not necessarily indicate a
concern or that the fluid needs to be
changed. However, a qualified expert, such
as the factory-trained technicians at your
dealership, should inspect discolored fluids
that also show signs of overheating or
foreign material contamination
immediately.
Make sure to change your vehicle ’s oils and
fluids at the specified intervals or in
conjunction with a repair. Flushing is a
viable way to change fluid for many vehicle
sub-systems during scheduled
maintenance. It is critical that systems are
flushed only with new fluid that is the same
as that required to fill and operate the
system or using a Ford-approved flushing
chemical.
Owner Checks and Services
Make sure you perform the following basic
maintenance checks and inspections every
month or at six-month intervals. Check Every Month
Engine oil level.
Function of all interior and exterior lights.
Tires (including spare) for wear and proper pressure.
476
Expedition (TB8) Canada/United States of America, enUSA, Edition date: 201907, Third-Printing- Scheduled Maintenance
Page 540 of 542

Information Contained on the Tire
Sidewall ............................................................ 355
Temperature A B C............................................ 354
Traction AA A B C............................................... 353
Treadwear............................................................. 353
Tire Pressure Monitoring System..........368 Changing Tires With a Tire Pressure
Monitoring System....................................... 370
Understanding Your Tire Pressure Monitoring System ...................................... 370
Tires See: Wheels and Tires...................................... 351
Towing a Trailer.............................................275 Load Placement................................................. 275
Towing Points................................................307
Towing the Vehicle on Four Wheels.........................................................296
Four-wheel-down Towing............................. 296
Recreational Towing........................................ 296
Towing
..............................................................275
Traction Control.............................................213
Principle of Operation....................................... 213
Trailer Reversing Aids
.................................276
Principle of Operation...................................... 276
Pro Trailer Backup Assist™............................ 276
Setting Up Pro Trailer Backup Assist..........276
Troubleshooting.................................................. 281
Using Pro Trailer Backup Assist................... 280
Trailer Sway Control...................................285
Transfer Case Fluid Check........................334
Transmission Code Designation............383
Transmission..................................................193
Transporting the Vehicle..........................306
U
Under Hood Overview...............................326
Unique Driving Characteristics
................179
Universal Garage Door Opener...............165 HomeLink Wireless Control System...........165
USB Port.........................................................407 Locating the USB Ports.................................. 408
Using Adaptive Cruise Control................237 Automatic Cancellation.................................. 240
Blocked Sensor................................................... 242
Canceling the Set Speed................................ 240
Changing the Set Speed................................. 240
Detection Issues.................................................. 241Following a Vehicle...........................................
238
Following a Vehicle to a Complete Stop................................................................... 239
Hilly Condition Usage........................................ 241
Overriding the Set Speed............................... 240
Park Brake Application..................................... 241
Resuming the Set Speed................................ 240
Setting the Adaptive Cruise Speed.............238
Setting the Adaptive Cruise Speed When Your Vehicle is Stationary.......................... 238
Setting the Gap Distance............................... 239
Switching Adaptive Cruise Control Off........................................................................\
241
Switching Adaptive Cruise Control On....................................................................... 238
Switching to Normal Cruise Control...........243
System Not Available....................................... 242
Using Four-Wheel Drive...........................200 4WD Switch Selections.................................. 200
4X4 Indicator Lights......................................... 200
Driving Off-Road With Truck and Utility Vehicles............................................................ 203
How Your Vehicle Differs From Other Vehicles............................................................ 202
Operating 4WD Vehicles With Spare or Mismatched Tires......................................... 202
Using Hill Descent Control.........................217 Hill Descent Modes............................................. 217
Using MyKey With Remote Start Systems...........................................................67
Using Power Running Boards
....................85
Automatic Power Deploy.................................. 85
Automatic Power Stow..................................... 85
Bounce-back......................................................... 86
Enabling and Disabling...................................... 85
Manual Power Deploy........................................ 85
Using Snow Chains.....................................367
Using Stability Control................................215 Stability Control and Traction Control with
Roll Stability Control ™ (RSC™)..............215
Using SYNC™ With Your Media Player.............................................................416
Audio Voice Commands................................... 417
Media Sources..................................................... 416
Using SYNC™ With Your Phone.............412 Accessing Features through the Phone
Menu................................................................... 413
Pairing a Phone................................................... 412
537
Expedition (TB8) Canada/United States of America, enUSA, Edition date: 201907, Third-Printing- Index