2020 AUDI A3 turn signal
[x] Cancel search: turn signalPage 141 of 400
8V2012721BK
Parking aid
The rearview camera is located above the rear li-
cense plate bracket. Make sure that the lens for
the parking system > fig. 135 is not covered by
deposits or any other obstructions because this
can affect the function of the parking system. For
information on cleaning, see > page 342.
The rearview camera coverage area includes ()
> fig. 134. Only this area is shown in the Info-
tainment display. Objects that are in area Q),
which is not covered, are not displayed.
Z\ WARNING
— Always read and follow the applicable warn-
ings > A\ in General information on
page 136.
— If the position and the installation angle of
the rearview camera was changed, for exam-
ple after a collision, do not continue to use
the system for safety reasons. Have it
checked by an authorized Audi dealer or au-
thorized Audi Service Facility.
— Only use the rearview camera to assist you if
it shows a good, clear picture. For example,
the image may be affected by the sun shin-
ing into the lens, dirt on the lens, or if there
is a malfunction.
— Use the rearview camera only if the luggage
compartment lid is completely closed. If the
luggage compartment lid is open the orien-
tation lines and blue surfaces are hidden.
Make sure any objects you may have mount-
ed on the luggage compartment lid do not
block the rearview camera.
— The camera lens enlarges and distorts the
field of vision. The object appears both al-
tered and inaccurate on the screen.
—Incertain situations, people or objects in
the display appear closer or farther away:
— For objects that do not touch the ground,
such as the bumper of a parked vehicle, a
trailer hitch or the rear of a truck. Do not
use the
orientation lines in this case.
—If driven from a level surface onto an in-
cline, or a downward slope.
— If driven toward protruding objects.
— If the vehicle is carrying too much load in
the rear.
CG) Note
— Always read and follow the applicable warn-
ings >@ in General information on
page 136.
— The orange-colored orientation lines in the
Infotainment display show the vehicle path
based on the steering wheel angle. The
front of the vehicle swings out more than
the rear of the vehicle. Maintain plenty of
distance so that an exterior mirror or a cor-
ner of the vehicle does not collide with any
obstacles.
Sct Remo
Applies to: vehicles with rearview camera
Switching on and off
Requirement: the vehicle speed must be under
approximately 6 mph (10 km/h).
> Press the Pv button in the center console. A
short confirmation tone sounds and the LED in
the button turns on.
Switching on automatically
The system switches on automatically when re-
verse gear is engaged while the engine is run-
ning.
Switching off automatically
The system switches off automatically when driv-
ing forward faster than 6 mph (10 km/h).
@) Tips
— The visual display* in the right section of the
display should help you detect the critical
vehicle area.
— You can change the volume of the signals
and the display > page 144.
139
Page 143 of 400
8V2012721BK
Parking aid
system. For information on cleaning, see
=> page 342.
When parking spaces are small, the parking sys-
tem signals a continuous tone when an obstacle
is less than approximately 0.7 feet (0.20 m)
away. Do not continue driving farther.
Z\ WARNING
— Always read and follow the applicable warn-
ings > A\ in General information on
page 136.
— Please note that park assist only controls
the steering. The driver is always responsi-
ble for braking and accelerating.
— The driver must decide if the parking space
displayed is suitable for the vehicle.
— The vehicle will change position when park-
ing. Make sure you do not endanger any oth-
er drivers.
— When using park assist to drive into or out
of a parking space, the steering wheel turns
quickly on its own. Reaching into the steer-
ing wheel spokes while this is happening can
result in injury.
@) Note
— Always read and follow the applicable warn-
ings >@ in General information on
page 136.
— Park assist guides the vehicle either away
from curbs or onto them if other vehicles
are parked on the curb. Make sure that your
vehicle's tires and rims are not damaged.
Take over steering at the right time.
— Certain conditions around the parking space
may result in the vehicle not being parked
as expected.
— Objects such as pillars or posts.
— Ground covering such as gravel, snow or
Ices
@) Tips
— The Electronic Stabilization Control (ESC)
must not be switched off during the parking
process > page 94.
— Parking in tight curves with park assist is
not possible.
SY iicealiaremelilie Rela
Applies to: vehicles with park assist
B8V-0644
Fig. 140 Infotainment system: finding a parking space
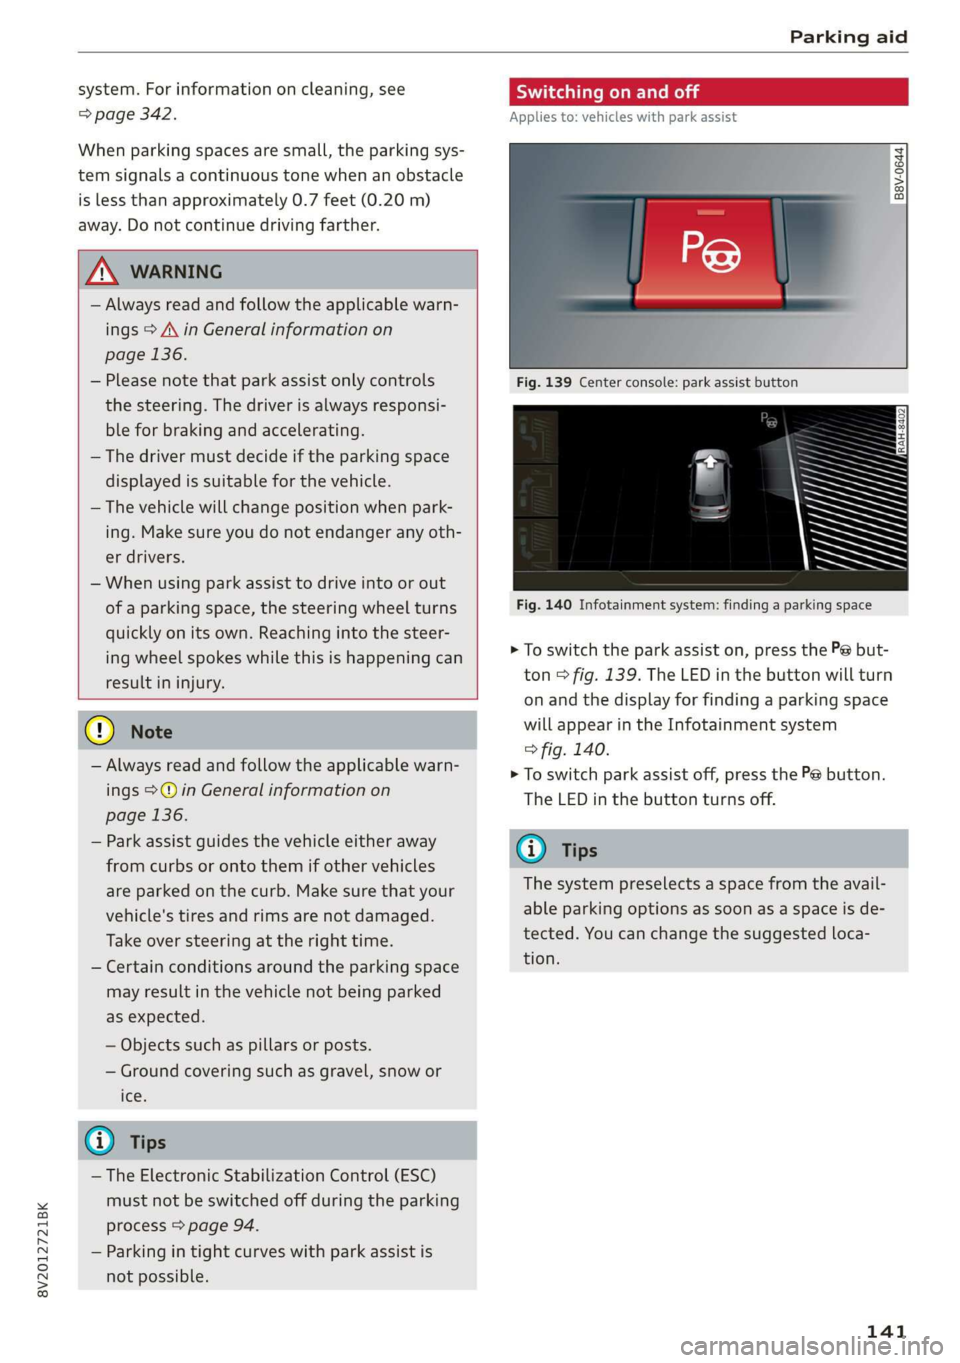
> To switch the park assist on, press the P@ but-
ton > fig. 139. The LED in the button will turn
on and the display for finding a parking space
will appear in the Infotainment system
> fig. 140.
> To switch park assist off, press the Pe button.
The
LED in the button turns off.
@ Tips
The system preselects a space from the avail-
able parking options as soon as a space is de-
tected. You can change the suggested loca-
tion.
141
Page 144 of 400
Parking aid
Parking space search
Applies to: vehicles with park assist
Fig. 142 Infotainment: notification to continue driving in
reverse (example: when parallel parking)
Searching for parking spaces
> Drive forward to the row of parking spaces ata
low speed. For the best parking results, the ve-
hicle should be approximately 3 feet (1 m) from
the row of parking spaces.
> The parking space search is first done on one
side of the lane. To switch the side for the park-
ing space search, activate the turn signal for
that side.
Selecting the parking space
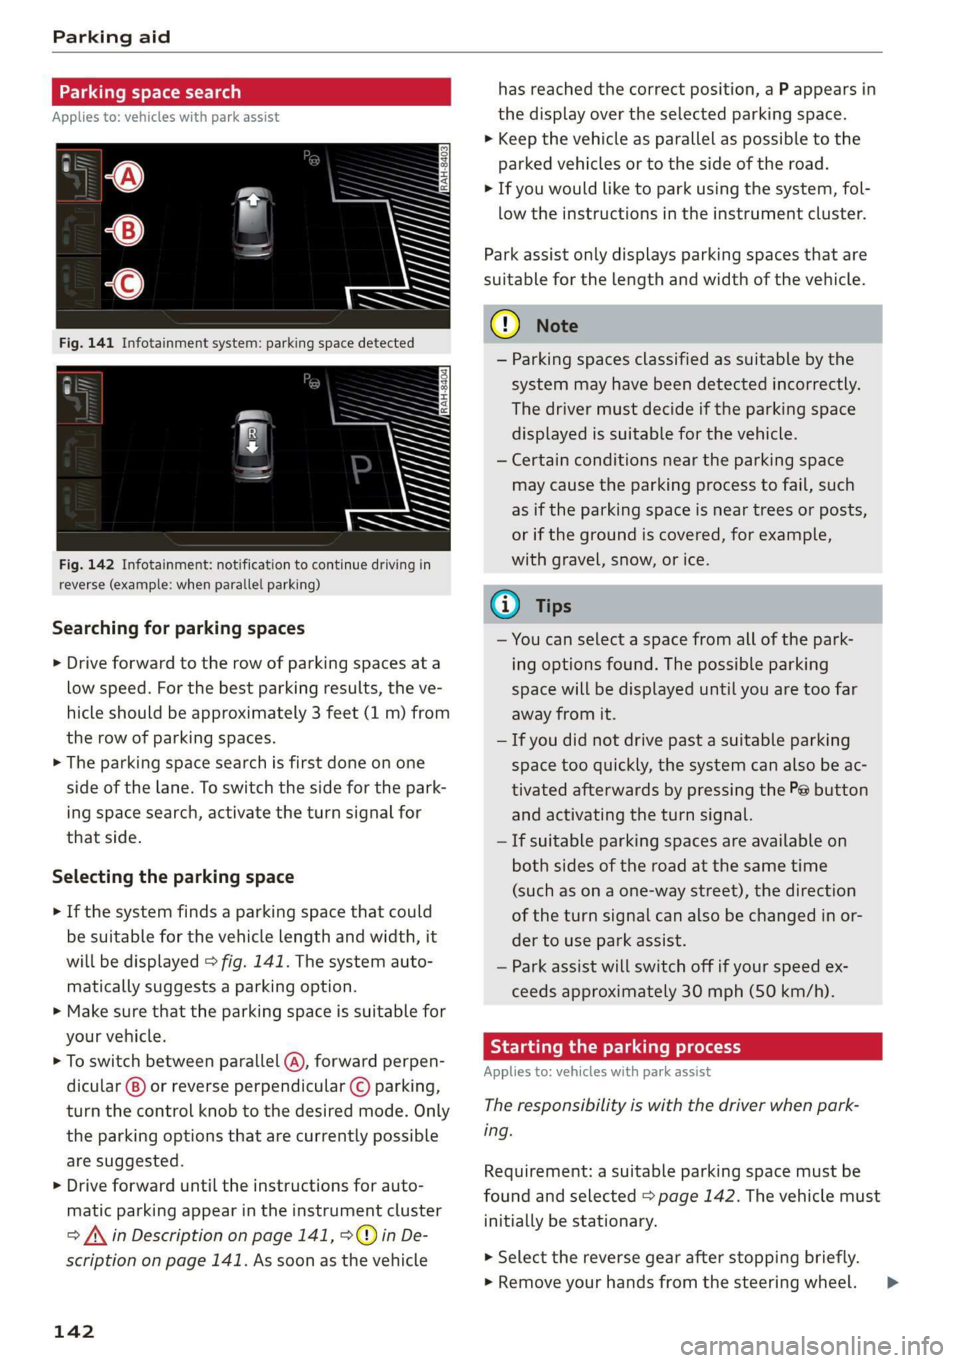
> If the system finds a parking space that could
be suitable for the vehicle length and width, it
will be displayed > fig. 141. The system auto-
matically suggests a parking option.
> Make sure that the parking space is suitable for
your vehicle.
> To switch between parallel (@), forward perpen-
dicular @) or reverse perpendicular © parking,
turn the control knob to the desired mode. Only
the parking options that are currently possible
are suggested.
> Drive forward until the instructions for auto-
matic parking appear in the instrument cluster
> /\ in Description on page 141, >©@ in De-
scription on page 141. As soon as the vehicle
142
has reached the correct position, a P appears in
the display over the selected parking space.
> Keep the vehicle as parallel as possible to the
parked vehicles or to the side of the road.
> If you would like to park using the system, fol-
low the instructions in the instrument cluster.
Park assist only displays parking spaces that are
suitable for the length and width of the vehicle.
@) Note
— Parking spaces classified as suitable by the
system may have been detected incorrectly.
The driver must decide if the parking space
displayed is suitable for the vehicle.
— Certain conditions near the parking space
may cause the parking process to fail, such
as if the parking space is near trees or posts,
or if the ground is covered, for example,
with gravel, snow, or ice.
G) Tips
— You can select a space from all of the park-
ing options found. The possible parking
space will be displayed until you are too far
away from it.
— If you did not drive past a suitable parking
space too quickly, the system can also be ac-
tivated afterwards by pressing the Pe button
and activating the turn signal.
— If suitable parking spaces are available on
both sides of the road at the same time
(such as on a one-way street), the direction
of the turn signal can also be changed in or-
der to use park assist.
— Park assist will switch off if your speed ex-
ceeds approximately 30 mph (50 km/h).
Starting the parking process
Applies to: vehicles with park assist
The responsibility is with the driver when park-
ing.
Requirement: a suitable parking space must be
found and selected > page 142. The vehicle must
initially be stationary.
> Select the reverse gear after stopping briefly.
» Remove your hands from the steering wheel. >
Page 145 of 400
8V2012721BK
Parking aid
> Pay attention to the path of the vehicle. When
the traffic situation allows, press the accelera-
tor pedal accordingly > A\ in Description on
page 141, >@) in Description on page 141.
> Follow the visual instructions and the warning
tones until the parking process has ended. The
arrows on the vehicle indicate the necessary di-
rection of travel.
Park assist automatically steers the vehicle into
the parking space while the driver presses the
pedals. The maximum parking speed is 4 mph
(7 km/h).
Interrupting the park assist
If the speed is too high and you take over steer-
ing, park assist switches off. To continue parking,
press the Pe button again. The park assist indica-
tor appears again in the display.
G) Tips
You can also cancel the direction of travel
specified by the system by switching between
forward and reverse gears. Based on the posi-
tion of the vehicle, the system then calculates
the additional steering and driving directions
for maneuvering.
Driving out of a parallel parking space
Applies to: vehicles with park assist
The responsibility is with the driver when leaving
a parking space.
If you parked the vehicle in a parallel parking
space, park assist can help you drive out of it.
> Start the engine.
> Press the Pe button > page 141, fig. 139.
> Wait until a message appears that requests the
direction to travel in for exiting the parking
space.
> Activate the appropriate turn signal. The mes-
sage Start automatic unparking procedure ap-
pears.
» Remove your hands from the steering wheel.
> Press the control knob to start the procedure
for exiting the parking space.
> Pay attention to the path of the vehicle. When
the traffic situation allows, press the accelera-
tor pedal accordingly > A\ in Description on
page 141, >@) in Description on page 141.
> Follow the visual instructions > page 143 and
the warning tones until the vehicle has finished
exiting the parking space.
> Drive in the direction indicated by the arrows on
the vehicle.
> The procedure has ended when additional cor-
rective movements are no longer necessary.
Take over steering.
Park assist automatically steers the vehicle out of
the parking space while the driver presses the
pedals. The maximum speed for exiting a parking
space is 3 mph (5 km/h).
Interrupting the park assist
If the speed is too high and you take over steer-
ing, park assist switches off. To continue exiting
the parking space, switch the engine off and on.
Then press the Pe button again. Otherwise, leave
the parking space without using park assist.
Messages
Applies to: vehicles with park assist
Park assist: canceled. Steering input by driv-
er. Please take over steering!
Park assist was canceled because the driver took
over steering. To continue parking, press the
button again.
ro" Park assist: time limit exceeded
& Park assist: canceled. Time limit exceeded.
Take over steering!
The parking process was not completed within
approximately six minutes of activating park as-
sist. To continue parking, press the Pe button
again.
Park assist: canceled. Speed too high. Please
take over steering!
The speed entering the parking space is too high.
Drive no faster than 4 mph (7 km/h).
Park assist: canceled. Stabilization control
(ESC) input. Please take over steering!
143
Page 149 of 400
8V2012721BK
Multi Media Interface
ZA\ WARNING
To reduce the risk of an accident, adjust the
volume of the audio systems so that signals
outside of the vehicle, such as police and fire
sirens, can be heard easily at all times.
G) Tips
The MMI switches off automatically if the en-
gine is not running and the vehicle battery is
low.
Infotainment system
display
SY iieiemly Aol ai
The Infotainment system display automatically
extends and retracts when you switch the igni-
tion on and off.
> When it is extended, press the [@! button to
switch the Infotainment system display on or
off.
When the MMI is switched on and the display is
switched off, you can operate certain functions
using the On/Off knob with the MMI joystick
function > page 146.
@ Tips
There may be delays when switching on the
display.
MMI operation
Selecting and confirming a function
cy
= x
ce|
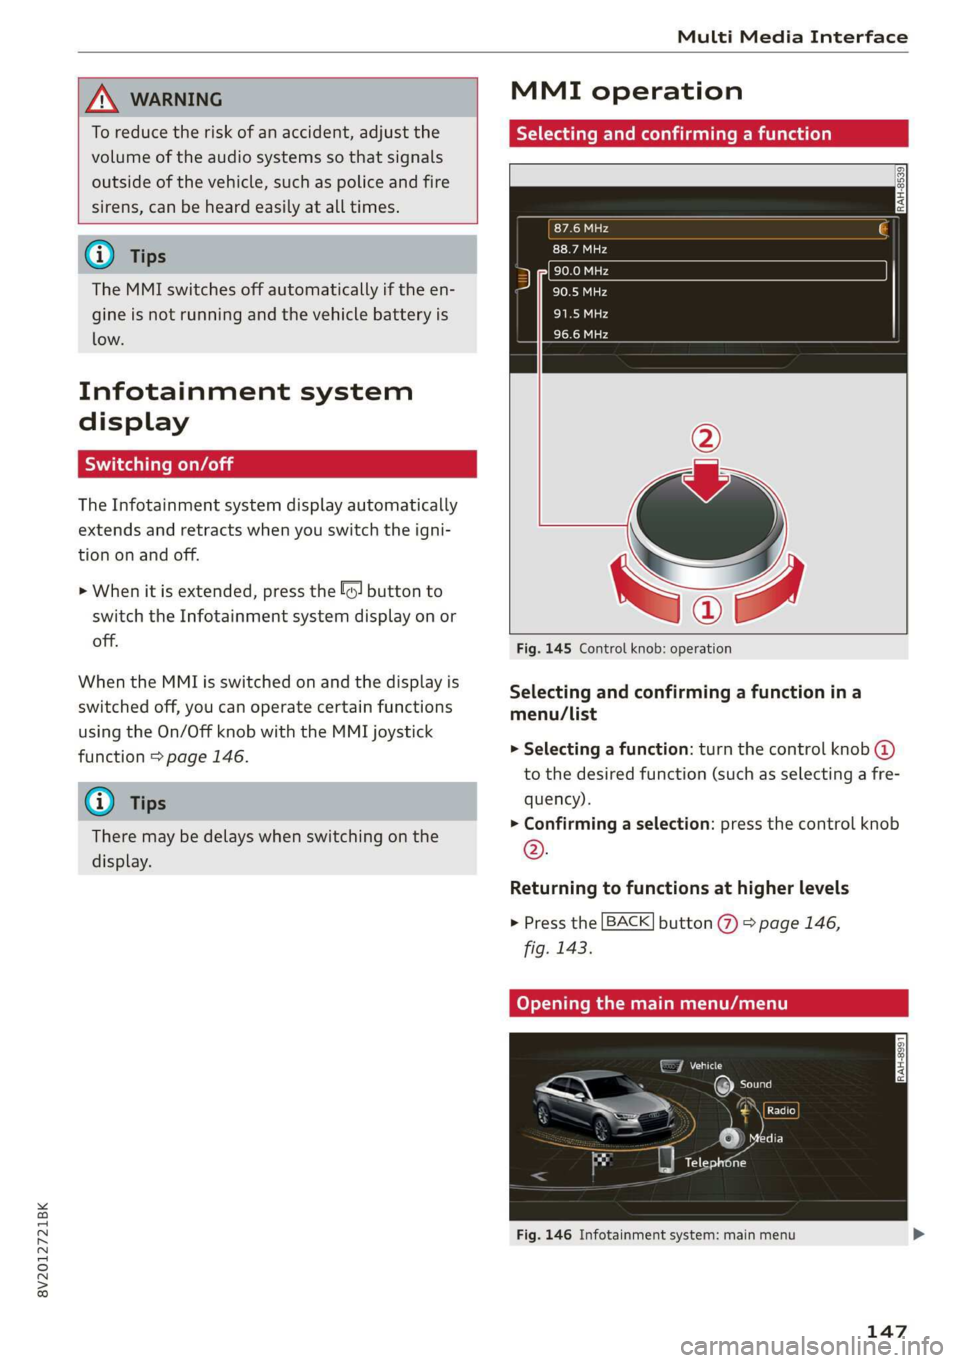
Fig. 145 Control knob: operation
Selecting and confirming a function in a
menu/list
> Selecting a function: turn the control knob @)
to the desired function (such as selecting a fre-
quency).
> Confirming a selection: press the control knob
©.
Returning to functions at higher levels
> Press the [BACK] button %) > page 146,
fig. 143.
Coy eY nema Anal)
Fig. 146 Infotainment system: main menu
147
Page 151 of 400
8V2012721BK
Multi Media Interface
MMI touch
MMI touch control pad
Applies to: vehicles with MMI touch
RAH-8776
, Los Angeles, CA
‘ ee
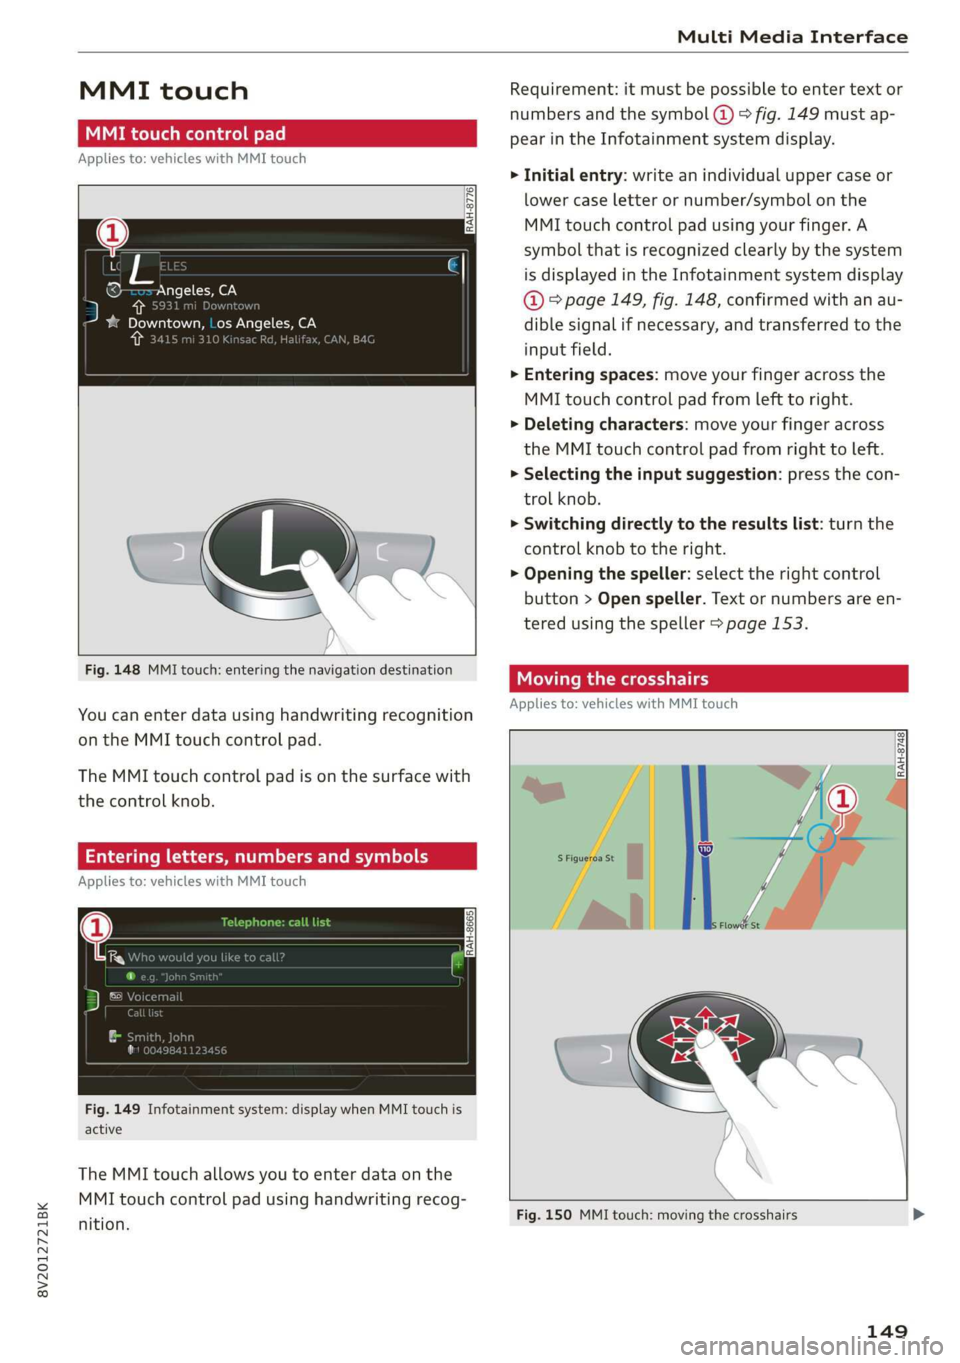
Fig. 148 MMI touch: entering the navigation destination
You can enter data using handwriting recognition
on the MMI touch control pad.
The MMI touch control pad is on the surface with
the control knob.
Entering letters, numbers and symbols
Applies to: vehicles with MMI touch
Fig. 149 Infotainment system: display when MMI touch is
active
The MMI touch allows you to enter data on the
MMI touch control pad using handwriting recog-
nition.
Requirement: it must be possible to enter text or
numbers and the symbol @ > fig. 149 must ap-
pear in the Infotainment system display.
> Initial entry: write an individual upper case or
lower case letter or number/symbol on the
MMI touch control pad using your finger. A
symbol that is recognized clearly by the system
is displayed in the Infotainment system display
@ ° page 149, fig. 148, confirmed with an au-
dible signal if necessary, and transferred to the
input field.
> Entering spaces: move your finger across the
MMI touch control pad from left to right.
> Deleting characters: move your finger across
the MMI touch control pad from right to left.
> Selecting the input suggestion: press the con-
trol knob.
> Switching directly to the results list: turn the
control knob to the right.
> Opening the speller: select the right control
button > Open speller. Text or numbers are en-
tered using the speller > page 153.
Moving the crosshairs
Applies to: vehicles with MMI touch
rans
~~
S Figueroa St ij
— | “ie
Lo
Fig. 150 MMI touch: moving the crosshairs
149
Page 157 of 400

8V2012721BK
Multi Media Interface
Selecting the input suggestion to complete
the entry
Requirement: an input suggestion to complete
the entry* @) must be displayed.
> MMI touch input*: press the control knob.
> MMI touch input*: turn the control knob to the
right. Select and confirm an entry from the list.
> Speller input: select and confirm [LIST] @
=> page 153, fig. 155, or
» Push the control knob down. Select and con-
firm an entry from the list.
Selecting an entry from the results list
Requirement: at least one entry must be dis-
played in the results list @).
Menus and Symbols
Qs
EXC eR
Seen
arcs
ome
Fig. 157 Infotainment system: menus and symbols
Symbol/Description Description
® Selected text Selected function.
@ ONLINE Receiving online traffic information > page 204.
©
Entertainment sliding
menu
Displays information about the media source that is currently se-
lected or a situation (such as an incoming call). Depending on vehi-
cle equipment, operation might also be possible using the open en-
tertainment sliding menu (such as selecting a radio station or ac-
cepting a call) >page 151.
Jukebox* importing proc-
Importing audio/video files to the Jukebox > page 213.
ess
Repeat track The track currently playing is repeated > page 223.
Shuffle All files on the playlist are played in random > page 223, Shuffle.
Arrow Access information by pressing the control knob when the selected
text is active.
©
|
@
|O/@|
©
Telephone signal
strength bars
Telephone signal strength.
©
Exclamation point on the
telephone
Indicates missed calls.
155
Page 158 of 400

Multi Media Interface
Symbol/Description Description
©
Data connection signal
strength bars*
Signal strength for the active data connection, or
PIN: enter the PIN (SIM)
PUK: enter the PUK
Network coverage for the active data connection > page 187
2G: GSM network
AGISGATE 3G: UMTS network
LTE*: LTE network
Mute The audio source is muted > page 234.
Roaming Outside the mobile network for the connected cell phone or the em-
bedded SIM card.
Importing process Import/update of the contacts in the directory or the call lists
Options menu*
Select and confirm context-dependent functions as well as settings
within a menu item
Bluetooth* Bluetooth device connected > page 214 or > page 169.
Scroll bars
Indicates a long list.
Move within lists by turning the control knob
Information that can be changed using the letter/number speller
Input field
PME HE => page 153 or MMI touch* > page 149.
MMI touch* Operation using the MMI touch control pad is possible.
Knob Setting for the selected function by turning the control knob.
: : : 7 :
Check boxes You can switch certain functions on [y or off L] by pressing the con
trol knob.
®
|
®
|O|@|
©
|
©
O|
©
|®|
©
|O|
©
Selection list
Settings for the selected function that are accessed by pressing the
control knob.
156