2020 AUDI A3 ad blue
[x] Cancel search: ad bluePage 5 of 400

8V2012721BK
Table of contents
Audi active lane assist. .............65 128
Audi side assist... 2... 0.00.00. 131
PRB CAIG, scsi: 3 6 nose 28 wow swan « 136
Generalinformation................. 136
Parking system plus...........000000 137
Rearview Cametaiics « + icon so ese vo aoa 138
Park assist........ 0.00.00. c eee eee 140
Adjusting the parking aid............. 144
ErrOrimessages’: ¢ « wea = v news 2s new 6 2 145
Infotainment system............ 146
Multi Media Interface............ 146
Traffic safety information............. 146
Introduction ............. eee eee eee 146
MMI On/Off knob with joystick function.. 146
Infotainment system display.......... 147
MMI operation.............-.0000005 147
MMI tOUEh: « sams ay moe a 2 seers + ¢ eons 149
Control
knob with joystick function..... 151,
Letter/number speller................ 153
PREG textisearch = xc « x saves » y wom 2 eee 154
Menus and Symbols ..........0...0005 155
Multifunction steering wheel.... 157
INtrOduCtion « » sass x & ears s & ewe + & RES 157
Radio... 2... ee eee ee 157
Media... ... ccc eee eee eee 157
Telephone ssc « cays ¢ gees & x eerey & x eee 158
Nawigations. « + cscs 6 + same ao annene #0 ann 159
Voice recognition system........ 162
General information 161
Operating ......... 0.0 cece eee eee eee 162
Command overview information........ 162
Gommands « wisi sv wie 6 2 wenn oe eer a 2 163
External voice operation.............. 168
TALS POR 5 6 cece ss ees0n oo ems 2 wow 169
Introduction. ...... 20... 0. e cee eee eee 169
Setup. ..... 2... eee eee eee eee 169
Using the Audi phone box............. 171
Using the telephone.................. 173
Favorites... 0... 0... cece eee eee 175
MESSAQCS cra, « : ews ¢ ¢ sete x © sees os cee 175
Listening to voicemail................ 178
Directory... ... 00.0... cece ee ee eee 178
Additional settings................0. 180
Troubleshooting. ..............0e0 eee 181
MUA CONMECE « oss65 5 6 60% oe Owe 6 6 or 182
General information................. 182
Audi connect Infotainment............ 182
Using a Wi-Fi hotspot................ 183
Audi connect Infotainment services..... 183
Audi connect e-tron services........... 185
SCHINGS mows 4 » new 2 eee « ¢ wes 4s ee 187
Troubleshooting............0.. eee eee 188
NavigatiOn’.« « » soc: ss acca y seen sees 189
Opening navigation...............00. 189
Entering a destination................ 189
Personal route assistance............. 195
Home address wisi se sceie ee eae ve eee 196
Favorites... 0.0... eee eee eee 196
Directory CONntaACtS wu 5 sensu 5 4 wees 8 8 ee 196
Alternative routes............0000 ee 197
Additional settings...............005 197
Mapizess x = seus g 9 ees Fo eS go Be Ey me 199
Satellite Mapieic ss same s wom a 6 eee 0 owe 202
Map update...............0 2.00000 202
Accessing traffic information.......... 204
Troubleshooting weiss 2 weve so wwe oo wow 205
Radio... ... cece 206
Opening the radio................4.. 206
Radio fumetioms crise « scscese oo eves oo siemens 207
Radio menu......... 0... eee eee eee ee 209
PROSCESS: = s aes 2 soem & s gla & x Hew ED HE 209
Additional settings ..............00 ee 209
Troubleshooting..............-.0000- 210
PROS wesc as soaen 6 3 sonweme 3 7 meen 6 eo 211,
Introduction. ....... 2... cee eee ee 211
Notes = scan « ¢ same © 7 eam og Some tS ee 211
Media drives.: « sissies + «seen 3 2 were sv wen 212
Bluetooth audio player............... 214
Wi-Fi audio player 214
Online media and Internet radio........ 215
Multimedia connections............-. 217
Playing media...............0--00005 219
Additional Settings « wows « s aswa a news 4 222
Supported media and file formats...... 224
Troubleshooting............0-seee eee 226
Page 141 of 400
8V2012721BK
Parking aid
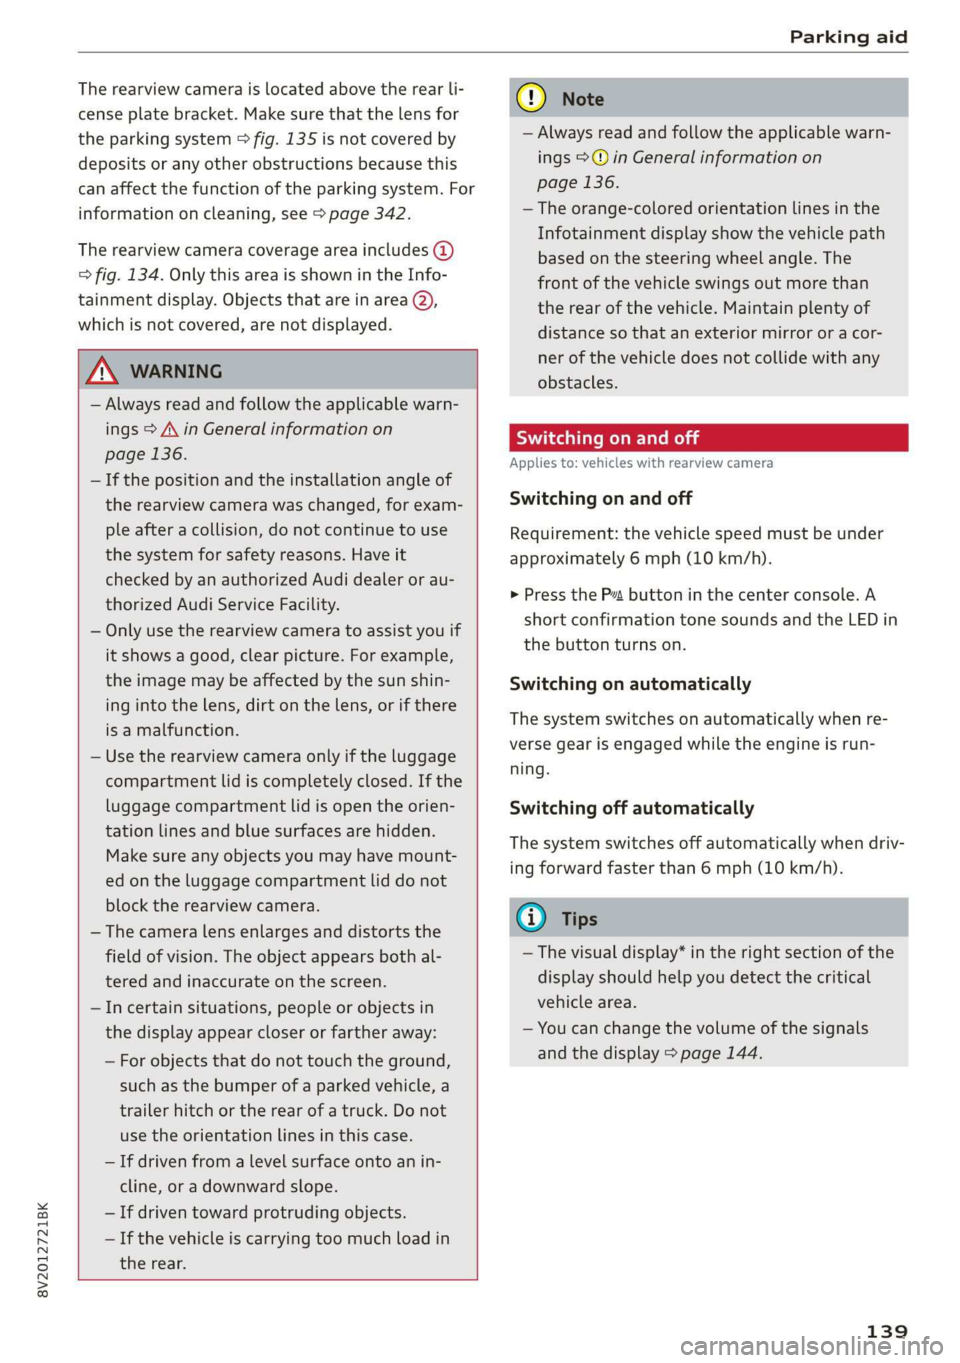
The rearview camera is located above the rear li-
cense plate bracket. Make sure that the lens for
the parking system > fig. 135 is not covered by
deposits or any other obstructions because this
can affect the function of the parking system. For
information on cleaning, see > page 342.
The rearview camera coverage area includes ()
> fig. 134. Only this area is shown in the Info-
tainment display. Objects that are in area Q),
which is not covered, are not displayed.
Z\ WARNING
— Always read and follow the applicable warn-
ings > A\ in General information on
page 136.
— If the position and the installation angle of
the rearview camera was changed, for exam-
ple after a collision, do not continue to use
the system for safety reasons. Have it
checked by an authorized Audi dealer or au-
thorized Audi Service Facility.
— Only use the rearview camera to assist you if
it shows a good, clear picture. For example,
the image may be affected by the sun shin-
ing into the lens, dirt on the lens, or if there
is a malfunction.
— Use the rearview camera only if the luggage
compartment lid is completely closed. If the
luggage compartment lid is open the orien-
tation lines and blue surfaces are hidden.
Make sure any objects you may have mount-
ed on the luggage compartment lid do not
block the rearview camera.
— The camera lens enlarges and distorts the
field of vision. The object appears both al-
tered and inaccurate on the screen.
—Incertain situations, people or objects in
the display appear closer or farther away:
— For objects that do not touch the ground,
such as the bumper of a parked vehicle, a
trailer hitch or the rear of a truck. Do not
use the
orientation lines in this case.
—If driven from a level surface onto an in-
cline, or a downward slope.
— If driven toward protruding objects.
— If the vehicle is carrying too much load in
the rear.
CG) Note
— Always read and follow the applicable warn-
ings >@ in General information on
page 136.
— The orange-colored orientation lines in the
Infotainment display show the vehicle path
based on the steering wheel angle. The
front of the vehicle swings out more than
the rear of the vehicle. Maintain plenty of
distance so that an exterior mirror or a cor-
ner of the vehicle does not collide with any
obstacles.
Sct Remo
Applies to: vehicles with rearview camera
Switching on and off
Requirement: the vehicle speed must be under
approximately 6 mph (10 km/h).
> Press the Pv button in the center console. A
short confirmation tone sounds and the LED in
the button turns on.
Switching on automatically
The system switches on automatically when re-
verse gear is engaged while the engine is run-
ning.
Switching off automatically
The system switches off automatically when driv-
ing forward faster than 6 mph (10 km/h).
@) Tips
— The visual display* in the right section of the
display should help you detect the critical
vehicle area.
— You can change the volume of the signals
and the display > page 144.
139
Page 142 of 400
Parking aid
Applies to: vehicles with rearview camera
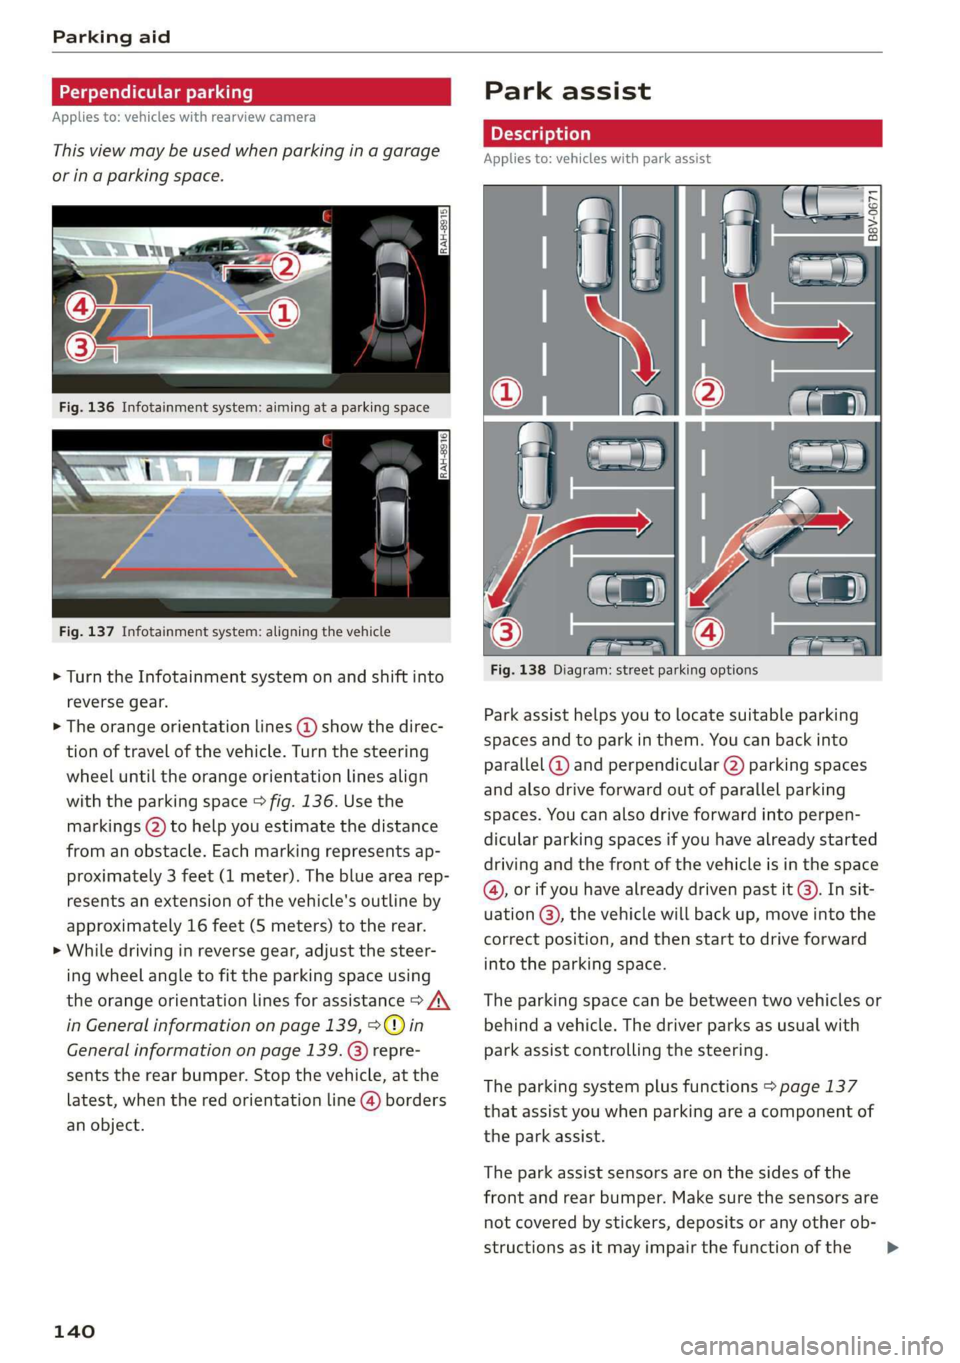
This view may be used when parking in a garage
or ina parking space.
Fig. 137 Infotainment system: aligning the vehicle
> Turn the Infotainment system on and shift into
reverse gear.
> The orange orientation lines @ show the direc-
tion of travel of the vehicle. Turn the steering
wheel until the orange orientation lines align
with the parking space > fig. 136. Use the
markings (2) to help you estimate the distance
from an obstacle. Each marking represents ap-
proximately 3 feet (1 meter). The blue area rep-
resents an extension of the vehicle's outline by
approximately 16 feet (5 meters) to the rear.
> While driving in reverse gear, adjust the steer-
ing wheel angle to fit the parking space using
the orange orientation lines for assistance > A\
in General information on page 139, >@) in
General information on page 139
sents the rear bumper. Stop the vehicle, at the
latest, when the red orientation line @) borders
an object.
repre-
140
Park assist
Applies to: vehicles with park assist
Fig. 138 Diagram: street parking options
Park assist helps you to locate suitable parking
spaces and to park in them. You can back into
parallel @) and perpendicular (2) parking spaces
and also drive forward out of parallel parking
spaces. You can also drive forward into perpen-
dicular parking spaces if you have already started
driving and the front of the vehicle is in the space
(4), or if you have already driven past it @). In sit-
uation @), the vehicle will back up, move into the
correct position, and then start to drive forward
into the parking space.
The parking space can be between two vehicles or
behind a vehicle. The driver parks as usual with
park assist controlling the steering.
The parking system plus functions > page 137
that assist you when parking are a component of
the park assist.
The park assist sensors are on the sides of the
front and rear bumper. Make sure the sensors are
not covered by stickers, deposits or any other ob-
structions as it may impair the function of the >
Page 158 of 400

Multi Media Interface
Symbol/Description Description
©
Data connection signal
strength bars*
Signal strength for the active data connection, or
PIN: enter the PIN (SIM)
PUK: enter the PUK
Network coverage for the active data connection > page 187
2G: GSM network
AGISGATE 3G: UMTS network
LTE*: LTE network
Mute The audio source is muted > page 234.
Roaming Outside the mobile network for the connected cell phone or the em-
bedded SIM card.
Importing process Import/update of the contacts in the directory or the call lists
Options menu*
Select and confirm context-dependent functions as well as settings
within a menu item
Bluetooth* Bluetooth device connected > page 214 or > page 169.
Scroll bars
Indicates a long list.
Move within lists by turning the control knob
Information that can be changed using the letter/number speller
Input field
PME HE => page 153 or MMI touch* > page 149.
MMI touch* Operation using the MMI touch control pad is possible.
Knob Setting for the selected function by turning the control knob.
: : : 7 :
Check boxes You can switch certain functions on [y or off L] by pressing the con
trol knob.
®
|
®
|O|@|
©
|
©
O|
©
|®|
©
|O|
©
Selection list
Settings for the selected function that are accessed by pressing the
control knob.
156
Page 163 of 400

8V2012721BK
Voice recognition system
BAR COMMANDS
* Telephone
* Audi connect
* Navigation
* Directory
* Radio
+ Media
* Sound
* Help
+ Help Speech dialog system
* Help Telephone
* Help Audi connect
* Help Navigation
* Help Map
* Help Radio
* Help Media
TELEPHONE
+ Enter number
* Delete number / correction
+ Directory
* Call (XY)
* business / private / land line / mobile
NAVIGATION
+ Navigate to (XY)
+ Start / cancel route guidance
+ Directory
+ Last destinations
+ Navigation favorites
+ Drive home
- Enter address
+ Enter country / town / street / state
+ Exclude route / Exclude route for (XY) km /m
+ Map
* Day map / Night map
AUDI CONNECT
* Audi connect
* Travel information / Parking information
* Fuel prices
* Weather
+ Radio presets
“FM
*FM/AM/ SIRIUS XM tlle,
* Station (XY) / Frequency (XY)
* Traffic announcement on / off
* 2D driving position map / 2D north position map / 3D map / Destination map / Overview map
+ Favorites a »)
+ Call (XY) sDS
* Enter number
* Redial
* Read new text message
+ Navigate to (XY)
+ Enter address/destination
* Online destinations
* Cancel route guidance
* Map
+ Line (XY)
* Next page / previous page
* Cancel
* No, I meant (XY)
* Correction
Call list _ a.
Redial
Call mailbox we
Enter PIN / delete PIN
Telephone favorites
+ Block route for (XY) miles / Block
the next section
* Route list
* Calculate alternative routes
* Online destinations
* Special destination
Flight information
City events
Online news
Twitter
MEDIA
Jukebox s))
+ CD/DVD MEDIA
SD card 1/ SD card 2
Audi music interface / iPod / USB / Bluetooth /
Wi-Fi / Medium (XY)
* Media favorites / Artists / Albums / Genres /
Tracks / Playlists / Videos
* Folder up
* Random playback on / off
Fig. 161 Command overview
161
Page 169 of 400
8V2012721BK
Voice recognition system
@) Note
Read the information about Audi connect, and
be sure to note the connectivity costs section
=@ in General information on page 182.
@) Tips
Destinations may have to be spelled when en-
tered, depending on which region you are in
and which menu language you have selected.
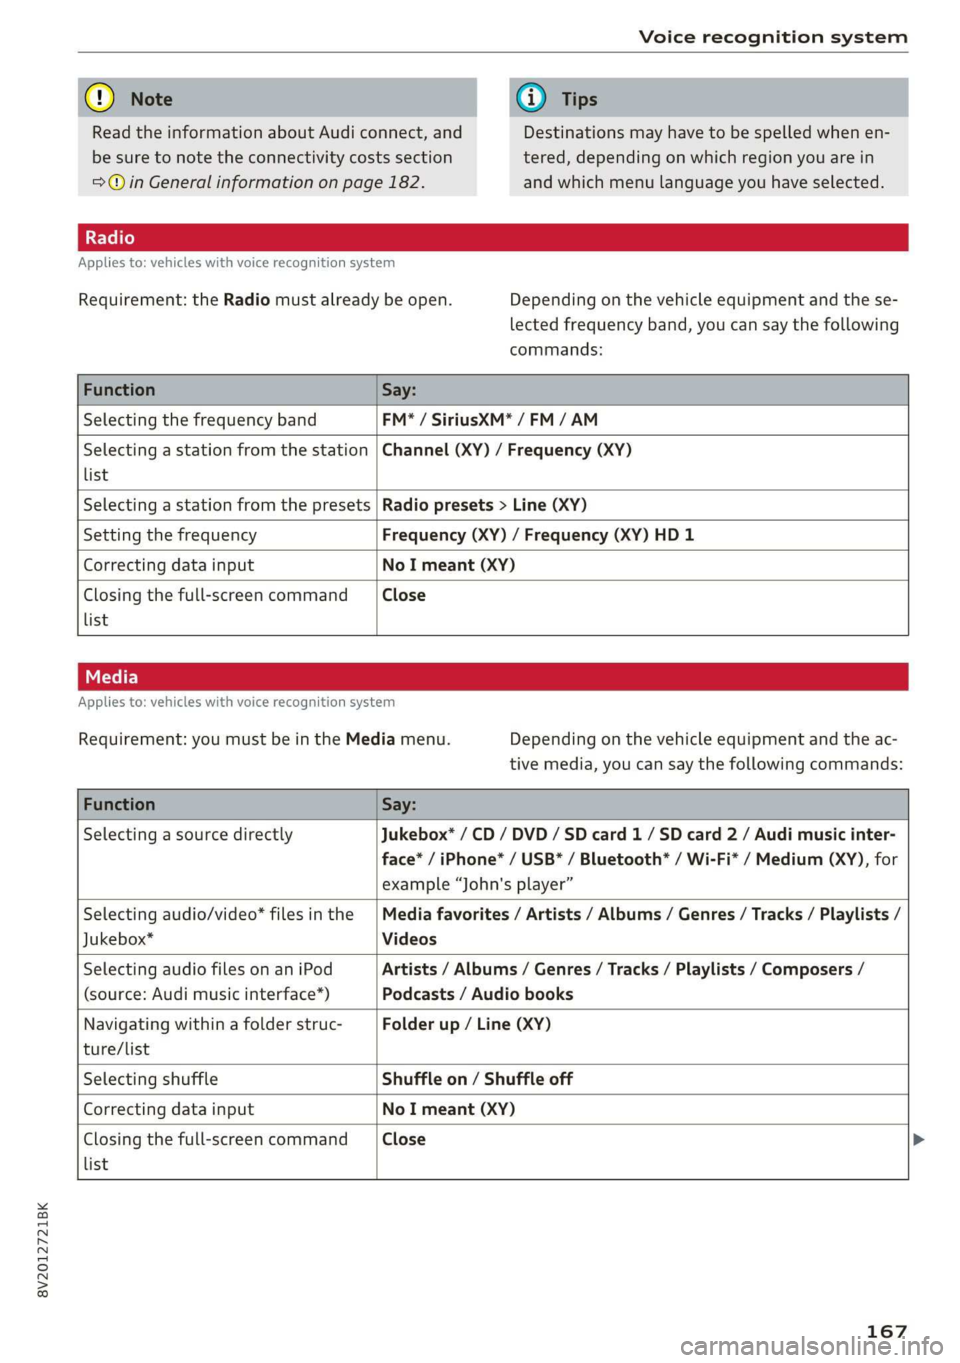
Applies to: vehicles with voice recognition system
Requirement: the Radio must already be open. Depending on the vehicle equipment and the se-
lected frequency band, you can say the following
commands:
Function Say:
Selecting the frequency band FM* / SiriusXM* / FM / AM
Selecting a station from the station
list
Channel (XY) / Frequency (XY)
Selecting a station from the presets Radio presets > Line (XY)
Setting the frequency Frequency (XY) / Frequency (XY) HD 1
Correcting data input No I meant (XY)
Closing the full-screen command
list
Close
Applies to: vehicles with voice recognition system
Requirement: you must be in the Media menu. Depending on the vehicle equipment and the ac-
tive media, you can say the following commands:
Function Say:
Selecting a source directly Jukebox* / CD / DVD / SD card 1 / SD card 2 / Audi music inter-
face* / iPhone* / USB* / Bluetooth® / Wi-Fi* / Medium (XY), for
example “John's player”
Selecting audio/video* files in the
Jukebox*
Media favorites / Artists / Albums / Genres / Tracks / Playlists /
Videos
Selecting audio files on an iPod
(source: Audi music interface*)
Artists / Albums / Genres / Tracks / Playlists / Composers /
Podcasts / Audio books
Navigating within a folder struc-
ture/list
Folder up / Line (XY)
list
Selecting shuffle Shuffle on / Shuffle off
Correcting data input No I meant (XY)
Closing the full-screen command Close >
167
Page 171 of 400
8V2012721BK
Telephone
Telephone
Introduction
Applies to: vehicles with telephone
You can operate various telephone functions easi-
ly through the MMI in your vehicle.
Depending on the country and the vehicle equip-
ment, the following options may be available:
— Connecting a cell phone with Bluetooth
— Using two telephones
— Using the Audi phone box
ZA WARNING
— Medical experts warn that mobile devices
can interfere with the function of pacemak-
ers. Always maintain a minimum distance of
about 7.9 inches (20 cm) between the mo-
bile device antennas and the pacemaker.
— Do not carry the mobile device in a pocket
directly over the pacemaker when the
phone is switched on.
— Switch the mobile device off immediately
if you suspect it may be interfering with
the pacemaker.
— Do not use the voice recognition system*
= page 162 in emergencies because your
voice may change in stressful situations. The
system may take longer to dial the number
or may not be able to dial it at all. Dial the
emergency number manually.
— Switch your mobile device off in areas where
there is a risk of an explosion. These loca-
tions are not always clearly marked. This
may include gas stations, fuel and chemical
storage facilities or transport vehicles, or lo-
cations where fuel vapors (such as propane
or gasoline vapor in vehicles or buildings),
chemicals or large quantities of dust parti-
cles (such as flour, sawdust or metal) may
be present in the air. This also applies to all
other locations where you would normally
turn your vehicle engine off.
— The demands of traffic require your full at-
tention. Always read the chapter
=> page 146, Traffic safety information.
CG) Note
Read the information about Audi connect, and
be sure to note the connectivity costs section
=> page 182.
G@) Tips
— The Bluetooth connection range is limited
to inside the vehicle.
—Aselection of supported Bluetooth devices
can be found in the database for tested mo-
bile devices at www.audi.com/bluetooth.
Setup
Connecting a cell phone via Bluetooth
Applies to: vehicles with telephone
Requirement: the vehicle must be stationary and
the ignition must be switched on. The Bluetooth
settings must be open on your mobile device dur-
ing the connection setup. The mobile device to be
connected must not be actively connected to any
other Bluetooth device. The MMI must not be
connected to a mobile device.
> Enable the Bluetooth function and visibility on
the MMI => page 233 and the cell phone.
> Select: [MENU] button > Telephone > Connect
mobile device > Find new devices > Next. The
available
Bluetooth devices are shown in the In-
fotainment system display, or
> Select: [MENU] button > Settings > left control
button > MMI settings > Connection manager
> page 231.
> Select and confirm the desired cell phone from
the list of displayed Bluetooth devices.
A PIN for a secure Bluetooth connection will be
generated.
> Confirm the PIN on your cell phone and on the
MMI, or:
> Enter the PIN for establishing a connection on
your cell phone. The time allowed for entering
the PIN is limited to approximately 30 seconds.
> Follow the system instructions.
> Pay attention to any other system prompts on
the MMI and on your cell phone.
169
Page 172 of 400
Telephone
After connecting successfully
Information about the connected profiles will ap-
pear. You can also change the profiles later
=> page 233.
The cell phone contacts are automatically loaded
in the MMI. This process can take several mi-
nutes, depending on the number of contacts.
Depending on your cell phone and the connection
type, you can use the following functions:
Handsfree
Requirement: your cell phone must be connected
to the MMI via a Bluetooth Hands Free Profile
(Bluetooth HFP).
You can use the hands-free system. You can make
calls using the antenna on your mobile device.
Sending and receiving messages
See > page 175.
@) Note
Read the information about Audi connect, and
be sure to note the connectivity costs section
=> page 182.
@) Tips
— You can apply additional settings to con-
nected mobile devices using the Connection
manager > page 231.
— You can also search for the MMI on your mo-
bile device using the Bluetooth device
search.
— You only have to pair your device one time.
Bluetooth devices that are already paired
automatically connect to the MMI when the
Bluetooth function is switched on, when
they are within range, and when the ignition
is switched on. The last connected mobile
device is given first priority.
— Pay attention to any system prompts dis-
played on your cell phone, for example if
the system should connect automatically in
the future. Depending on the cell phone,
you may also need to download the directo-
ry and confirm access to your text messages
separately.
170
— When leaving the vehicle, the Bluetooth
connection to the mobile device will auto-
matically disconnect. Depending on your
mobile device, phone calls in progress may
be automatically redirected from the MMI
to your mobile device so that you can con-
tinue the call on your phone.
Using two telephones
Applies to: vehicles with telephone, and Audi phone box
You can connect two cell phones to the MMI, for
example your business cell phone as the primary
phone and your private cell phone as the secon-
dary phone. You can be reached in your vehicle
through both cell phones.
The first connected cell phone is displayed as the
primary phone in the MMI. The second cell phone
is connected as the secondary phone.
The directory from the connected primary phone
will always be displayed. If you would like to use
the directory from the secondary phone, you
must switch the primary and secondary phone
=>page 171.
Connecting a cell phone as the primary
phone
> Connect your cell phone to the MMI via Blue-
tooth. The first connected cell phone is dis-
played as the Primary phone in the MMI.
See > page 169, Connecting a cell phone via
Bluetooth.
Connecting a cell phone as the secondary
phone
Requirement: a cell phone must be connected to
the MMI as the primary phone.
> Select: [MENU] button > Telephone > right con-
trol button > Connect secondary telephone.
See > page 169, Connecting a cell phone via
Bluetooth.
Example: you have connected your business cell
phone to the MMI as the primary phone and your
private cell phone as the secondary phone. To be
able to call contacts from your private cell phone
directory, you must switch the primary and