2020 AUDI A3 ignition
[x] Cancel search: ignitionPage 12 of 400
Quick access
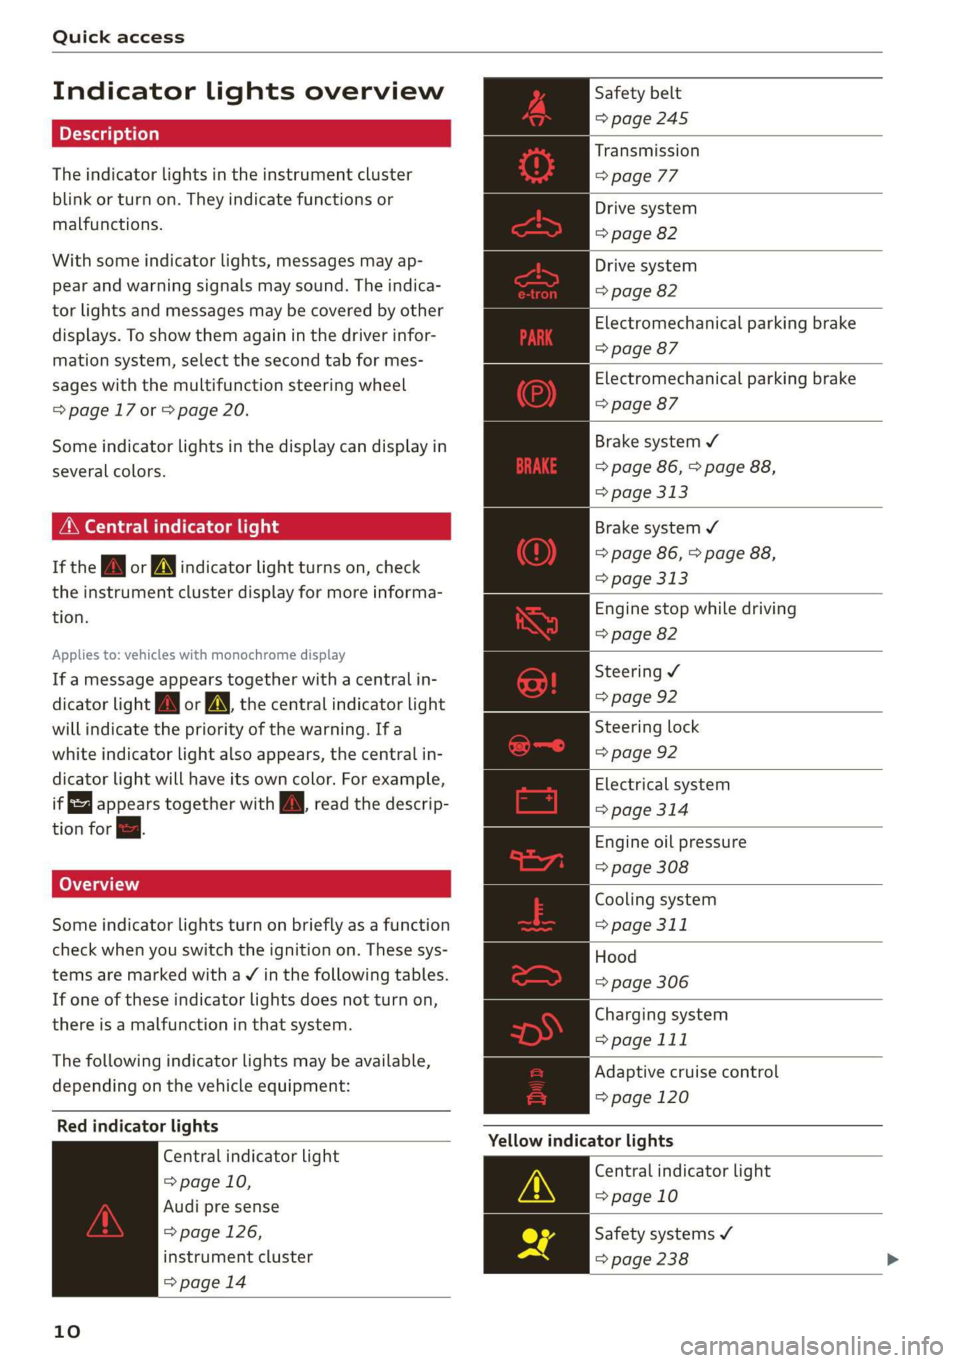
Indicator lights overview
The indicator lights in the instrument cluster
blink or turn on. They indicate functions or
malfunctions.
With some indicator lights, messages may ap-
pear and warning signals may sound. The indica-
tor lights and messages may be covered by other
displays. To show them again in the driver infor-
mation system, select the second tab for mes-
sages with the multifunction steering wheel
=> page 17 or > page 20.
Some indicator lights in the display can display in
several colors.
MMe O eel em lis
If the wa or MN indicator light turns on, check
the instrument cluster display for more informa-
tion.
Applies to: vehicles with monochrome display
If a message appears together with a central in-
dicator light A\ or A the central indicator light
will indicate the priority of the warning. Ifa
white indicator light also appears, the central in-
dicator light will have its own color. For example,
it appears together with Bw read the descrip-
tion for &.
Some indicator lights turn on briefly as a function
check when you switch the ignition on. These sys-
tems are marked with a V in the following tables.
If one of these indicator lights does not turn on,
there is a malfunction in that system.
The following indicator lights may be available,
depending on the vehicle equipment:
Red indicator lights
Central indicator light
=> page 10,
Audi pre sense
=> page 126,
instrument cluster
=> page 14
10
Safety belt
=> page 245
Transmission
> page 77
Drive system
=> page 82
Drive system
=> page 82
Electromechanical parking brake
=> page 87
Electromechanical parking brake
=> page 87
Brake system ¥
=> page 86, > page 88,
=> page 313
Brake system ¥
=> page 86, > page 88,
> page 313
Engine stop while driving
=> page 82
Steering ¥
=> page 92
Steering lock
=> page 92
Electrical system
=> page 314
Engine oil pressure
=> page 308
Cooling system
=> page 311
Hood
=> page 306
Charging system
> page 111
Adaptive cruise control
=> page 120
Yellow indicator lights
Central indicator light
=> page 10
Safety systems ¥
=> page 238
Page 17 of 400
8V2012721BK
Instrument cluster
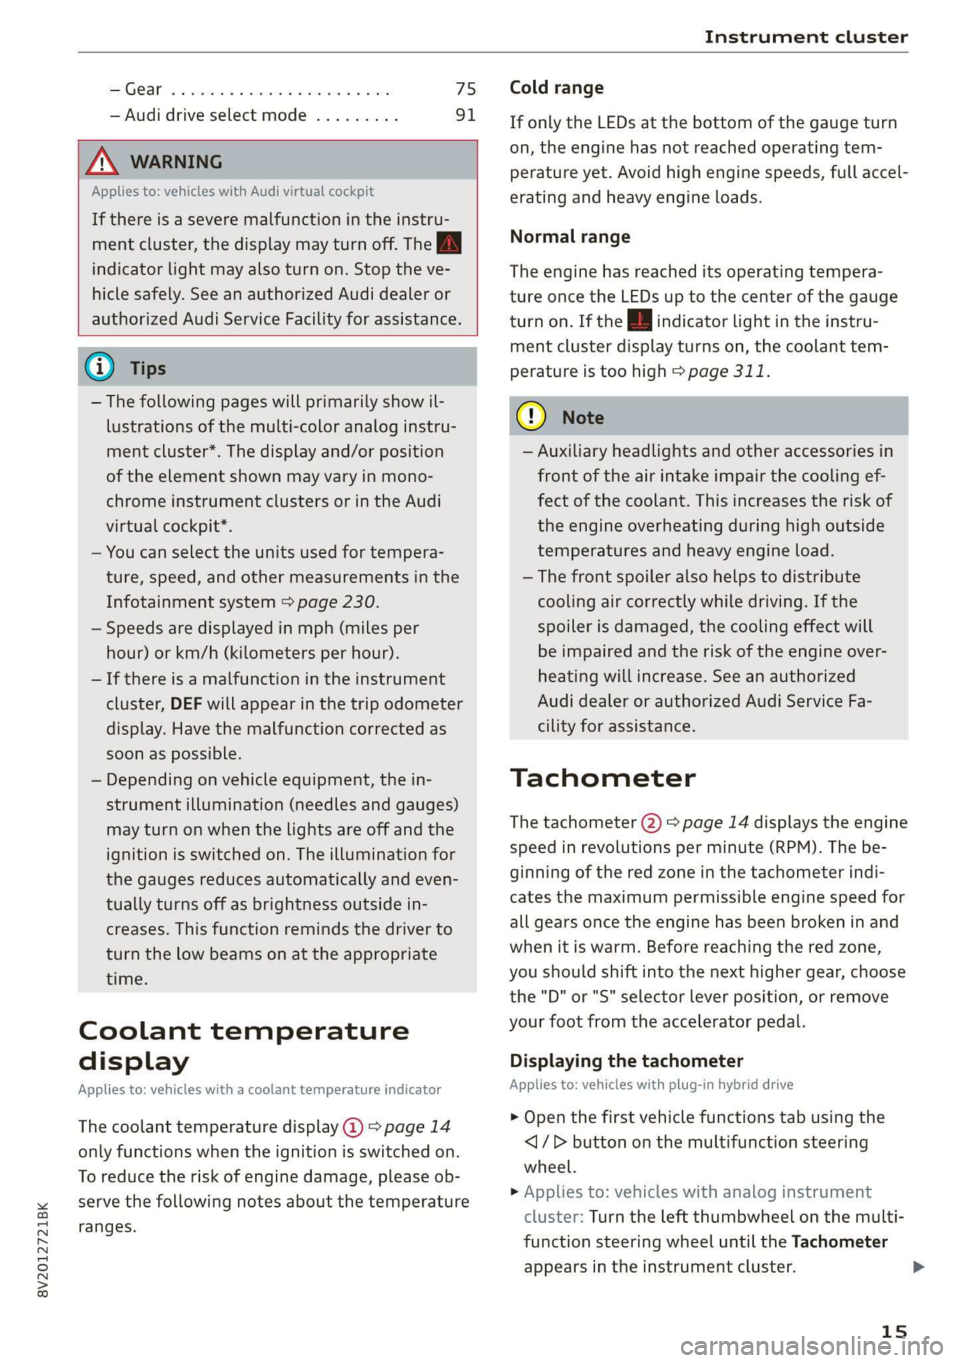
SSGOAM’ sx cscsone ov cxexens @ a aomnees vo s8sue 75
— Audi drive select mode ......... 91
ZA WARNING
Applies to: vehicles with Audi virtual cockpit
If there is a severe malfunction in the instru-
ment cluster, the display may turn off. The wa
indicator light may also turn on. Stop the ve-
hicle safely. See an authorized Audi dealer or
authorized Audi Service Facility for assistance.
@ Tips
— The following pages will primarily show il-
lustrations of the multi-color analog instru-
ment cluster*. The display and/or position
of the element shown may vary in mono-
chrome instrument clusters or in the Audi
virtual cockpit*.
— You can select the units used for tempera-
ture, speed, and other measurements in the
Infotainment system > page 230.
— Speeds are displayed in mph (miles per
hour) or km/h (kilometers per hour).
— If there is a malfunction in the instrument
cluster, DEF will appear in the trip odometer
display. Have the malfunction corrected as
soon as possible.
— Depending on vehicle equipment, the in-
strument illumination (needles and gauges)
may turn on when the lights are off and the
ignition is switched on. The illumination for
the gauges reduces automatically and even-
tually turns off as brightness outside in-
creases. This function reminds the driver to
turn the low beams on at the appropriate
time.
Coolant temperature
display
Applies to: vehicles with a coolant temperature indicator
The coolant temperature display @) > page 14
only functions when the ignition is switched on.
To reduce the risk of engine damage, please ob-
serve the following notes about the temperature
ranges.
Cold range
If only the LEDs at the bottom of the gauge turn
on, the engine has not reached operating tem-
perature yet. Avoid high engine speeds, full accel-
erating and heavy engine loads.
Normal range
The engine has reached its operating tempera-
ture once the LEDs up to the center of the gauge
turn on. If the || indicator light in the instru-
ment cluster display turns on, the coolant tem-
perature is too high > page 311.
@) Note
— Auxiliary headlights and other accessories in
front of the air intake impair the cooling ef-
fect of the coolant. This increases the risk of
the engine overheating during high outside
temperatures and heavy engine load.
—The front spoiler also helps to distribute
cooling air correctly while driving. If the
spoiler is damaged, the cooling effect will
be impaired and the risk of the engine over-
heating will increase. See an authorized
Audi dealer or authorized Audi Service Fa-
cility for assistance.
Tachometer
The tachometer (2) > page 14 displays the engine
speed in revolutions per minute (RPM). The be-
ginning of the red zone in the tachometer indi-
cates the maximum permissible engine speed for
all gears once the engine has been broken in and
when it is warm. Before reaching the red zone,
you should shift into the next higher gear, choose
the "D" or "S" selector lever position, or remove
your foot from the accelerator pedal.
Displaying the tachometer
Applies to: vehicles with plug-in hybrid drive
> Open the first vehicle functions tab using the
<1/D button on the multifunction steering
wheel.
> Applies to: vehicles with analog instrument
cluster: Turn the left thumbwheel on the multi-
function steering wheel until the Tachometer
appears in the instrument cluster.
15
>
Page 19 of 400
8V2012721BK
Instrument cluster
combustion engine for a brief peri-
od of time
Odometer
B8U-0340
8:20™
3/3/2016
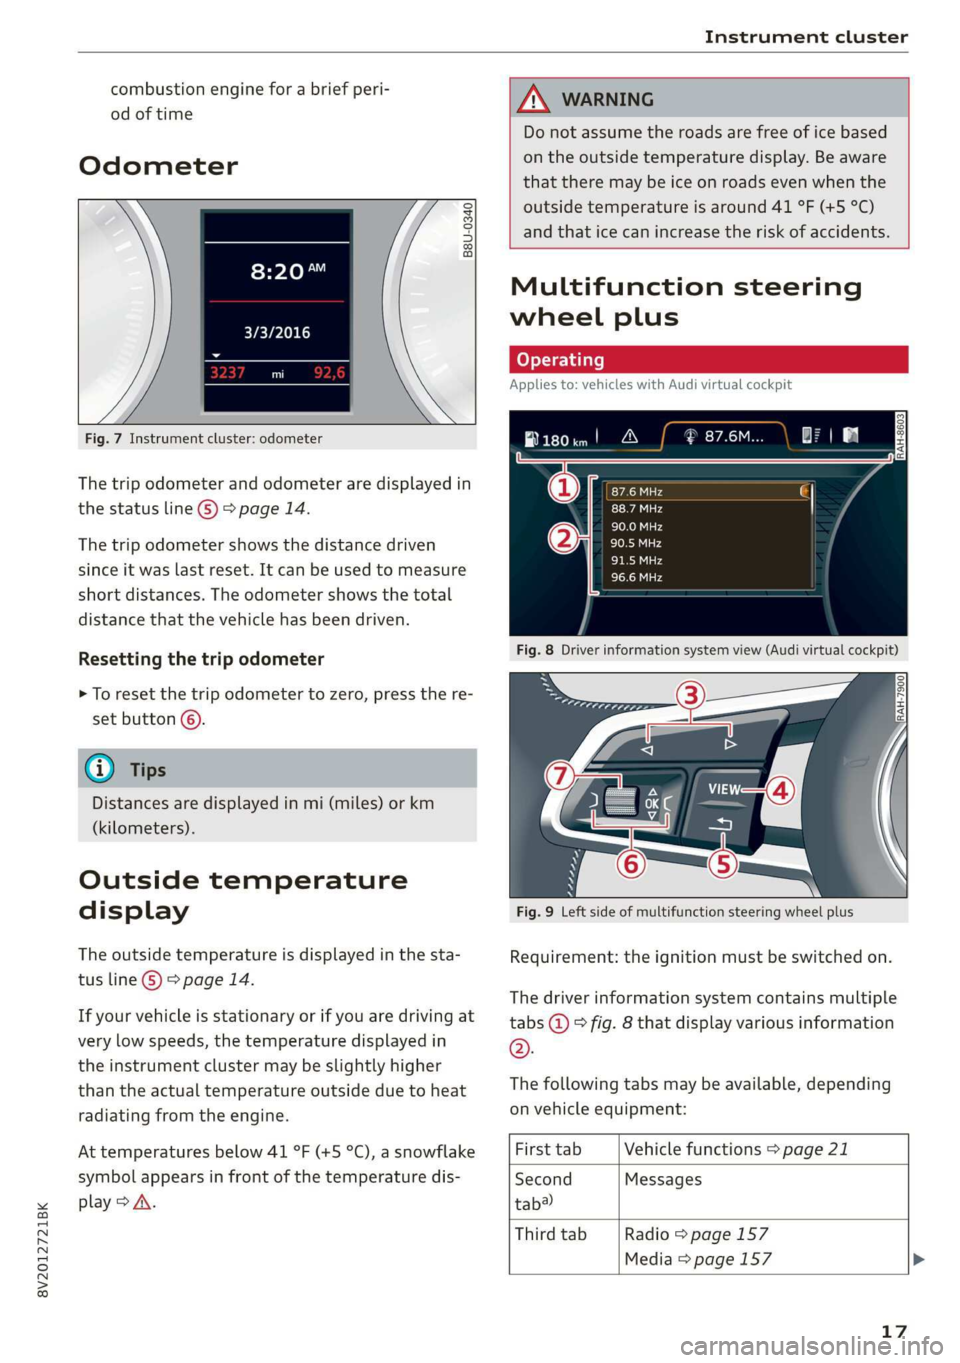
Fig. 7 Instrument cluster: odometer
The trip odometer and odometer are displayed in
the status line ©) > page 14.
The trip odometer shows the distance driven
since it was last reset. It can be used to measure
short distances. The odometer shows the total
distance that the vehicle has been driven.
Resetting the trip odometer
> To reset the trip odometer to zero, press the re-
set button ©.
@ Tips
Distances are displayed in mi (miles) or km
(kilometers).
Outside temperature
display
The outside temperature is displayed in the sta-
tus line ©) > page 14.
If your vehicle is stationary or if you are driving at
very low speeds, the temperature displayed in
the instrument cluster may be slightly higher
than the actual temperature outside due to heat
radiating from the engine.
At temperatures below 41 °F (+5 °C), a snowflake
symbol appears in front of the temperature dis-
play > A\.
ZA WARNING
Do not assume the roads are free of ice based
on the outside temperature display. Be aware
that there may be ice on roads even when the
outside temperature is around 41 °F (+5 °C)
and that ice can increase the risk of accidents.
Multifunction steering
wheel plus
Applies to: vehicles with Audi virtual cockpit
B180im! A
Fig. 8 Driver information system view (Audi virtual cockpit)
Fig. 9 Left side of multifunction steering wheel plus
Requirement: the ignition must be switched on.
The driver information system contains multiple
tabs @ © fig. 8 that display various information
®.
The following tabs may be available, depending
on vehicle equipment:
First tab Vehicle functions > page 21
Second Messages
tab?
Third tab Radio > page 157
Media > page 157
17
Page 22 of 400
![AUDI A3 2020 Owner´s Manual Instrument cluster
— Switching the voice recognition system off:
press and hold the |] button. Or: say the com-
mand Cancel.
For more information about the voice recognition
syste AUDI A3 2020 Owner´s Manual Instrument cluster
— Switching the voice recognition system off:
press and hold the |] button. Or: say the com-
mand Cancel.
For more information about the voice recognition
syste](/manual-img/6/40265/w960_40265-21.png)
Instrument cluster
— Switching the voice recognition system off:
press and hold the |] button. Or: say the com-
mand Cancel.
For more information about the voice recognition
system, see > page 162, Voice recognition sys-
tem.
@ Right thumbwheel
You can adjust the volume of an audio source or a
system message (for example, from the voice
recognition system) when the sound is playing.
— Increasing or decreasing the volume: turn the
right
thumbwheel up or down.
—Muting or pausing: turn the right thumbwheel
down. Or: press the right thumbwheel.
—Unmuting or resuming: turn the right thumb-
wheel up. Or: press the right thumbwheel.
@ ls] bei] button
— Selecting the previous/next track or station:
press the [xs] or [>>!] button.
— Fast forwarding/rewinding audio files: press
and hold the button until the desired
location in the file is reached.
Kid] or [>>I
©) [x] button / steering wheel heating [¢
— Steering wheel heating*: you can find addition-
al information in > page 68.
— Programmable steering wheel button - Open-
ing a function: press the |*] button on the mul-
tifunction steering wheel.
— Programmable steering wheel button - Re-
questing a function: press and hold the [+] but-
ton.
— Programmable steering wheel button in the
Infotainment system, select: [MENU] button >
Vehicle > left control button > Vehicle settings
> Steering wheel button assignment.
© |] button
— Repeating the last navigation prompt: press
the [s] button when route guidance is active.
— Changing the voice guidance volume: when
route guidance is active, turn the right thumb-
wheel upward or downward during a navigation
prompt.
20
Multifunction steering
wheel
Applies to: vehicles with analog instrument cluster
Fig. 15 Right side of the multifunction steering wheel
Requirement: the ignition must be switched on.
@ Operating the driver information system
The driver information system contains multiple
tabs @ > page 17, fig. 8 that display various in-
formation @) 9 page 17, fig. 8.
The following tabs may be available, depending
on vehicle equipment:
First tab Vehicle functions > page 21
Second Messages
tab?)
Third tab Radio > page 157
Media > page 157
Fourth tab | Telephone* > page 158
Fifth tab Navigation* > page 159
a) This tab is only visible when there is at least one indicator
light or message displayed.
— Switching tabs: press the|<>| button repeated-
ly until the desired tab is shown.
Page 24 of 400
Instrument cluster
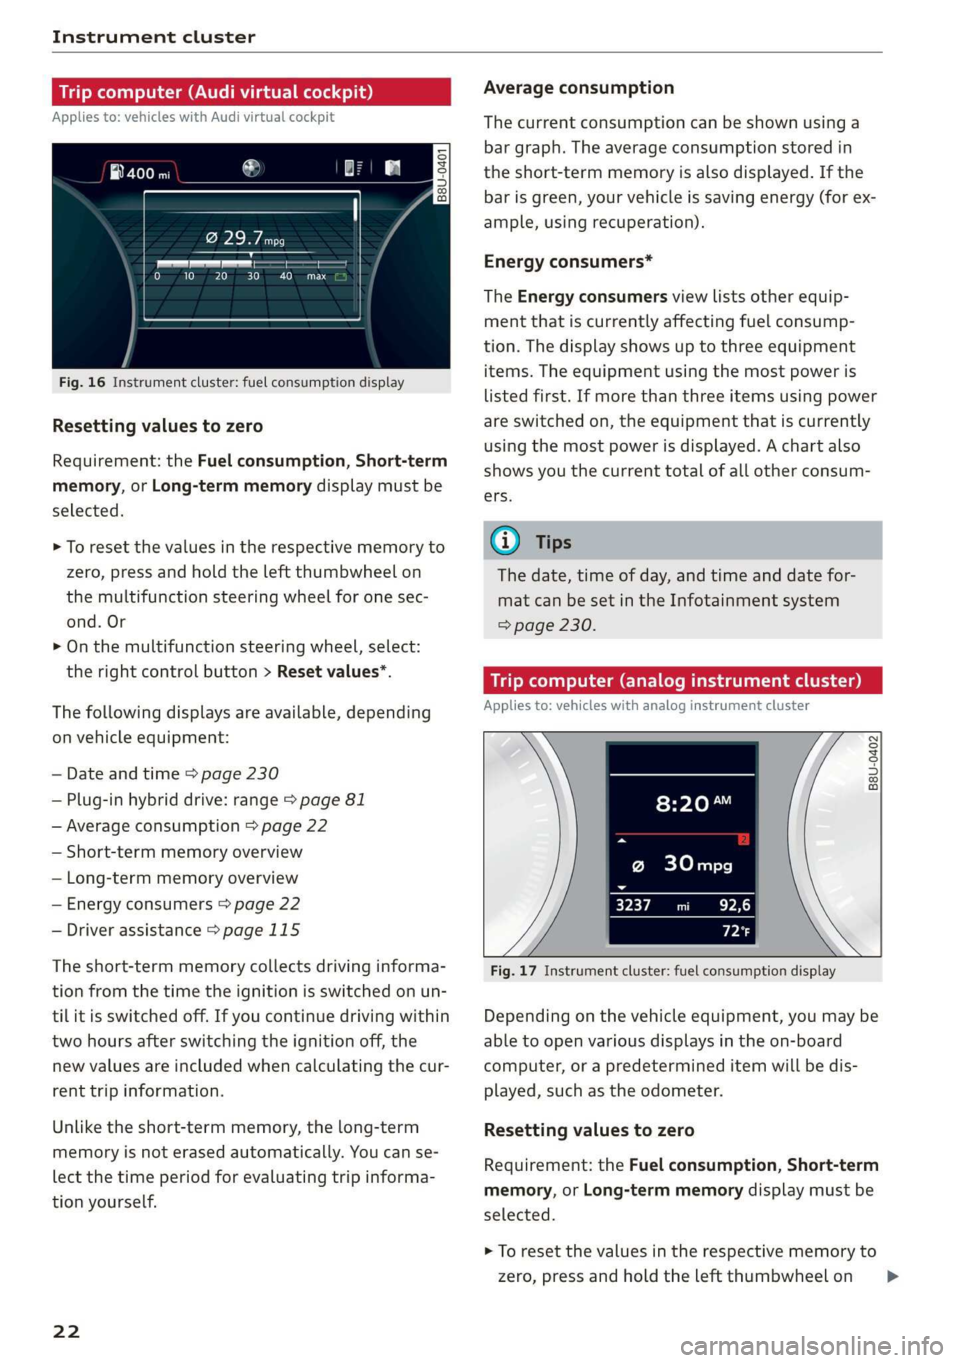
Trip computer (Audi virtual cockpit)
Applies to: vehicles with Audi virtual cockpit
i SS
a
to} 10 Pit ee Mg
Fig. 16 Instrument cluster: fuel consumption display
Resetting values to zero
Requirement: the Fuel consumption, Short-term
memory, or Long-term memory display must be
selected.
> To reset the values in the respective memory to
zero, press and hold the left thumbwheel on
the multifunction steering wheel for one sec-
ond. Or
> On the multifunction steering wheel, select:
the right control button > Reset values*.
The following displays are available, depending
on vehicle equipment:
— Date and time > page 230
— Plug-in hybrid drive: range > page 81
— Average consumption > page 22
— Short-term memory overview
— Long-term memory overview
— Energy consumers > page 22
— Driver assistance > page 115
The short-term memory collects driving informa-
tion from the time the ignition is switched on un-
til it is switched off. If you continue driving within
two hours after switching the ignition off, the
new values are included when calculating the cur-
rent trip information.
Unlike the short-term memory, the long-term
memory is not erased automatically. You can se-
lect the time period for evaluating trip informa-
tion yourself.
22
Average consumption
The current consumption can be shown using a
bar graph. The average consumption stored in
the short-term memory is also displayed. If the
bar is green, your vehicle is saving energy (for ex-
ample, using recuperation).
Energy consumers*
The Energy consumers view lists other equip-
ment that is currently affecting fuel consump-
tion. The display shows up to three equipment
items. The equipment using the most power is
listed first. If more than three items using power
are switched on, the equipment that is currently
using the most power is displayed. A chart also
shows you the current total of all other consum-
ers.
(i) Tips
The date, time of day, and time and date for-
mat can be set in the Infotainment system
=> page 230.
Trip computer (analog instrument cluster)
Applies to: vehicles with analog instrument cluster
B8U-0402
@ 30mpg
3237 mi EPA
Px
Fig. 17 Instrument cluster: fuel consumption display
Depending on the vehicle equipment, you may be
able to open various displays in the on-board
computer, or a predetermined item will be dis-
played, such as the odometer.
Resetting values to zero
Requirement: the Fuel consumption, Short-term
memory, or Long-term memory display must be
selected.
> To reset the values in the respective memory to
zero, press and hold the left thumbwheel on >
Page 25 of 400

8V2012721BK
Instrument cluster
the multifunction steering wheel for one sec-
ond.
On-board computer
In the trip computer, you can call up the follow-
ing displays one after the other by turning the
left thumbwheel on the multifunction steering
wheel:
— Date > page 230
— Remaining range
— Plug-in hybrid drive*: speedometer > page 15,
range > page 81, energy flow display
=> page 80
— Short-term memory &
— Average consumption
— Long-term memory
— Engine oil temperature*
The short-term memory collects driving informa-
tion from the time the ignition is switched on un-
til it is switched off. If you continue driving within
two hours after switching the ignition off, the
new values are included when calculating the cur-
rent trip information.
Unlike the short-term memory, the long-term
memory is not erased automatically. You can se-
lect the time period for evaluating trip informa-
tion yourself.
@ Tips
The date, time of day, and time and date for-
mat can be set in the Infotainment system
=> page 230.
ries a ate eli)
Applies to: vehicles with efficiency program
Resetting values to zero
> To reset the values in the respective memory to
zero, press and hold the left thumbwheel on
the multifunction steering wheel for one sec-
ond.
The efficiency program can help you to use less
fuel. It evaluates driving information in reference
to fuel consumption and shows other equipment
influencing consumption. Economy tips provide
advice for efficient driving.
The efficiency program receives distance and con-
sumption data from the short-term memory. If
the data in the efficiency program is deleted, the
values in the short-term memory are also reset.
The following additional displays may be availa-
ble in the efficiency program, depending on vehi-
cle equipment:
— Other equipment: other equipment that is cur-
rently affecting fuel consumption is listed in
the efficiency program. The display shows up to
three other equipment items. The equipment
using the most power is listed first. If more
than three items using power are switched on,
the equipment that is currently using the most
power is displayed. A chart also shows you the
current total of all other consumers.
— Economy tips: in certain situations, economy
tips appear automatically for a short time in
the efficiency program. If you follow these
economy tips, you can reduce your vehicle's fuel
consumption. To turn an economy message off
immediately after it appears, press any button
on the multifunction steering wheel.
Engine oil temperature display and boost
indicator
Applies to: vehicles with engine oil temperature display/boost
indicator
Engine oil temperature indicator
Applies to: vehicles with analog instrument clus-
ter: The engine oil temperature is only shown on
the lap timer display > page 117.
Applies to: vehicles with Audi virtual cockpit: The
engine oil temperature is only displayed in the
enhanced view or in the sport view* > page 19.
When engine oil temperatures are low, the dis-
play --- °F (--- °C) appears in the instrument clus-
ter.
The engine has reached its operating tempera-
ture when the engine oil temperature is between
176 °F (80 °C) and 248 °F (120 °C) under normal
driving conditions. The engine oil temperature
may be higher if there is heavy engine load and
high temperatures outside. This is not a cause for
concern as long as the 2 => page 308 or =
= page 308 indicator lights do not turn on.
23
Page 27 of 400

8V2012721BK
Opening and closing
Opening and closing
Central locking
You can lock and unlock the vehicle centrally. You
have the following options:
— Remote control key > page 27
— Sensors in the front door handles* > page 28
— Lock cylinder on the driver's door > page 30,
or
— Interior central locking switch > page 29
Turn signals
The turn signals flash twice when you unlock the
vehicle and flash once when you lock the vehicle.
If they do not flash when locking, check if all
doors and lids are closed.
Automatic locking (Auto Lock)
The Auto Lock function locks all doors and the
luggage compartment lid once the speed has ex-
ceeded approximately 9 mph (15 km/h). The ve-
hicle will unlock again if the unlock function in
the central locking switch is pressed, the “P” gear
is engaged, or the ignition is switched off.
You can open the doors individually from the in-
side by pulling the door handle one time. To open
the rear doors* individually, you must pull the
door handle twice.
In the event of a crash with airbag deployment,
the doors will also automatically unlock to allow
access to the vehicle.
Selective door unlocking
The doors and luggage compartment lid will lock
when they close. You can set in the Infotainment
system whether only the driver's door or the en-
tire vehicle should be unlocked when unlocking
=> page 29.
Unintentionally locking yourself out
Only lock your vehicle when all of the doors and
the luggage compartment lid are closed and the
remote control key is not in the vehicle. This re-
duces the risk of locking yourself out accidental-
ly.
The following conditions prevent you from lock-
ing your remote control key in the vehicle:
—If the driver's door is open, the vehicle cannot
be locked by pressing the & button on the re-
mote control key or by touching the locking
sensor* on a door.
— If the convenience key* that was last used is in-
side the luggage compartment, the luggage
compartment lid will automatically open again
after closing it >©.
— If the last convenience key* that was used is de-
tected inside the vehicle, the vehicle cannot be
locked from the outside for a brief time > ©.
ZA WARNING
— If you leave the vehicle, switch the ignition
off and take the vehicle key with you. This
applies particularly when children remain in
the vehicle. Otherwise the children could
start the engine or operate electrical equip-
ment such as power windows.
— No one, especially children, should stay in
the vehicle when it is locked from the out-
side, because the windows can no longer be
opened from the inside > page 30. Locked
doors make it more difficult for emergency
workers to get into the vehicle, which puts
lives at risk.
CG) Note
Applies to: vehicles with convenience key
— If the convenience key that was last used is
detected inside the passenger compart-
ment, then the vehicle cannot be locked
from the outside using the sensor. Take the
convenience key with you and lock the vehi-
cle again. Otherwise, the vehicle will not be
protected against unauthorized access.
— If you lock the vehicle using the button on
the vehicle key with the front passenger's
or rear door* open while accidentally plac-
ing the key in the passenger compartment
and closing the door, the vehicle will not
lock. The turn signals will flash several
times to indicate this. If you do not open
25
>
Page 31 of 400
8V2012721BK
Opening and closing
ZA WARNING
Read and following all warnings > A\ in De-
scription on page 25.
@ Tips
If your vehicle is left standing for a long peri-
od of time, note the following:
— The proximity sensor switches off after a
few days to save energy. You then have to
pull once on the door handle to unlock the
vehicle and a second time to open it.
—To prevent the vehicle battery from dis-
charging, the energy management gradual-
ly switches off convenience functions that
are not needed. You then may no longer be
able to unlock your vehicle with the sensors.
(eye eked Reauuia
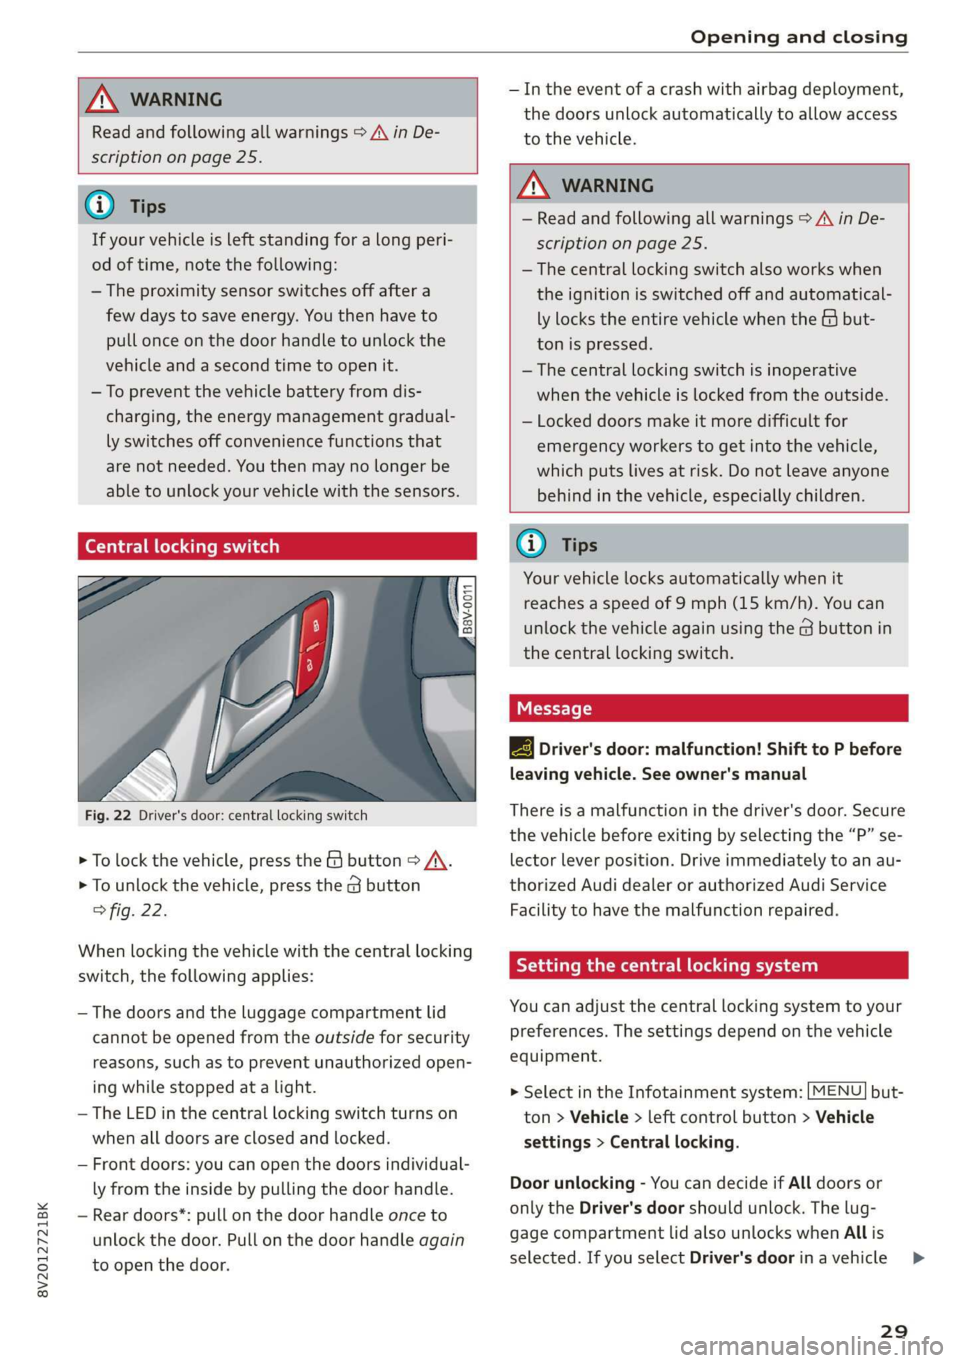
Fig. 22 Driver's door: central locking switch
> To lock the vehicle, press the & button > A\.
> To unlock the vehicle, press the G button
fig. 22.
When locking the vehicle with the central locking
switch,
the following applies:
— The doors and the luggage compartment lid
cannot be opened from the outside for security
reasons, such as to prevent unauthorized open-
ing while stopped at a light.
— The LED in the central locking switch turns on
when all doors are closed and locked.
— Front doors: you can open the doors individual-
ly from the inside by pulling the door handle.
— Rear doors*: pull on the door handle once to
unlock the door. Pull on the door handle again
to open the door.
— In the event of a crash with airbag deployment,
the doors unlock automatically to allow access
to the vehicle.
ZA WARNING
— Read and following all warnings > A in De-
scription on page 25.
— The central locking switch also works when
the ignition is switched off and automatical-
ly locks the entire vehicle when the & but-
ton is pressed.
—The central locking switch is inoperative
when the vehicle is locked from the outside.
— Locked doors make it more difficult for
emergency workers to get into the vehicle,
which puts lives at risk. Do not leave anyone
behind in the vehicle, especially children.
@ Tips
Your vehicle locks automatically when it
reaches a speed of 9 mph (15 km/h). You can
unlock the vehicle again using the @ button in
the central locking switch.
2B Driver's door: malfunction! Shift to P before
leaving vehicle. See owner's manual
There is a malfunction in the driver's door. Secure
the vehicle before exiting by selecting the “P” se-
lector lever position. Drive immediately to an au-
thorized Audi dealer or authorized Audi Service
Facility to have the malfunction repaired.
Setting the central locking system
You can adjust the central locking system to your
preferences. The settings depend on the vehicle
equipment.
> Select in the Infotainment system: [MENU] but-
ton > Vehicle > left control button > Vehicle
settings > Central locking.
Door unlocking - You can decide if All doors or
only the Driver's door should unlock. The lug-
gage compartment lid also unlocks when All is
selected. If you select Driver's door inavehicle >
29