2020 AUDI A3 Driving on the left
[x] Cancel search: Driving on the leftPage 17 of 400
8V2012721BK
Instrument cluster
SSGOAM’ sx cscsone ov cxexens @ a aomnees vo s8sue 75
— Audi drive select mode ......... 91
ZA WARNING
Applies to: vehicles with Audi virtual cockpit
If there is a severe malfunction in the instru-
ment cluster, the display may turn off. The wa
indicator light may also turn on. Stop the ve-
hicle safely. See an authorized Audi dealer or
authorized Audi Service Facility for assistance.
@ Tips
— The following pages will primarily show il-
lustrations of the multi-color analog instru-
ment cluster*. The display and/or position
of the element shown may vary in mono-
chrome instrument clusters or in the Audi
virtual cockpit*.
— You can select the units used for tempera-
ture, speed, and other measurements in the
Infotainment system > page 230.
— Speeds are displayed in mph (miles per
hour) or km/h (kilometers per hour).
— If there is a malfunction in the instrument
cluster, DEF will appear in the trip odometer
display. Have the malfunction corrected as
soon as possible.
— Depending on vehicle equipment, the in-
strument illumination (needles and gauges)
may turn on when the lights are off and the
ignition is switched on. The illumination for
the gauges reduces automatically and even-
tually turns off as brightness outside in-
creases. This function reminds the driver to
turn the low beams on at the appropriate
time.
Coolant temperature
display
Applies to: vehicles with a coolant temperature indicator
The coolant temperature display @) > page 14
only functions when the ignition is switched on.
To reduce the risk of engine damage, please ob-
serve the following notes about the temperature
ranges.
Cold range
If only the LEDs at the bottom of the gauge turn
on, the engine has not reached operating tem-
perature yet. Avoid high engine speeds, full accel-
erating and heavy engine loads.
Normal range
The engine has reached its operating tempera-
ture once the LEDs up to the center of the gauge
turn on. If the || indicator light in the instru-
ment cluster display turns on, the coolant tem-
perature is too high > page 311.
@) Note
— Auxiliary headlights and other accessories in
front of the air intake impair the cooling ef-
fect of the coolant. This increases the risk of
the engine overheating during high outside
temperatures and heavy engine load.
—The front spoiler also helps to distribute
cooling air correctly while driving. If the
spoiler is damaged, the cooling effect will
be impaired and the risk of the engine over-
heating will increase. See an authorized
Audi dealer or authorized Audi Service Fa-
cility for assistance.
Tachometer
The tachometer (2) > page 14 displays the engine
speed in revolutions per minute (RPM). The be-
ginning of the red zone in the tachometer indi-
cates the maximum permissible engine speed for
all gears once the engine has been broken in and
when it is warm. Before reaching the red zone,
you should shift into the next higher gear, choose
the "D" or "S" selector lever position, or remove
your foot from the accelerator pedal.
Displaying the tachometer
Applies to: vehicles with plug-in hybrid drive
> Open the first vehicle functions tab using the
<1/D button on the multifunction steering
wheel.
> Applies to: vehicles with analog instrument
cluster: Turn the left thumbwheel on the multi-
function steering wheel until the Tachometer
appears in the instrument cluster.
15
>
Page 18 of 400
Instrument cluster
» Applies to: vehicles with Audi virtual cockpit:
Select on the multifunction steering wheel:
right control button > Left dial > Tachometer or
Combination view.
Engine speed limitation
Applies to: vehicles with engine speed limitation
If the BA indicator light turns on, the engine will
be automatically limited to the RPM displayed in
the instrument cluster. This will protect the en-
gine components, for example during a cold start
or from overheating.
The engine speed limitation deactivates once the
engine is no longer in the critical temperature
range and you have released the accelerator ped-
al once.
If the engine speed limitation was activated by
an engine control malfunction, the B or EPC | in-
dicator light also turns on. Make sure the engine
speed does not go above the speed displayed, for
example when downshifting. Drive to an author-
ized Audi dealer or authorized Audi Service Facili-
ty immediately to have the malfunction correct-
ed.
@ Note
The needle in the tachometer (2) may only be
in the red area of the gauge for a short period
of time before there is a risk of damaging the
engine. The location where the red zone be-
gins varies depending on the engine.
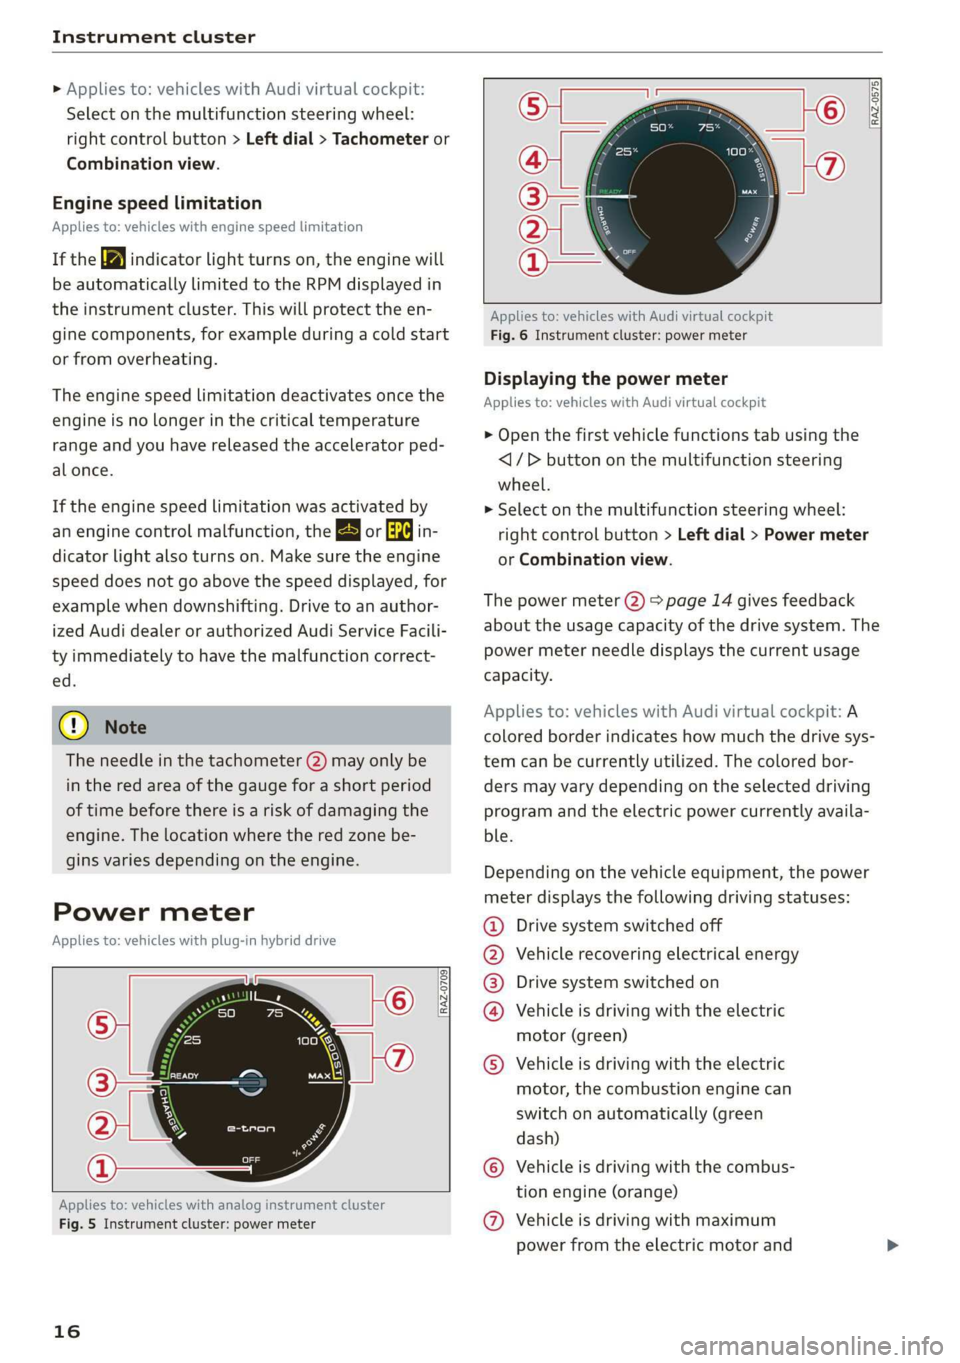
Power meter
Applies to: vehicles with plug-in hybrid drive
RAZ-0709
Applies to: vehicles with analog instrument cluster
Fig. 5 Instrument cluster: power meter
16
[RAZ-0575]
Applies to: vehicles with Audi virtual cockpit
Fig. 6 Instrument cluster: power meter
Displaying the power meter
Applies to: vehicles with Audi virtual cockpit
> Open the first vehicle functions tab using the
<1/D button on the multifunction steering
wheel.
> Select on the multifunction steering wheel:
right control button > Left dial > Power meter
or Combination view.
The power meter (2) > page 14 gives feedback
about the usage capacity of the drive system. The
power meter needle displays the current usage
capacity.
Applies to: vehicles with Audi virtual cockpit: A
colored border indicates how much the drive sys-
tem can be currently utilized. The colored bor-
ders may vary depending on the selected driving
program and the electric power currently availa-
ble.
Depending on the vehicle equipment, the power
meter displays the following driving statuses:
Drive system switched off
Vehicle recovering electrical energy
Drive system switched on
Vehicle is driving with the electric
motor (green)
©
©0800
Vehicle is driving with the electric
motor, the combustion engine can
switch on automatically (green
dash)
Vehicle is driving with the combus-
tion engine (orange)
© © Vehicle is driving with maximum
power from the electric motor and
Page 19 of 400
8V2012721BK
Instrument cluster
combustion engine for a brief peri-
od of time
Odometer
B8U-0340
8:20™
3/3/2016
Fig. 7 Instrument cluster: odometer
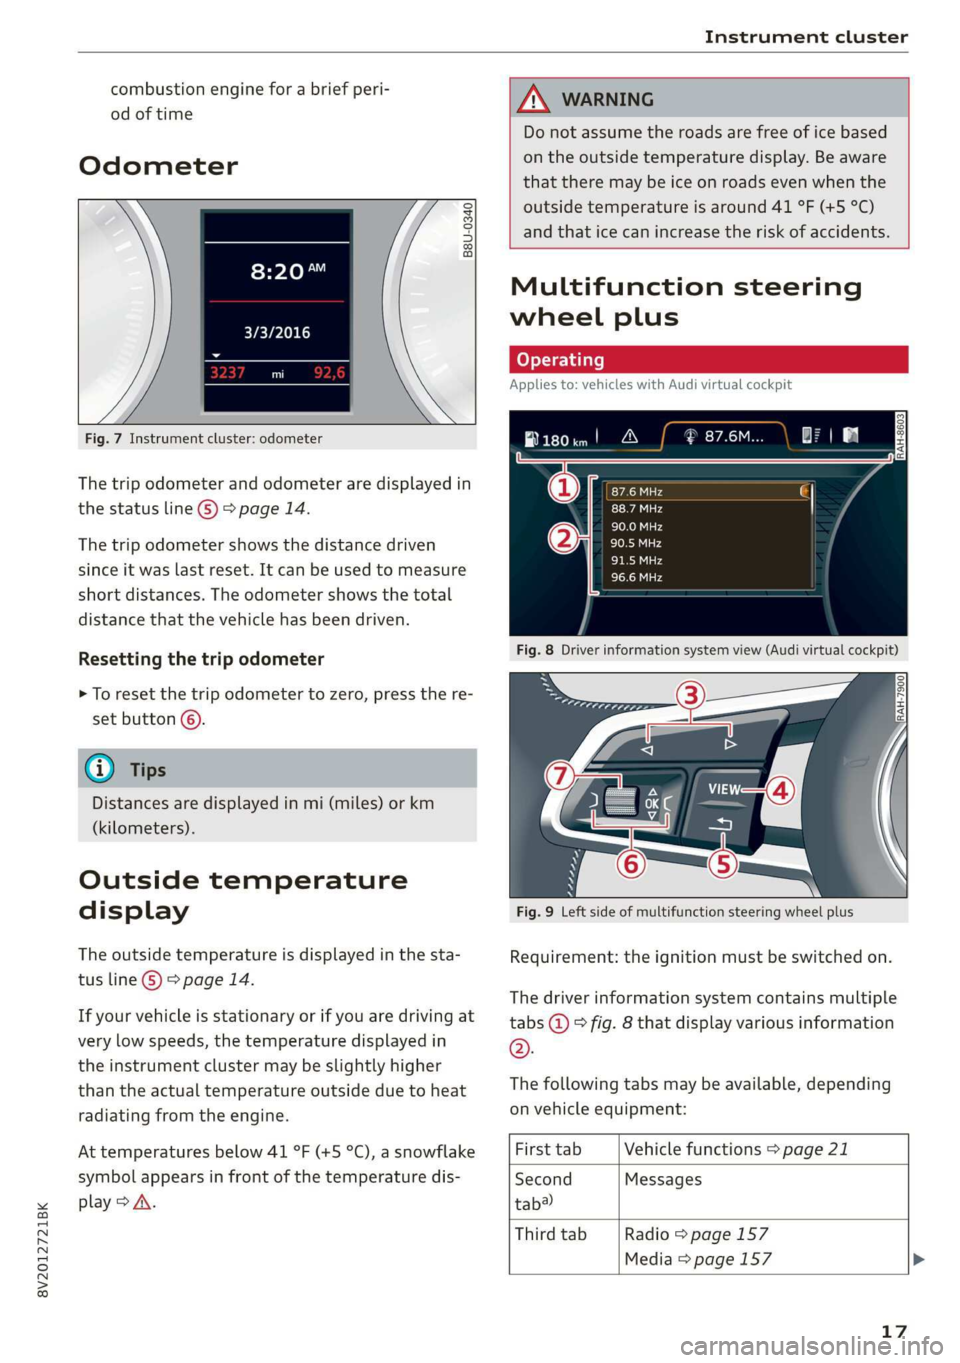
The trip odometer and odometer are displayed in
the status line ©) > page 14.
The trip odometer shows the distance driven
since it was last reset. It can be used to measure
short distances. The odometer shows the total
distance that the vehicle has been driven.
Resetting the trip odometer
> To reset the trip odometer to zero, press the re-
set button ©.
@ Tips
Distances are displayed in mi (miles) or km
(kilometers).
Outside temperature
display
The outside temperature is displayed in the sta-
tus line ©) > page 14.
If your vehicle is stationary or if you are driving at
very low speeds, the temperature displayed in
the instrument cluster may be slightly higher
than the actual temperature outside due to heat
radiating from the engine.
At temperatures below 41 °F (+5 °C), a snowflake
symbol appears in front of the temperature dis-
play > A\.
ZA WARNING
Do not assume the roads are free of ice based
on the outside temperature display. Be aware
that there may be ice on roads even when the
outside temperature is around 41 °F (+5 °C)
and that ice can increase the risk of accidents.
Multifunction steering
wheel plus
Applies to: vehicles with Audi virtual cockpit
B180im! A
Fig. 8 Driver information system view (Audi virtual cockpit)
Fig. 9 Left side of multifunction steering wheel plus
Requirement: the ignition must be switched on.
The driver information system contains multiple
tabs @ © fig. 8 that display various information
®.
The following tabs may be available, depending
on vehicle equipment:
First tab Vehicle functions > page 21
Second Messages
tab?
Third tab Radio > page 157
Media > page 157
17
Page 21 of 400
8V2012721BK
Instrument cluster
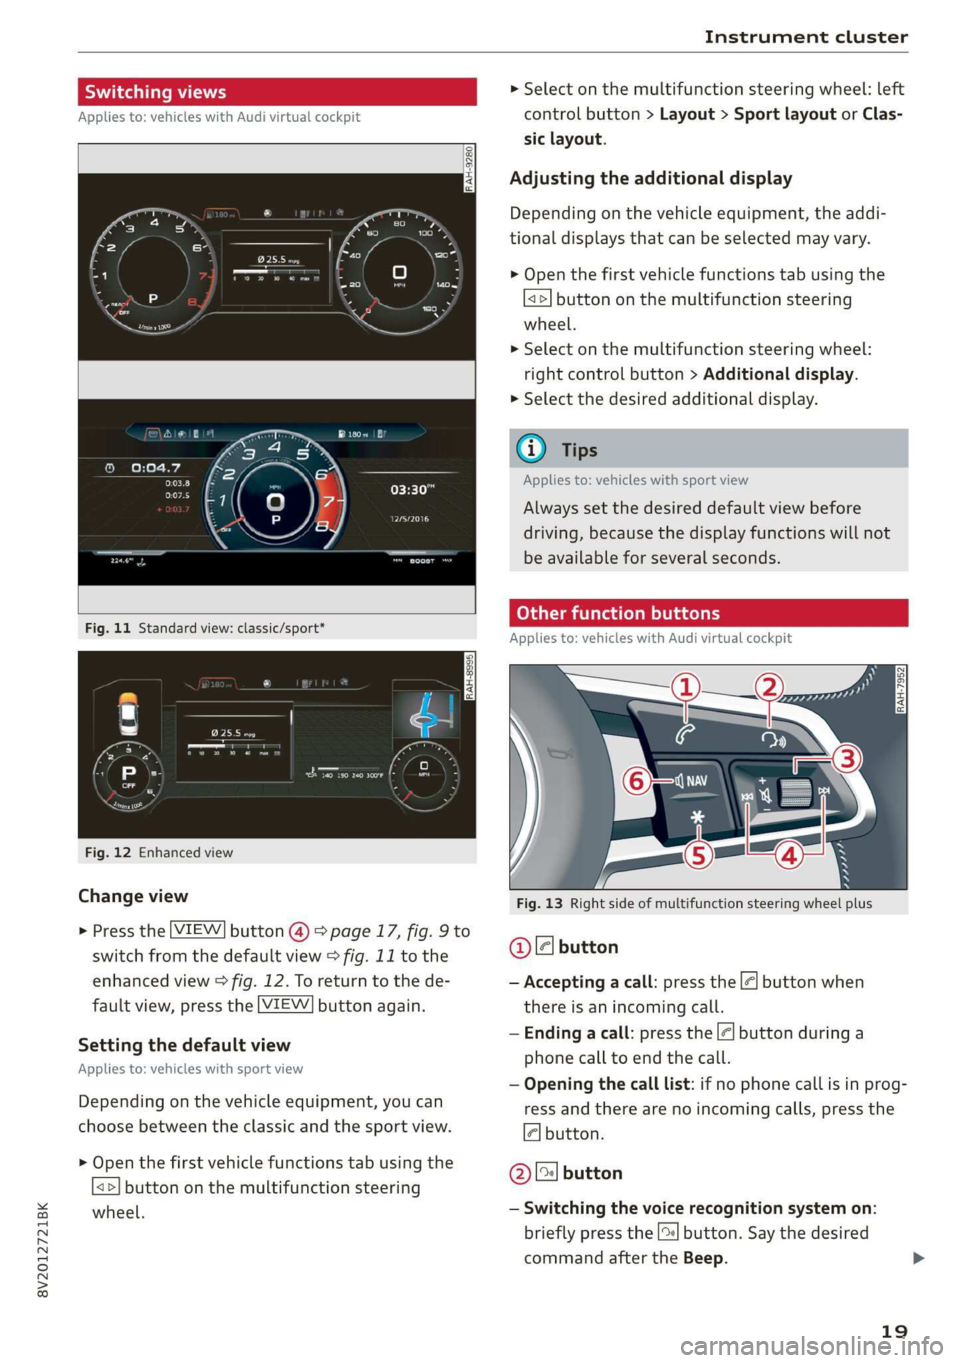
Switching views > Select on the multifunction steering wheel: left
Applies to: vehicles with Audi virtual cockpit control button > Layout > Sport layout or Clas-
sic layout.
Adjusting the additional display
Depending on the vehicle equipment, the addi-
tional displays that can be selected may vary.
> Open the first vehicle functions tab using the
<>] button on the multifunction steering
wheel.
> Select on the multifunction steering wheel:
right control button > Additional display.
> Select the desired additional display.
G@) Tips
Applies to: vehicles with sport view
Oreo
Always set the desired default view before
driving, because the display functions will not
be available for several seconds.
SEIN
Applies to: vehicles with Audi virtual cockpit
Fig. 12 Enhanced view
Change view Fig. 13 Right side of multifunction steering wheel plus
> Press the [VIEW] button @) > page 17, fig. 9 to
switch from the default view > fig. 11 to the @ ll button
enhanced view > fig. 12. To return to the de- — Accepting a call: press the |<] button when
fault view, press the [VIEW] button again. there is an incoming call.
— Ending a call: press the |¢| button during a
phone call to end the call.
; : , — Opening the call list: if no phone call is in prog-
Depending on the vehicle equipment, you can ress and there are no incoming calls, press the
choose between the classic and the sport view. 4] button.
Setting the default view
Applies to: vehicles with sport view
> Open the first vehicle functions tab using the
<>] button on the multifunction steering
wheel. — Switching the voice recognition system on:
briefly press the [2] button. Say the desired
command after the Beep.
@) [2] button
19
Page 24 of 400
Instrument cluster
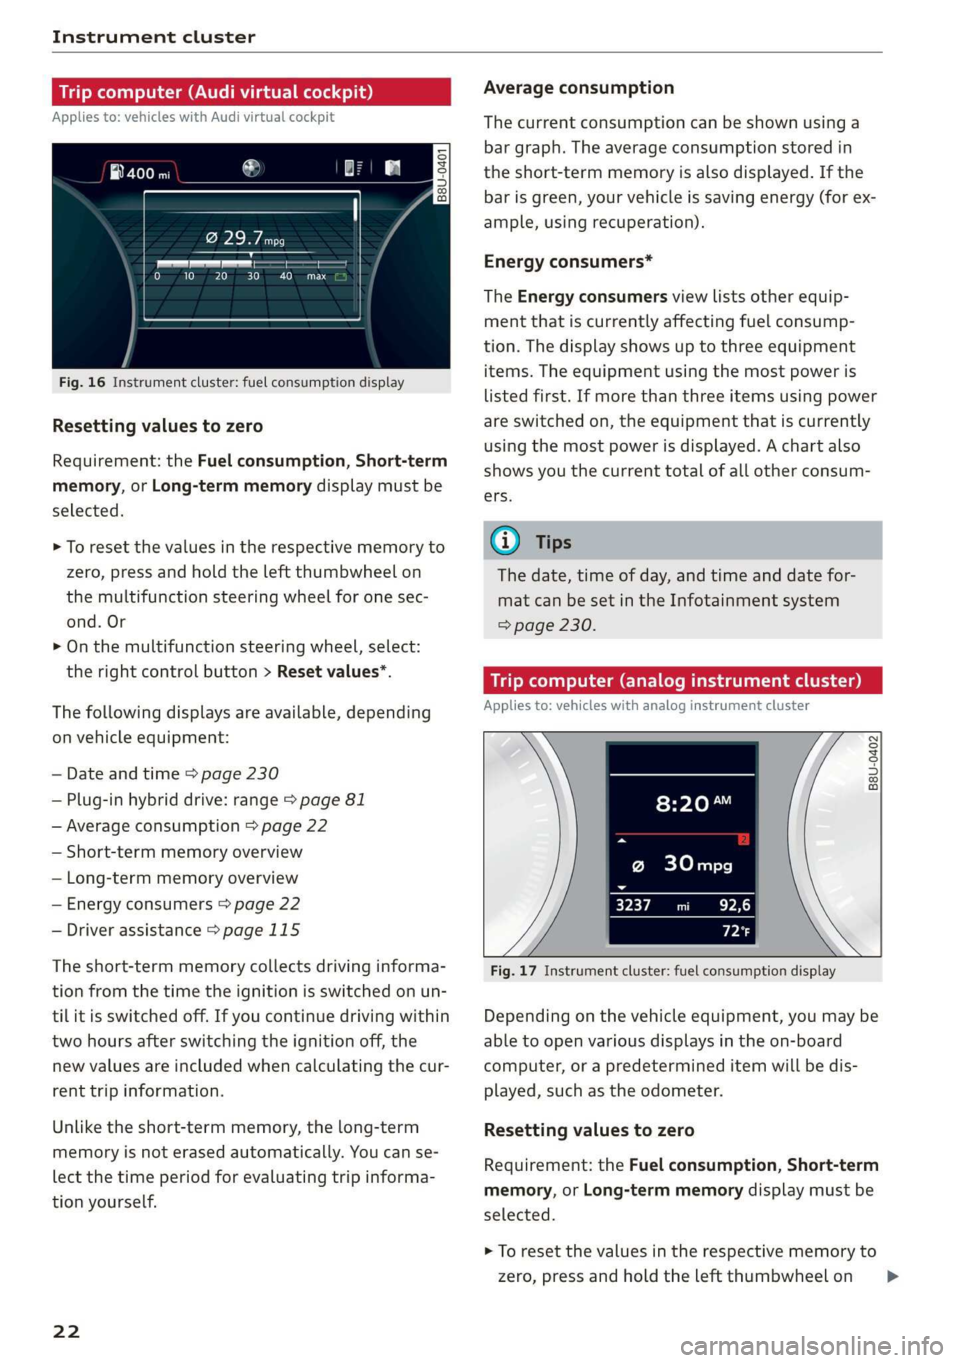
Trip computer (Audi virtual cockpit)
Applies to: vehicles with Audi virtual cockpit
i SS
a
to} 10 Pit ee Mg
Fig. 16 Instrument cluster: fuel consumption display
Resetting values to zero
Requirement: the Fuel consumption, Short-term
memory, or Long-term memory display must be
selected.
> To reset the values in the respective memory to
zero, press and hold the left thumbwheel on
the multifunction steering wheel for one sec-
ond. Or
> On the multifunction steering wheel, select:
the right control button > Reset values*.
The following displays are available, depending
on vehicle equipment:
— Date and time > page 230
— Plug-in hybrid drive: range > page 81
— Average consumption > page 22
— Short-term memory overview
— Long-term memory overview
— Energy consumers > page 22
— Driver assistance > page 115
The short-term memory collects driving informa-
tion from the time the ignition is switched on un-
til it is switched off. If you continue driving within
two hours after switching the ignition off, the
new values are included when calculating the cur-
rent trip information.
Unlike the short-term memory, the long-term
memory is not erased automatically. You can se-
lect the time period for evaluating trip informa-
tion yourself.
22
Average consumption
The current consumption can be shown using a
bar graph. The average consumption stored in
the short-term memory is also displayed. If the
bar is green, your vehicle is saving energy (for ex-
ample, using recuperation).
Energy consumers*
The Energy consumers view lists other equip-
ment that is currently affecting fuel consump-
tion. The display shows up to three equipment
items. The equipment using the most power is
listed first. If more than three items using power
are switched on, the equipment that is currently
using the most power is displayed. A chart also
shows you the current total of all other consum-
ers.
(i) Tips
The date, time of day, and time and date for-
mat can be set in the Infotainment system
=> page 230.
Trip computer (analog instrument cluster)
Applies to: vehicles with analog instrument cluster
B8U-0402
@ 30mpg
3237 mi EPA
Px
Fig. 17 Instrument cluster: fuel consumption display
Depending on the vehicle equipment, you may be
able to open various displays in the on-board
computer, or a predetermined item will be dis-
played, such as the odometer.
Resetting values to zero
Requirement: the Fuel consumption, Short-term
memory, or Long-term memory display must be
selected.
> To reset the values in the respective memory to
zero, press and hold the left thumbwheel on >
Page 25 of 400

8V2012721BK
Instrument cluster
the multifunction steering wheel for one sec-
ond.
On-board computer
In the trip computer, you can call up the follow-
ing displays one after the other by turning the
left thumbwheel on the multifunction steering
wheel:
— Date > page 230
— Remaining range
— Plug-in hybrid drive*: speedometer > page 15,
range > page 81, energy flow display
=> page 80
— Short-term memory &
— Average consumption
— Long-term memory
— Engine oil temperature*
The short-term memory collects driving informa-
tion from the time the ignition is switched on un-
til it is switched off. If you continue driving within
two hours after switching the ignition off, the
new values are included when calculating the cur-
rent trip information.
Unlike the short-term memory, the long-term
memory is not erased automatically. You can se-
lect the time period for evaluating trip informa-
tion yourself.
@ Tips
The date, time of day, and time and date for-
mat can be set in the Infotainment system
=> page 230.
ries a ate eli)
Applies to: vehicles with efficiency program
Resetting values to zero
> To reset the values in the respective memory to
zero, press and hold the left thumbwheel on
the multifunction steering wheel for one sec-
ond.
The efficiency program can help you to use less
fuel. It evaluates driving information in reference
to fuel consumption and shows other equipment
influencing consumption. Economy tips provide
advice for efficient driving.
The efficiency program receives distance and con-
sumption data from the short-term memory. If
the data in the efficiency program is deleted, the
values in the short-term memory are also reset.
The following additional displays may be availa-
ble in the efficiency program, depending on vehi-
cle equipment:
— Other equipment: other equipment that is cur-
rently affecting fuel consumption is listed in
the efficiency program. The display shows up to
three other equipment items. The equipment
using the most power is listed first. If more
than three items using power are switched on,
the equipment that is currently using the most
power is displayed. A chart also shows you the
current total of all other consumers.
— Economy tips: in certain situations, economy
tips appear automatically for a short time in
the efficiency program. If you follow these
economy tips, you can reduce your vehicle's fuel
consumption. To turn an economy message off
immediately after it appears, press any button
on the multifunction steering wheel.
Engine oil temperature display and boost
indicator
Applies to: vehicles with engine oil temperature display/boost
indicator
Engine oil temperature indicator
Applies to: vehicles with analog instrument clus-
ter: The engine oil temperature is only shown on
the lap timer display > page 117.
Applies to: vehicles with Audi virtual cockpit: The
engine oil temperature is only displayed in the
enhanced view or in the sport view* > page 19.
When engine oil temperatures are low, the dis-
play --- °F (--- °C) appears in the instrument clus-
ter.
The engine has reached its operating tempera-
ture when the engine oil temperature is between
176 °F (80 °C) and 248 °F (120 °C) under normal
driving conditions. The engine oil temperature
may be higher if there is heavy engine load and
high temperatures outside. This is not a cause for
concern as long as the 2 => page 308 or =
= page 308 indicator lights do not turn on.
23
Page 28 of 400

Opening and closing
the vehicle within a short time to remove
the vehicle key, then the vehicle will lock au-
tomatically. This prevents the vehicle from
being left unlocked for long periods of time.
The key will then be locked inside the vehi-
cle.
— If the convenience key* that was used last is
detected inside the luggage compartment,
it will not be possible to lock the luggage
compartment and the luggage compart-
ment lid will open. The turn signals will
flash several times to indicate this. The
doors will lock. Always take the convenience
key with you, or unauthorized people may
be able to enter the vehicle.
@ Tips
— Do not leave valuables unattended in the ve-
hicle. A locked vehicle is not a safe!
— The LED in the driver's door rail blinks when
you lock the vehicle. If the LED lights up for
approximately 30 seconds after locking,
there is a malfunction in the central locking
system. Have the problem corrected by an
authorized Audi dealer or authorized Audi
Service Facility.
Az o < uw © Cd
B8V-0376
Fig. 18 Your vehicle key set
Remote or convenience key*
The convenience key* is a remote control key with
special functions > page 28 and > page 71.
You can unlock/lock your vehicle with the remote
control key. To fold the key out and back in place,
press the release button > fig. 18.
26
Number of keys
You can check the number of keys assigned to
your vehicle in the Infotainment system. To do
this, select the [MENU] button > Vehicle > left
control button > Service & checks > Vehicle in-
formation. This way, you can make sure that you
have all the keys when purchasing a used vehicle.
Replacing a key
If a key is lost, see an authorized Audi dealer or
authorized Audi Service Facility. Have this key de-
activated. It is important to bring all keys with
you. If a key is lost, you should report it to your
insurance company.
Electronic immobilizer
The immobilizer prevents unauthorized use of
the vehicle. Under certain circumstances, the ve-
hicle may not be able to start if there is a key
from a different vehicle manufacturer on the key
chain.
Data in the master key
During driving, data that is relevant for service
and maintenance is continuously stored on your
master key. Your Audi service advisor can read
out this data and tell you about the work your ve-
hicle needs. This applies also to vehicles with a
convenience key*.
@) Note
Protect the remote control key against high
temperatures, direct sunlight, and moisture.
@) For the sake of the environment
° Do not dispose of remote control keys in
household trash. They contain materials that
can be recycled. Contact an authorized Audi
dealer or authorized Audi Service Facility for
more information.
Gi) Tips
— The operation of the remote control key can
be temporarily disrupted by interference
from transmitters near the vehicle working
in the same frequency range (such as a cell
phone or radio equipment). Always check if
your vehicle is locked.
Page 38 of 400

Power top
Power top
Automatic power top
ere eleurl lela)
Applies to: vehicles with power top
The power top opens and closes automatically.
When open, the power top is stored completely
in the power top compartment. The power top
can be opened or closed at speeds up to 30 mph
(50 km/h). The power top will not open when the
temperature is below -5 °F (-15 °C).
Under normal conditions, the power top is wind-
and waterproof. In rare cases, small droplets of
water may form under extreme weather condi-
tions such as torrential or prolonged rain. That is
normal and no cause for concern.
Follow the care instructions to keep the power
top free of leaks and to maintain its appearance
= page 342, Care and cleaning. Also observe the
following:
— Open and stow the power top only when it is
clean and dry. Stowing the power top when it is
damp can create imprints in it, and if it is left
that way for long periods of time, mildew and
other damage can form. To prevent scratching
or damaging the power top, do not use any
sharp-edged objects to remove ice and snow.
The rear window may be cleared of ice with a
standard ice scraper.
— Do not leave the power top open for several
weeks or the creases in it may become discol-
ored.
— Do not open the power top when the tempera-
ture is below 32 °F (0 °C). The fabric in the
power top loses elasticity in sub-zero tempera-
tures.
36
Opening and closing the power top
Applies to: vehicles with power top
B8V-0595
Fig. 34 Center console: power top switch
Requirement: the power top storage compart-
ment must be lowered > page 38 and the lug-
gage compartment lid must be closed.
> Switch the ignition on.
> To open or close the power top, pull or press
and hold the switch @) until it is completely
opened or closed.
The status of the power top is shown in the in-
strument cluster display when operating the
power top switch.
You can close the power top when the wind de-
flector is installed > page 39.
A message will appear in the instrument cluster
if the power top cannot be opened or closed
=> page 38.
ZA WARNING
— When operating the power top, make sure
the function is not affected by wind or other
factors and that it does not interfere with
other drivers.
— Never drive when the power top is not
locked correctly. The wind from driving
could cause the power top to open. This can
result in injuries and damage to the vehicle.
— Make sure no one will be injured by the pow-
er top supports and other moving compo-
nents when opening and closing the top.
— The headroom in the rear is reduced when
opening and closing the power top. Make >