2019 VOLVO XC60 TWIN ENGINE steering wheel
[x] Cancel search: steering wheelPage 55 of 695

SAFETY
}}
53
Driver/passenger-side airbags
As a supplement to the seat belts, the vehicle isequipped with driver and passenger side frontairbags.
Driver/passenger side front airbags.
In a frontal collision, the airbags help protect thedriver's and passenger's head, face and chestand the driver's knees and legs.
A collision of a sufficiently violent force will trig-ger the sensors and one or more airbags willinflate. The airbag helps cushion the initial impactof the collision for the passenger. The airbagdeflates when compressed by the collision. Asmall amount of powder will also be releasedfrom the airbag. This may appear to be smokeand is normal. The entire process, from inflationto deflation of the airbag, occurs within tenths ofa second.
NOTE
The sensors react differently depending onthe circumstances of the accident andwhether or not the seat belt is used. Does notapply to all belt positions.
In some accident situations, only one (ornone) of the airbags will be deployed. Thesensors monitor the impact of the collisionand react accordingly to deploy one, severalor no airbags.
WARNING
The seat belt and the airbag work together. Ifthe seat belt is not used or is used incorrectly,the airbag may not provide the intended pro-tection in a collision.
To help prevent injury in the event the airbagis deployed, passengers should sit as uprightas possible, with their feet on the floor andtheir backs against the seat backrest.
WARNING
Volvo recommends contacting an authorizedVolvo workshop for repairs. Incorrectly per-formed repairs to the airbag system couldimpair function and lead to serious injury.
The front airbag system
The front airbag system includes gas generatorssurrounded by the airbags, and deceleration sen-
sors that activate the gas generators, causing theairbags to be inflated with nitrogen gas.
As the movement of the seats' occupants com-presses the airbags, some of the gas is expelledat a controlled rate to provide better cushioning.The belt tensioners minimize slack in the seatbelts and are activated for occupants wearingtheir seat belts. The entire process, from inflationto deflation of the airbag, occurs within tenths ofa second.
The location of the front airbags is indicated bySRS AIRBAG embossed on the steering wheelpad and above the glove compartment, and bydecals on both sun visors and on the front andfar right side of the dash.
The driver's side front airbag is folded andlocated in the steering wheel hub.
The knee airbag is folded on the underside ofthe dashboard on the driver's side. The textAIRBAG is embossed on the panel.
The passenger's side front airbag is foldedbehind a panel located above the glove compart-ment.
Page 58 of 695

||
SAFETY
56
WARNING
No objects or accessory equipment, e.g.dashboard covers, may be placed on,attached to, or installed near the air bagcover (the area above the glove compart-ment) or the area affected by airbagdeployment.
There should be no loose articles, suchas coffee cups on the floor, seat, or dash-board area.
Never try to open the airbag cover on thesteering wheel or the passenger's sidedashboard. This should only be done by atrained and qualified Volvo service techni-cian.
Failure to follow these instructions canresult in injury to the vehicle's occupants.
Related information
Airbags (p. 52)
Occupant weight sensor (p. 56)
Occupant weight sensor
The Occupant Weight Sensor (OWS) isdesigned to meet the regulatory requirements ofFederal Motor Vehicle Safety Standard (FMVSS)208 and is designed to disable (will not inflate)the passenger's side front airbag under certainconditions.
Occupant Weight Sensor (OWS) indicator light
Disabling the passenger's side front
airbag
Volvo recommends that ALL occupants (adultsand children) shorter than 140 cm (4 feet7 inches) be seated in the back seat of any vehi-cle with a front passenger side airbag and beproperly restrained for their size and weight.
The OWS works with sensors that are part of thefront passenger's seat and seat belt. The sensorsare designed to detect the presence of a properly
seated occupant and determine if the passeng-er's side front airbag should be enabled (mayinflate) or disabled (will not inflate).
The OWS will disable (will not inflate) the pas-senger's side front airbag when:
the front passenger's seat is unoccupied, orhas small/medium objects in the front seat,
the system determines that an infant is pres-ent in a rear-facing infant seat that is instal-led according to the manufacturer's instruc-tions,
the system determines that a small child ispresent in a forward-facing child restraintthat is installed according to the manufactur-er's instructions,
the system determines that a small child ispresent in a booster seat,
a front passenger takes his/her weight off ofthe seat for a period of time,
a child or a small person occupies the frontpassenger's seat.
The OWS uses a PASSENGER AIRBAG OFFindicator lamp which will illuminate and stay on toremind you that the passenger's side front airbagis disabled. The PASSENGER AIRBAG OFF indi-cator lamp is located in the overhead console,near the base of the rearview mirror.
Page 84 of 695

DISPLAYS AND VOICE CONTROL
* Option/accessory.82
Instruments and controls in left-hand drive vehicles
The overviews show the location of the vehicle'sdisplays and controls.
Steering wheel and dashboard
Parking lights, daytime running lights, lowbeams, high beams, turn signals, rear foglight, trip computer reset
Steering wheel paddles for manual shifting*
Head-up display*
Instrument panel
Wipers and washers, rain sensor*
Right-side steering wheel keypad
Steering wheel adjustment
Horn
Left-side steering wheel keypad
Hood open
Display lighting, tailgate unlock/open*/close*, halogen headlight height adjustment
Ceiling console
Front reading lights and courtesy lighting
Panoramic roof*
Ceiling console display ON CALL button
HomeLink®*
Center and tunnel console
Center display
Hazard warning flashers, defrosting, media
Gear selector
Start knob
Drive modes
Parking brake
Auto-hold brakes
Driver's door
Page 85 of 695

DISPLAYS AND VOICE CONTROL
* Option/accessory.83
Memory for power front seat settings*, doormirrors and head-up display*
Central locking
Power windows, door mirrors, electric childsafety locks*
Controls for front seat
Related information
Manual front seats (p. 184)
Adjusting the power* front seats (p. 185)
Adjusting the steering wheel (p. 198)
Lighting panel and controls (p. 152)
Starting the vehicle (p. 430)
Instrument panel (p. 84)
Center display overview (p. 109)
Transmission (p. 444)
Page 87 of 695

DISPLAYS AND VOICE CONTROL
85
Left sideIn the centerRight side
–Media playerDistance to discharged battery
–Navigation system mapCurrent fuel consumption
–PhoneApp menu (activated using steering wheel keypad)
–Voice Control–
–CompassA–
ADepends on selected drive mode.BTotal distance.
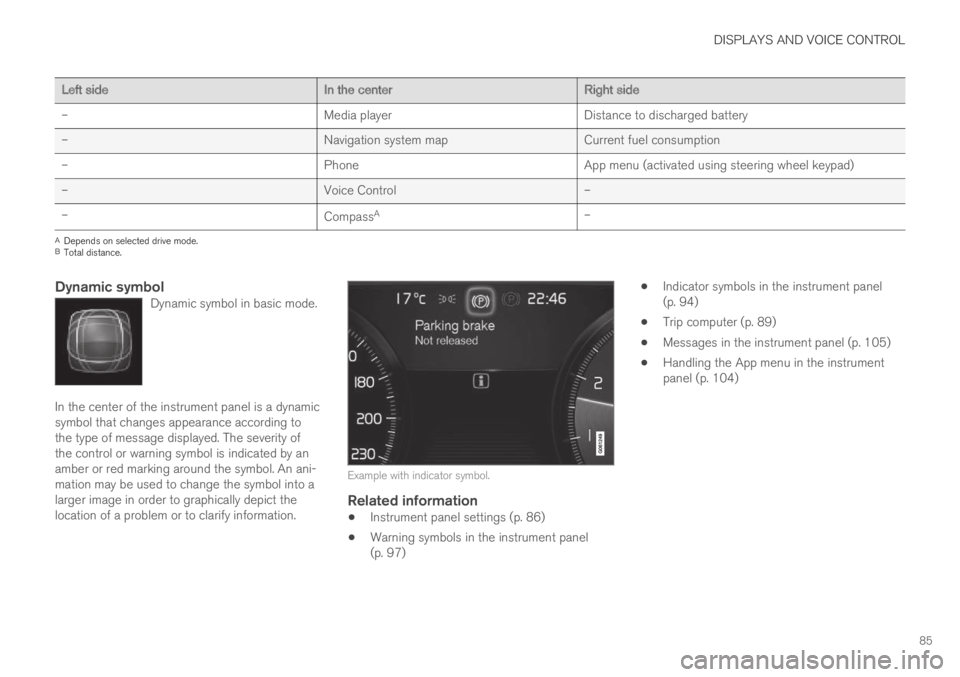
Dynamic symbol
Dynamic symbol in basic mode.
In the center of the instrument panel is a dynamicsymbol that changes appearance according tothe type of message displayed. The severity ofthe control or warning symbol is indicated by anamber or red marking around the symbol. An ani-mation may be used to change the symbol into alarger image in order to graphically depict thelocation of a problem or to clarify information.
Example with indicator symbol.
Related information
Instrument panel settings (p. 86)
Warning symbols in the instrument panel(p. 97)
Indicator symbols in the instrument panel(p. 94)
Trip computer (p. 89)
Messages in the instrument panel (p. 105)
Handling the App menu in the instrumentpanel (p. 104)
Page 88 of 695

DISPLAYS AND VOICE CONTROL
86
Instrument panel settings
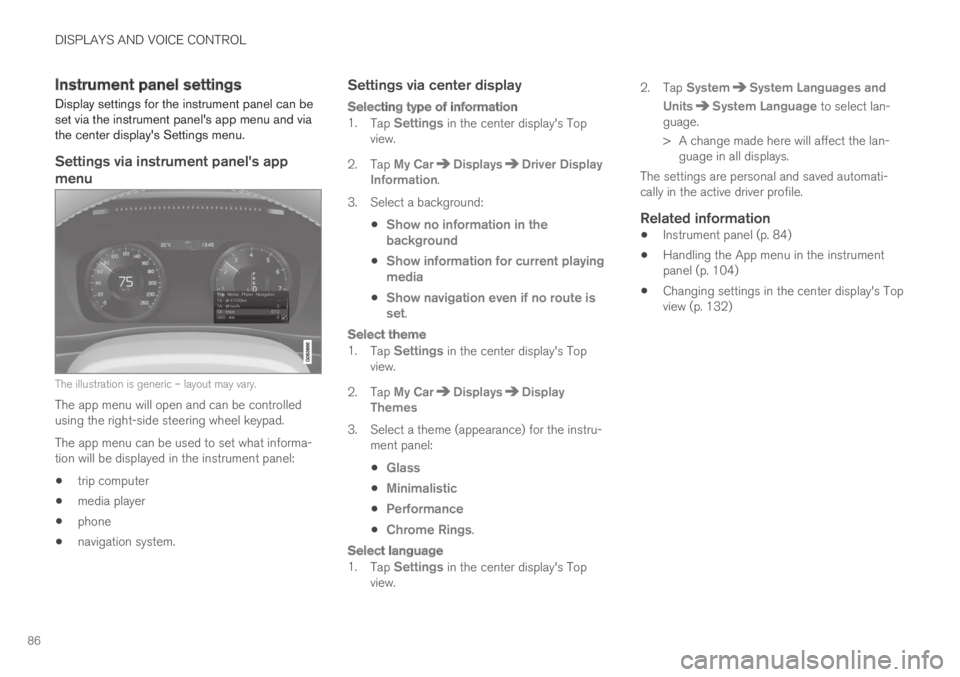
Display settings for the instrument panel can beset via the instrument panel's app menu and viathe center display's Settings menu.
Settings via instrument panel's app
menu
The illustration is generic – layout may vary.
The app menu will open and can be controlledusing the right-side steering wheel keypad.
The app menu can be used to set what informa-tion will be displayed in the instrument panel:
trip computer
media player
phone
navigation system.
Settings via center display
Selecting type of information
1.Tap Settings in the center display's Topview.
2.Tap My CarDisplaysDriver DisplayInformation.
3.Select a background:
Show no information in thebackground
Show information for current playingmedia
Show navigation even if no route isset.
Select theme
1.Tap Settings in the center display's Topview.
2.Tap My CarDisplaysDisplayThemes
3. Select a theme (appearance) for the instru-ment panel:
Glass
Minimalistic
Performance
Chrome Rings.
Select language
1.Tap Settings in the center display's Topview.
2.Tap SystemSystem Languages and
UnitsSystem Language to select lan-guage.
> A change made here will affect the lan-guage in all displays.
The settings are personal and saved automati-cally in the active driver profile.
Related information
Instrument panel (p. 84)
Handling the App menu in the instrumentpanel (p. 104)
Changing settings in the center display's Topview (p. 132)
Page 93 of 695

DISPLAYS AND VOICE CONTROL
91
Displaying trip data in theinstrument panel
Data recorded and calculated by the trip com-puter can be displayed on the instrument panel.
This data is stored in a trip computer app. Youcan choose which information the instrumentpanel will display in the app menu.
Open and navigate in the app menu2 using the right-hand steering wheel keypad.
App menu
Left/right
Up/down
Confirm
1.Open the app menu in the instrument panelby pressing (1).
(The App menu cannot be opened whilethere is an unacknowledged message in theinstrument panel. The message must be con-firmed before the App menu can be opened.)
2. Navigate to the trip computer app by movingleft or right using (2).
> The top four menu rows show measuredvalues for trip odometer TM. The next fourmenu rows show measured values for tripodometer TA. Scroll up or down in the listusing (3).
3. Scroll down to the option buttons to choosewhich information to show in the instrumentpanel:
Distance to empty tank
Odometer
Mileage for trip odometer TM, TA or nodisplay of mileage
Current fuel consumption, average fuelconsumption for TM or TA, or no displayof fuel consumption
Tourist (alternative speedometer).
Distance to discharged battery
Select or clear a selection using the O but-ton (4). The change will apply immediately.
Related information
Trip computer (p. 89)
Resetting the trip odometer (p. 92)
2The illustration is generic - details may vary according to vehicle model.
Page 94 of 695

DISPLAYS AND VOICE CONTROL
92
Resetting the trip odometer
Resetting the trip odometer using the left-sidesteering wheel lever.
–Reset all information in trip odometer TM (i.e.mileage, average fuel consumption, averagespeed and driving time) by pressing andholding the RESET button on the left-handsteering wheel lever.
Tapping the RESET button only resets thedistance driven.
The TA trip odometer can not be manually reset.It resets automatically if the vehicle is not usedfor four hours or more.
Related information
Trip computer (p. 89)
Displaying trip statistics in thecenter display
Trip computer statistics can be displayed graphi-cally in the center display, providing an overviewthat facilitates more fuel-efficient driving.
Open the Driver performanceapp in the App view to displaytrip statistics.
Each bar in the graph repre-sents a driving distance of 1kilometers, 10 kilometers or100 kilometers (or miles). The bars are addedfrom the right as you drive. The bar at the far rightshows the data for the current trip.
Average fuel consumption and total driving timeare calculated from the most recent reset of thetrip statistics.
Fuel and electricity consumption are shown inseparate graphs. The electricity consumptionshows "net" consumption, i.e. consumed currentminus regenerated current generated by braking.
Trip computer statistics3.
Related information
Trip statistics settings (p. 93)
Trip computer (p. 89)
3The illustration is generic - details may vary according to vehicle model.