2019 VOLVO XC60 TWIN ENGINE set clock
[x] Cancel search: set clockPage 86 of 695

DISPLAYS AND VOICE CONTROL
* Option/accessory.84
Instrument panel
The instrument panel displays information rela-ted to the vehicle and driving.
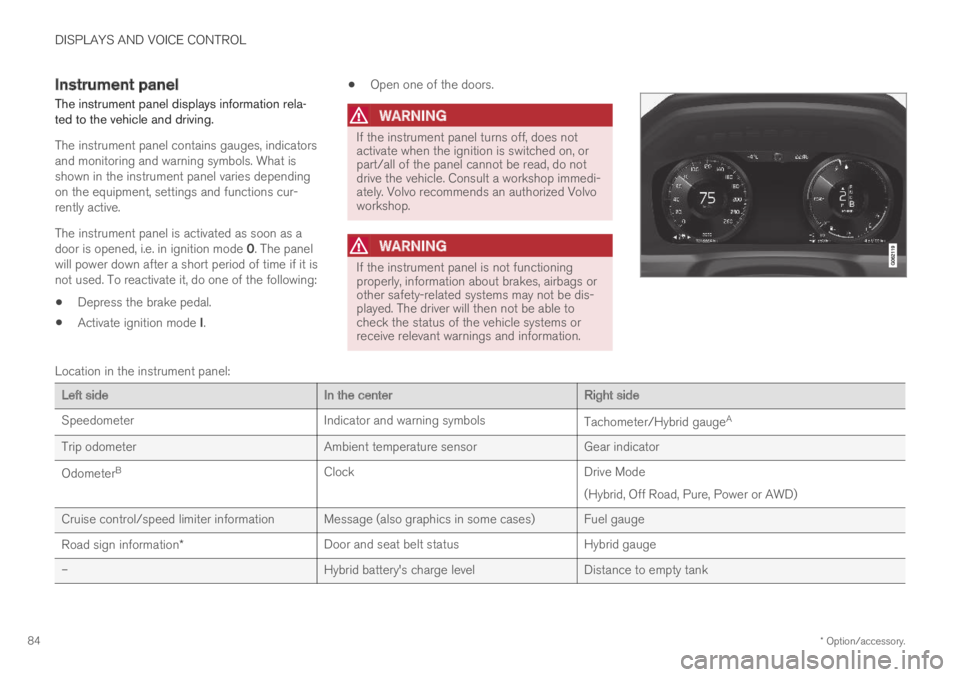
The instrument panel contains gauges, indicatorsand monitoring and warning symbols. What isshown in the instrument panel varies dependingon the equipment, settings and functions cur-rently active.
The instrument panel is activated as soon as adoor is opened, i.e. in ignition mode 0. The panelwill power down after a short period of time if it isnot used. To reactivate it, do one of the following:
Depress the brake pedal.
Activate ignition mode I.
Open one of the doors.
WARNING
If the instrument panel turns off, does notactivate when the ignition is switched on, orpart/all of the panel cannot be read, do notdrive the vehicle. Consult a workshop immedi-ately. Volvo recommends an authorized Volvoworkshop.
WARNING
If the instrument panel is not functioningproperly, information about brakes, airbags orother safety-related systems may not be dis-played. The driver will then not be able tocheck the status of the vehicle systems orreceive relevant warnings and information.
Location in the instrument panel:
Left sideIn the centerRight side
SpeedometerIndicator and warning symbolsTachometer/Hybrid gaugeA
Trip odometerAmbient temperature sensorGear indicator
OdometerBClockDrive Mode
(Hybrid, Off Road, Pure, Power or AWD)
Cruise control/speed limiter information Message (also graphics in some cases) Fuel gauge
Road sign information*Door and seat belt statusHybrid gauge
–Hybrid battery's charge levelDistance to empty tank
Page 95 of 695

DISPLAYS AND VOICE CONTROL
93
Trip statistics settings
Trip statistics settings can be reset or adjusted.
1.Open the Driver performance app in theApp view to display trip statistics.
2.Tap Preferences to
change the graph scale. Select 1, 10 or100 km/miles for the bar.
reset data after each trip. Performed whenthe vehicle remains stationary for morethan 4 hours.
reset data for current trip.
Trip statistics, calculated average consump-tion, and total driving time are always resetsimultaneously.
Unit standards for distance, speed, etc. can bechanged via system settings in the center display.
Related information
Displaying trip statistics in the center display(p. 92)
Trip computer (p. 89)
Resetting the trip odometer (p. 92)
Date and time
The clock is displayed in both the instrumentpanel and the center display.
Location of clock
Location of clock in 12" and 8" instrument panels.
In the center display, the clock is located at thetop right of the status bar.
Certain messages and other information mayobscure the clock in the instrument panel.
Time and date settings
–Select SettingsSystemDate andTime in the center display's Top view tochange settings for time and date format.
Adjust the time and date by tapping the up ordown arrows on the touchscreen.
Automatic time for vehicles with GPS
When the vehicle is equipped with a navigationsystem, Auto Time is also available. The timezone will then be automatically set to the vehi-cle's location. In some navigation systems, thecurrent location must also be set to determinethe correct time zone. If Auto Time is notselected, the time and date can be adjustedusing the up and down arrows on thetouchscreen.
Daylight savings time
In some countries, an automatic change to day-light savings time can be selected by activatingAuto. For other countries, daylight savings timecan be changed by selecting On or Off.
Related information
Instrument panel (p. 84)
Changing settings in the center display's Topview (p. 132)
Page 113 of 695

DISPLAYS AND VOICE CONTROL
* Option/accessory.111
adjusted using the right-side steering wheelkeypad.
Home view ‒ the initial view displayed whenthe screen is turned on.
App view ‒ shows downloaded apps (third-party apps) as well as apps for integratedfunctions, such as FM radio. Tap an app iconto open that app.
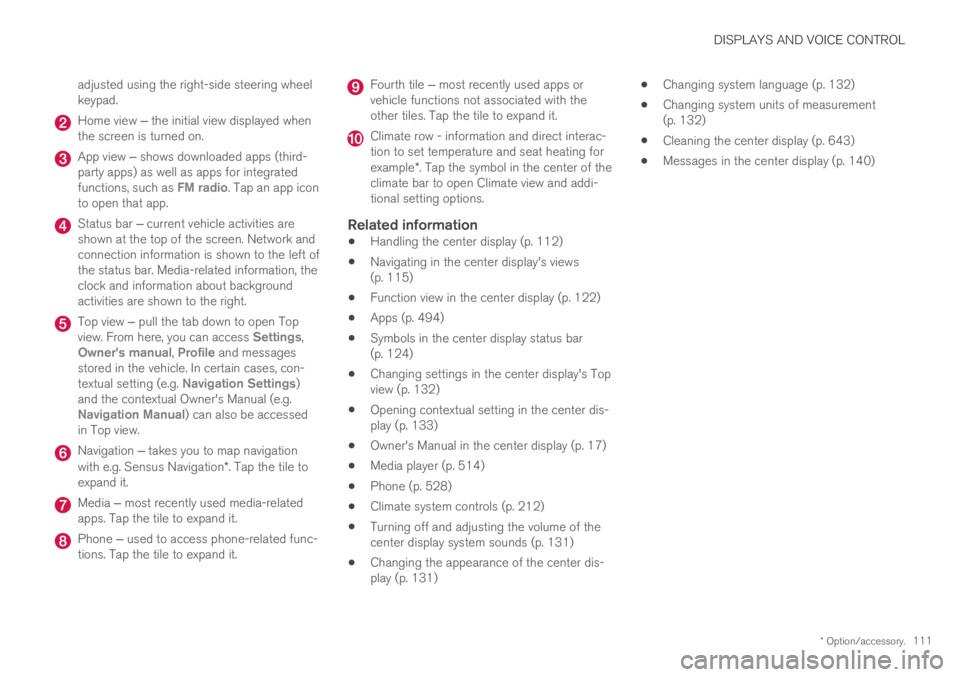
Status bar ‒ current vehicle activities areshown at the top of the screen. Network andconnection information is shown to the left ofthe status bar. Media-related information, theclock and information about backgroundactivities are shown to the right.
Top view ‒ pull the tab down to open Topview. From here, you can access Settings,Owner's manual, Profile and messagesstored in the vehicle. In certain cases, con-textual setting (e.g. Navigation Settings)and the contextual Owner's Manual (e.g.Navigation Manual) can also be accessedin Top view.
Navigation ‒ takes you to map navigationwith e.g. Sensus Navigation*. Tap the tile toexpand it.
Media ‒ most recently used media-relatedapps. Tap the tile to expand it.
Phone ‒ used to access phone-related func-tions. Tap the tile to expand it.
Fourth tile ‒ most recently used apps orvehicle functions not associated with theother tiles. Tap the tile to expand it.
Climate row - information and direct interac-tion to set temperature and seat heating forexample*. Tap the symbol in the center of theclimate bar to open Climate view and addi-tional setting options.
Related information
Handling the center display (p. 112)
Navigating in the center display's views(p. 115)
Function view in the center display (p. 122)
Apps (p. 494)
Symbols in the center display status bar(p. 124)
Changing settings in the center display's Topview (p. 132)
Opening contextual setting in the center dis-play (p. 133)
Owner's Manual in the center display (p. 17)
Media player (p. 514)
Phone (p. 528)
Climate system controls (p. 212)
Turning off and adjusting the volume of thecenter display system sounds (p. 131)
Changing the appearance of the center dis-play (p. 131)
Changing system language (p. 132)
Changing system units of measurement(p. 132)
Cleaning the center display (p. 643)
Messages in the center display (p. 140)
Page 118 of 695

||
DISPLAYS AND VOICE CONTROL
* Option/accessory.116
NOTE
In Home view's standard mode – short presson the Home button. An animation describingaccess to the various views is shown on thescreen.
NOTE
When the vehicle is moving:
Certain functions (e.g. using the centerdisplay's keyboard) may be deactivated.
Certain texts (e.g. those generated byapps) will be shortened to three rows.Tap the Read out button to have theentire message read aloud.
The message will be shortened to onerow. Tap the Read out button to havethe entire message read aloud.
Status bar
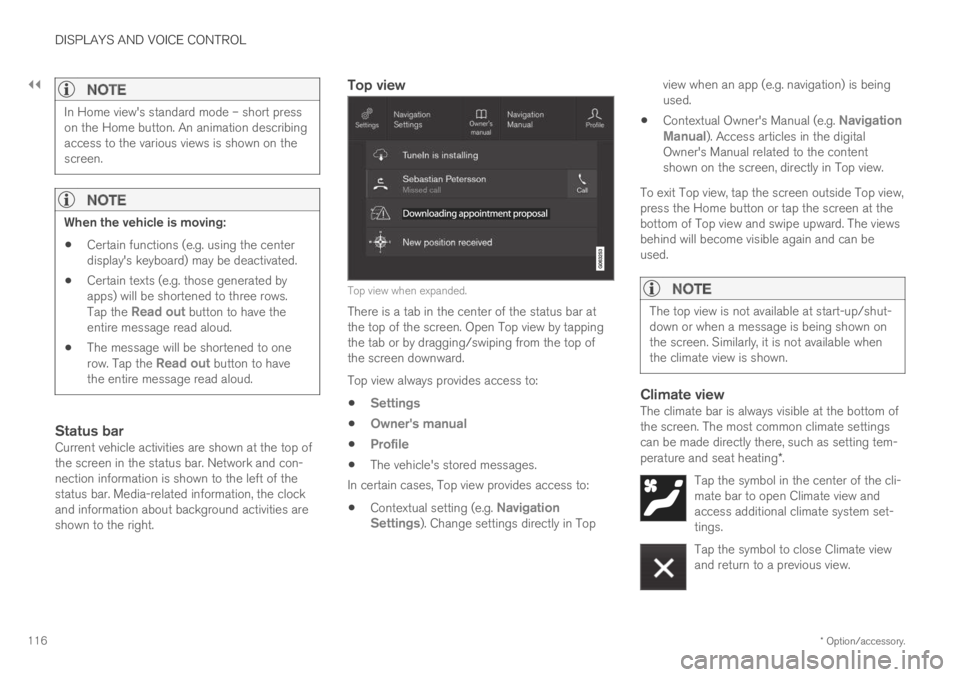
Current vehicle activities are shown at the top ofthe screen in the status bar. Network and con-nection information is shown to the left of thestatus bar. Media-related information, the clockand information about background activities areshown to the right.
Top view
Top view when expanded.
There is a tab in the center of the status bar atthe top of the screen. Open Top view by tappingthe tab or by dragging/swiping from the top ofthe screen downward.
Top view always provides access to:
Settings
Owner's manual
Profile
The vehicle's stored messages.
In certain cases, Top view provides access to:
Contextual setting (e.g. NavigationSettings). Change settings directly in Top
view when an app (e.g. navigation) is beingused.
Contextual Owner's Manual (e.g. NavigationManual). Access articles in the digitalOwner's Manual related to the contentshown on the screen, directly in Top view.
To exit Top view, tap the screen outside Top view,press the Home button or tap the screen at thebottom of Top view and swipe upward. The viewsbehind will become visible again and can beused.
NOTE
The top view is not available at start-up/shut-down or when a message is being shown onthe screen. Similarly, it is not available whenthe climate view is shown.
Climate view
The climate bar is always visible at the bottom ofthe screen. The most common climate settingscan be made directly there, such as setting tem-perature and seat heating*.
Tap the symbol in the center of the cli-mate bar to open Climate view andaccess additional climate system set-tings.
Tap the symbol to close Climate viewand return to a previous view.
Page 147 of 695

DISPLAYS AND VOICE CONTROL
}}
* Option/accessory.145
Calibrating the horizontal position
If the windshield or display unit has beenreplaced, the head-up display's horizontal posi-tion may need to be calibrated. Calibration meansthat the projected image is rotated clockwise orcounterclockwise.
1.Tap Settings in the center display's Topview.
2.Select My CarDisplaysHead-Up
Display OptionsHead-Up DisplayCalibration.
3.Calibrate the horizontal position of the imageusing the right-side steering wheel keypad.
Rotate counterclockwise
Rotate clockwise
Confirm
Related information
Head-up display* (p. 142)
Activating and deactivating the head-up dis-play* (p. 143)
Driver profiles (p. 136)
Storing positions for seats, mirrors and head-up display* (p. 186)
Voice control15
The driver can use voice commands to controlcertain functions in the media player, aBluetooth-connected phone, the climate systemand the Volvo navigation system*.
Voice commands offer extra convenience andhelp minimize distractions so drivers can concen-trate on driving and keep their attention on theroad and traffic situation.
WARNING
The driver is always responsible for ensuringthat the vehicle is operated in a safe mannerand that all applicable traffic regulations arefollowed.
Voice control microphone
Voice control is carried out as a dialog, with spo-ken commands from the user and verbal respon-
Page 230 of 695

||
CLIMATE CONTROL
228
4.Tap Date to set a time for a specific date.
Tap Days to set a time for one or more daysof the week.
With Days: Activate/deactivate the repeatfunction by selecting/deselecting theRepeat weekly checkbox.
5.With Date: Select a date for preconditioningby scrolling in the date list using the arrows.
With Days: Select days of the week for pre-conditioning by tapping the buttons for thedays.
6.Set the time at which preconditioning shouldbe completed by scrolling using the arrows inthe clock.
7.Tap Confirm to add a timer setting.
>The timer setting will be added to the listand activated.
Editing a timer setting
1. Open Climate view in the center display.
2.Select the Parking climate tab.
3.Tap the timer setting you would like tochange.
> A pop-up window will appear.
4. To edit a timer setting, follow the proceduresdescribed under the heading "Adding a timersetting" above.
Related information
Preconditioning (p. 225)
Preconditioning timer (p. 227)
Activating and deactivating preconditioningtimer (p. 228)
Deleting preconditioning timer settings(p. 229)
Activating and deactivatingpreconditioning timer
Timer settings in the preconditioning timer canbe activated or deactivated as needed.
Timer buttons in the Parking climate tab in Climateview.
1. Open Climate view in the center display.
2.Select the Parking climate tab.
3.Activate/deactivate a timer setting by tap-ping the timer button to the right of the set-ting.
> The timer setting is activated/deactivatedand the button lights up/goes out.
Related information
Preconditioning (p. 225)
Preconditioning timer (p. 227)
Page 271 of 695

KEY, LOCKS AND ALARM
269
Disarming the alarm without a functioning
remote key
The vehicle can be unlocked and disarmed evenif the remote key is not functioning, e.g. if thebattery is discharged.
1. Open the driver's door using the detachablekey blade.
> This will trigger the alarm.
Location of the backup key reader in the cup holder.
2. Place the remote key on the key symbol inthe backup reader in the tunnel console'scup holder.
3.Turn the start knob clockwise and release.
> The alarm will be disarmed.
Turning off a triggered alarm
–Press the unlock button on the remote keyor put the ignition into mode I by turning thestart knob clockwise and then releasing it.
NOTE
Remember that the alarm is armed whenthe vehicle is locked.
The alarm will be triggered if any of thedoors is opened from the inside.
Automatically arming and disarming the
alarm
Automatically arming the alarm helps preventinadvertently leaving the vehicle without alarmprotection.
If the vehicle is unlocked using the remote key(and the alarm is disarmed) but none of thedoors or tailgate are opened within two minutes,the alarm will be automatically rearmed. The vehi-cle will also re-lock.
On some markets, the alarm will be automaticallyarmed following a slight delay after the driver'sdoor has been opened and closed without beinglocked.
To change this setting:
1.Tap Settings in the center display's Topview.
2.Tap My CarLocking.
3.Select Passive Arming Deactivation totemporarily deactivate the function.
Related information
Alarm (p. 267)
Page 433 of 695

STARTING AND DRIVING
}}
431
In some situations, such as in cold weather or ifthe hybrid battery's charge level is too low, thegasoline engine will start instead.
The vehicle should not be started with the charg-ing cable connected. However, if the cable can-not be pulled out or if the vehicle incorrectlydetects a cable that is not connected, the vehiclecan be started using an override procedure:
1.Press the brake pedal and turn the startknob clockwise.
2.Charge cable Remove before start willappear in the instrument panel.
3.Turn the start knob clockwise again.
4.Removed? Turn and hold start knob 7swill appear. Turn the knob clockwise and holdit for 7 seconds to start the vehicle.
Location of the backup reader in the tunnel console.
If the Vehicle key not found message is shownin the instrument panel at start, place the remotekey at the backup reader and then make a newstart attempt.
NOTE
When the remote key is placed in the backupreader, make sure that no other vehicle keys,metal objects or electronic devices (e.g. cellu-lar phones, tablets, laptops or chargers) are inthe backup reader. Multiple vehicle keys closeto each other in the backup reader can dis-rupt their functionality.
If Vehicle start System check, wait is dis-played in the instrument panel while attemptingto start the vehicle, wait until the message disap-pears and try again to start the vehicle.
CAUTION
If the engine has not responded after 3attempts – wait for 3 minutes before startinga new attempt. Starting capability increases ifthe starter battery is given time to recover.
NOTE
The vehicle cannot be started if the hybridbattery is discharged.
WARNING
Never remove the remote control key fromthe vehicle while driving.
WARNING
Always remove the remote key from thepassenger compartment when you leavethe vehicle and make sure the ignition isin mode 0.
Always put the gear selector in P andapply the parking brake before leavingthe vehicle. Never leave the vehicle unsu-pervised while the engine is running.
Always open the garage door fully andmake sure that ventilation is very goodbefore starting the engine in a garage.The exhaust fumes produced by the vehi-cle contain carbon monoxide, which isinvisible and odorless but very toxic.
NOTE
With a cold start, idling speed may be consid-erably higher than normal for certain enginetypes. This is done to get the emissions sys-tem up to normal operating temperature asquickly as possible, which minimizes exhaustemissions and protects the environment.