2019 VOLVO S60 TWIN ENGINE tow
[x] Cancel search: towPage 478 of 645

AUDIO, MEDIA AND INTERNET
* Option/accessory.476
Streaming media via Bluetooth®
The vehicle's media player is equipped withBluetooth and can play audio files fromBluetooth-enabled external devices such as cel-lular phones and tablets.
In order for the media player to be able to wire-lessly play audio files from an external device, thedevice must be connected to the vehicle viaBluetooth.
Related information
Connecting a device via Bluetooth® (p. 476)
Connecting a phone to the car via Bluetoothfor the first time (p. 485)
Playing media (p. 470)
Compatible file formats for media (p. 478)
Connecting a device via Bluetooth®
Connect a Bluetooth® device to the vehicle towirelessly play media and give the vehicle anInternet connection if it is available.
Many cellular phones on the market currently
offer wireless Bluetooth® technology, but not allphones are fully compatible with the vehicle.
The procedure for connecting a media device isthe same as for connecting a cellular phone to
the vehicle via Bluetooth®.
Related information
Streaming media via Bluetooth® (p. 476)
Connecting a phone to the car via Bluetoothfor the first time (p. 485)
Playing media (p. 470)
Playing media via the USB port
External audio sources, such as an iPod® orMP3 player, can be connected to the audio sys-tem via the vehicle's USB port.
Devices with rechargeable batteries can becharged when they are connected via the USBport and the ignition is in mode I, II or the engineis running.
The content on the external source can be readfaster if it only contains data of a compatible for-mat. Video files can also be played via the USBport.
Some MP3 players have their own file systemthat the vehicle has support for.
Related information
Connecting a device via the USB port(p. 477)
Playing media (p. 470)
Video (p. 474)
Ignition modes (p. 395)
Technical specifications for USB devices(p. 477)
Apple® CarPlay®* (p. 479)
Android Auto* (p. 482)
Page 484 of 645

AUDIO, MEDIA AND INTERNET
* Option/accessory.482
Android Auto*
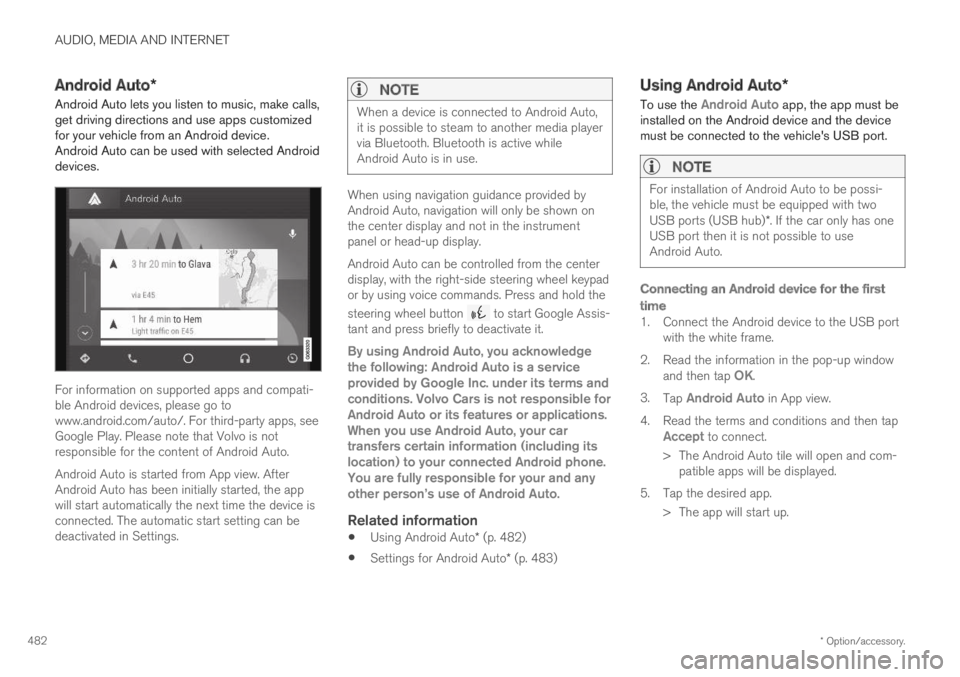
Android Auto lets you listen to music, make calls,get driving directions and use apps customizedfor your vehicle from an Android device.Android Auto can be used with selected Androiddevices.
For information on supported apps and compati-ble Android devices, please go towww.android.com/auto/. For third-party apps, seeGoogle Play. Please note that Volvo is notresponsible for the content of Android Auto.
Android Auto is started from App view. AfterAndroid Auto has been initially started, the appwill start automatically the next time the device isconnected. The automatic start setting can bedeactivated in Settings.
NOTE
When a device is connected to Android Auto,it is possible to steam to another media playervia Bluetooth. Bluetooth is active whileAndroid Auto is in use.
When using navigation guidance provided byAndroid Auto, navigation will only be shown onthe center display and not in the instrumentpanel or head-up display.
Android Auto can be controlled from the centerdisplay, with the right-side steering wheel keypador by using voice commands. Press and hold the
steering wheel button to start Google Assis-tant and press briefly to deactivate it.
By using Android Auto, you acknowledgethe following: Android Auto is a serviceprovided by Google Inc. under its terms andconditions. Volvo Cars is not responsible forAndroid Auto or its features or applications.When you use Android Auto, your cartransfers certain information (including itslocation) to your connected Android phone.You are fully responsible for your and anyother person
Page 502 of 645

AUDIO, MEDIA AND INTERNET
500
Terms of use and data sharing
The first time certain services and apps arestarted, a pop-up window with the headingTerms and conditions and Data sharing mayopen.
The aim is to inform the user about Volvo's termsof use and data sharing policy. By accepting datasharing, the user accepts that certain informationwill be sent from the vehicle. This is required forcertain services and apps to work with full func-tionality.
The data sharing function for connected servicesand apps is deactivated by default. For certainconnected services and apps in the vehicle towork, data sharing must be activated. Data shar-ing can be set from the center display's Settingsmenu.
NOTE
Settings for privacy and data sharing areunique for each driver profile.
Related information
Activating and deactivating data sharing(p. 500)
Activating and deactivating datasharing
Data sharing for relevant services and apps canbe set via the Settings menu in the center dis-play.
1.Tap Settings in the Top view in the centerdisplay.
2.Tap SystemPrivacy and data.
3. Select to activate or deactivate data sharingfor individual services and all apps.
If data sharing for a connected service or down-loaded apps is not activated, this can be donewhen they are started in the center display. If thisis the first time that a service is started, or e.g.after a factory reset or certain software updates,Volvo's terms and conditions for connected serv-ices must be accepted. Note that data sharingwill then also be activated for other services orapps that sharing has already been accepted for.
NOTE
After visiting a Volvo workshop, you may needto reactivate data sharing so that services andapps will work again.
Related information
Terms of use and data sharing (p. 500)
Hard disk storage space
It is possible to view how much space is remain-ing on the vehicle's hard disk.
Storage information for the vehicle's hard diskcan be shown, including total capacity, availablecapacity and how much space is used for instal-led apps. The information is found under
SettingsSystemSystem InformationStorage.
Related information
Apps (p. 450)
Page 528 of 645

||
WHEELS AND TIRES
* Option/accessory.526
Related information
Recommended tire pressure (p. 521)
Adjusting tire pressure (p. 520)
Saving a new inflation pressure in the moni-toring system* (p. 523)
Viewing tire pressure status in the centerdisplay* (p. 524)
Tire pressure monitoring system* (p. 521)
Inflate tires with the compressor included inthe tire sealing system (p. 539)
When changing wheels
The wheels can be changed, e.g. to switch tosnow tires or spare tires. Follow the applicableinstructions for removing and installing thewheel.
Changing to tires of another dimension
Make sure that the tire dimension is approved foruse on the vehicle.
If you change to tires of another dimension, con-tact an authorized Volvo workshop to update thevehicle's software. A software update may benecessary when changing to tires of larger/smaller dimensions or when changing to or fromsnow tires.
Related information
Removing a wheel (p. 528)
Installing a wheel (p. 530)
Tool kit (p. 526)
Snow tires (p. 533)
Spare wheel (p. 531)
Wheel bolts (p. 527)
Tool kit
Tools for e.g. towing or changing wheels areprovided in the vehicle's trunk.
The foam block under the cargo compartmentfloor contains the towing eyelet, the tire sealingsystem, the tool for removing plastic wheel boltcovers and the tool for removing the lockingwheel bolts.
If the vehicle is equipped with a spare tire*12, ajack and lug wrench are provided.
Related information
When changing wheels (p. 526)
Jack* (p. 527)
12Not available on all models.
Page 531 of 645

WHEELS AND TIRES
}}
* Option/accessory.529
1.Turn on the vehicle's hazard warning flashersif a wheel change must be performed in anarea with traffic.
2. Apply the parking brake and put the gearselector in P, or first gear if the vehicle has amanual transmission.
For vehicles with Leveling Control*: If thevehicle is equipped with pneumatic suspen-sion, this must be switched off before thevehicle is lifted with the jack*.
3.Take out the jack*, lug wrench* and tool forremoving the plastic covers, which arestowed in the foam block.
Tool for removing the plastic covers on the wheel bolts.
4. Place chocks in front of and behind thewheels that are still on the ground. For exam-ple, use heavy wooden blocks or largestones.
5.Using the lug wrench, screw the towing eyeinto place as far as possible according to theinstructions.
CAUTION
The towing eyelet must be screwed into thelug wrench* as far as possible.
6. Remove the plastic covers from the wheelbolts using the designated tool.
7.With the vehicle still on the ground, use thelug wrench/towing eye to loosen the wheelbolts ½-1 turn by pressing downward (coun-terclockwise).
8. When hoisting the vehicle, it is important thatthe jack or garage lift arms are positioned onthe designated points under the vehicle. Thetriangle markings on the plastic cover indi-cate where the jack attachment points/liftingpoints are located. There are two jack attach-ment points on each side of the vehicle.There is a groove for the jack at each attach-ment point.
9. Position the jack under the attachment pointbeing used, ensuring that the surface is firm,flat and not slippery.
Page 539 of 645

WHEELS AND TIRES
}}
537
3.Make sure the switch is in the 0 (Off) posi-tion and take out the electric cable and thehose.
4.Unscrew the orange cover on the compres-sor and unscrew the cap on the sealing com-pound bottle.
5. Screw the bottle onto the bottle holder as faras possible.
The bottle and the bottle holder are equip-ped with catches to help prevent the sealingcompound from leaking. Once the bottle isscrewed into place into the bottle holder, itcannot be unscrewed. The bottle can only be
removed by a workshop16.
WARNING
Do not unscrew the bottle. It is equipped witha catch to prevent leakage.
6.Unscrew the tire's valve cap and screw thehose's valve connector as far as possibleonto the valve.
Be sure the air release valve on the com-pressor's hose is completely closed.
7. Connect the electrical cable to the nearest12 V outlet and start the vehicle.
NOTE
Make sure that none of the vehicle's other12 V sockets are used while the compressoris running.
WARNING
Never leave children unattended in the vehiclewhile the engine is running.
WARNING
Inhaling exhaust fumes could lead to seriousinjury. Never leave the engine running in anenclosed space or a space without sufficientventilation.
8.Start the compressor by moving the switch tothe I (On) position.
WARNING
Never stand next to a tire being inflated withthe compressor. If cracks, bulges, etc. form onthe tire, switch off the compressor immedi-ately. The vehicle should not be driven. Callroadside assistance to have the vehicle towedto a workshop for inspection/replacement ofthe tire. Volvo recommends an authorizedworkshop.
NOTE
When the compressor first starts, air pressuremay temporarily increase up to 6 bar (88 psi)but should decrease again after approxi-mately 30 seconds.
9. Inflate the tire for 7 minutes.
CAUTION
To help avoid overheating, the compressorshould never be used for more than10 minutes at a time.
16An authorized Volvo workshop is recommended.
Page 540 of 645

||
WHEELS AND TIRES
538
10. Switch off the compressor and check theinflation pressure using the air pressuregauge. The inflation pressure should bebetween 1.8 bar (22 psi) and 3.5 bar(51 psi). If the inflation pressure is too high,use the air release valve to release air.
WARNING
If pressure falls below 1.8 bar (22 psi), thehole in the tire may be too large. The vehicleshould not be driven. Call roadside assistanceto have the vehicle towed to a workshop forinspection/replacement of the tire. Volvo rec-ommends an authorized workshop.
11.Switch off the compressor and remove theelectrical cable.
12. Unscrew the hose from the tire's valve andscrew the valve cap back on.
NOTE
After inflating a tire, always replace thevalve cap to help prevent valve damagecaused by gravel, dirt, etc.
Use plastic valve caps only. Metal capscould corrode and become difficult toremove.
13. Put the protective hose cover onto the hoseto help prevent leakage of any residual seal-ing compound. Return the equipment to thecargo compartment.
14.Immediately drive the vehicle at least 3 km(2 miles) at a maximum speed of 80 km/h(50 mph) to allow the sealing compound toseal the tire, and then recheck the inflationpressure.
WARNING
During the tire's first revolution, some sealingcompound may spray out of the puncturehole. Before driving away, make sure that noone is near the vehicle who could be sprayedwith sealing compound. Make sure no one iswithin 2 meters(7 feet) of the vehicle.
15.Rechecking the inflation pressure
Connect the hose to the tire's valve andscrew the hose connector onto the valve asfar as possible. The compressor must beswitched off.
16.Check the inflation pressure on the air pres-sure gauge.
If the pressure is under 1.3 bar (19 psi),the tire is not sufficiently sealed. The vehi-cle should not be driven. Call roadsideassistance to have the vehicle towed.
If the inflation pressure is higher than1.3 bar (19 psi), the tire must be inflatedto the inflation pressure specified on thetire pressure decal on the driver's sidedoor pillar (1 bar = 100 kPa = 14.5 psi). Ifthe inflation pressure is too high, use theair release valve to release air.
WARNING
Check inflation pressure regularly.
Volvo recommends driving to the nearest author-ized Volvo workshop to have the tire replaced/repaired. Inform the workshop that the tire con-tains sealing compound.
The sealing compound bottle and the hose mustbe replaced after use. Volvo recommends con-tacting an authorized Volvo workshop for replace-ment.
Page 542 of 645

||
WHEELS AND TIRES
540
Related information
Recommended tire pressure (p. 521)
Using the tire sealing system (p. 535)
Tire sealing system (p. 534)
Determining the vehicle's permittedweight
Properly loading your vehicle will provide maxi-mum return of vehicle design performance.
Weight designations
Before loading your vehicle, familiarize yourselfwith the following terms for determining yourvehicle's weight ratings, with or without a trailer,from the vehicle's Federal/Canadian Motor Vehi-cle Safety Standards (FMVSS/CMVSS) label, andthe vehicle's tire information placard:
Curb weight
The weight of the vehicle including a full tank offuel and all standard equipment. It does notinclude passengers, cargo, or optional equipment.
Capacity weight
All weight added to the curb weight, includingcargo and optional equipment. When towing, tow-bar weight is also part of cargo weight.
Permissible axle weight
The maximum allowable weight that can be car-ried by a single axle (front or rear). These num-bers are shown on the Federal/Canadian MotorVehicle Safety Standards (FMVSS/CMVSS) label.The total load on each axle must never exceed itsmaximum permissible weight.
Gross vehicle weight (GVW)
The vehicle's curb weight + cargo + passengers.
Steps for Determining Correct Load
Limit
1. Locate the statement "the combined weightof occupants and cargo should never exceedXXX kg or XXX lbs." on your vehicle's plac-ard.
2. Determine the combined weight of the driverand passengers that will be riding in yourvehicle.
3. Subtract the combined weight of the driverand passengers from XXX kg or XXX lbs.
4. The resulting figure equals the availableamount of cargo and luggage load capacity.For example, if the "XXX" amount equals1400 lbs. and there will be five 150 lb. pas-sengers in your vehicle, the amount of availa-ble cargo and luggage load capacity is 650lbs. (1400 - 750 (5 × 150) = 650 lbs.)
5. Determine the combined weight of luggageand cargo being loaded on the vehicle. Thatweight may not safely exceed the availablecargo and luggage load capacity calculatedin Step 4.
6. If your vehicle will be towing a trailer, loadfrom your trailer will be transferred to yourvehicle. Consult this manual to determinehow this reduces the available cargo and lug-gage load capacity of your vehicle.