2019 VOLKSWAGEN T-ROC indicator
[x] Cancel search: indicatorPage 133 of 502

and the driver door opened, acoustic
warnings sound under the following conditions:
If the parking light is switched on.
If the side lights are switched on or the rear fog light is switched on .
When the Coming Home function is switched on, no signal tone will be given as a reminder that a
light is still switched on when leaving the vehicle.
Some settings can be stored in the user accounts of the personalisation function and therefore
change when the user account changes Personalisation
Troubleshooting
Turn signal indicator lamp
If a turn signal on the vehicle has failed, the indicator lamp will start flashing twice as fast.
The indicator lamp flashes green.
Check the lighting and change the appropriate bulb as required Changing bulbs
If the problem persists, go to a qualified workshop.
Does not apply in China and Japan: trailer turn signals indicator lamp
The indicator lamp goes out if a trailer turn signal or all trailer lights stop working.
The indicator lamp flashes green.
Check the lighting and change the appropriate bulb as required Changing bulbs
If the problem persists, go to a qualified workshop.
Vehicle lighting not working
Vehicle lighting has failed either completely or partially.
The indicator lamp lights up yellow.
Check the lighting and change the appropriate bulb as required Changing bulbs
If the problem persists, go to a qualified workshop.
Fault in rain/light sensor
In the light switch position , the vehicle lighting is not switched on or off automatically.
The indicator lamp lights up yellow.
Switch the ignition off and on.
If the problem persists, go to a qualified workshop.
Page 134 of 502

Switching main beam on and off
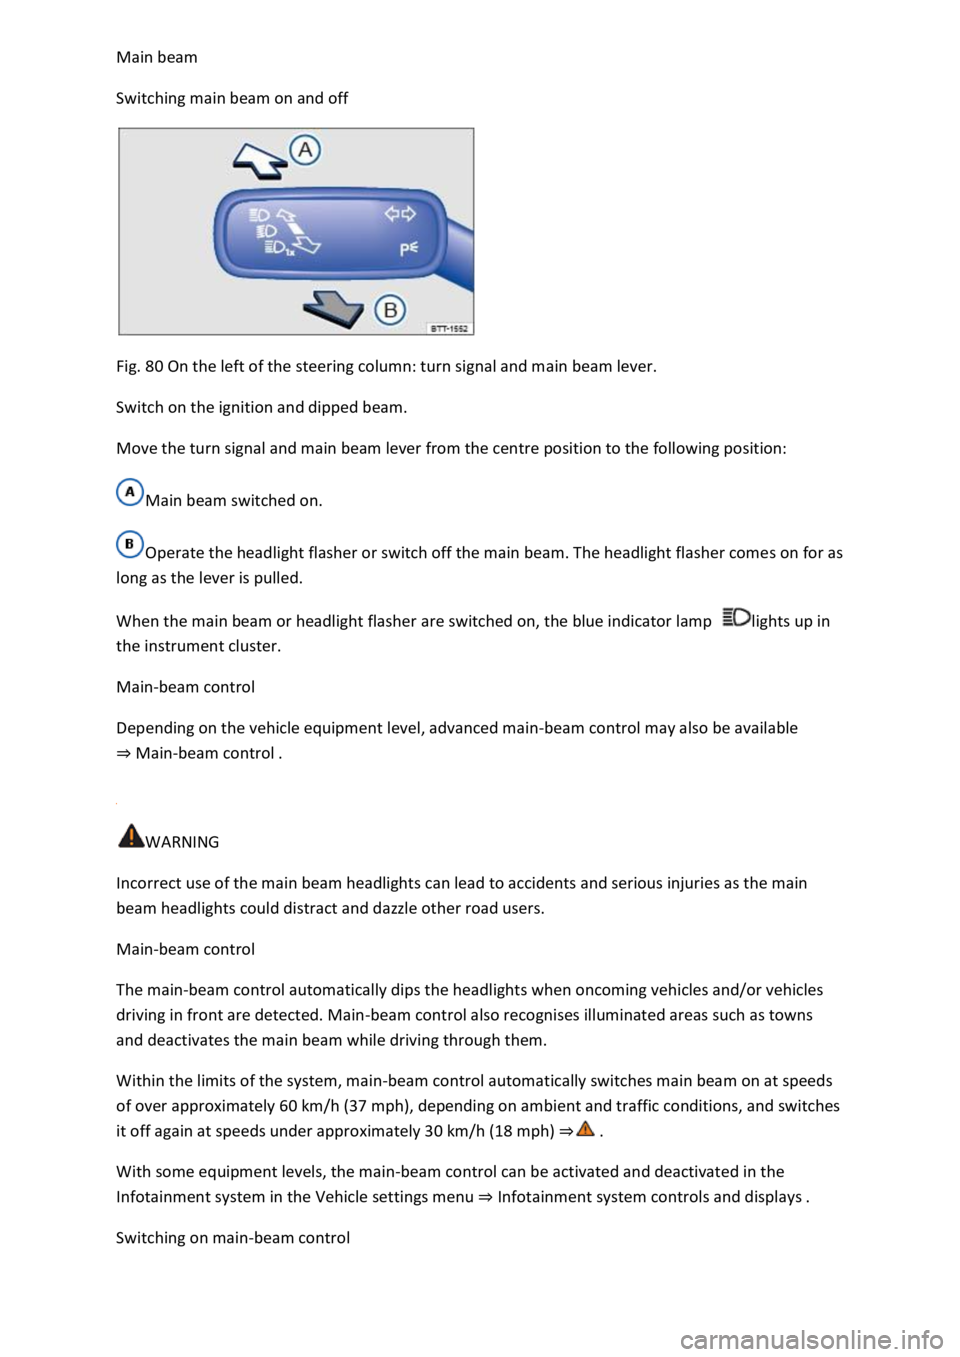
Fig. 80 On the left of the steering column: turn signal and main beam lever.
Switch on the ignition and dipped beam.
Move the turn signal and main beam lever from the centre position to the following position:
Main beam switched on.
Operate the headlight flasher or switch off the main beam. The headlight flasher comes on for as
long as the lever is pulled.
When the main beam or headlight flasher are switched on, the blue indicator lamp lights up in
the instrument cluster.
Main-beam control
Depending on the vehicle equipment level, advanced main-beam control may also be available
Main-beam control
WARNING
Incorrect use of the main beam headlights can lead to accidents and serious injuries as the main
beam headlights could distract and dazzle other road users.
Main-beam control
The main-beam control automatically dips the headlights when oncoming vehicles and/or vehicles
driving in front are detected. Main-beam control also recognises illuminated areas such as towns
and deactivates the main beam while driving through them.
Within the limits of the system, main-beam control automatically switches main beam on at speeds
of over approximately 60 km/h (37 mph), depending on ambient and traffic conditions, and switches
it off again at speeds under approximately 30 km/h (18 mph)
With some equipment levels, the main-beam control can be activated and deactivated in the
Infotainment system in the Vehicle settings menu Infotainment system controls and displays
Switching on main-beam control
Page 135 of 502

matic headlights .
Tap the turn signal and main beam lever forwards from the basic position.
When main-beam control is switched on, the indicator lamp lights up in the instrument cluster
display.
Switching off main-beam control
Pull back the turn signal and main beam lever.
OR: switch off the automatic headlights .
OR: switch off the ignition.
OR: push the turn signal and main beam lever forwards to switch on the manual main beam.
System limits
The main beam must be manually switched off under the following conditions, as it is not switched
off by the main-beam control in time or at all:
In poorly lit streets where there are highly-reflective signs.
Other road users with insufficient lighting facilities, such as pedestrians, cyclists.
In tight bends, with half-hidden oncoming traffic, on steep crests or in dips.
With oncoming traffic on roads with a central barrier where the driver can see clearly over the
central barrier e.g. truck drivers.
In fog, snow or heavy rain.
In conditions with swirled-up dust and sand.
If the windscreen is damaged in the camera's field of vision.
If the camera's field of vision is covered by condensation, dirt, a sticker, or by snow or ice.
If the camera is faulty or the power supply is interrupted.
WARNING
Do not let the extra convenience afforded by main-beam control tempt you into taking any risks
when driving. The system is not a substitute for the full concentration of the driver.
Always check the vehicle lights yourself and adapt them to the prevailing conditions for light,
visibility and road traffic.
The main-beam control may not be able to recognise all driving situations correctly and may not
work properly in certain situations.
If the camera's field of view is dirty, covered or damaged, the function of the main-beam control
may be impaired. This also applies if changes are made to the vehicle's lighting system, for example
if additional headlights are fitted.
Page 144 of 502

depending on the intensity of the rain.
Activating and deactivating the rain/light sensor
Position - the rain/light sensor is deactivated.
Position - the rain/light sensor is activated, automatic wipe when necessary.
The automatic wipe function can be activated and deactivated in the Infotainment system in
the Vehicle settings menu Infotainment system controls and displays
If the automatic wipe function is deactivated in the Infotainment system, the intervals are set at
fixed levels.
Adjusting the sensitivity of the rain/light sensor
The sensitivity of the rain/light sensor can be adjusted manually using the switch in the wiper lever
Fig.
Switch to the right high sensitivity.
Switch to the left low sensitivity.
WARNING
The rain/light sensor cannot always adequately detect all precipitation and activate the wipers
correspondingly.
If necessary, switch on the wipers manually in good time if the water on the windscreen restricts the
field of vision.
Some settings can be stored in the user accounts of the personalisation function and therefore
change automatically when the user account changes
Troubleshooting
Washer fluid level too low
The indicator lamp lights up yellow.
Fill up the washer fluid reservoir at the next opportunity Washer fluid
Fault in rain/light sensor
The wipers are not switched on automatically if it rains during rain/light sensor operation.
The indicator lamp lights up yellow.
Switch the ignition off and on.
If the problem persists, go to a qualified workshop.
Page 145 of 502

The wipers do not wipe.
The indicator lamp lights up yellow.
Switch the ignition off and on.
If the problem persists, go to a qualified workshop.
Changes in the activation behaviour of the rain/light sensor
Possible causes for faults and misinterpretations relating to the sensitive surface of the rain/light
sensor
Damaged wiper blades: a film of water or smears caused by damaged wiper blades can increase the
time the wipers are switched on, can shorten the length of the intervals between wipes or cause the
wipers to run quickly and continuously.
Insects: insects hitting the windscreen can cause the wipers to be activated.
Salt deposits: in winter, salt deposits can cause the wipers to continue to wipe the windscreen when
it is almost dry.
Dirt: dry dust, wax, windscreen coatings (lotus effect), or detergent deposits (from an automatic car
wash) can cause the rain/light sensor to become less sensitive and react too slowly, or prevent it
from reacting at all. Clean the sensitive surface of the rain/light sensor Caring for and cleaning the
vehicle exteriorat regular intervals and inspect the wiper blades for damage.
Crack in the windscreen: a wipe cycle will be triggered if the rain/light sensor is on when the
windscreen is impacted by a stone. The rain/light sensor will then register the impairment of the
sensitive surfaces and adjust accordingly. Depending on the size of the stone impact, the activation
behaviour of the rain/light sensor may be changed.
We recommend that you use an alcohol-based glass cleaner to remove wax and polish.
The wipers will try to wipe away any obstacles that are on the window. The wiper will stop moving if
the obstacle continues to block its path. Remove the obstacle and switch the wiper back on again.
Mirrors
Introduction
This chapter contains information on the followingsubjects:
Interior mirror
Exterior mirrors
You can use the exterior mirrors and the interior mirror to observe traffic behind you and adjust
your driving style accordingly.
Page 164 of 502

Food, medicine and other items that are sensitive to heat or cold could be either damaged or
rendered useless by the air flowing out of the vents.
Never leave food, medicines or other temperature-sensitive objects in front of the vents.
Switching the auxiliary heater and ventilation on and off
First read and observe the introductoryinformation and safety warnings
The auxiliary heater can be operated only when the ignition is switched off. If the ignition is switched
on while the auxiliary heater is working, the auxiliary heater continues to run to provide additional
heat.
Switching on the auxiliary heater
Press the immediate heat button in the air conditioning block Front controls
OR: press the button on the remote control Remote control
OR: program the departure time Programming the auxiliary heater and ventilation
The auxiliary heater heats the vehicle interior to at least 22
The auxiliary heater will not switch on if the 12-volt vehicle battery is low or the fuel tank is empty.
Switching off the auxiliary heater manually
Press the immediate heat button in the air conditioning block Front controls
OR: press the button on the remote control Remote control
OR: touch the function button on the Infotainment system Programming the auxiliary heater
Auxiliary heater switches off automatically
When the programmed departure time is reached, or after the programmed operating period has
elapsed Programming the auxiliary heater and ventilation
When the indicator lamp lights up (fuel gauge) Fuel gauge
If the charge level of the 12-volt vehicle battery is too low 12-volt vehicle battery
The auxiliary heater runs on for a short time after it has been switched off manually or automatically
so that the remaining fuel in the system can be burnt off.
When the vehicle is at a standstill, the auxiliary heater can be activated up to three times in
succession for the maximum operating duration.
Page 167 of 502

Switching on: press the button Fig. 93
The auxiliary heater is switched on when the LED on the remote control is lit up green.
Switching off: press the button Fig. 93
The auxiliary heater is switched off when the LED on the remote control is lit up red.
LED in the remote control
The LED Fig. 93
Lit up
greenThe auxiliary heater is switched on.redThe auxiliary heater is switched off.
Flashing irregularly
greenAuxiliary heater disabled: the fuel tank is nearly empty, the 12-volt vehicle battery voltage is
too low or a malfunction has occurred. Refuel and drive long enough to recharge the 12-volt vehicle
battery or visit a qualified workshop.
Flashing regularly
red or greenSwitch-on or switch-off signal has not been received. Move closer to the vehicle.
Lit up or flashing
orangeThe button cell (battery) in the remote control is weak. Replace the button cell.
Range
The remote control has a range of a few hundred metres when the button cell is fully charged.
Maintain a distanced of at least 2 metres between the remote control and the vehicle.
Avoid any obstacles between the remote control and the vehicle.
Hold the remote control with the aerial Fig. 93pointing vertically upwards.
Do not cover the aerial.
Adverse weather or a weak battery cell will significantly reduce the range.
Renewing the button cell in the remote control
The button cell in the remote control must be replaced if the indicator lamp does not light up.
Insert a suitable object, e.g. a screwdriver, in the recess on the side in the direction of the arrow
Fig. 93
Use the object to lever off the battery cover.
Slide the battery cover forwards slightly in the direction of the arrow.
Page 170 of 502

NOTICE
Free access to the pedals must be ensured at all times. For example, a larger brake pedal travel will
be necessary in order to stop the vehicle if a brake circuit fails. The brake pedal will have to be
depressed further and harder than normal.
Gear-change indicator
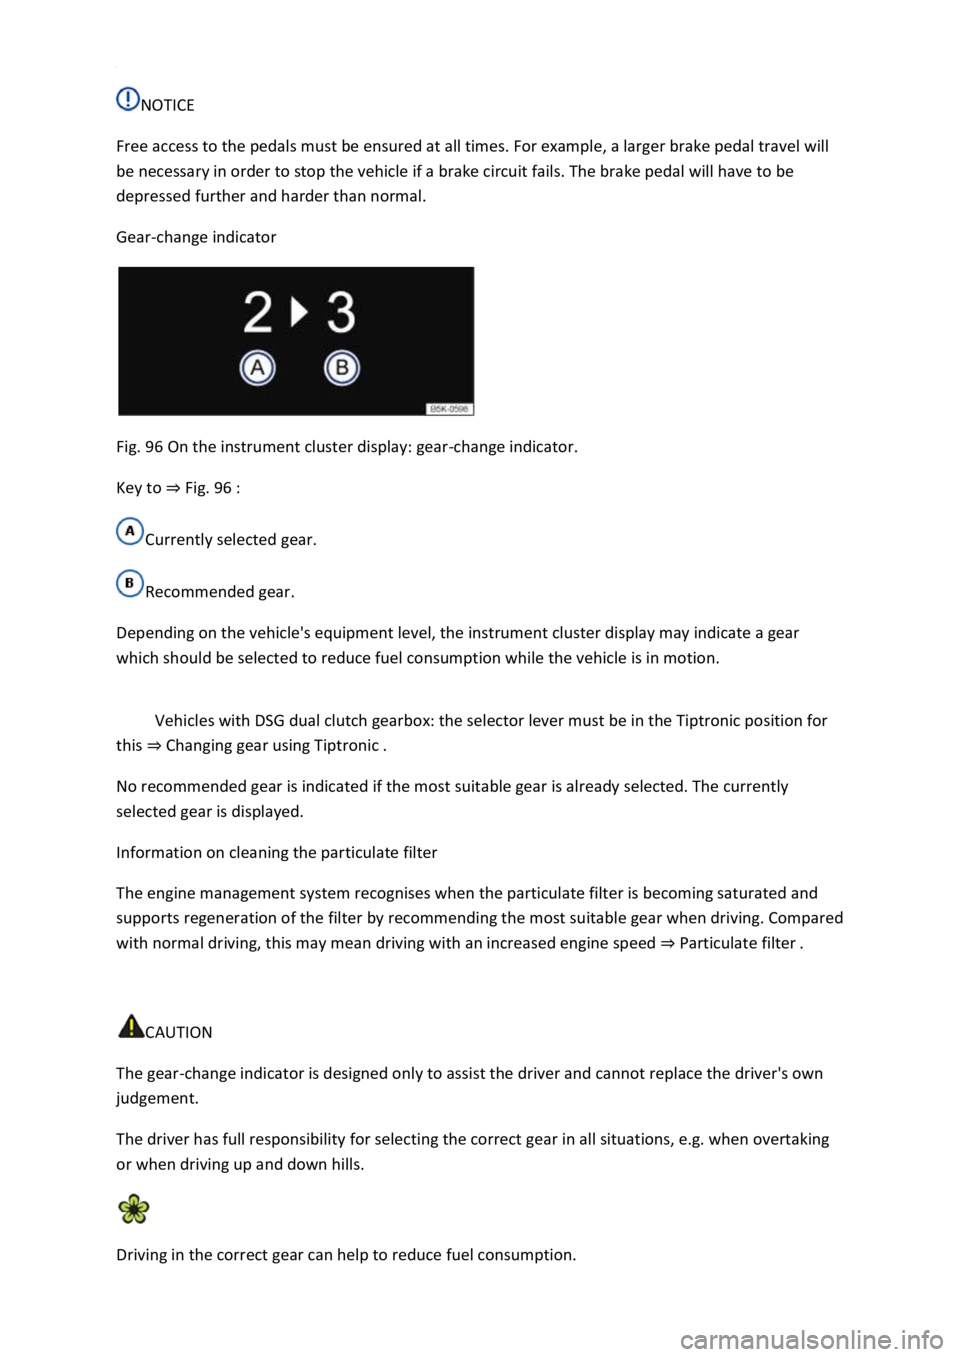
Fig. 96 On the instrument cluster display: gear-change indicator.
Key to Fig. 96
Currently selected gear.
Recommended gear.
Depending on the vehicle's equipment level, the instrument cluster display may indicate a gear
which should be selected to reduce fuel consumption while the vehicle is in motion.
Vehicles with DSG dual clutch gearbox: the selector lever must be in the Tiptronic position for
this Changing gear using Tiptronic
No recommended gear is indicated if the most suitable gear is already selected. The currently
selected gear is displayed.
Information on cleaning the particulate filter
The engine management system recognises when the particulate filter is becoming saturated and
supports regeneration of the filter by recommending the most suitable gear when driving. Compared
with normal driving, this may mean driving with an increased engine speed Particulate filter
CAUTION
The gear-change indicator is designed only to assist the driver and cannot replace the driver's own
judgement.
The driver has full responsibility for selecting the correct gear in all situations, e.g. when overtaking
or when driving up and down hills.
Driving in the correct gear can help to reduce fuel consumption.